To master the art of making pleated curtains, you’ll need steady hands and a familiarity with conventional methods. Who says, however, that we must revert to our antiquated ways? With the use of clip rings and other curtain hardware, we’ll show you how to manufacture pinch pleat curtains more quickly and affordably while still getting the same professional results.
It is easy to add a dash of sophistication to any window covering with pleats. If you’re dealing with floor-length drapes or top window valances, adding pleats changes the aesthetic completely.
Bạn đang xem: How To Make Pleat Curtains With Less Hassle? Comprehensive Guide
Hemming, pressing, stitching, folding, and cutting are all necessary steps in the traditional method of making pleats. As a matter of fact, this is more difficult than it appears. Fortunately, modern curtain hardware allows us to bypass the time-consuming process of manufacturing pleated curtains entirely.
Using binder rings
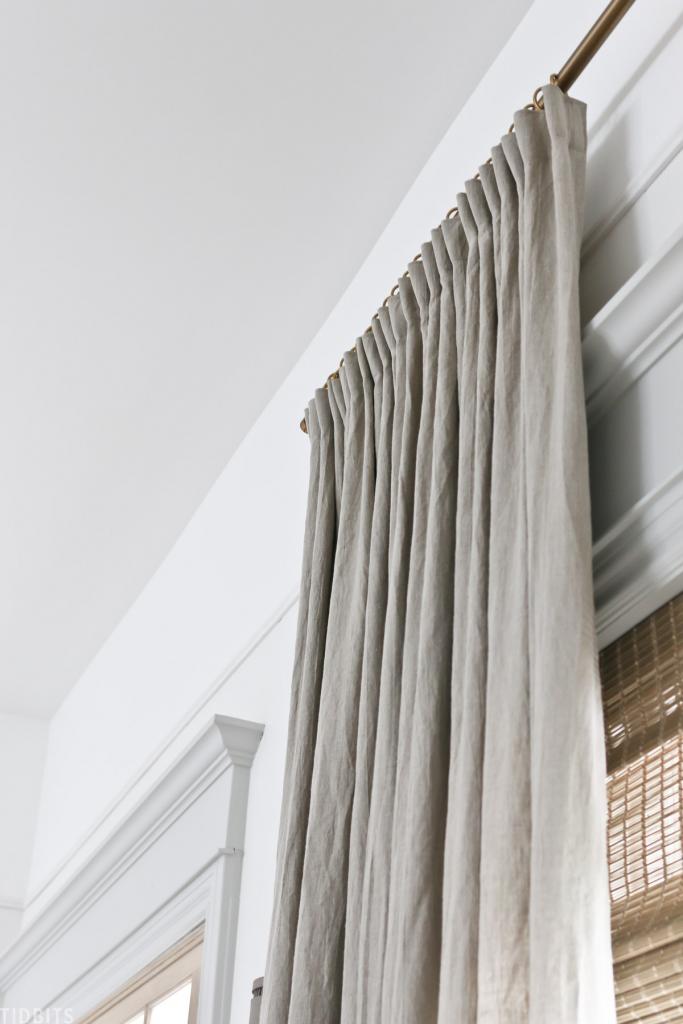
Rings or makeshift rings made out of binder rings and paper clips can be used. Alternatively, you can utilize rings. Using spray paint, you may match the color of your curtain rod to these. It’s much easier to adjust curtains with this detachable curtain hardware.
Step 1: Get your materials ready.
Prep your ordinary curtains for pinch pleats by gathering rings and preparing them for pinch pleats. Make certain that your curtains are of a standard size so that they may be hung at the proper height even after the ring clips or binder rings have been attached.
Put them in the washing machine if you haven’t laundered your curtains before, and you’ll undoubtedly benefit from it. Determine how much pleater tape you need for the curtain by taking a piece of tape and measuring it.
Step 2: Attach your pleater tape.
Line your tape about a quarter-inch from the top edge of the curtain. Make certain that the pockets closest to one another do not extend past the curtain’s edge by more than half an inch. Attach the pleater hooks by making small holes on the bottom of the tape before adhering it.
Before hemming the edges, fix your pleater tape with pins. Use the pins to hold the tape in place. To finish off the gold seam, hand-sew the tape’s edges to the gold thread. It’s best not to sew over the tiny pockets or holes at the bottom that act as an aperture.
Step 3: Attach pinch pleat curtain hooks.
Again, your measuring tape and pencil will come in handy for this phase. Mark where the hooks should be placed. Make sure the top of the curtain has beautiful pinch pleats formed. As a reference, use a ruler or tape measure to keep the distances between the hooks uniform.
To find the center of your curtain, fold it in half and then start outlining where you want the hooks to go. Holding four hooks at a time and moving them up the pockets will expedite the process. Driving all of them at once is far more time-consuming than doing so in batches.
Step 4: Hang your curtains
Make sure your pleater tape is in place and your pleater hooks are appropriately spaced. Re-adjust the hooks if necessary if you’re not happy with the consistency of the spaces between the strands.
Slide the binder rings onto the rod and secure them with the hooks. The curtain rod should rest evenly on the brackets when it is hung up. You can make as many alterations to the curtains as you wish to make them look orderly.
Design Tips
Add drapery weights to your pinch pleat curtain to make it seem even nicer. Curtains don’t always hang the way you want them to and can therefore appear clumsy rather than sleek. Using curtain weights, you can teach your drapes how to hang properly.
Before hanging the garments, you can further define the folds with a steamer or iron. Consider adding swags or other curtain layers to your design to give your window a more finished look.
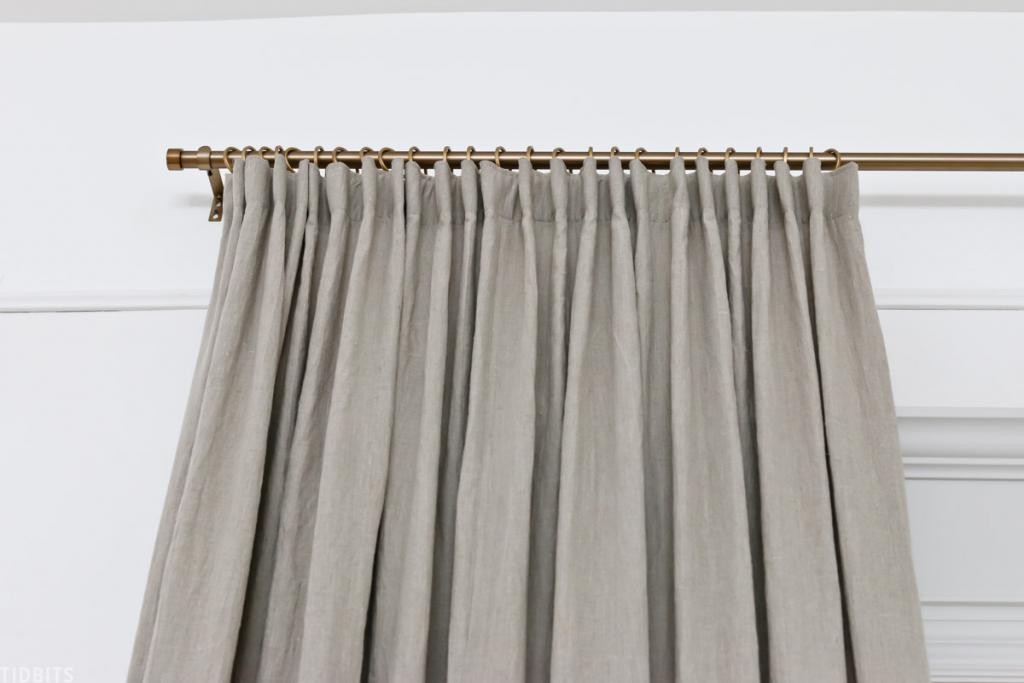
Pleated curtains
Xem thêm : How To Make Ruffled Curtains? Complete Step-by-Step Guide
Many different styles of curtain pleats can be used to enhance the overall appearance of your window treatments. It aids in the addition of a sense of refinement and class to the design. Pleated curtains can liven up any window treatment, no matter what the fabric or interior style is like.
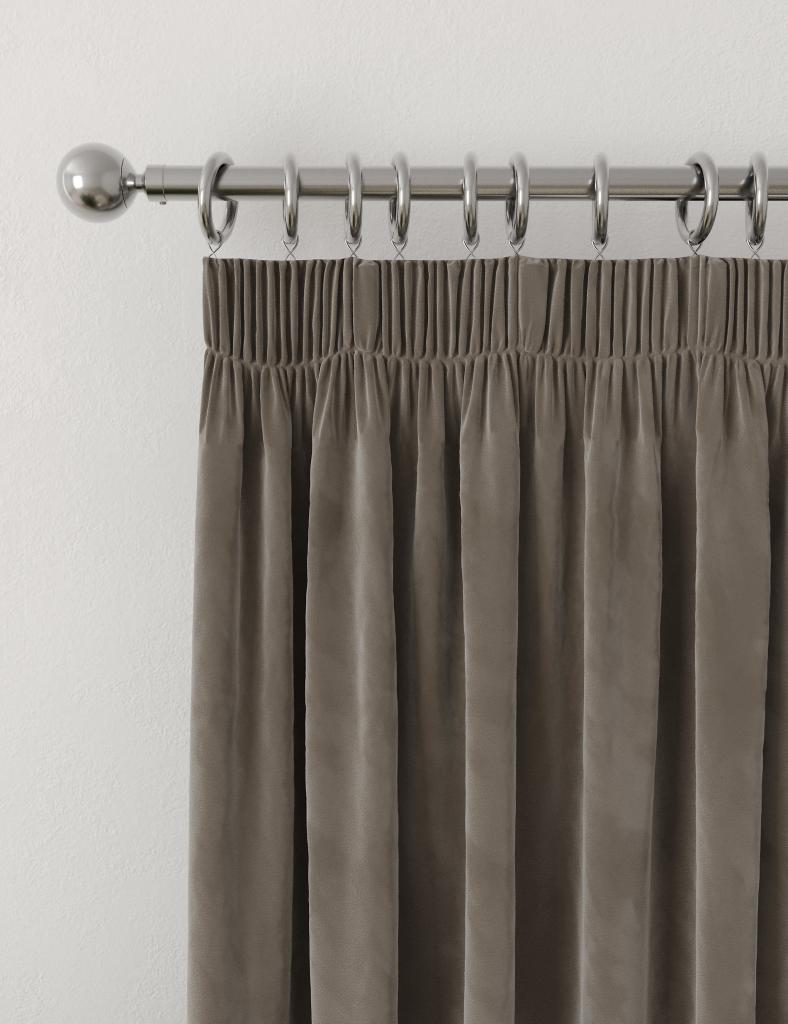
Pinch pleats are one of the simplest and most common styles of pleat in curtain panels. Other styles include box pleat curtains, goblet pleats, pencil pleats, and many others. Making simple pleated curtains is a good starting point for more advanced projects.
For some people, it might be difficult to decide whether or not they want formal or traditional window coverings in their home. If this is the case, pleated curtains, particularly those made of thicker or heavier fabrics, are a sure bet. Any area can benefit from a professional appearance thanks to pleats.
How To Make Pinch Pleat Curtains Without Tape?
As a first step, it is necessary to take measurements. Many pinch pleat curtains, measuring is a breeze, unlike for other sewing jobs. To measure accurately, you’ll want to utilize a ruler, which is both flexible and simple to operate.
So, measure the area where you plan to hang the curtains. Make a cloth panel that is twice as wide as the other one. For a professional appearance, double the thickness of your dividers if you can.
Add an inch to all sides for hems. You can add inches to the bottom hem of any home décor cloth if you want it to be a little thicker. Curtain weights can also be used if you want to sew a heavy hem on a lightweight cloth. A French seam can be used to attach the yardage to any roof cotton fabric.
Additionally, you have the option of lining up the curtains or not. While it’s fine if you don’t, start there.
Equipment That You’ll Need
- a ready-to-hang curtain set or curtain fabric
- Ruler
- Hooks with four prongs are available.
- With thread, a sewing machine
- A needle for stitching by hand
- Clamps used to hang drapery.
- Drapery pole
- Clips or pins
- Iron
- a pair of fabric shears
The first step is to wash and dry your fabric before moving on to the next stage. Because the curtain will most likely shrink, this is a must-do. After you’ve washed and dried the curtain, iron it. This is because your curtain will be sewn together neatly and easily, and the fabric will be easy to cut. As a result, let’s begin the process.
If you’re working with a pre-made curtain, consider yourself fortunate and proceed to step 3 right away.
Step 1: Measuring And Cutting The Fabric
To keep things simple and economical, you can buy four yards of fabric for each window. To put it another way, you’ll need two yards of cloth for each curtain. If you want to make your curtains broader, you can order more fabric.
Again, you’ll be working on a set of purely ornamental drapes. Because they aren’t functional, you won’t have to move them all the way around the window to for them to look good. In addition, you may not feel the desire to touch them once they’ve been hung once more. However, you may always clean or vacuum them from time to time.
- There is the option of making shorter curtains for a single room that terminate at the windowsill’s bottom. Pink flower cloth is a great choice if your walls are painted pink. Beautiful curtains can be made from lightweight cotton fabrics that are both delicate and soft.
- However, full-length curtains can also be made. The ivory and grey colors of this windowpane fabric, available in superior patterns, make it ideal for a man’s room.
- For shorter curtains, all you have to do is fold the fabric in half horizontally. Fold the fabric vertically for long curtains. Once you’ve done this in both cases, trim the fold as straight as possible.
Step 2: Sewing A Hem On The Curtains
Try not to get too technical or mathematical in this case. Then, all you have to do is sew a neat little hem all the way around the drapery cloth. Also, before sewing the hem, make sure it’s ironed well.
The bottom of the curtain should not be sewn. The bottom half of your curtains can be sewn at the end so that you know exactly where they will terminate in the room.
Step 3: Sew-On The Hand-Stitch
In this case, you have the option of using pleat tape or pinch pleat tape, or you can simply hand stitch your way through the process. You’ll learn how to accomplish it without tape, but I’ll also touch on pleat tapes in a brief discussion.
Xem thêm : How To Get Creases Out Of New Curtains? Comprehensive Guide
Sewing needle in hand, align it with the top of the curtain at the back of the window. Hand-stitches are then used to secure this alignment. Take a pair of scissors and snip off the end of the hand-stitched fabric.
Things To Note Before Sewing:
- The back of the curtain, where the unsightly hems are, is where your hand-stitch will go.
- To maintain a pinch pleat channel opening akin to that found in pleat tapes, a small hole must be drilled into the fabric. To make the little hole into which the pinch pleat clip hooks will be inserted, simply use a scissor.
- In order to insert the hooks, you must not stitch over the pinch pleat hole.
Sew immediately onto your curtain while ensuring that everything is lined or placed properly. All four corners of a curtain must be sewn except for channel openings.
For Pleat Tape:
Your pleat tapes must have straight, regularly spaced vertical lines running the entire length of them. Some small holes or channels will be needed at the bottom of each vertical line. The pleat tape will be sewn here. Pinch pleat tape should be aligned to the top of the curtain on the back for pinning. Snip off any extra tape before sewing along the pleat tape.
Step 4: Inserting Your Pinch Pleat Hooks
Pinch pleat curtains are just around the corner, and this is where the magic begins. The four-prong pinch pleat hooks have four prongs and a little hook. So, save the small hook for subsequent use on the curtain ring.
Step 5: Getting The Beautiful Pinch Pleat Look And Appeal
Insert the prongs into each pinch pleat for a stunning three-pleat effect. You must squeeze the fabric together to get them to work. It may take a few tries, but you’ll get the hang of it in no time.
Additionally, line up the openings in the rear of the curtains closer together while pinching them to your preferred style. Pull the prongs apart firmly to increase your leverage. Re-squeeze them together after you’ve inserted them.
Step 6: Spacing Your Pleats
Determine where the next pleat will begin after you have put the first hook. The amount of cloth you use and your personal taste will play a role in this decision. Sewing professionals often recommend spacing the pleats between 3 and 6 in.
Look at your drapes and decide where the pleats should go. The more pleats you have, the more room you have. Pinch pleats provide a lot of interest. Measure the correct number of pinch pleat channels between each pleat for uniformly spaced pinch pleats.
However, if you like, you can simply wing it. Pinch pleat hooks should be placed in the middle, at the very end, and in any other way that looks excellent. After installing the pinch pleat hooks, fine-tune the pleats to achieve the desired effect.
Step 7: Hanging The Beautiful Pinch Pleat Curtains
So, you’re close to the end. All that is left to do is hang your curtains. For drapery rings, begin by attaching them to a curtain rod first. Hang each curtain hook on the ring that corresponds to its pinch pleat curtain hook.
It’s simple to hang the rings first. One by one, the rings will fall off the hooks if you try to do it all at once. Once the curtain has been hung, remove any excess fabric at the bottom and stitch a nice and flawless hem.
Are DIY Pinch Pleat Curtains Best For Home Decor?
Pinch pleat curtains should be used with care because they are prone to tearing if not handled properly. As a result, you won’t be able to un-gather or close your curtains to block out the light. Rather than serving a practical purpose, pinch pleat curtains were created purely for aesthetic purposes. In terms of house decor, this is the ideal option, but not for privacy.
How Can I Calculate Pleats?
The number of pleats on a window curtain can be used to calculate pleats. The number of pleats might be as many as six. Here’s how you do it: Divide by the number of pleats. Calculate the size of the pleats that you want. Fold the pleat a couple inches longer.
Summary
When it comes to curtain pleats, there are a variety of options. Pleats on curtains may seem little, but they actually give them a unique look. Making them is, maybe, more difficult than it first appears.
There are countless methods to make those professional-looking pleats out of common household things, but you just have to let your imagination run wild. Learn how to make pleat curtains without the need for complicated sewing or hemming operations.
Nguồn: https://iatsabbioneta.org
Danh mục: Curtains


