Some people may not consider ruffled curtains a possibility, but we think they’re fantastic. They can spruce up a home’s appearance without spending a lot of money.
To make a ruffled curtain for your windows, if you’ve decided to do so, would be wonderful. A detailed tutorial on how to make ruffled curtains can be found in this page.
Bạn đang xem: How To Make Ruffled Curtains? Complete Step-by-Step Guide
Steps on How to Make Ruffled Curtains
Those who want to decorate their home with ruffled curtains can follow these instructions to do it.
Step #1: Measure the Area
Before you begin making ruffled curtains, you need to measure your space. Please measure your window or other location where you plan to hang the ruffled curtains before purchasing them.
The length and breadth measurements are essential for producing a curtain that is the correct length and width.
That being said, the length of ruffled curtains will be determined by your specific design in mind. Unless you have something specific in mind, it can be anywhere from 12 inch to 8 or 10 inches broad.
Step #2: Cutting the Fabric
At this point in the process, you’ve already picked out the right fabric and color. Then, cut the cloth, making sure to get at least twice as long as the area you’re working with. Make careful to cut twice as wide as the area has been measured while cutting for the width.
If the measurements for the area are 50 inches in length and 2 inches in width, you’ll have a total of 50 inches. Cutting your curtain cloth to 150 inches long and 4 inches wide is the next step.
The length and seam allowances for the fabric should be added before you begin cutting. The total length of the material would be 152 inches and the breadth would be 5 12 inches.
Step #3: Fold and Stitch
Fold the short ends of the fabric toward the wrong side by an inch, and you’re done. After that, press the fold while also folding the ruffle in half and pressing it.
A serged edge or zig-zag finish is all that is needed to complete the project. Please keep in mind that one inch of sewing should be completed with eight stitches.
Install your machine and loosen the top tension by 12 turn after setting it up. 5/8 inch from the serged edge of the cloth, sew the first gathering line through the fabric. Sew a few stitches backwards to create a lock at the beginning of the line stitching.
Repeat the stitching with 6-inch threads that appear loose. It should be 7/8 inches from the fabric’s serged line this time around.
Step #4: Registration Line
At 14, 12, and 34 of an inch, registration markers might be used to divide the stitching lines on the fabric. Then, using your curtain’s measurements, calculate how much ruffle you need and mark the portion of the panel that requires it.
Using the registration marks, sew the ruffle to the panel’s right side. To avoid cutting any of the stitches, use straight pins and keep an eye out for the gathering lines.
Step #5: Stitching Gathering Lines
Pin the wrong side of your fabric to your straight pin before beginning to sew both gathering lines.
After that, remove all but the top two threads by lifting the bottom ones. Ruffles are formed when you tug on the fabric, and this process continues until all the ruffles are flat on the surface.
The registration marks should be even off by making a small change to the spacing around them. By removing the fabric’s gathering threads, you can stitch through both gathering lines and add the ruffle to the panel.
DIY Ruffled No-Sew Curtains
In addition to ruffled curtains, consider the no-sew option first. Curtain sewing might be intimidating for some people.
Sewing isn’t necessary for ruffled curtains. Isn’t that enough to sway your opinion? Stapling beneath the fabric will provide the desired effect.
How Do You Make a Ruffled Valance?
Xem thêm : How To Hang Grommet Curtains With Sheers? Comprehensive Guide
The steps for sewing a ruffled valance are very similar to those described above. After taking the initial dimensions of your space, you must, however, cut the fabric in half. Then sew the two sections together by preparing the edges you’ll be sewing.
Cleanly hem the edges, then use the rod’s circumference to gauge how big you want the ruffles to be.
Don’t forget to stitch your registration mark in place before you fold the fabric. The ruffles can now be made using the method outlined above.
Is it Cheaper to Make Your Curtain?
Making your own curtains saves you money, which is a wonderful perk. If you sew your own curtains, you’ll save money in the long run. Even if you stitch one yourself, you’ll only wind up costing $20.
As a result of these and other considerations, prices for curtains might vary widely. The cost of producing ruffled curtains can be estimated while you look for instructions on how to do it.
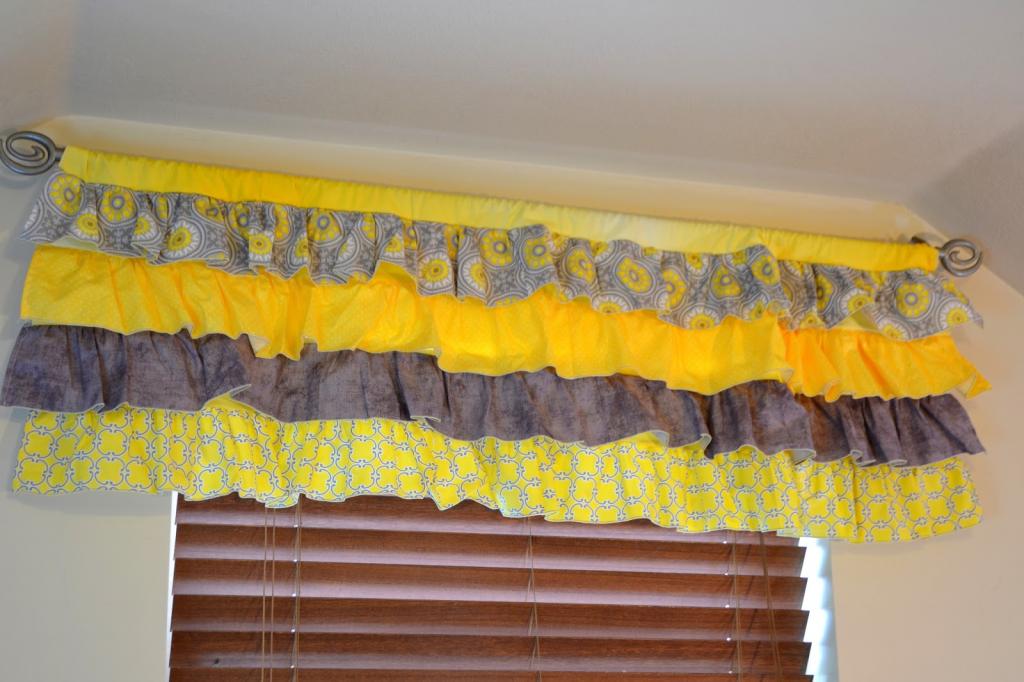
How to Sew Ruffled Kitchen Curtains
I’m going to demonstrate how simple it is to make ruffled kitchen curtains without a pattern. In each kitchen, there is a unique kitchen window. Let your creative juices flow and design your own ruffled curtains! Your kitchen window’s measurements are all you need to get started!
To begin, choose four distinct fabric patterns that go well with one another. (A spool of each hue.) The ruffles will be sewn to a plain-colored piece of fabric (1 and 1/4 yards).
A 40-inch-wide and 20-inch-deep window covering area is within reach. It’s for two windows in my kitchen, just in case you’re wondering. However, if you only have one window with these dimensions, you should only purchase half of the fabric measures I provided. However, you’ll need an additional 1 and 1/4 yards for the back. When you buy the cloth, it’s already folded in half. Having a little extra fabric on hand is something I always do, just in case.
On the spot where my old curtain rod had been, I took a new measurement (from the previous homeowners). Adding extra holes was unnecessary for me. It was a terrible experience the last time I tried it! Measure the area where the curtains will hang once they’ve been made.
Cut 5′′ wide strips from each of the four fabrics. For each window, you’ll need 3-4 strips of fabric. If you stitch your ruffles as scrunchy as possible, the result will vary.) It will match the last ruffle for the top ruffle. For the top ruffle, cut 4-5 3′′ broad pieces.
Is it obvious that I’m married to a construction worker and have a young child?
To create the ruffle backing, simply fold over the basic cloth. Aim for 2′′ from the top and bottom and 4′′ from the sides. (Yes, I am well aware that my ability to accurately measure is lacking.) This is where you’ll be sewing a straight stitch. It is recommended that the curtain rod be inserted between the 2′′ and 4′′ marks on the wall. This is where you’ll stitch the first ruffle: just above the 2-inch mark.
Make a 1/4′′ hem on both sides of the ruffle strips at the top. Using straight pins in the cloth will be a snap if you pre-iron this section of fabric.
Between the top edge and the 2″ line you had just sewn across, stitch the 3″ strip onto the plain (black) cloth. As you sew a straight stitch, scrunch up the fabric. Nonetheless, maintain the underside of the fabric flat and even.
The next piece of fabric for the ruffle should be folded under and lined next to the cloth you are currently sewing, as shown in the example. This way, everything becomes one big ruffle. You can see right above how I folded my fabric under to disguise the seam as I reached the very end of the curtain. The ruffle should come to an end this way. The ruffle in this picture is the final one… why the top isn’t hemmed, so as not to confuse you. There’s more to come!
You should only hem one side of the ruffles for the rest. Under the ruffles, the unhemmed side will be completely obscured.
The ruffle begins at the tops of the strips with a no-hemmed edge. The ruffle should have an inch of fabric under it. That’s why it’s a whole inch above the 2″ mark. Keep in mind that your curtain rod should be installed between the 2′′ and 4′′ gap. (As can be seen in the illustration immediately above.)
To be visible, mark the fabric 1″ below the 4″ line using a pencil or pen. Approximately half an inch below the ruffle on top of it. Use this drawn line as a guide for your next ruffle and sew and ruffle along it.
Take a half-inch measurement from the underside of each ruffle. Ruffle and sew this pattern.
Make sure to follow the same pattern if you’re sewing two windows side-by-side. The first ruffle on the first curtain should be followed by the second ruffle on the second curtain. With each ruffle of the curtain, go on to the next one. By doing so, you ensure that they are properly aligned when placed side by side.
Xem thêm : How To Make Cheap Curtains Look Expensive? Special Tips and Tricks
Make ruffled curtains for your kitchen with this tutorial. If you have any questions, please don’t hesitate to get in touch with me. Beginner sewers will have little trouble completing this project. Even if you’re not familiar with all the gizmos on your computer! Even though I still don’t, Straight stitching is all you need to get the job done. My first ruffled project and my first curtains were both this. It makes me glad to be able to show you this sewing project!
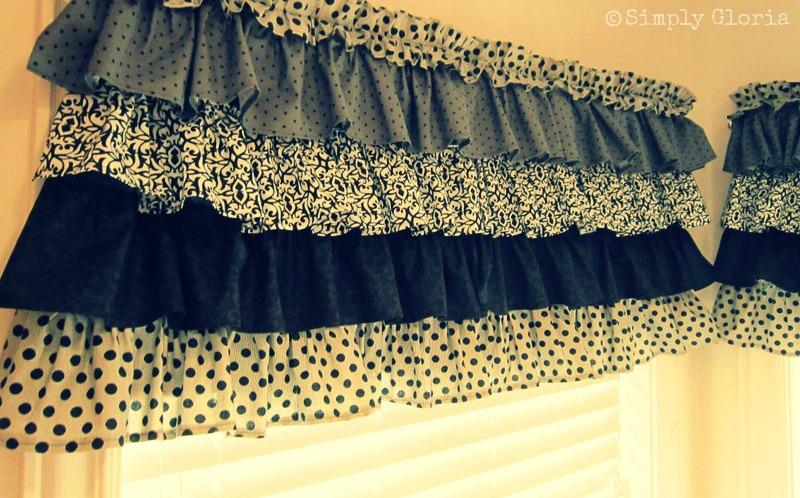
How to Make No-Sew DIY Ruffled Curtains for under $50
The fact that Hawk Hill is now an Airbnb property is a treat since it means I get to hear from guests about their experiences there. The tiered, ruffled drapes in the grey bedroom, shown above, are one of the most frequently requested questions I get.
Tiered ruffles in two shades of grey satin, stacked on top of one another, add visual interest to these period-appropriate double windows. When I tell the unusual method I utilized to create this opulent effect for a few dollars instead of the hundreds it would cost to furnish the bedroom with commercially created similarly luscious ruffled drapes, people’s jaws drop. These curtains have a beautiful, sophisticated, and costly appearance, and I’m thrilled that I was able to make them for about $30!
If you want to hang sheers or blackout curtains, you’ll need to install functional layered curtains behind these curtains. In this video, I’ll teach you how to accomplish just that.
This building saves money by creating an ornate façade, but it sacrifices functionality in the process. There is no movement in the curtain after following this tutorial’s instructions. Curtains can be hung in the back of these window treatments by attaching them to double or single curtain rods or tension rods, as shown. As a result, you can utilize inexpensive curtain rods and finials instead of more expensive curtain rods and finials.
It’s Rental-Friendly!
It was important to me that this tutorial be suitable for both older homes with original woodwork and rental properties where the window dressing will be temporary because my house has firm plaster walls and window frames that date back to its original 100-year-old construction. In the event that you’ve got drywall walls, you can skip the plywood base phase of the instruction if you’re fine with leaving dozens of little staple holes in your wall (easy to fix with wood-filler).
Supplies Needed
If you don’t have a staple gun, you can use thumbtacks.
Thread & Needle (for sewing a channel for curtain rod)
2 sheets of plywood, each 1’x2’6″.
Four woodscrews, a drill, and a drill bit
1 spool of thread If you’re looking for a cheap, lightweight fabric for this project, polyester chiffon or satin finish is ideal.
It’s my apologies for the cartoonish illustrations! With the introduction of Graphite Crayons, I’ve fallen head over heels in love and can’t imagine drawing with anything else! graphite crayons are like sidewalk chalk in that they are made of pure pencil lead and have a nice, smooth feel on a large sheet of paper; however, they are not made of chalk.
How To Make Ruffled Curtains from a Bolt of Fabric:
(I’ve sketched out my approach rather than photographing the instruction step by step because this item was accomplished before my blog era.)
Put up a curtain rod on the wall. When it comes to a statement window treatment like this one, it’s best to go bigger than your window. I went about six inches over the top of the woodwork and eight to ten inches broader on both sides.
Put a piece of plywood on the window’s sides. Rather than being placed directly at eye level, the ruffles will be placed 3/4-1/2 inch below that point.
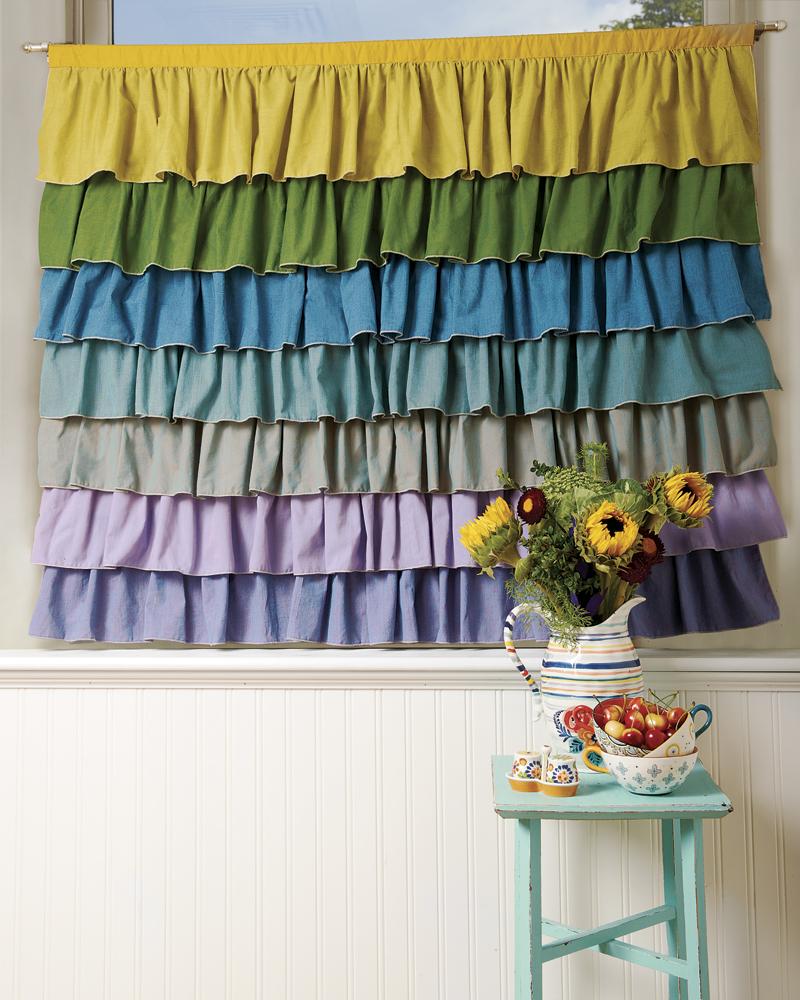
Sew a channel into the end of around 25 feet of cloth from your bolt. Slip the fabric’s end onto the curtain rod while it’s still attached to the bolt. Wait to cut the fabric off your bolt until after you’ve styled and stapled your curtain because there’s no way to predict how much length you’ll need.
Staple fabric bundles to board with a staple driven through them from underneath. Overhanging the staple by allowing the fabric to fall down and over it Once you’ve achieved a waterfall ruffle appearance, it’s all about styling and simply shifting, bunching, and stapling cloth. It’s the lavish design that adds intrigue, so don’t cut corners on fabric or ruffles.
5. Cut your cloth from the bolt and sew a loose hem around the bottom until it feels styled properly and sufficiently secured.
Make four or six more passes with the fabric to achieve a romantic, flowing appearance.
Conclusion
If you’ve never made a ruffled curtain before, it’s a worthwhile endeavor. Does making your ruffled curtains pose any difficulties for you? Start making ruffled curtains today by reading this tutorial.
Nguồn: https://iatsabbioneta.org
Danh mục: Curtains


