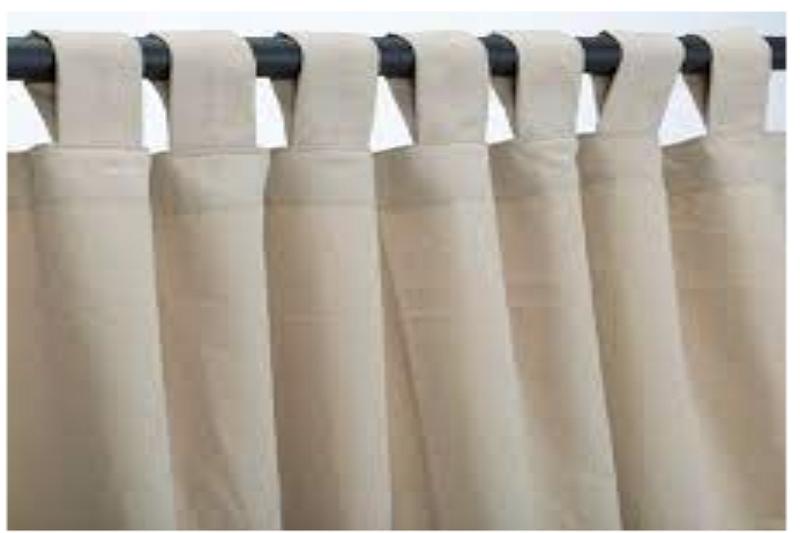
Is it frustrating that no matter how hard you look, the right curtains just won’t appear? Because why not do it yourself and make them?
This tutorial will show you how to make lined tab curtains out of a simple set of sheets. These curtains can be personalized in a variety of ways, such as with different colors, patterns, or even embellishments like lace.
Bạn đang xem: 5 Easy And Simple Diy Lined Tab Curtains
Lined Tab Curtain Instructions
Materials
- The same pattern and size on two sheets (cotton, linen, or silk)
- Sewing machine with zipper foot if available
- Stitching machine that has zipper foot (if any)
- Scissors. One or two yards (meters) of cloth will be needed depending on the number of tab curtains you wish to make.
- Ruler
- Pins to hold the patterns in place when cutting out the curtains – a large piece of paper is essential here for holding the patterns in place while cutting out the curtains.
- Using a caliper
Step 1: Take a measurement of the length of your window and buy cloth to match. Because my windows were 88 inches wide, I wanted a material that was 90 inches wide. The next thing you’ll need are curtain tabs, which can be found in sets varying in length from 12 to 24 inches.
This depends depend on the length of the curtains you choose. Because my fabric is 90 inches long, I had to use 18-inch tabs for my project.
The second step is to prepare. Four pieces of fabric were initially cut out in the 90-inch and the 84-inch widths. Do not use more than one piece of material that is 90 inches long.
When sewing with a machine, use pins to align your fabric pieces so that they stay in place and look great when the project is finished. Step 3.
Hand-sewing your curtains is a time-consuming process, so make sure that all of your stitches are appropriately spaced out before you begin.
It’s up to you how much time and effort you’re willing to put into your project, but I used a straight stitch to sew all four curtains together. Make sure the “backing” of the cloth (the one with no print) is facing outwards, whichever method is used. By doing this, you’re able to get an even, smooth piece of fabric for the lining.
While this step isn’t absolutely necessary, I cut my seams to ensure that they were level and aligned uniformly on both sides. Once the four curtains had been pressed together, I left approximately an inch or two on each side for hemming on each end.
Because I don’t have an overlock, I had to use a twin needle sewing machine to sew the curtains. The cloth is now ready for the lining! Make sure you use the same fabric weight as your curtains.
Step #5: Line one side of the cloth, then fold it over and tuck it away on the other side.
Xem thêm : How To Cut Swag Curtain? What Type of Material Should I Use For Swag Curtains?
Hemming is the final step. Sewing skills are not required to make these curtains.
In order to prevent your machine from malfunctioning or breaking down prematurely while utilizing twin needles, do not use a standard needle!
While choosing fabrics for lined tab curtains, keep in mind that the lining should have a comparable weight and feel to the curtains themselves when making your selection. When you line one side and return it to the other side before hemming, the fabric will fold over itself precisely without any obvious seams.
What are lined curtains?
Insulating lining is sandwiched between the two layers of fabric that make up lined curtains. The liner or insulation layer is often referred to as the inner layer, whereas the outer layer may simply be referred to as “the curtain.”
There will be at least one seam where the two materials meet in a lined curtain (these can also include hemmed edges). The top layer is the one that is most frequently in contact with the outside world and hence becomes soiled, whilst the bottom layer serves to keep it clean.
Grease from cooking may stain windows and walls, therefore lined curtains are commonly used in kitchens to keep it from happening. Dust management and sound insulation are just a few of the many uses for lined curtains in industrial settings.
How to care for lined curtains
Sponges and water or mild detergent can be used to clean the linings of the curtains. Please do not use hot water to wash the curtains, as this could cause them to shrink.
Line drying is the only way to keep the fabric from shrinking more, so don’t put it in the dryer with anything else. Static electricity can draw lint from clothing that is nearby. It is not advisable to iron.
For rooms that are being redecorated or re-decorated, thin-lining curtains are commonly employed. Temporary apartments and homes on the market may benefit from the illusion of more windows thanks to these products.
It is important to know how to care for linings on draperies. Use a sponge and water or a light detergent to wash them. Washing them in hot water will cause them to shrink.
If at all feasible, line dry the garment to avoid further shrinkage and do not place it in the dryer with other garments. Lint from neighboring garments can be drawn in by the static charge created as a result. It is not advisable to iron.

Before You Begin
Cut your curtains to the correct length and breadth based on the measurements of your window. Measure the length and width of your window with a tape measure. The length and width of traditional curtains are equal to (or slightly longer than) the width of the window.
Xem thêm : How To Hang Ikea Curtains? Complete Step-by-Step Guide
Taking the width of your window, multiplying it by 1.5, and then dividing it by two, you’ll get two curtain panels. Each panel’s width will be determined by this value. The length of each panel will be equal.
Add roughly 10 inches to the curtain length you’ve chosen. Making lined curtains requires a hem, so you’ll need the extra length to accommodate it.
Tip
Extend your curtains to be longer than the width of your window to give the illusion of more space, but keep them from pooling on the floor to avoid a cluttered impression. They should barely touch the ground.
What You’ll Need
Equipment / Tools
- Iron
- Board for ironing
- Measurement with a tape
- Scissors
- Needle and thread or a sewing machine
- Pins for sewing
- a yardstick, ruler, or other measuring device
Materials
- Between 5 and 6 yards of drapery fabric
- A lining of around five to six yards
- Chalk
- Towel ring
- a curtain’s tacks
Instructions
Cut Your Curtain Fabric
Mark the length and breadth of your curtain panels with chalk once you’ve measured them. A yardstick or ruler can be used to draw a straight line across the fabric. Once you’ve marked your curtain panel, grab a pair of scissors and begin cutting along the marked line.
Cut Lining Fabric
In step one, mark and cut your lining fabric using the same way, but deduct 10 inches from the total length because you won’t need to hem the lining fabric.
Fold and Press Hems
To iron a curtain, place the fabric on the ironing board with the back of the curtain facing up. Afterwards, fold up the bottom of the cloth panel by about four inches, and then fold it in half. Make a clean crease with your iron. Create a four-inch double hem by folding the fabric an additional four inches and making another crease.
The fabric will be hemmed at this crease. You may be able to get around this section’s need for pinning by ironing it, but it depends on the sort of fabric you’re working with. Pin the fabric in place if necessary.
Hem the Curtain Fabric
In order to keep your curtains in place, sew a quarter-inch seam from the top of your fold all the way down the length of your cloth.
Hem the Lining Fabric
Iron your lining fabric with the inside facing up on your ironing board. To make a crease, fold the bottom edge up by two inches, fold it again, and iron it. Double-hem it by folding it up two more inches and ironing an additional crease. In the event that you need to, pin it in place prior to stitching. Then, along the lining’s whole length, sew a quarter-inch in from the fold’s top to complete the previous step.
Attach the Lining Fabric
Your curtain and liner fabrics need to be attached after they’ve been correctly hemmed. Right-side-up, put your curtain fabric down on the floor with the lining fabric on top of it. It’s important to smooth out any wrinkles or folds in your lining before you line it up with your curtain fabric. Using pins and sewing thread, join the pieces of fabric together.
Sew Tops, Bottoms, and Sides
You’re almost there! Turn your curtain right-side-out. A double-folded edge hides unsightly raw edges when you fold in each side edge by an inch and then another inch. Then, using pins to hold the folds in place, iron them out. After that, stitch the seam closed and remove the pins. This procedure should be repeated on both curtain panels’ top, bottom, and side.
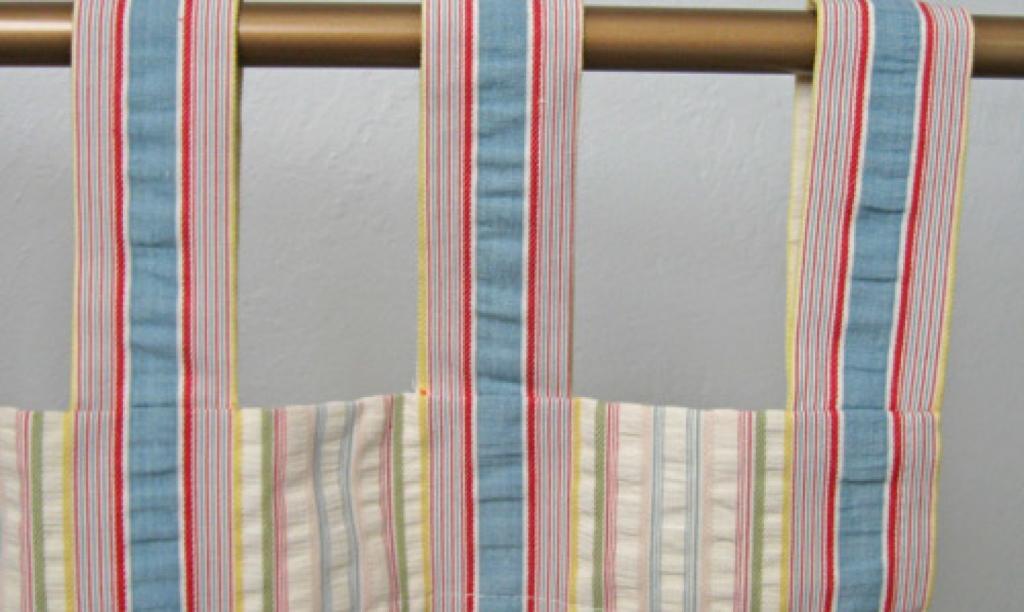
Hang Curtains
Curtain rings are used to attach the curtains to the rod. Fold two pleats every four inches along the top of the curtain panels, making sure that each pleat points outward. Tack the pleats together by threading a needle through each one. As a final step, attach curtain rings to the pleats and folded edges of each panel. Hang the curtain rod in front of your window and enjoy the results of your labor of love.
Nguồn: https://iatsabbioneta.org
Danh mục: Curtains