Ok, that makes sense. It’s very similar to making a curtain, except that curtain grommets are used instead.
Have you ever had the feeling of wanting something but not knowing what it is?
Bạn đang xem: How To Make Lined Grommet Curtains? Step-By-Step Process
Okay, I did it. It’s not easy to zero in on exactly what you’re looking for when there are so many possibilities.
Actually, you are correct in saying that. In particular, when picking out new curtains to replace the ones I’ve outgrown.
Have you experienced that difficulty as well?
Fortunately, I uncovered some never-before-used sheets in my mom’s storage box.
It’s well-made, and I think it’ll look great with my curtains.
It was perfect for a curtain, so that’s what I did with it.
If you have a sewing machine, your ability to sew in a straight line is the only expert skill you’ll need.
Supplies Needed:
- Pick your favorite fabric*
- Mechanical Sewing Machine
- Thread
- Scissors
- Tack Measurement Device
- Tops with Grommets
- Pins
- Lining material
- Iron
- Pressing Board
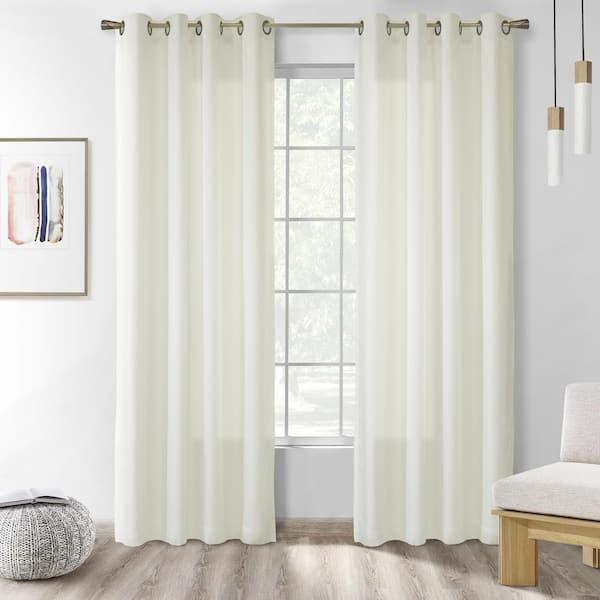
DIY Lined Grommet Top Curtain Panels
We have curtains that reach the ceiling, which I made. As a result, my yardage may not match yours. I would suggest measuring the desired length of the curtains and adding an additional 12-16 inches. Since I was using a fabric intended for home decoration, it is already 54 inches in width.
I **did not go out and buy fancy curtain lining. I used the few white twin-sized sheets I still had from my college days of throwing Toga parties.
First, you’ll need to measure your windows, pick a curtain size, and then cut your fabric to the appropriate length. Before I could begin, I had to square up my fabric. When the curtains were closed, I wanted my pattern to be uniform across the width.
Second, I accidentally ironed the fabric on the back. You must act now. If you don’t, you’ll be reminded of the wrinkles every time you admire your room and the lovely things you made in it. So just do it; it’s awful, but it’s necessary. (warning: ironing the lining fabric is required as well!) If you’re worried about ruining the good side while ironing, iron the wrong side instead!
Then I folded and pressed another half-inch hem. Do the same thing on the other side of the curtain.
At the top, I pressed a half-inch hem, folded it over, and pressed a 4-inch hem. Insert your grommets here. Verify that the finished hem will extend past the grommets.
5. I eliminated the top and bottom hems from my sheets.
Six, with the right side of the panel down, lay the sheet so that its raw edges are hidden under the pressed hem. Fasten with a pin. Bottom-tier surplus is acceptable. We’ll get to the chopping block later.
Seven, finish the curtain panels by sewing a straight hem along all four sides and the bottom of the upper section where the grommets will be attached.
Eight, we’ll determine the length of the curtain rod hanger in order to install the grommets. You’re concerned about the distance between the curtain rod and the wall. Find the length of the curved curtain rod holder from its end to its middle. Don’t forget this sum of money.
We’ll be putting in our grommets in step nine. Using my discount coupon, I purchased a package of Grommets from Jo-Ann Fabric and Crafts.
Embedded in the packaging is a circlip template for use in making precise circle cuts.
You’ll have to work out the spacing yourself. Curtains will look sloppy if folded more than the distance between the wall and the rod allows. After taking measurements from both sides, I found that they were EXACTLY THE SAME as what was previously recorded. (Use the CENTER of the template as your measuring guide, working from the fabric’s end). I used the template and a pen to make marks at those locations.
After that, I put twice as much space between each of the remaining grommets as I had originally measured. The curtains can be pushed open and pleated in this way.
When you’re ready to install the grommets, simply cut out the middle of the circles you marked. Cutting carefully within the lines proved to be useful.
Then you should look for a pair of grommets. Both are toothed and grooved.
Arrange the grommet so that the grooved side is down on the table, and then set your curtain on top of the grommet with the right side up.
You need to press down firmly on the top half of the grommet and then place the other half on top. It fits like a glove.
Xem thêm : How To Hem Curtains? Tips for Hemming Curtains
You should do this for each of the grommets. They are as simple to set up as advertised.
We are ready to hang the curtains in Room 11. Go ahead… congratulate yourself… You’re almost finished, and they look fantastic!
After they were hung, I took a measurement and tacked the hem in place. The hem was unraveling, so I took them off and resewed it. While you could sew them on by hand, it was much quicker to simply remove them and use a sewing machine.
What you have is a stunning, unique curtain panel. Moreover, my own is ideal for the youngster’s new quarters.
To find the perfect fabric, I suggest consulting this guide and then shopping at Online Fabric Store. Really, I could spend hours just looking at them all. It inspires me to sew cushions, extra curtains, and other home decor items. Sign up for my newsletter if you want to know how I made the custom adjustable crib skirt, accent pillows, and fabric-covered lamp shade that match the other awesome prints I chose for Small Dude’s room!
How To Make A Lined Grommet Curtain?
How do you go about creating lined grommet curtains?
The procedure for creating a grommet curtain is as follows:
Step #1. Prepare the things you need
The following supplies are the very basics you’ll require.
Fabric
Used fabrics or sheets will do in a pinch, but if you’d prefer to buy a new one, you can do so at a textiles shop or online.
Sewing machine or kit
That’s the kind of thing I was referring to before. Your grommet curtain won’t turn out right unless you have some level of proficiency in sewing.
Alternatively, you can use a sewing machine to speed up the process. Manual and electrical sewing machines are both available.
There is always the option of using a sewing kit and needle and thread if you don’t have a sewing machine.
Thread
Select a thread color that coordinates with the fabric. If your fabric has multiple patterns, choose the one with the most occurrences of that color.
Scissors
If you need scissors, any pair that cuts well will do. Ensure it can cut through various materials.
Measuring tape
You must be familiar with this one.
Each measurement will be double-checked with a measuring tape.
Grommet top kits
You can purchase these grommet top kits online.
We’ll use them to patch up the rips in the drapes.
Pins
Pins will be used to keep the fabric in place for easier sewing.
Iron and board
That way, when the fabric is pleated, it won’t wrinkle as much and will look nicer.
Step #2. Measure
You will need to measure the window after getting the following things ready.
Take the dimensions of it.
Fabric should be cut to a size that is twice as wide and an additional 12 inches in length.
If you want perfectly straight cuts, lay the fabric flat on the floor or another flat surface.
Step #3. Ironing
Ironing the fabric is the next step.
It’s going to be tiresome, but it’s worth it in the end. Warm up the iron and prepare to press the fabric.
Do not put the temperature dial all the way to the top, as doing so could cause the fabric to catch fire.
Adjust the temperature so that it is just warm enough to make the crumpled pieces neat.
Xem thêm : How To Make Bead Curtains? Complete Step-by-Step Guide
If you don’t want to ruin the good side of the curtain, iron it on the back.
You know, the face and all that stuff.
Step #4. Hem the fabric
Hem the edges by folding them in. The hems should be double folded and should measure between two and three inches.
Raise it to a height of four inches.
Insert the grommets there.
Confirm that the finished hem will be large enough to house your chosen grommets.
Hems should be pinned before moving on.
Step #5. Sewing
Sewing is the next procedure. Now that the edges are pinned, you can sew them along the sides.
Stitch it down a quarter of an inch from the creased hem.
A sewing machine or a sewing kit would be useful.
Knowledge of basic sewing techniques is required.
Use the straight stitch setting on your sewing machine.
However, if you must sew by hand, backstitching or basting are two excellent options.
Step #6. Measure the curtain rod
Make sure your curtain rod is the right size. Use that as a guide when setting up the grommets.
Make a hole in the length equal to the number of grommets you’ll be using.
There is a template inside the grommet that is used to mark the curtain with the grommet’s dimensions.
You can measure the hole in your curtain with this.
Step #7. Placing the grommet
You should hang the curtain backwards, with the top facing outwards, and the grooved side facing inwards.
Check that the holes you drilled align with the grommets.
To close the grommet, press down firmly from above.
After the grommets are fastened, you’ll hear a snap.
Apply the same procedure to the remaining grommets.
Pull the curtain rod through the openings when you’re done. At that point, you’re finished.
Conclusion
Making lined grommet curtains is a breeze.
This is a great hobby, especially if you already know the basics of sewing.
You can follow these instructions to improve your ironing and sewing skills.
Concern for safety is priority number one.
Nguồn: https://iatsabbioneta.org
Danh mục: Curtains


