To hang pinch pleated curtains, follow these simple steps. You can, and it only takes 11 simple steps! You’ll be able to do all of the steps with ease, I promise!
- Choosing Curtain Colors For A Beige Wall Ideas Tips
- How To Clean Curtains Without Taking Them Down? Comprehensive Guide
- How To Measure For Grommet Top Curtains? Step-By-Step Guide
- How To Make Gathered Curtains? Step-by-Step Tutorial
- How To Add Blackout Lining To Existing Curtains? Complete Step-by-Step Guide
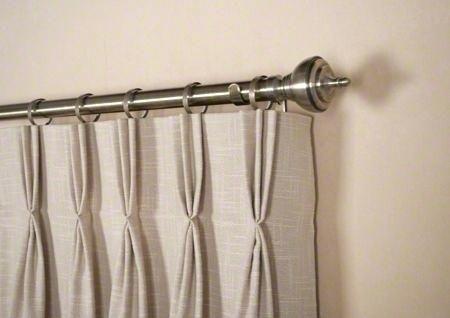
It’s possible to add a new degree of sophistication to your area by hanging pinch pleat curtains.
Bạn đang xem: How To Hang Pinch Pleat Curtains? Ultimate Guide
However, a particular curtain hook is required for this style.
Hooks used for this sort of curtain are different from hooks used for other forms of curtain, such as pencil pleat curtain, for example.
The first step may seem difficult, but after you’ve taken that one, the others will be a piece of cake.
Steps To Hang Pinch Pleat Curtains
Divide the process into two parts.
- The hook is attached.
- Pinch pleat curtains were hung on the ceiling.
Hooks must be installed before you may hang curtains.
![How To Hang Pinch Pleat Curtains [5 Steps] - Home Decor Bliss](https://iatsabbioneta.org/wp-content/uploads/2022/09/how-to-hang-pinch-pleat-curtains-img_6329ae5818524.jpg)
To hang pinch pleat curtains, how do you do it?
Here’s how it’s done, step by step:
Step #1. Laying out the fabric
You should place your fabric face-down on a table. To avoid wrinkles, spread it out flat before using.
Step #2. Counting the hooks
Verify that the quantity of hooks and rings is the same.
Each pleat requires one hook. Also, one hook is needed for each end.
Hooks are needed for each pleat. For either end, a hook is also required.
Make sure that all of the hooks are the same size.
Step #3. Measuring the space
The distance between the top of the curtain hardware and the hook should be measured. Get the hooks in the ground.
Step #4. Aligning the hooks and marking the fabric
In accordance with the measurement you selected, place each hook on top of the creases.
If you want to know where to place the hooks, you can lay them out on the material beforehand.
Xem thêm : How To Fold Curtains? Complete Step-by-Step Guide
The bottom of each hook should be marked with a pencil. To mark the spot, you might simply use a sewing pin.
Step #5. Piercing the fabric
The hook’s sharp point should be used to stab the fabric in the designated region.
When removing the outer layer of the material, be sure to go all the way through the interior stuffing.
Continue to push the hook, but make sure it doesn’t become stuck in the wrinkles.
Lift each pleat and look at the front side of it as you go.
Step #6. Adjusting the height
Add a few extra hooks to each pleat before measuring the length.
The curtain rod’s gliders or rings might be used to secure each hook as you secure the remainder of your pinch pleat curtain.
Make sure that their heights are equal. If not, you’ll need to move the hooks to get them in the right place.
Remove a hook by pulling it straight out until its sharp point emerges.
Just like before, insert it into its new location the same way you did before.
Step #7. Continue with the rest of the hooks
You can now insert the remaining hooks after making sure the height is correct.
Ensure that the space between each pleat is the same.
To ensure that the pleats are evenly spaced, you can measure them.
It’s time to hang your pinch pleat curtains now that you’ve installed all of the hooks.
Take the following steps:
Step #8. Folding the space between pleats
Depending on your preference, you can either fold the spaces between the two pleats inside or outwards first.
This step is crucial because when you hang your curtains later, the curtain tops can bunch together as you push them together.
Xem thêm : How To Pinch Pleat Curtains? Complete Step-by-Step Guide
To obtain a more professional look, you need to find the areas between the pleats and fold them.
Step #9. Folding the remaining space between pleats
In between pleats, fold the fabric in the same manner.
It’s up to the hardware you’re using to determine whether or not this is best done inward or outward.
The hem allowance should be folded in half on both ends. Hooks should be positioned in the middle.
Doing so will cause the end of the fabric to be slightly pushed outward.
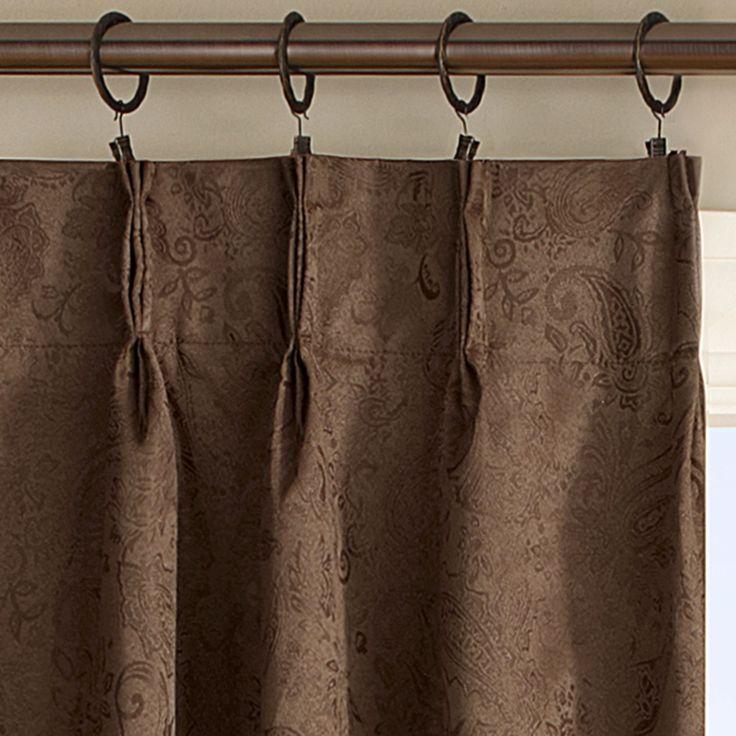
Step #10. Inserting the end hooks into the ring or glider
Allow the hook loop to fall into place after it has been slid over the ring or glider.
Starting from the middle will allow you to add extra rings and gliders as necessary.
If you don’t, your curtain will tumble toward the hook’s end if you don’t support it.
Gliders come equipped with a little eyeless, which you’ll notice when utilizing one.
However, if you use a ring, you should also put the hook into each eyelet of the curtain ring.
You’ll find it at the bottom.
For each ring or glider, insert all hooks one by one until the process is complete. However, only one at a time should be done.
Also, don’t forget to support the weight of the curtain. If you don’t skip any gliders or rings, it will help.
Without unhooking each hook and putting it back in its right spot, you’ll have to do it all over again.
Step #11. Adjusting the curtains to fill any space
After that, all you have to do is adjust the curtain panels.
It’s A Wrap!
Following the methods outlined above, your new pinch pleat curtains are ready to hang.
Pinch pleat curtains can be hung in this manner.
Congratulations on a job well done!
Nguồn: https://iatsabbioneta.org
Danh mục: Curtains


