There was a curtain hack that I posted last week that, although useful, was a little obscure and may not be anything you’ll ever need to do. Today’s curtain tutorial, on the other hand, is one that I’m confident most of you will find beneficial! I’d like to demonstrate to you how to hem curtains. Despite the fact that there are numerous videos on the subject, I’d like to share my proven and simple way for getting your curtains to hang perfectly every time, every time!
Curtains that are excessively long may need to be hemmed at some point in their life unless they are custom-made or the curtain rods are hung at the exact height required for the curtains. You may even put it off because it seems too difficult or because you’re afraid you’ll make a mistake. I’ll be honest… I’ve hemmed curtains to the wrong length more times than I like to admit because measurement is not one of my strong points. However, the way I’m going to show you today is not only simple, but it almost guarantees that your curtains will be the correct length the first time around!
Bạn đang xem: How To Hem Curtains? Tips for Hemming Curtains
After enlarging our master bedroom curtains, I still had to cope with their length……
But I was able to hem my curtains to the right length in less than 20 minutes (from start to finish) and without measuring at all!
The Method
Now… There are a few reasons why I came up with this approach to hemming curtains. To begin, no matter how carefully I measured and double-checked my work, when I went to hang my freshly mended curtains, they were either too long or too short. To lower or raise the hems, I’d have to pull them out further. In addition, even if I hemmed the bottoms of my curtains at a consistent length (2′′ up across the width of the panel, for example), they always seemed to be too short on the ends and too long in the middle. Do you know if this is a common occurrence?
To avoid having to redo them every time, I decided to hem them the same way my mother did when she hemmed my pants: by having me put them on and then pinning them up so that they were the same height all the way around. A full disclaimer: I’m pretty sure this isn’t the “right” way to hem curtains, but it’s actually quite efficient! What are you waiting for?!?
Supplies Needed
- The drapes are way too lengthy.
- Torx screws
- Spools of thread and needles.
- Using the same thread
- an ironing board and an iron
- Clear yardstick or ruler (optional)
Hang Your Curtains
You can hang your curtain rods at the height you desire before you begin hemming your curtains.
If you want to wash your curtains frequently, you may want to pre-wash them before sewing the hems.
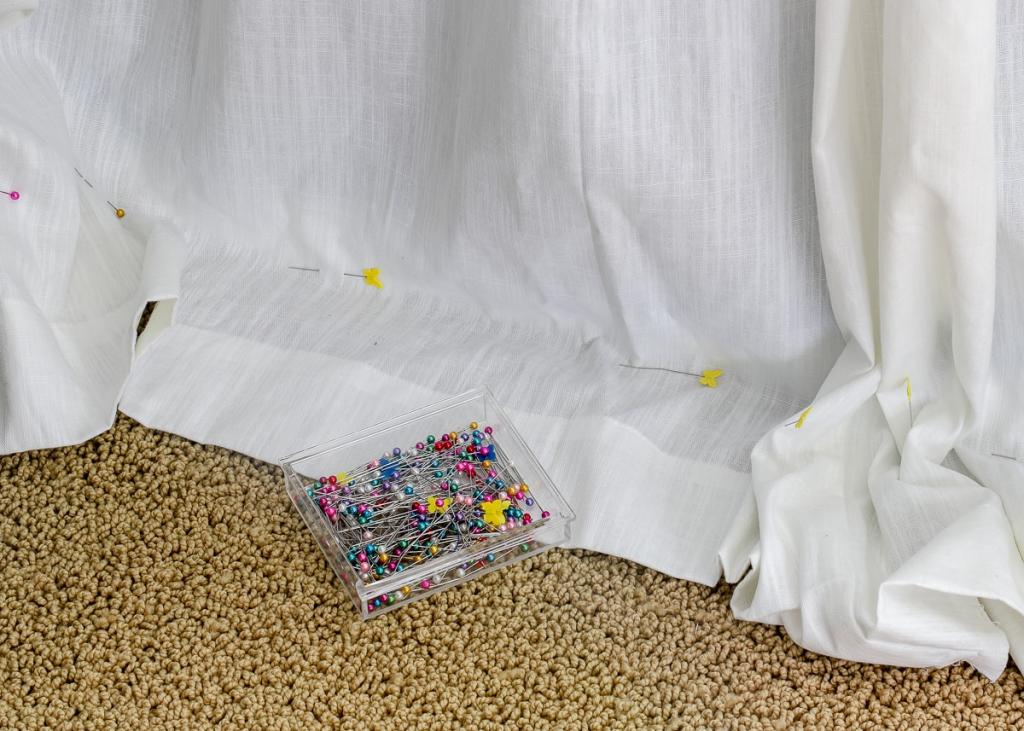
Pin the Curtain Hem
Decide where you want the curtain hem to end, and then measure the distance. As a result, measuring (or rather, not measuring) my curtains is a breeze for me. To get your drapes to hang correctly, start with one side and gradually pull it toward the floor. Pin the curtain to the wall or baseboard where the carpet meets the floor/carpet.
Keep the curtain pulled straight down at all times as you work your way across the entire panel, pinning your target place at 8-10′′ intervals until you reach the end.
When calculating the distance between pins, I do not take into account whether they are equidistant or in line with the previous pin. Instead, I aim to create a straight line of pins on the wall or floor when the curtain is hanging straight down.
Use a yardstick instead of the wall or floor to set your pins if your curtains are to hang 1′′ off of the floor. A pin should be placed at the 1′′ mark (or 2′′, or 3′′, etc.) on the curtain, and the curtain should be pulled tautly across the panel at regular intervals. If you hang your curtains properly and use a yardstick to measure them, you’ll have a lot better chance of getting a perfectly straight and even hem.
Fold and Iron the Hem
You’ll need an ironing board to iron the curtains after they’ve been removed from the curtain rod. Ironing board: Place the curtain right side down on the ironing board.
I’d want to point out that you don’t have to undo the hem on your current garment (unless you really, really want to). Because I frequently need to re-adjust our curtains in new homes, I always keep the additional length. It’s because of this that I’ll be finishing off my new hem with my present hem.
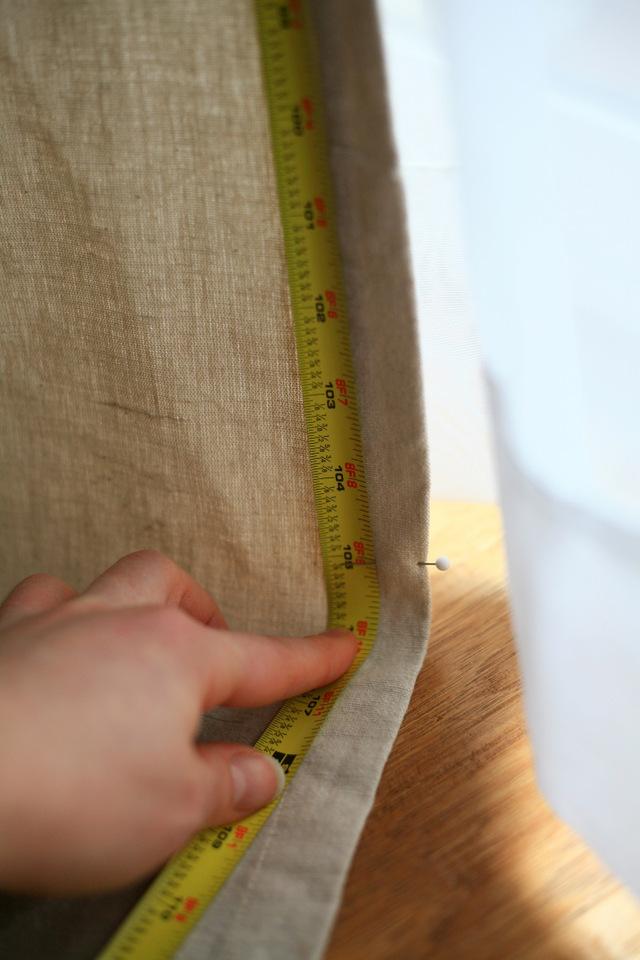
The bottom border of your curtains should be folded up at least 1′′ and then another 1′′ before you begin sewing. Fold your curtains 1 inch then 4 inches before sewing the final hem if you have the extra length (as shown below). Instead of a ragged, tattered edge, the inside of your hem will have a neat, finished edge.
On the pin line you made when you were hanging the curtain, you’ll simply hem it by folding up the curtain’s bottom edge toward the rear. Pin the bottom of the panel to the top of the hem after it has been folded across the width of the panel (the vertical pins shown below).
In order to ensure that your hem is neatly folded, iron it before sewing it. If steam is required, do so to provide a smooth surface.
Sew the Hem In Place
Xem thêm : How To Hang Heavy Curtains? Comprehensive Guide
Once the hem is “measured,” pinned, and ironed, load your sewing machine with corresponding thread and sew the hem in place across the panel’s width. Sewing about 1/8′′ – 1/4′′ in from the completed edge is my preferred method.
Using heat-n-bond tape under your hem will allow you to complete this job without sewing. The problem is that iron-on products are rarely reversible, and I prefer to have the option of taking out my hem whenever possible!
A regular stitch length is fine if you don’t plan on adjusting your hem in the near future. But I prefer to increase my stitch length to 3 or 4 stitches. As long as I remember to use this, I won’t have to redo the hem any time soon.
Before rehanging your curtains, give them one last press using the complete panels.
Take a breather, and admire your perfectly hemmed drapery!
No matter how you’re supposed to hem curtains, I’ve found it to be an enormous time saver! Because I know the hem is going to be perfect, I’m lot more driven to actually finish it!
Thanks so much for reading, and I hope you find this curtain hemming tutorial useful! This is the first time I’ve hemmed drapes this way. Do you know of any other methods I might want to try?
Tips for hemming curtains
Decide on your hemming method and gather your materials. Both strategies worked perfectly for me when I put them to the test. If you don’t feel at ease with sewing, I don’t see the point in doing so. If you don’t know how to sew, the Heat n Bond Ultra Hold is an excellent substitute.
If you have floor-length curtains, I recommend pinning them up while they’re still hanging. Lined up on the floor, even the tiniest error is immediately apparent. Also, because not all floors are perfectly flat, your curtains’ hems may need to be somewhat slanted.
If your curtains are going to end at the wall, you may simply measure and label the curtain length before hanging the curtains.
Trim the bottom of the curtain by measuring or pinning it in place. Before cutting, add a 1′′ seam allowance to the bottom of the garment.
Both methods of shortening and hemming curtains are shown in the video included in this page. A different browser or ad blocker may be the solution if you can’t see the video. To begin, we’ll use the new sew version.
How to hem curtains without sewing
Adding a no-sew hem to a garment is easy using UltraHold hemming tape.
Simply press down for a few seconds on one side of the hem tape to adhere it to the back of the curtain with the glossy side down. Allow for thorough cooling.
Remove the paper backing by tearing it off with a pair of scissors. To get it all off in one piece, I had to work on a few different areas. Before pressing the fabric, fold it in half and then press it again. It will take a little longer for this phase, so be patient. To make the layers adhere, push them together with your fingertips.
The iron on the hem appeared to be secure and stable. It’s stunning from both angles, too!
How to hem curtains with a sewing machine
Starting with the raw edge of your curtains, finish them up with a serger or zig zag stitch on a sewing machine. Press a 1′′ hem and iron it in place to secure the garment.
The hem can be sewn on with a sewing machine or a coverstitching machine. With the right thread, you won’t even know it’s there. Alternatively, you might run parallel stitches on your sewing machine using a three-stitch coverstitch.
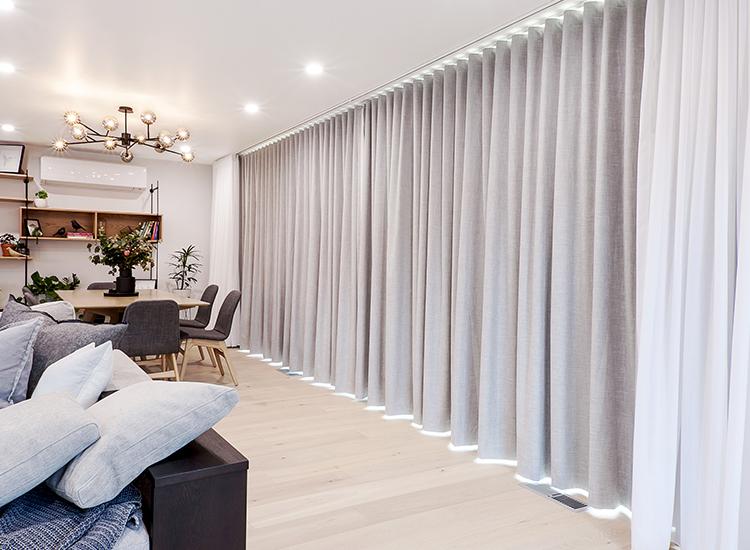
Hang and enjoy your new curtains as soon as you’re done! Short windows in our living room necessitate the use of these drapes. There are many ways to use curtains, even if they aren’t the correct length at first.
Sewing Or Taping: Which Is Better?
Xem thêm : How To Hang Curtains With Clips? A Step-by Step Learning Guide
If you were to ask which approach I preferred or thought was superior, I’d say stitching.
Both have their good and bad points:
Sewing
For curtains that will be used for a long time, sewing is preferable to tape. An additional benefit is that you may alter it.
You can undo the stitches and resew them if you need to change the curtain’s length.
In addition to being less untidy, sewing them will last longer than taping them.
However, unless you employ the basting method of stitching, the curtain’s hem will show the stitches you’ve used to make it.
Taping
When it comes to aesthetics, there’s no comparison between taping and stitching on the curtain hems.
Moreover, it takes less time and effort to do so. It’s as simple as taping and ironing it.
Once the hem is detachable, it will be difficult to modify the length of the garment.
You’ll also have to fork over an additional dollar for the tape, but if you already own one, there’s no problem.
However, the length of the curtain is still up to you and the purpose for which you intend to use it.
Our time is valuable, and we don’t want to re-invent the wheel.
You’d like to know more about DIY projects? Click here to read more.
That’s all I have to say on the subject.
Conclusion
The cost of hiring someone else to hem your curtains can be prohibitive if you know how to do it yourself. Doing it yourself can save you a lot of money.
You can customize it to your liking by making your own alterations and final touches.
My curtain hems were a lot of fun to make.
In addition to helping me pass the time, it gave my curtain some additional character.
Nguồn: https://iatsabbioneta.org
Danh mục: Curtains


