Why not try making a set of balloon curtains yourself?
- How To Make Macrame Curtains? Complete Step-by-Step Guide
- How To Hang Curtains On A Traverse Rod? Complete Guide
- How To Get Wrinkles Out Of New Curtains? Things You Will Need
- How To Hang Curtains On A Metal Door? Step-by-Step Tutorial
- How To Add Blackout Lining To Existing Curtains? Complete Step-by-Step Guide
Just a piece of fabric, a few supplies, and your sewing skills are all you need to get started.
Bạn đang xem: How To Make Balloon Curtains At Home? Step by Step Instructions
Suppose you are already tired of switching from colors to colors. Isn’t it time to try something new?
Your curtains may be perfectly pressed, but sometimes you’d like to take things a notch up in terms of style a step further.
Why not construct a balloon curtain instead, I’ll tell you?
There you go! We’re building a balloon curtain. Yippee!
Is this your first time making a balloon curtain?
Some of you may have an inkling of what I’m referring to, while others may not.
So, if you’re interested in learning more about how to sew a balloon curtain, give this post some time.
It will be well worth your time.
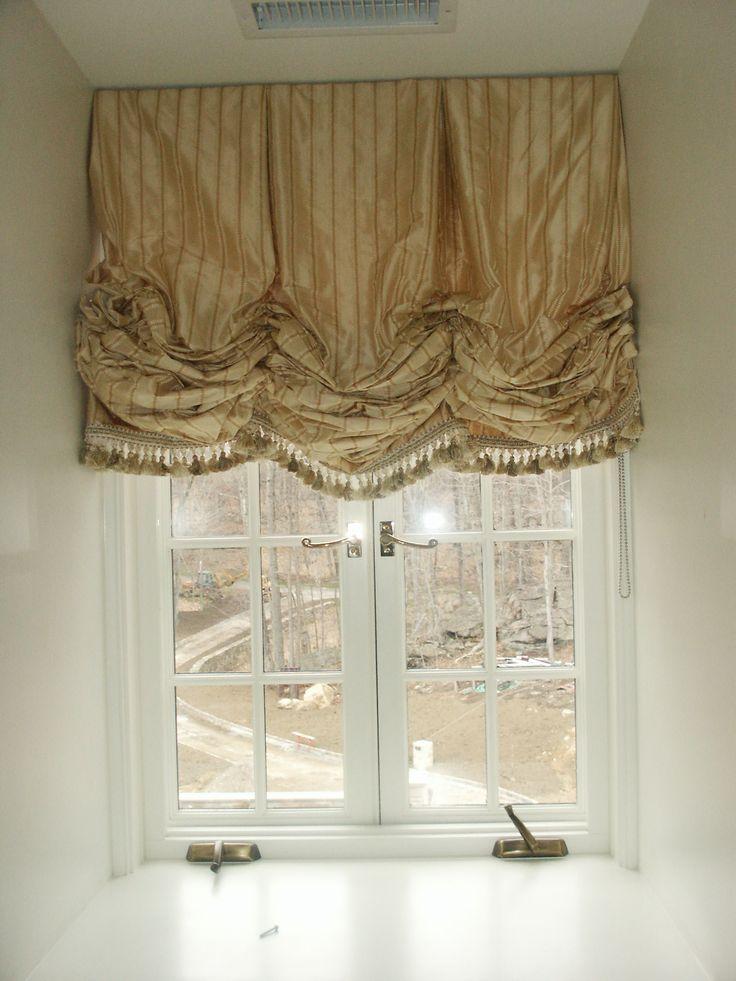
Balloon Curtains
You don’t have to blow on a balloon curtain to make it work.
Instead of being a curtain, this is more appropriately referred to as a shade or valance.
When they’re rolled up, they get puffy. You produce the delicate rounds by making pleats.
Even though balloon blinds come in a wide variety of shapes and sizes, we’ll concentrate on the manufacturing method instead.
Steps To Make Balloon Curtains At Home
The question now is, how can you make your own homemade balloon curtains?
It’s simple; all you need to do is follow a few basic steps to complete this task.
Step #1. Prepare
Begin the process by ensuring that you have all of the necessary tools and materials at your disposal.
#1. Fabric
Your fabric will be your first and most important requirement.
As long as it’s soft, we may use whichever fabric we choose for the balloon curtain.
If you want a nicer finish, I recommend using silk or faux silk for your balloon curtain.
Any material with a similar sheen will do.
#2. Sewing kit or machine
Use your sewing machine if you have one.
Putting it to good use saves both time and money.
Xem thêm : How To Hang Scarf Curtains? Easy Step-by-step Guide
When all else fails, you can always stitch by hand.
Include the following items in your sewing kit to get started.
- Needle
- Thread
- Instrument for measuring length and width
- Scissors
- a tailor’s chalk (pencil)
Pins for sewing
#3. Clothes iron
Make your task easier by using this one.
This will also help to remove any wrinkles from your curtain, making it look more professional.
Step #2. Measure
Once you’ve gathered everything you’ll need, the next step is to take a measurement of the window.
The dimensions of this object would be appreciated.
3 to 1 is a good rule of thumb for curtain width, but you can go as wide as you like.
The 3:1 ratio relates to the curtain’s width, not the window’s width.
The length of the curtain should be measured from the curtain rod to the desired length.
It will take an additional 5 inches to add the double hem and another 5 to add the rod-pocket.
Get enough fabric before starting the job.
You can use old sheets or any other fabric that you already own to make a quilt.
This could save you money in curtain costs.
Step #3. Cut and sew
Cutting the fabric is now possible after obtaining the appropriate measurements.
To make it easier to apply the patterns, use a clothes iron to press the fabric.
A flat surface should be used.
To avoid fraying, the edges must be hemmed or serged.
To keep the fabric from loosing threads, do this….
#1. Hemming
It’s possible to do a double hem.
It’s possible to increase the amount, however it may impact the round ballooning of your curtain.
If the prevailing color of the fabric isn’t white, try sewing with a straight stitch and a different color of thread.
Make sure to stitch the hems towards the inner folds while finishing them.
Looks better with this.
#2. Rod pocket
Xem thêm : How To Tie Back Curtains With A Tassel? Complete Step-by-Step Guide
It’s important to keep half an inch folded along the top border of the fabric while stitching the pocket for the rod.
You should construct the rod pocket a minimum of 3 inches wide if you have a 2 inch diameter rod to work with.
Sew it in place while holding it in place with a sewing pin.
For the rod pocket, you may need to utilize eyelets.
#3. Making the balloon
Here is a formula for making the balloon: the curtain’s total weight divided by the number of panels desired.
In stitching, this will lead to the necessary spacing.
You’ll need to utilize either your sewing machine or your hand sewing skills.
Make a plan for how the panels will be split. A single thread and some manual sewing are the next steps.
Using a 2 to 3 inch gap stitch, begin at the bottom and work your way up.
Columns will be stitched together using this as a foundation.
The next step is to pull the thread until the desired balloon length is achieved.
Using a sewing machine, sew all of the remaining columns together.
Step #4. Hang
Your curtains are ready to be hung!
Use an edge hook to hold the curtain edges in place for the best results.
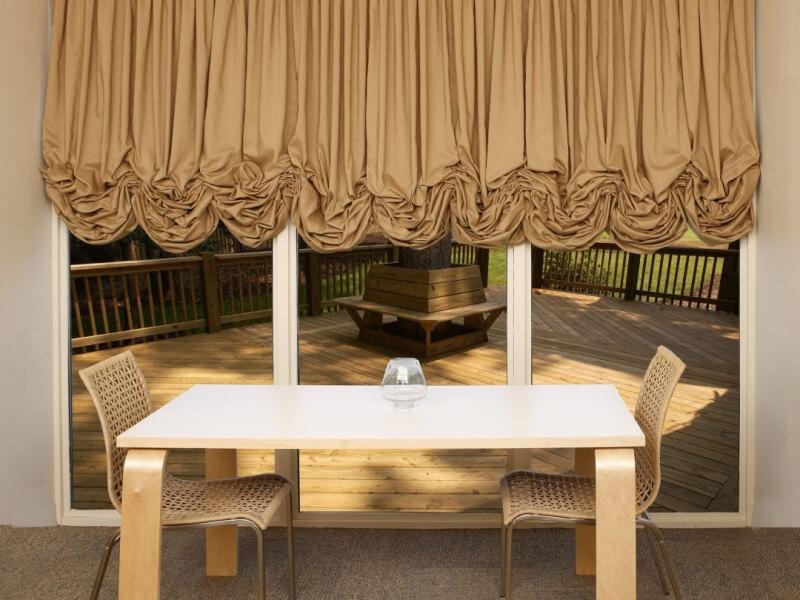
Balloon valances are best used in the living room or the bedroom, where they may be seen by people.
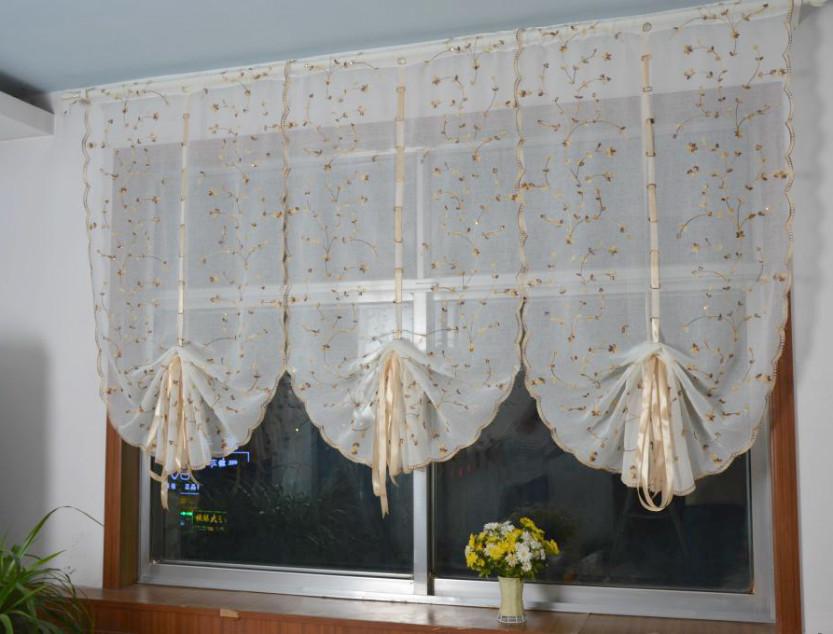
How to Make Balloon Curtains From Sheers
With a little planning and some basic sewing abilities, you can transform plain sheer panels into billowing balloon curtains. In order to accomplish this project, you will need to know how to use a tape measure and sew on a button. If you obtain the necessary materials ahead of time, such as by visiting your local fabric or craft store, you can easily make your balloon curtain in a few hours.
If necessary, wash sheer panels before to manufacturing. The number of panels you’ll need depends on how wide your window is in total. For the greatest results, double the rod or window width by 3 to get the 3-to-1 fullness.
Smooth out a sheer panel on a clean, level surface with the front side facing up. Measure and mark evenly spaced pencil dots 14 to 18 inches apart on the panel length, starting at the bottom and stopping approximately 20 inches below the rod-pocket case, using a tape measure.
To eliminate thread bumps on the face of the fabric, hand-sew one ring at each pencil mark using a minimum quantity of delicate threads. A single sheer panel should have rings attached to both ends and one or more evenly spaced rows within its body. Each horizontal row of rings will produce a cloth balloon.
Add a few additional inches to the length of a row of sewed rings to account for knots. The white lift rope should be pre-cut into identical lengths. Make a knot at the bottom and top of each ring in the row with the lift cord. Once you’ve threaded all of the rows, you’re done. Set aside a 4 to 6 inch piece of lift cord for each row of rings.
Install a curtain rod by inserting it through the rod pocket and placing it where you want it. Thread the bottom three to six rings of each row with the pre-cut lift cord sections and tighten them together to get the desired completed length. Hold the rings in place using knots tied through the rings. For larger windows, you may choose to draw up all the rings to make an enlarged balloon valance at about 24 to 30 inches from the top of the curtain rod. Balloons should be inflated between each row of cloth.
Conclusion
As a result of this tutorial, you may now build a balloon curtain at home.
To make these curtain hacks and DIY projects at home, you will need to learn how to sew. ‘
You can save money and time by doing your own sewing instead of hiring a professional.
Nguồn: https://iatsabbioneta.org
Danh mục: Curtains


