No, I don’t know how to put blackout lining to curtains.
We’re here to help, so don’t worry about it. To learn more, stick around to the end of the article.
Bạn đang xem: How To Add Blackout Lining To Existing Curtains? Complete Step-by-Step Guide
A common use of curtains is to keep out too many shades of light and to keep out the noise from the outside world.
Additionally, it shields you from prying eyes from the outside world.
It would be fantastic to add a liner to your existing curtains if you wanted to increase their coverage.
If you’ve previously made a basis for your curtains, it’s very important that you know how to add a second layer.
The color of a blackout curtain isn’t limited to white.
This can be used as a liner at the rear.
To keep the curtain’s design and color intact, hide it at the back of the curtain.
Steps To Add Blackout Lining To Existing Curtains
Everything gets blacked out by the name of the lining or blackout curtain.
Its purpose is to offer your rooms with even more effective and pleasurable covering.
This is essential if you’re a night owl.
Adding a lining or additional layer to your curtains is simple if you follow a tutorial.
Everything else is required to make it happen, of course.
But after that, relax and don’t stress out..
We’re here to lend a hand.
To add blackout lining to existing curtains, follow these instructions:
Step #1. Remove the curtain on the rod
To begin, remove your curtains from the rod and give it a thorough cleaning.
When sewing a lining to an unclean curtain, you must first clean it well before doing so.
Remove all the dust from it and then wash it with the liner to soften it up.
Step #2. Get the measurements
To ensure that the curtain would fit, you need use a measuring tape that is at least 10 feet long.
Make sure your measurements are accurate by using an old curtain as a guide.
Xem thêm : How To Make Balloon Curtains At Home? Step by Step Instructions
In order to avoid problems with sewing, make sure you have exactly the right amount on each side.
Step #3. Cut the blackout fabric needed
It’s time to cut out the fabric in the third stage, but not until you’ve taken measurements.
For curtains, a marking tool that is both visible and easy to wash can be used, such as tailor’s chalk.
On each side, add at least 12 inch of excess fabric.
You’ll need it later on while making a curtain.
After you’ve marked the fabric, cut it.
Step #4. Start assembling both fabrics and pin
To begin, lay your top curtain flat on the floor, and then add fabric lining to the top of it.
Your old curtain should face the floor, so make sure it’s facing the right way up.
The following layer will be sewn to the back.
The 12 excess fabric should be folded inside one of the sides when you pin.
Flip both curtains and pin the other two sides, leaving a door open so that you can flip it back over again if necessary.
Step #5. Sew all the three
You’ll then sew the three sides together, making sure they’re perfectly aligned and looking beautiful.
Check to see if your curtains fit your needs.
To ensure a professional appearance, the stitching must be neat and exact.
Then stitch the remaining open end.
Flip it over after sewing 34 of the way through to display the outer appearance.
Stitch the remaining 14 of the last side once you are certain that it looks good and enjoyable.
Step #6. Hang it again on your curtain rod
After that, you can assess whether or not the procedure was successful in helping you learn how to do it better in the future.
Ensure that the curtain rod is securely inserted into the curtain and resealed.
The space should be darker and quieter while maintaining the same shape, appearance, and color.
Try to keep an eye on it for a few days to see whether it works and if your curtains remain the same.
The fabric will be slightly more difficult to work with even if you just detect the tiniest of alterations.
Because it is soaked in fabric conditioners and powder, you can wash it to soften the cloth for a short time.
If you suspect you’ve made a mistake, it’s always possible to go back and look for it.
Xem thêm : How To Install Curtains Over Blinds? Complete Step-by-Step Guide
Make a bookmark or take a screen shot of this page to ensure that you don’t lose it.
Please click here if you’d like to learn how to wash these curtains.
That’s it.
Can You Attach Blackout Linings To Curtains Without Sewing?
Blackout curtain linings can be attached to a set of curtains without sewing and are suited for use with eyelet and tape headed curtains.
The linings are attached to the curtains with the included rings and hooks, and an illustrated three-step installation guide is included with the linings.
It doesn’t get any easier than this!
What You Need
To begin, you’ll need a few items to transform your old curtains into blackout ones:
- A tiny ladder for putting up and taking down your curtains
- A flat, transparent surface, such as a table or the floor.
- With the accompanying curtain rings and hooks, you may hang your pre-made blackout curtain linings.
- You may want to softly iron out any creases in the fabric that are formed when the fabric is folded and deposited into a plastic bag.
How To Add Blackout Lining To Existing Curtains
It only takes three steps to install our blackout curtain linings to an existing set of curtains.
Step 1
Lay the curtains face down on a flat surface after removing them from the pole.
You should unwrap the Blackout linings from their packaging to remove any wrinkles in the cloth before installing them.
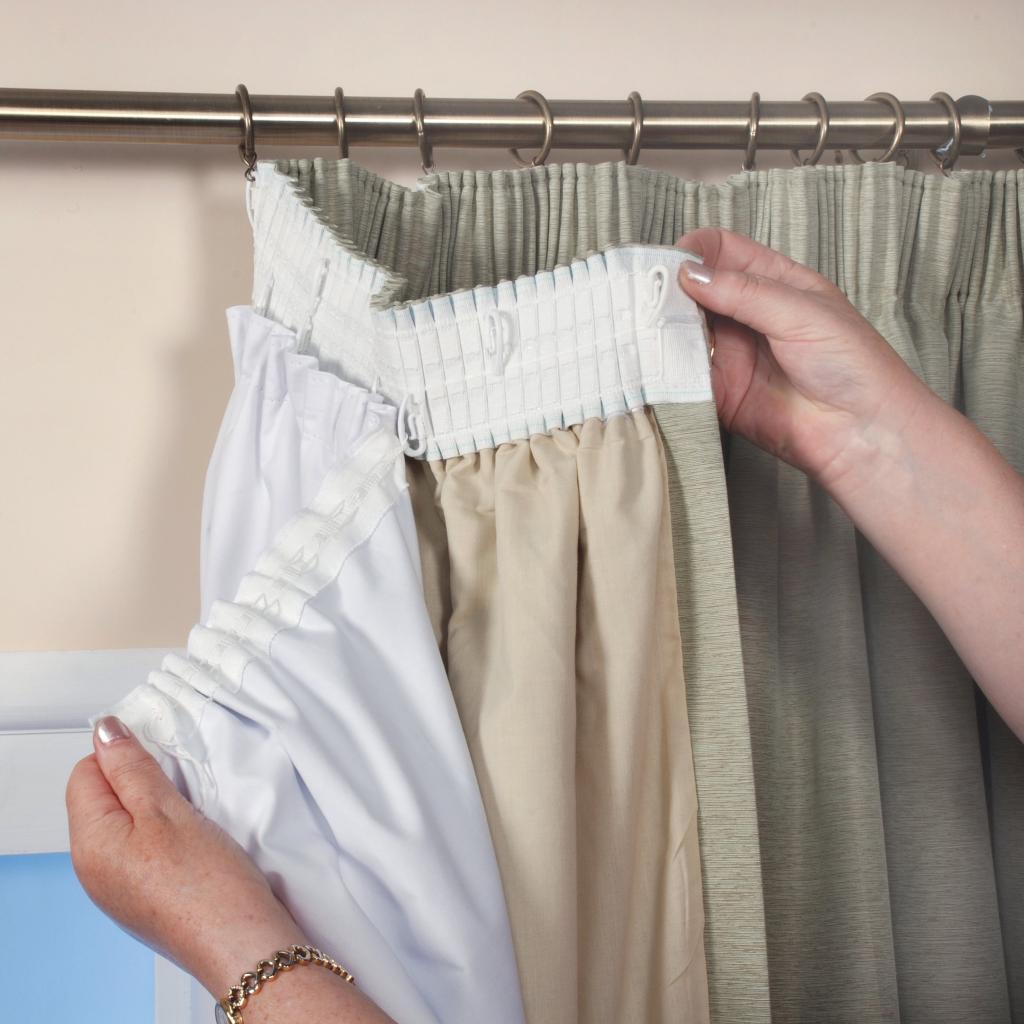
The lining panel should be placed on top of the curtains with the header tape facing you.
Step 2
Insert the curtain hooks into the lining’s header tape pockets.
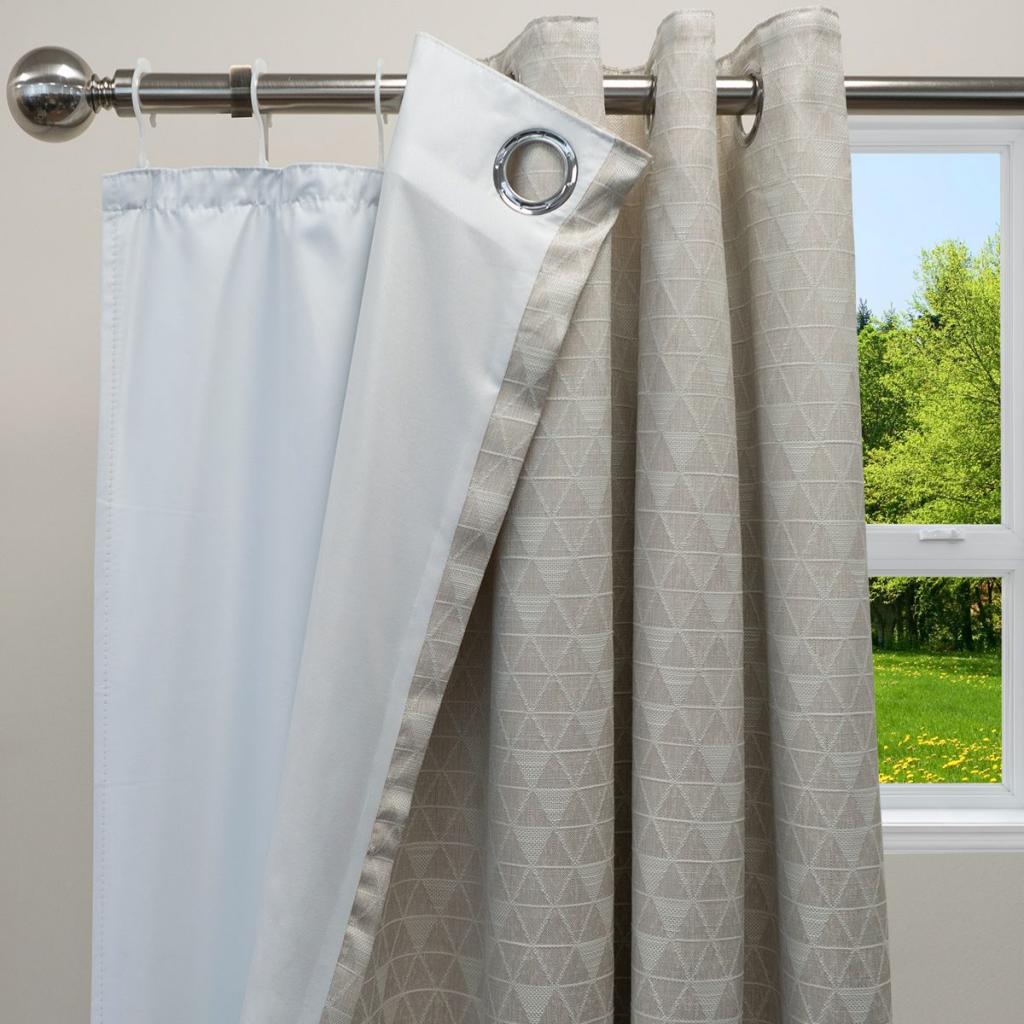
Put two curtain rings between each pair of eyelets on the curtain pole and thread it through the eyelet curtains.
Then, with the header tape facing down, attach the lining panel to the curtain rings. Alternatively, this can be done once the curtain pole and eyelets have been installed at the window.
Step 3
To get the best drape, hang the curtains and adjust the hooks on the header tape.
Your new blackout curtains are ready for use as soon as the work is done.
Using linings with taped heading curtains, you may simply put the curtain hooks into the header tape pockets on the lining, then insert them into the header taped on your curtains.
Want A New Set Of Blackout Curtains Instead?
Our blackout curtains come in a variety of styles and sizes, so you may transform the look and feel of your space.
If you’ve got a sewing machine and are looking for something a little more custom, we have blackout fabric for you.
When it comes to our 100% and 95% blackout fabric, we’ve got you covered. It’s machine washable, easy to care for and splash-proof; it also has a high-tech triple weave that ensures the fabric is long-lasting.
Conclusion
Now that we’ve reached the end of our post, we sincerely hope that you can put these suggestions into action.
We’re glad we were able to answer your question on how to add blackout lining to existing curtains.
Nguồn: https://iatsabbioneta.org
Danh mục: Curtains


