How do you manufacture gypsy rag curtain? Just some lengthy strips of cloth and a creative mind are all you need.
Styles vary among the people I know, and it is part of what makes us special.
Bạn đang xem: How To Make Gypsy Rag Curtains? Step by Step Instructions
Like what I’m about to show you, a new and exciting art form you may have never heard of.
Has making a gypsy curtain ever been on your to-do list?
Some of you may have heard of it, but for others who have never heard of it, I’ll explain what it is.
A curtain can be made using long pieces of colorful fabric that you already have around your house.
Yes, that’s correct.
You won’t have to throw away the cloth because you can use it for something else.
It can be considered garbage by some, but I’ll show you how it can be used as a piece of art or a way to liven up a room.
Gypsy Rag Curtains
Long strips of fabric are used to make these curtains. They can be different colors or designs.
It has a sophisticated bohemian vibe to it. To summarize, this look is perfect if you want to exude a laid-back yet unique feel.
Steps To Make Gypsy Rag Curtains
So, how do you go about making gypsy rag curtains? It’s simple.
All you have to do is prepare the ingredients and then follow these simple instructions to get started.
Do not be alarmed; I am confident that you will be able to locate them in your own homes. Is it necessary to be able to sew? It’s a good thing! That is not the case.
Step #1. Preparation
There’s no need to prepare for this one.
In this activity, the role of originality and inventiveness is important.
You’ll have to search your home for these items now.
Scissors
Cutting the fabric into strips requires scissors, but if you already have the fabric in strips, you can use scissors to trim it instead.
Colored fabrics or strips
The fabric you choose for your curtain will have a huge impact on the final product.
Xem thêm : How To Hang Outdoor Curtains With Wire? Comprehensive Guide
In the end, it isn’t about appearance. Whether it’s new or old, you can use it.
A-rod or long stick
We’ll use that to hang the fabrics from, and it’ll double as a curtain rod.
Candle and lighter
We’ll use it to burn the fabric’s edges to avoid it from being bulled to thin sheets and pieces of fiber.
Step #2. Cutting
Burning off the fabric’s edges will prevent it from being reduced to thin sheets and fragments of fiber.
You can make strips by cutting the fabric. Just 2 to 3 inches will do.
This step can be omitted if the textiles have already been cut into strips.
Step #3. Burning the sides
You’ll then need to light your candle.
Keeping it away from combustible materials is a must.
Putting your safety first is essential.
Take each strip and slightly burn each edge.
Step #4. Tying
Each strip should be slightly charred on the edges.
It doesn’t matter how you tie the knot, as long as it’s neat and tidy.
Tie two strips of fabric together to create a longer piece of fabric.
Step #5. Measure
After you’ve finished attaching the materials to the rods, take a measurement of your window to make sure it’ll fit.
If required, add more strips. Using the smaller strips, you can lengthen the curtain if it appears shorter.
Immediately cut the curtain if you notice it’s going to be longer than you expected.
Tie the end of each strip when you’ve finished cutting or when you’ve established that the curtain’s length is acceptable.
tying the end will keep it in place and make it look more uniform at the bottom.
Step #6. Hang
Hanging your curtains after completing the preceding stages is a great way to show off the results of your hard work.
My Experience
They were made by a family member of mine.
Xem thêm : How To Add Blackout Lining To Existing Curtains? Complete Step-by-Step Guide
Cut the fabric in half and re-tie it when I was a kid, she’d say.
I’m not sure why she let us get away with it, but we did. Because she owns a tailoring shop, she had a wide variety of fabric.
We couldn’t deny her fascination with colors because she has so many of them in her wardrobe.
So when she rearranged the strips, I was taken aback. One by one, she strung them together to form a rod.
She mixed and matched this design to create a richer, fuller look. Increasing the amount of fabric used will result in a thicker curtain rag.
That’s when she went on to hang the new curtain, and we were all surprised by the outcome.
With a beaming grin, I informed Mom that I had a hand in making the new curtain. We had a great time and got a lot of things done.
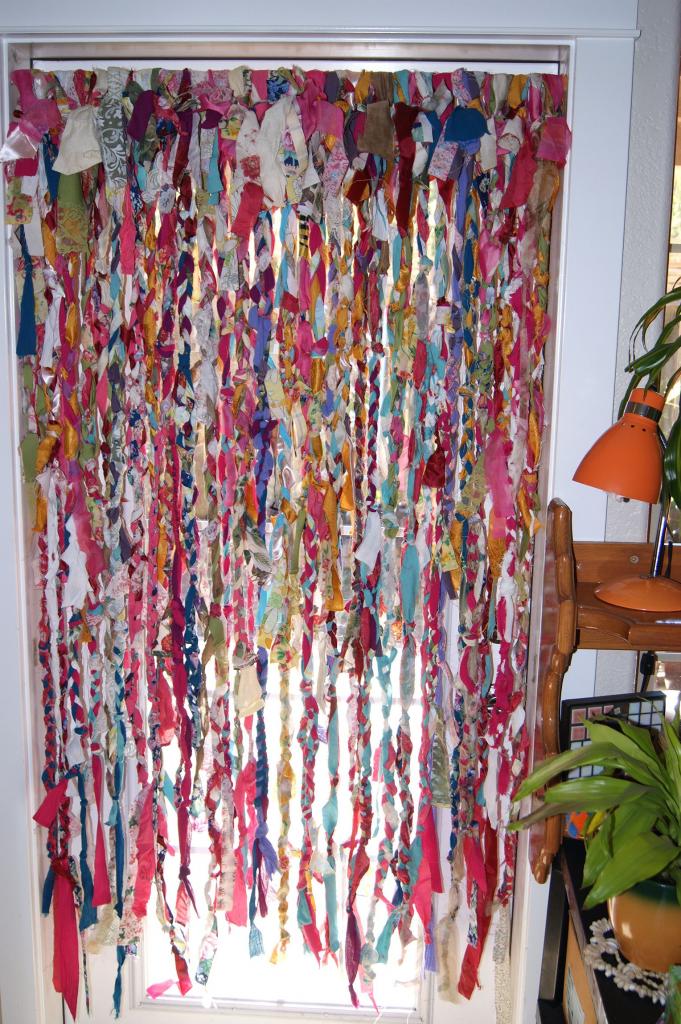
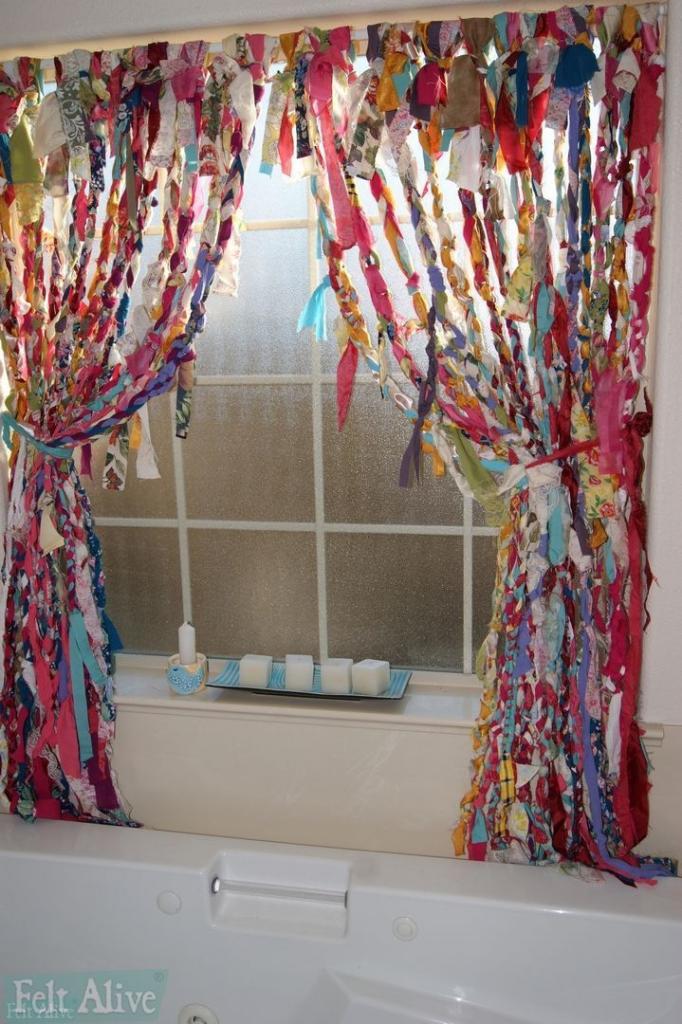
Despite the fact that my studio is bright and cheery, my windows were in desperate need of a makeover to match. When my mother-in-law granted me the use of her fabric stockpile in exchange for scrounging privileges, I seized the opportunity and created these whimsical no-sew rag curtains. I constructed valances and full-length drapes.
It turns out that sheers are the most enjoyable fabric to knot, so I looked through her stock to find any and all shades of the bright colors that made me happy, as well as lots of neutral colors to tie it all together. As long as those colors were present, the prints on the fabric might be anything. In addition, I discovered trim, ribbon, lace, and ric-rac that I could knot into my project!
Despite my best efforts, my mother-in-law has a more restrained sense of style than I do, so I supplemented her kind donation with a few trips to the thrift store in search of vibrant hues and deep jewel tones. All I needed to complete my haul were hot pink and turquoise sheets, a gold tablecloth, and a couple more sheers.
Cut the fabric into strips up to 2 inches wide as soon as I had a collection of at least 12 distinct fabrics. Remember, I’m not a seamstress and I used salvage fabric, so I don’t know how many yards of fabric these drapes require. My rotary cutter, however, was quite helpful in cutting all of those strips.
To begin a strand, I cut at least six strips of cloth from the stacks of fabric. For each of the strands, I made an effort to include a variety of textures and colors. For a more uniform appearance, you may begin with the same strips for all of the strands.
For my curtain rod, I tied a loop at one end of the strips, ensuring sure it was big enough to slide over. A coat hanger on my closet door proved to be the best option for keeping the strand in place as I knotted it.
To my dismay, my first love, macrame, kept interrupting my braiding plans! Twisted and square knotted, the strands have reverted back to their original state of plaiting. To make up for any shortfalls in my fabric, I would simply tie on another strip from my stash until each strand was long enough.
The colors, patterns, and textures came together in a magical way as I knotted! All strips were tied together in a single strand, which subsequently split into multiple smaller strands.
I discovered that leaving the knots loose makes the process go MUCH faster and uses significantly less fabric per strand. It also helps that the strands are lighter and more streamlined. When braided with different colors and textures, I discovered that even the worst fabric can look magnificent. To show off the fabrics I was working with, I developed the technique of leaving huge spaces in between knots throughout my work.
Most importantly, I learnt how important it is to listen to music to stay in sync with the twisting beat. One of my favorite pastimes is to dance while I’m working on a project.
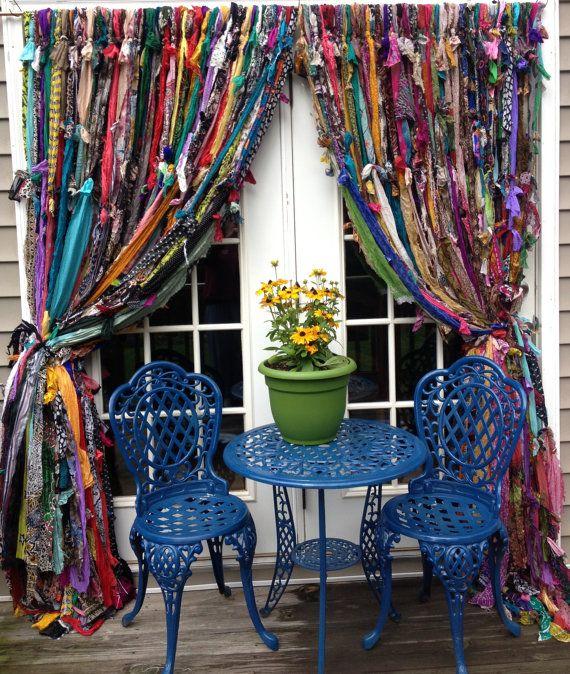
My mind immediately began to wander to all the areas where I could use some curtains that looked just like them. My patio needs a privacy screen that allows wind and light to sway through. In my guest bathroom, I’m lacking a shower curtain (I picture using blues and beiges for a beachy feel.) That’s not all; my sister, who lives in a boho-chic cabin in Alaska, also needs some. The next surprise from me (I’m sorry, Keri if I’ve spoilt it for you.)
Conclusion
My sister in Greece has already constructed her own pair of rag curtains to conceal the street view while allowing fresh air to circulate through her country home without air conditioning.
After finishing the strands, I strung them on the curtain rods and clipped the ends. For my MIL, I built a long set (without my flamboyant accents) and it fits well in the entryway of her craft cave. I also prepared some for the bathroom. If you’re looking for inexpensive window curtains but don’t have the sewing skills to make them yourself, I highly recommend a relaxing artistic knotting session. I think it’s even better than needle felting!
Nguồn: https://iatsabbioneta.org
Danh mục: Curtains


