A curtain valance is a piece of fabric that covers the top of the window. They first appeared during the Renaissance and grew in popularity in Victorian England. The purpose of window valances is to conceal all of the wall-mounted gear required to hold up the blinds and drapes. They are also available in a variety of styles. This article will teach you how to make valances for your windows.
Valance comes in a variety of styles, all of which can be customized to your liking. You can achieve this by incorporating your favorite colors, textures, and patterns into the overall design of the area. Valances are available for purchase in a variety of locations, and you can utilize them in your home.
Bạn đang xem: How To Make Valance Curtains? Easy Step-by-step Guide
However, in order to achieve the look you like, you must create it from scratch. Valance curtains are easy to make, even if you have never sewn before. Sewing machine or other non-sewing methods, we’ve provided step-by-step instructions for making valance curtains below.
Supplies Needed
If you want to make your own window treatment, you’ll need the following materials:
- There are two major types of curtain fabrics: one that covers the valance’s front, and one that covers its back. To figure out how much fabric you’ll need, follow the steps in the measurement charts provided below. Purchase extra yardage for your valance width to avoid having to match seams across a huge window.
- In this lesson, the underside of the valance is lined with curtain lining fabric (sometimes referred to as fabric B). The lining makes the valance easier to construct and more attractive on the reverse side (which might be seen from the outside of the window). Ask the workers at your local fabric store for the cheapest drapery lining they can find!
- You may need to use blackout lining instead of or in addition to ordinary lining when you use a fabric that lets a lot of light pass through.
- Using the same thread
- Sewing machine, rotary cutter, ruler, and mat; scissors; sewing gauge; chalk marker; pins; iron
- Hardware and a curtain rod.
Easy Process Of Making A Window Valance
Getting the materials ready is the first step in learning how to manufacture valance curtains. In order to make valance curtains, you’ll need the following supplies:
- Fabric
- Measure with a Tape
- Machine to sew with or a Glue Gun
- Thread
- Pins that are perfectly straight
Step #1: Measurements
Measure your window’s width with a tape measure.
Determine how long you want your valance to be by looking at the curtain rod. If the window is especially wide, the depth can be up to 15 inches longer than the standard.
On a flat surface, lay the fabric out so that the front of the material is facing down. Measure the fabric to determine the desired width of the valance.
Depending on the style of the valance, it can be hung either horizontally or vertically over a rod. If you are going for a straight valance the width should be wide enough for the distance in between the drapes’ outer edges.
Measure the width of your window twice for both light and medium-weight materials if you desire a gathered look.
When using sheer textiles, the width of your window should be three or four times the length of the fabric. The usage of many valence panels is sometimes necessary.
Step #2: Cutting the fabric
Cutting the fabric is the next stage in making valance curtains. For the hems, you’ll need to add 2 extra inches to the width of each valance panel. Cut out the fabric you’ll be using.
Measure the fabric to determine the desired depth of the valance. Because you’ll be folding the fabric in half, twice the measurements. To finish the hems and cut, add two additional inches.
Step #3: Pinning
Pinning is the next stage in the process of making valance curtains. Use straight pins to keep the hems in place on both sides of the fabric as you measure 1 inch into each side for the hem.
Step #4: Sew with machine
If you choose, you can sew the hem on both sides using a sewing machine. Straight pins should be removed. The hem can be sealed in place with a glue gun or press-on tape if you do not wish to stitch.
Finally, flip the fabric over so that the hemmed side is facing you. The bottom of your cloth should be folded up to meet the top edges, and the upper edges should be folded up to meet the lower ones.
Pin your fabric’s top hem to a 1-inch hem measurement. Use an iron tape or a glue gun to finish the hem instead of stitching it with a sewing machine.
The hems should be facing inside as you turn the right side of the fabric out this way.
Xem thêm : How to Hang Curtains on a Canopy Bed? Step-by-Step Tutorial
An inch and a half is the distance from the line you sewed or sealed into place. If your curtain rod is thicker than the typical size, you’ll need to expand the space to accommodate it.
Secure with pins and then sew, glue, or iron-on tape to complete.
Step #5: Installing the Valance
This is the final step in the process of making curtains with a valance. Using a curtain rod, hang your drapes. When hanging the valance, you can stuff it with toilet paper or newspaper to make it look puffy.
How Much Fabric do I Need for a Valance?
The amount of cloth needed for a valance is entirely dependent on your personal preference. However, you should need about one and a half yards to 5 yards for the front fabric if you have a 36 to a 40-inch standard window. You’ll need 2 and a half to 8 yards of face cloth for windows that double in width from 70 to 80 inches wide.
How Long Should you Make a Valance?
A valance’s fabric requirements are determined by your selection. However, if you have a 36 to a 40-inch standard window, you’ll need between one and a half and five yards of front cloth. As a general rule, for windows that double in width, you’ll need between 2 and a half and 8 yards of face fabric.
How Much of a Window Should a Valance Cover?
A valance should cover between 2 and 6 inches of the top and the frame of your window. Your window’s overlap is what you’re looking at here. As for the valance itself, it covers the wall above and to the side of the window.
Measuring and Cutting the Fabric
Get a tape measure and cut out the curtain and liner material!
You need to know how big your finished valance will be in order to cut your cloth. To begin, take an accurate measurement of your window. The first step is to measure the window’s dimensions. Typically, your final valance should extend on both sides by at least 3-5 inches beyond the window casing (if possible). Beginning with a 20-inch valance is a fantastic starting point for those who aren’t sure where to begin.
If you aren’t sure how long you want your valance to be, leave a few extra inches and trim it before hemming to save time.
Once you have the measurements of your finished valance, use these to calculate the fabric cuts. These are the measurements I use most often, although you are free to experiment with the formulae. Fabric A is the curtain fabric, and Fabric B is the curtain lining in the diagrams below.
You should be able to understand the given equations. Using the example of a finished valance measuring 20′′ by 10′′, here is how I would cut my fabric:
For the most part, your curtain and lining fabrics will be the same height, but your lining fabric will be narrower than your curtain. This is what it would look like if you laid the curtain lining on top of the curtain fabric:
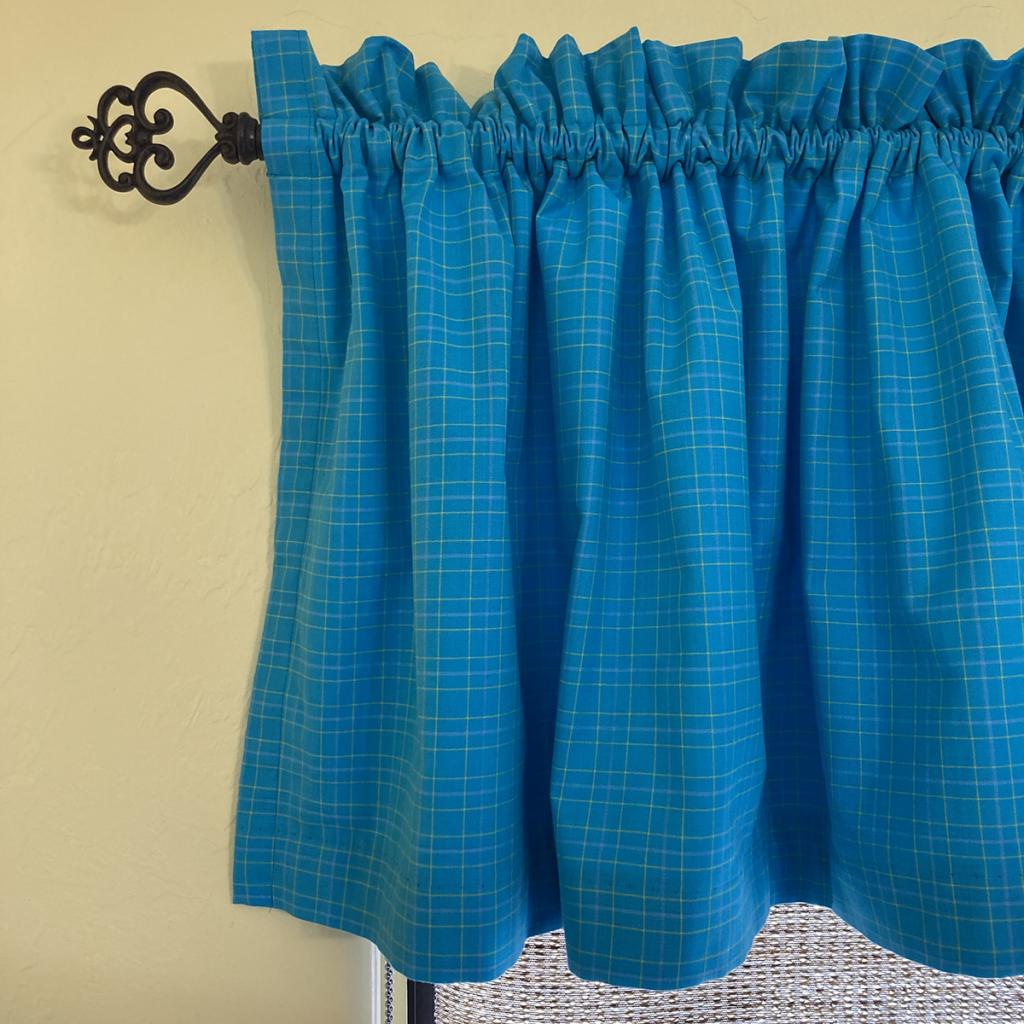
My blue curtain fabric and lining are already cut and ready to be put together into a valance, so I’m ready to get started!
Sewing the Valance Together
Line up the top and bottom of the curtain and lining fabrics with the right sides facing each other (they should be the exact same height). After that, pin the two left-side edges of the fabric together, and then do the same on the right. You should pin the shorter sides together, unless you’re making a valance that’s as long as it is wide. Once the lining and curtain are put together, you’ll see that the lining no longer lays flat due to the fact that it is smaller than the curtain (shown below).
Using a 1/2′′ seam allowance and coordinating thread, stitch the valance on both sides.
Flip the valance right side out after removing the pins. The next step is to use a hot iron to flatten the seams.
Approximately 2 inches of the curtain fabric will be folded backwards because your lining was cut smaller than your curtain (which is exactly what you want!). That way, you may keep the contrasting lining hidden while still having a nicely finished valance.
The valance’s reverse side is depicted in the photo below. A flat surface should be achieved after pressing and smoothing everything. Only your curtain fabric should be visible from the front (not shown).
Finishing the Top and Bottom of the Valance
Xem thêm : How To Put Two Curtains On One Rod? Easy Step-by-step Guide
In order to complete the valance’s top and bottom, you must first finish the sides. For this stage, you’ll need a sewing gauge and a hot iron.
Fold the fabric (curtain and lining) at the top of the valance by half an inch and press it in place.
For a final touch, iron another 3′′ of cloth on top of the first fold.
ADDING BLACKOUT LINING (OPTIONAL)
Hold your curtain up to a window so you can see how much light is coming in. That’s not enough light blocking for me! I thought my dark fabric and plain drapery lining would be enough, but oh no! My valance was drenched in light, and it didn’t look good at all! You’ll need a blackout lining if you want your valance to be completely opaque.
There are two ways to add blackout lining to your valance: either by hand or by machine. Use it as a substitute for curtain lining in two ways: On the other hand, I was concerned that the lining would show through the edges where it didn’t extend. Before stitching the valance’s top, you can insert blackout lining in its place by snipping out a rectangle and putting it in place. As an alternative, you can just use a piece of blackout lining that is cut into a rectangle the size shown in red in the image below.
Slide the blackout lining between the curtain and draper lining layers before going on to the next step (where you stitch the top hem in place). Make sure it’s flat, straight, and as close to the top of the valance as feasible before attaching it.
In order to secure the blackout liner, pin and sew the hem of the top of the dress.. Additionally, this stitch line serves as an anchor for the valance’s blackout lining panel.
The valance’s top and both sides should be sewed together and appearing neat and orderly at this time! Finish the bottom edge. To begin, fold the bottom edge of the hem over and iron it in half…
Pin the hem in place after another 2 inches of folding and ironing.
Make sure you sew the hem as near to the edge as possible, just like you did with the top.
Adding a Rod Pocket to the Window Valance
You can hang your cloth valance in a variety of ways once it has been made and hemmed. In the event that you choose to use rings with clips, you can skip this final step. A rod pocket adds not just convenience, but it’s one of the quickest and easiest methods for hanging drapes!
Use your curtain rod to establish where and how big your rod pocket should be. The valance is now complete and ready to hang (see image below), so all that remains is to attach it to a rod.
Although the rod should fit more snugly in the pocket, I prefer to have some cloth hanging above the curtain rod itself. The rod pocket can be created by moving the rod down to the hemmed stitch line of your garment. A pin can then be used to identify a suitable location for a new stitch line (below left). Take out the rod, and then extend the line all the way down the valance with a chalk pencil or fabric pen (below right).
Make sure the rod pocket is exactly aligned by stitching the valance one more along the line you just drew.
This is it! Hang your curtains!
You can make a beautiful valance to go with any window treatment in about an hour. This is the DIY window treatment for you if you don’t want to spend a lot of time or money on a lot of fabric.
A Target shower curtain was upcycled into this valance. Because the shower curtain’s 72-inch width was ideal for this window, it also came in at a low price of $15! What’s the icing on the cake? Two identical pillows for the couch in the adjacent room will be made using what I have left over. In the near future, I’ll be showing you how the three rooms came together!
Conclusion
Sewing skills at the beginner level are not necessary to construct valance curtains that have a personalized appearance. They can be found in a variety of fabrics, in a variety of patterns, and in a variety of colors and designs. It’s also possible to purchase valances that are inexpensive and easily interchangeable seasonally at home or retail outlets.
A valance can also be made from different materials, such as corrugated metal or wood. A cornice is a window decoration with a defined structure. A cornice, on the other hand, refers to a more ornate window treatment. There isn’t much fabric needed to make valances so they’re a great DIY project for those who don’t want to spend a lot of time or money.
Nguồn: https://iatsabbioneta.org
Danh mục: Curtains


