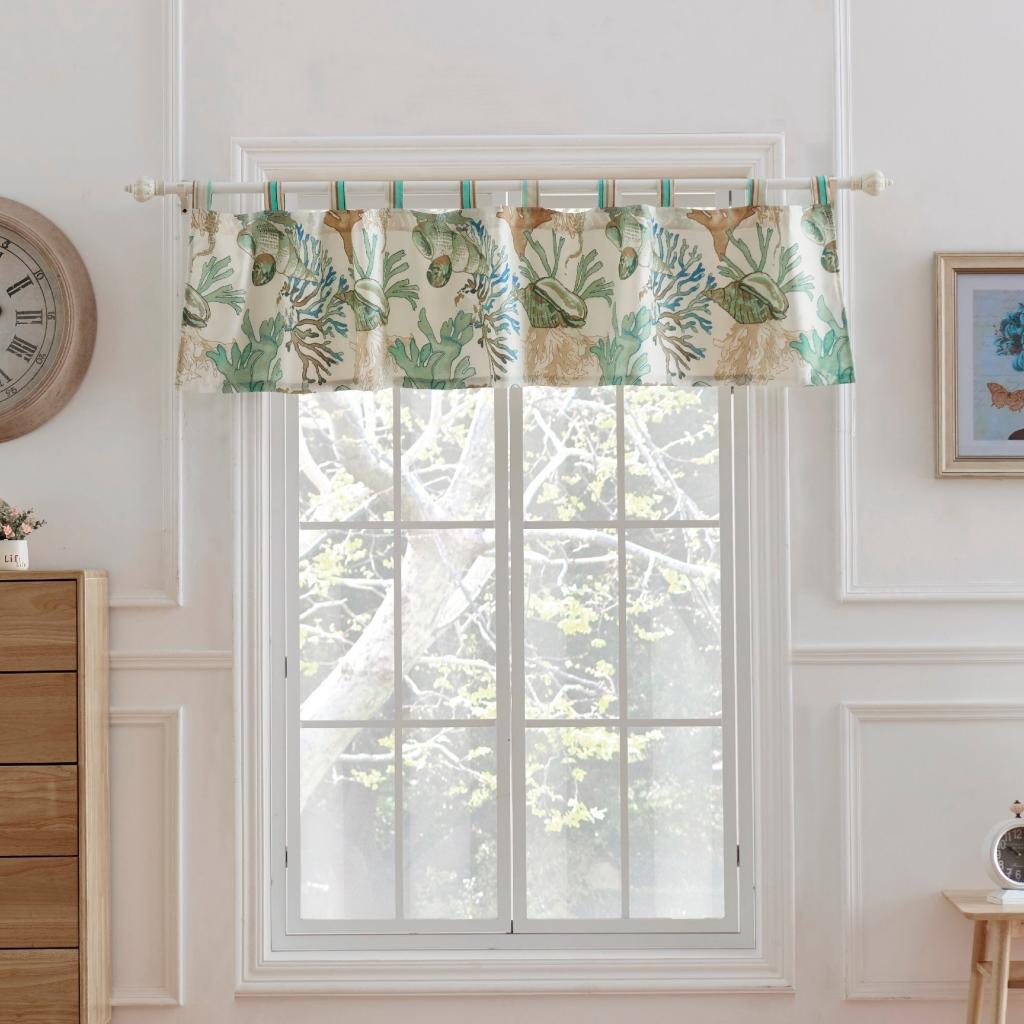
Gathered drapes are easy to make. Making your space more fashionable can be as simple as learning how to do this.
In terms of design, curtains with gathered headers can be used with any style. Large windows can benefit from the addition of this extra-wide material.
Bạn đang xem: How To Make Gathered Curtains? Step-by-Step Tutorial
This is an easy-to-maintain window treatment because of its fixed location.
To hang them correctly, all you have to do is know the secrets of the trade.
Calculation-related tricks are what I’m referring to.
The amount of fullness needed, the finished curtain’s size, and the number of panels necessary must all be determined.
But the most difficult part is determining the fabric size needed to complete the curtain.
Sewing seams and folding hems are all that’s required to complete the project.
Steps To Make Gathered Curtains
You can be sure that your curtains will fit your windows perfectly if you sew them yourself.
When it comes to making gathered curtains, how do you do it?
When the measurements are exact, it’s a piece of cake.
Here we’ll go over each step of the procedure one by one.

Step #1. Deciding where you want to hang the curtain
Decide whether or not you want your curtain to hang inside the window frame before buying it.
How much do you plan to dangle from the eaves and the side rails?
Decide on the length of your drapery, whether you want it to terminate just below the windowsill, extend all the way to the floor, or fall anywhere in between.
Step #2. Measuring up
You should first hang the track or curtain pole before you begin taking measurements.
If you want to build a pair of gathered curtains, start by measuring the pole’s width and dividing it in half.
Also, make a note of the curtain rod’s diameter and record it on paper.
Take a measurement from where you want it to hang to the bottom and work your way up.
Step #3. Installing the curtain rod
Follow the manufacturer’s directions for setting up the curtain rod.
Measure the desired curtain length from the bottom of the rod after it has been fixed on the wall.
Step #4. Cutting the fabric
In order to finish the bottom hem and the ruffle, you will need to add eight and six inches to the rod circumference you recorded before.
This figure is how long you should cut your fabric to.
Step #5. Hemming the fabric
The bottom hem requires four inches of fabric folding.
Fold it another four inches, and then press it firmly again.
Sew close to the second fold of the hem to keep it in place.
In addition, press the side edges of the paper at a 1 1/2-inch fold.
Continue with the second fold in the same manner.
Step #6. Adding drapery weights
Xem thêm : How To Make Gypsy Curtains? Complete Step-by-Step Guide
Open the initial fold at the bottom of the fabric and attach a 1-inch drapery weight on top of the bottom hem for further support and aesthetic appeal.
After that, line up the edge with the second fold on the side of the paper.
Stitch the weights into the plastic tab on top of the weights.
Fold the hem back into place when you’re finished.
Step #7. Sewing the hem
Starting at the top of the panel, sew the hems down to the bottom.
There must be stitches at the second fold of the fabric.
Once this is done, fold the fabric’s top edge in half and press.
Step #8. Sewing for the hook
Make sure the incorrect side is facing down and the pressed side is facing up when you place the panel on the table.
Using a needle and thread, sew the hook-and-loop tape about an inch away from the pushed folds.
Step #9. Sewing the ruffle
Two and a half inches should be added to the rod’s circumference after it has been divided in half.
Press the fabric’s top edge after it has been folded in half this many times.
The hem should be secured with a few pins.
Using a self-erasing pencil, draw a ruffle along the top edge of the panel.
Then, beginning at the first fold, stitch the curtain panel across.
Next, you can stitch the line you made for the ruffle to create both the ruffle and the rod casing.
Step #10. Inserting the rod
Attach the curtain rod to the panel and hang it up.
Make sure the gathers are evenly spaced.
Step #11. Attaching the tape to the rod
Tape two pieces of the self-sticking hoop and loop tape to the rod’s underside.
One should be placed on the outer edge of the panel, while the other should be placed on the inside edge.
Before sewing them in, check to make sure they’re aligned with the curtain’s corresponding tape.
Step #12. Securing the panel
To keep the panel in place, line up the tapes and the curtain so that they are parallel to one another.
How to make curtains
Measuring Up
To ensure that your curtains fit exactly, it’s advisable to measure up with your curtain pole or track in place first. Divide the curtain panel width in half if you’re building a pair. You need at least twice as much curtain per square foot as you think you’ll need. Each curtain will cover a span of 60cm (2312in) if your pole is 120cm (47in). The finished curtain’s width should be between 120 cm and 150 cm (47in–59in).
Measure the distance from the top of the curtain to where you want the bottom of the curtain to be.
Calculating and buying fabric
Because you can join fabric widths in full or half widths, you need to figure out the closest possible dimension to your desired width. It is sufficient to use one width of fabric for each finished curtain if your curtain fabric is 137cm (54in) wide and your finished curtain width is 120cm–150cm (47in–59in).
For the top and bottom curtain hems, add 29 cm (1112in) to the finished drop measurement. Use the cut drop measurement multiplied by the number of widths of fabric you require when making your fabric purchase. You will need 358cm (141in) of fabric if your finished curtain length is 150cm (59in) and you are using one width of cloth for each curtain.
The number of lengths of lining fabric required is the same as for the curtains, however the finished curtain drop should only be increased by 2cm (34in). You will need 304cm of lining for the same curtains as above (59in+34in+59in+34in) (59in+34in+59in+34in).
Heading tape
Although heading tape comes in a variety of widths, a 7.5cm (3in) pencil tape provides a clean, professional look. To ensure a tight fit, purchase additional tape to extend the length of each curtain by 20cm. 314cm (137+20+137+20cm) is needed for a pair of drapes of the same width.
Cutting Out
Cut the curtain fabric and lining to the dimensions you calculated earlier.
Joining fabric widths
Xem thêm : How To Make Back Tab Curtains? Comprehensive Guide
Before putting your curtains together, attach any pieces of cloth that are different widths. Each piece of fabric should be cut to the desired length. Using right sides (RS) facing and matching raw edges, arrange the fabric widths right sides (RS) together and sew using a 1.5cm (58in) seam allowance. Trim the selvedges to prevent puckering of the fabric edges.
Cut the fabric vertically down the middle if you are joining a half width. The curtain should be hung with the half-widths on the outside edges.
Total time:
a few days off
Making your curtains
Step 1
A piece of curtain fabric that has been either cut or connected should be turned over 5cm (2in) to the wrong side (WS) and pressed throughout. Press down on the top edge of the WS once it has been turned over by 2in (5cm). WS: 12cm (434in) bottom edge, then 12cm (434in) again to WS and push. If you’re making a pair of curtains, do the same on the second piece of fabric. It is possible to mitre these hems for a more professional look. Here, you fold the second round diagonally. There are several guides on how to do this on the internet. To complete the look, simply fold the double hem in the opposite direction as shown.
Step 2
Turn the liner fabric side edges to the WS by 6cm (238in) once it has been cut or connected. Then secure with a pin after pressing hard. It’s time to re-pin and turn the bottom edge over 3cm (114in) to the WS side. Closely stitch this hem to the turned-over edge with a machine. Although the machine stitching will not be seen from the front, it will improve the appearance of the curtain’s rear if you choose a coordinating thread to sew this hem. It is unnecessary to hem the top edge of your lining because it will be covered by the curtain heading tape when it is attached later.
Step 3
Preparation is key when it comes to hand-stitching your curtain hems before lining them. Stitching on the front of the curtains will be hidden, and the fabric will lie flat, allowing the curtains to hang properly. To finish the hem, use a very little hemming stitch. Take a 2cm (34in) stitch through the fold of the hem to secure your thread. Incorporate another back-and-forth stitch into the fold after the first little stitch just above it. Re-fold the fabric 2cm (34in) and do this again. Using the same thread as the cloth, these minuscule stitches will be nearly undetectable on the front.
Step 4
It’s time to flatten your RS curtain fabric to the point where it’s absolutely even. Overlap the lining fabric RS with the curtain width seams matching if it has any. Lining should be cut immediately below the curtain fabric’s upper edge by around 0.5cm (1/4in). 1cm (3/8in) inside the curtain fabric’s turned under edges is ideal for lining. Pin it in place again after making sure it’s flat. Attach the lining’s sides to the curtain fabric’s sides using slip stitching. Make sure not to stitch through to the reverse side (RS) using the 2cm (34in) long stitches.
Step 5
Knot the draw cords together once they’ve been pulled out to a length of 10cm (4in). Turn the tape under by 3cm (114in) after trimming the end to 7cm (234in). 0.5cm (14in) away from the edge of the curtain fabric, pin your heading tape along this edge, right below the rolled over top of the cloth. Trim and turn the tape under when you get to the opposite side edge, then knot the cords in the same way you did the other side. It’s important that you don’t sew through any knotted cords when sewing the tape in place, so make sure you do it carefully.
Step 6
You’re almost done with your curtains; all you need to do is pleat the top. Pull up the draw cords from the center of the curtain until the curtain measures the finished width you desire. Make sure the front gathers are positioned evenly throughout the curtain. Make a loose knot and a bow with the cords at the center to keep them from drooping too low. Divide the number of hook pockets in your heading tape by the number of hooks on your curtain pole or track to get the total number of hooks. Hang your curtains by looping the hooks through the pockets.
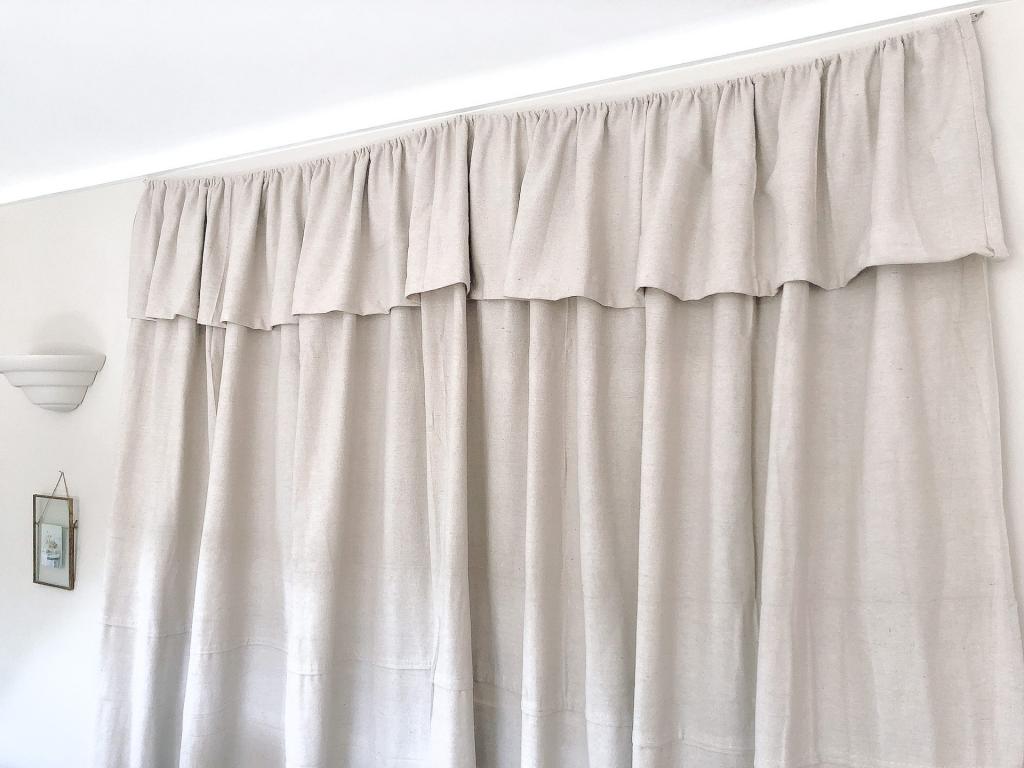
How to Make Gathered Curtain Panels
Gathered curtain panels are hung on a stylish rod to frame the window and provide beauty to the area. Large windows can benefit from the addition of additional panels, normally one fabric width wide, to the gathered heading. A few drapery-maker methods help keep them in place and in place, making them a breeze to put up and take down.
Take a tape measure to the rod and make a note of the circumference.
Measure the length of the curtain from the bottom of the curtain rod to the end of the curtain, following the manufacturer’s recommendations.
Cut the fabric to this length after adding the rod circumference, 8 inches for the bottom hem, and 6 inches for the top ruffle and ease.
Press the fold of the bottom hem up by four inches before tucking it in. To make it 4 inches longer, turn it one more and press. To keep the hem in place, sew all the way to the second fold.
Turn and press each side edge once, then turn and press it a second time.
At the bottom of the curtain, the side edge folds open. 1/4 inch above the bottom hem edge, attach a 1-inch drapery weight. The weight should be aligned with the second pressed fold of the side hem on one long edge. Using a few stitches in the weight’s plastic tab, secure it in place. Along the fold lines, re-insert the side hems.
From the top of the panel to the bottom border of the hem, sew closely to the second fold.
Press the first hem fold after turning the top edge of the curtain panel by half an inch.
Lay the panel face down on the table with the pushed fold facing you.
The hook side of hook-and-loop tape should be sewn 1 inch from each outer edge, 1 inch above the pressed fold, to create a 1/2-inch square.
Add 2 1/2 inches to the rod circumference by dividing the rod circumference in half. Press down on the panel’s top edge after it has been rotated by this amount. Secure the hem with a safety pin. Measure 2 inches from the panel’s top edge to draw the stitching line for the ruffle hem. This is the edge that is closest to where you are now standing. Use a self-erasing marking pencil for this task. Ruffle and rod casing are created by stitching the ruffle sewing line near to where it folds and on the ruffle sewing line.
The panel should be threaded onto the rod and the gathers should be uniformly spaced.
Using self-stick hook and loop tape, adhere two pieces of the loop side to the back of the curtain rod, one at the outside edge and the other aligned with the remaining panel edge. It is important that they are placed such that they match the tape sewed into the curtain
To hold the panel in place and prevent it from “moving,” align the curtain and rod hook-and-loop tapes.
It’s A Wrap!
Investing in custom-made curtains will set you back quite a bit of money.
If you spend it on something extravagant, it might be worthwhile.
However, if you’re looking for the simplest curtains, you should learn how to construct gathered ones.
This is a simple task. Sewing straight seams on the fabric is all that’s required.
Nguồn: https://iatsabbioneta.org
Danh mục: Curtains


