I’ve been using the same grommet-topped curtain panels in every room of our house since I was a kid. As a result, we can easily add similar panels in the future if necessary, and our home as a whole benefits from some uniformity. After experimenting with Command Hooks, I discovered that my regular grommet-topped panels were no longer hung correctly. This was the first time in a long time that I had to find a new way to hang my curtains, and that’s when I discovered curtain rings. In the end, after a great deal of trial and error, I discovered a super-simple method for hanging rings of curtains that not only looks fantastic, but also yields an absolutely perfect hem. Get ready to learn a few of my simple skills!
Grommet-topped curtain panels have been my go-to for years because of their simplicity and neat appearance. As soon as they’ve been correctly hemmed (see my failsafe hemming process), they’ll pleat pretty much on their own and are easy to keep uniform.
Bạn đang xem: How To Hang Curtains With Clips? A Step-by Step Learning Guide
Our master bedroom curtain rod ended up being too close to the wall when I used Command Hooks to hang it, meaning my grommet panels didn’t function. Instead, I hung the drapes using rings.
The ease with which I was able to hang my curtains, as well as the quickness with which I was able to create a wider curtain display with perfectly-hemmed edges, has led me to believe that curtain rings had “opened my eyes” to their brilliance.
Why Consider Curtain Rings
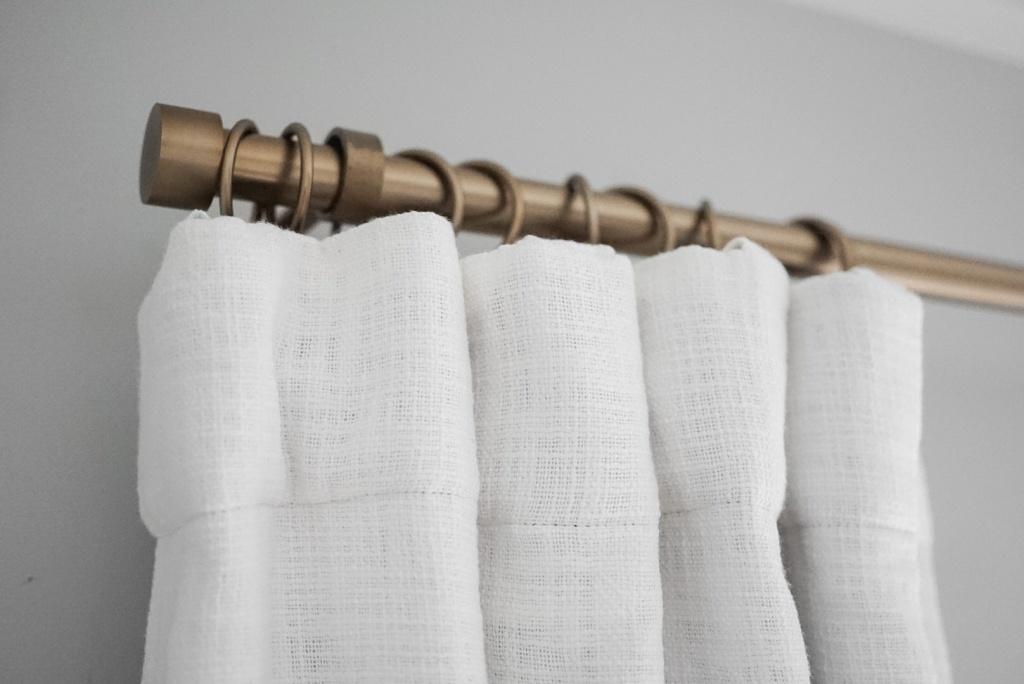
To give the window a larger appearance, I’ve started doubling up my grommet-topped panels on both sides (since a standard panel only produces four pleats). You can control how wide your curtains are with curtain hooks since you may choose how many pleats you want! Curtain rings (left) and grommets (right) are seen side-by-side (right).
And that’s not all. When I hung the curtains on rings, I didn’t even have to hem them (in the traditional sense), but yet still ended up with panels at the perfect length! Is this something you’d like to learn more about?
Supplies Needed
…but hold on! Using rings to hang the curtains, I didn’t even have to hem them (traditionally speaking), but I still got perfect-length panels! You’d want to see for yourself?
- At the height you prefer, a pre-installed curtain rod
- (At the very least) floor-length curtain panels
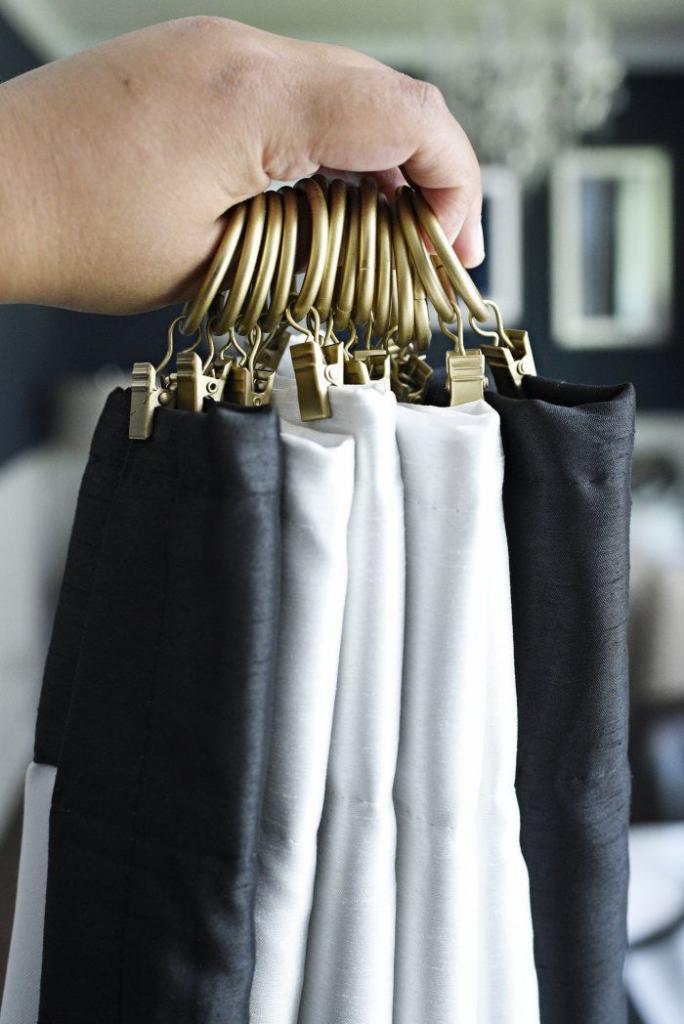
- Because the panels are held closer to the rod by 1′′ rings, I prefer them. My purchase was a bulk set.
- Stitching needles or a fabric marker
- Ironing board and iron
- Ruler
Hang Your Curtain Rod Where You Want It
Instead of hanging your curtain rod to accommodate the length of your curtains, put it where you want it first. Then, as needed, adjust your curtains. This is an excellent resource if you’re not sure how high or broad to hang your curtain rod.
Always buy longer curtains than you think you need, because it is much easier to make them shorter than it is to make them longer.
Determining How Many Curtain Hooks to Use
As previously stated, the number of pleats you receive when hanging curtains using grommets or back-tabs is predetermined (and therefor, how wide your curtain panel sits). Your curtain will take on a whole new aesthetic dimension after you have final say over ring placement.
The number of rings you use mainly depends on how broad your panel is, how wide you want it to sit on the rod, and how tight you want the pleats to be. Here are a few broad rules of thumb to get you started:
- Pleats in the panel will cause it to hang wider on the rod if there are more curtain rings than usual.
- Having fewer rings means fewer pleats, which means the panel will sit closer to the rod.
- To make pleats look uniform, add extra rings or pleats.
- With fewer rings and pleats, the cloth will hang more loosely and possibly sag between rings.
- One clip equals one pleat in the specified number of clips.
Each curtain panel needs to have two clips, one on each corner, with the remaining clips going in between them. You may want to experiment with the number of rings on your panel before making a final decision.
On my white 56-inch wide panels, I used 10 clips (for 9 pleats) and on my navy 42-inch wide panels, I used 9 clips (for 8 pleats).
Step 1: Hang Curtains Upside-Down
You’re going to suppose that your curtains are too lengthy for this instruction. You can skip the first three steps if your curtains are exactly the right length for your rod.
Start by hanging the curtain rods upside down. As you progress through the course, you’ll see what I mean.) Place your clips as evenly as possible and with the necessary quantity for the desired depth and number of pleats, as described above. You don’t have to be flawless at this point.
The grommets in the shot below should be ignored. Because I will be “hemming” the non-grommet side, my panel is hung upside down.
Step 2: Pin Hem
Straight pins or a fabric pen can be used to mark the exact spot where the curtain panel meets the floor/baseboard, as demonstrated in this sewed hem tutorial and this non-sewn hem tutorial. As you make your way across the breadth, be sure to gently pull the panel down straight so you can pinpoint the exact spot where it hits the floor. Because we hung it upside-down, remember that the hem line you just pinned should be at the top of the curtain panel.
Remove the curtain panel from the curtain pole and the curtain rings.
Step 3: Iron Hem In Place
(If your curtain is really wrinkled, you can iron it all immediately.)
A heat-safe surface like an ironing board should be used to iron your hemmed curtain panel. Fold the hem along the pin line wrong-sides together, as shown below.
Using an ironing board or other heat-safe surface, place your hemmed curtain panel right-side down on top. Fold the hem in the opposite direction of the pin line, as seen in the image below.
Using an ironing board or other heat-safe surface, place your hemmed curtain panel right-side down on top. Put pins along the hemline and fold it in the opposite direction, as demonstrated here:
Using an ironing board or other heat-safe surface, place the hemmed curtain panel right-side-up on top of the fabric. Fold the hem in the opposite direction of the pin line, as illustrated below.
Not yet astonished?
Step 4: Space & Place Clips
Xem thêm : How To Dry Clean Only Curtains? Complete Step-by-Step Guide
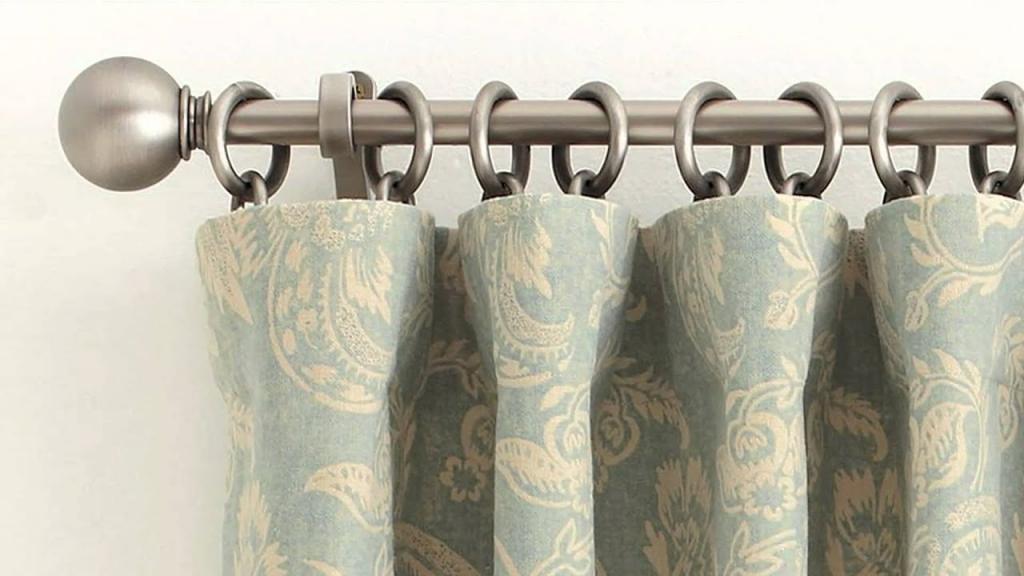
Fold and iron the curtain panel before placing the curtain rings on top of it. Use a ruler to ensure that your rings are evenly placed along the panel’s top. A ring on each side, all the way to the edge, is what you’re going for! It’s important that the remaining rings are spread out evenly.
Now that your curtain panel has been hemmed, it’s ready to go!
Step 5: Pleat & Train the Curtains
Put the curtains back on the rod and close them. Starting with the rings on the rod, begin by pulling the fabric toward you between each ring. While the curtain rings should face the wall, pleated fabric should face forward and away from it.
The added weight and bulk of the doubled-over fabric at the top of the panel makes it easier to construct tight pleats! ‘Tis the season!’
Using your hands, create pleats all the way down the curtain’s length after the top ones are in place. Once you’ve produced the pleats, secure them with a string (or, as I did, a hair clip). “Training” your curtains is a great way to keep their pleats perfect even after you hang them.
Let go of the string/clips and adjust the curtain rings as desired!
Now that you’ve completed this task, you’ll have curtains that are correctly hemmed and pleated! How simple was that?!?
Using grommets to hang curtain panels is nothing new to me, as I stated at the outset. And I don’t mind hemming my curtains the “old fashioned” way in order to make them function in home after home after home after home after home.
Then, after seeing the effects for myself and learning how simple it is to hang curtains on rings, I’ve decided to give it another go. The next time I buy curtains, I think I’ll go for curtain rings instead of grommets.
What’s your go-to method for hanging curtains? As for my top-hemming trick, how do you feel about it? I’m not sure I’ll ever stitch another hem again!
Steps To Hang Curtains With Clip Rings
Hanging your curtains would be a lot easier and less time consuming if you utilize clip rings. This is always an option.
These tools are simple to use, but they require some training.
And what about clip ring curtain hanging?
The instructions are available for your convenience.
Just remember that and do what you’ve been taught.
There is a logical sequence to these actions.
Don’t miss a beat, or you’ll be starting from the beginning.
Step #1. Buy your curtains
To begin, you’ll need to buy or make your curtains, depending on your preference. You always have a choice.
Both have their advantages and disadvantages. When you buy a curtain, for example, there is less difficulty for you.
Making your own curtains, on the other hand, gives you complete creative freedom.
Make certain that the curtain you purchase will fit your window frame precisely. It will accomplish what it sets out to do in this manner.
Step #2. Identify the dimensions, including the weight of your curtains
Another thing to keep in mind when it comes to clip rings is that you’ll need to measure and weigh your curtains.
Clip rings that can’t hold your curtains in place aren’t going to do you any good.
To figure out how many clip rings you’ll need, take into account the breadth.
You’ll need to know how to measure windows for curtains if you want to figure out what size curtains to buy.
A heavy curtain may fall inside the acceptable range of clip rings you’re employing.
Step #3. Find clip rings
Xem thêm : How To Make Lined Grommet Curtains? Step-By-Step Process
Clip rings are now available for purchase. Find one that has large clips to keep the curtain in place as much as possible.
To make your life easier, invest on some curtain ring clips. There is no need to penetrate the fabric with rings.
If you like, you can design your own ring clips. It’s entirely up to you.
In the same way that you place paper clips, you also place curtain clips.
Additionally, your curtain clips should complement the style of your curtains, if not the entire space.
Because clip rings come in so many variations, it is up to you to pick one that suits your style.
Step #4. Measure and put markings
The next step is to get your curtains to the top and indicate the area where the ring clips will be placed.
It’s now easier than ever to get your hands on and organize because of the variety of options available for purchase or DIY construction.
You may need fewer or more clips depending on the length and weight of your curtain.
Typically, you’ll place one every two inches from the curtain’s end. However, it all depends on the situation.
Consider adding more ring clips if you are concerned that it is too heavy to be carried by the clips alone.
Step #5. Attach the clips and hang
Once you’ve made your marks, it’s time to attach the clips.
Once you’ve completed this stage, you can use that as a guide.
The next step is to make sure that the distance between them is equal and that they appear proportional to the width of your curtain.
Make sure that even if it has a lot of clip rings on top, it will still look clean and polished.
These are great for making it easier to hang your curtains.
If you’re in a hurry, it’s best to do things this way.
When hanging curtains with rings, this is the final option you have to choose from.
The foundation is shaky and can easily give way.
It’s preferable if you can clip it and keep it well-secured.
Conclusion
And that concludes our look at how to use clip rings to hang curtains.
Be sure to follow the directions provided.
You can save time by hanging curtains with the help of clip rings.
Hopefully, these actions and recommendations can be put into practice in your own life.
How to Perfectly Hang Curtains From Rings
Nguồn: https://iatsabbioneta.org
Danh mục: Curtains


