When you have a camper, it may seem like a little detail, but covering up your windows is an important consideration.
An overview of the choices that I’ve been researching in order to plan the fixings and internal cladding I’ll be utilizing in my remodeling project, as well as ensuring that there won’t be any issues with wiring or anything else getting in the way. Moreover, don’t they need to look good, too?
Bạn đang xem: How To Hang Curtains In A Van? A Step-By-Step Tutorial
Why worry about curtains anyway?
There are several reasons, including privacy from curious passersby, keeping warm or cool at night, and obtaining a good night’s sleep till the sun comes up. Blinds that block out all light are the only option for me.
This tutorial to 7 Tried and True Ways to Install Curtains in a Campervan offers you a variety of methods, some of which are good and some of which are not. As a result, I’ve given links to a few real-world instances, but they aren’t endorsements or affiliate connections.
In this tutorial, you will learn about the advantages and disadvantages of each method, as well as a basic step-by-step guidance, so you can make an informed decision.
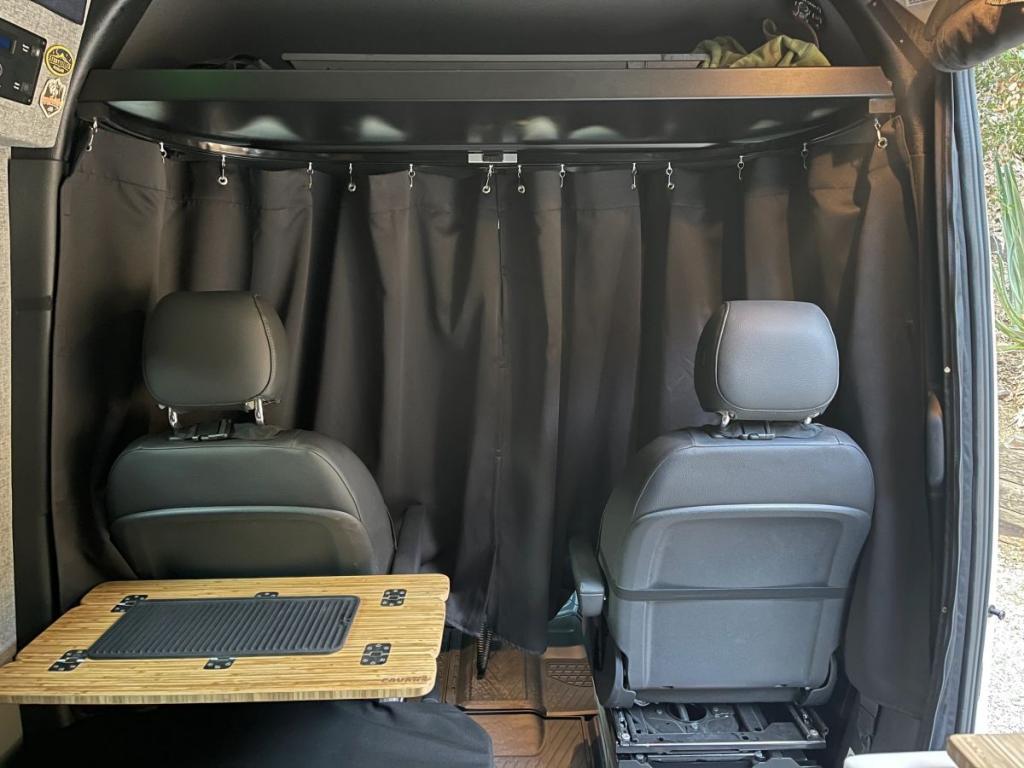
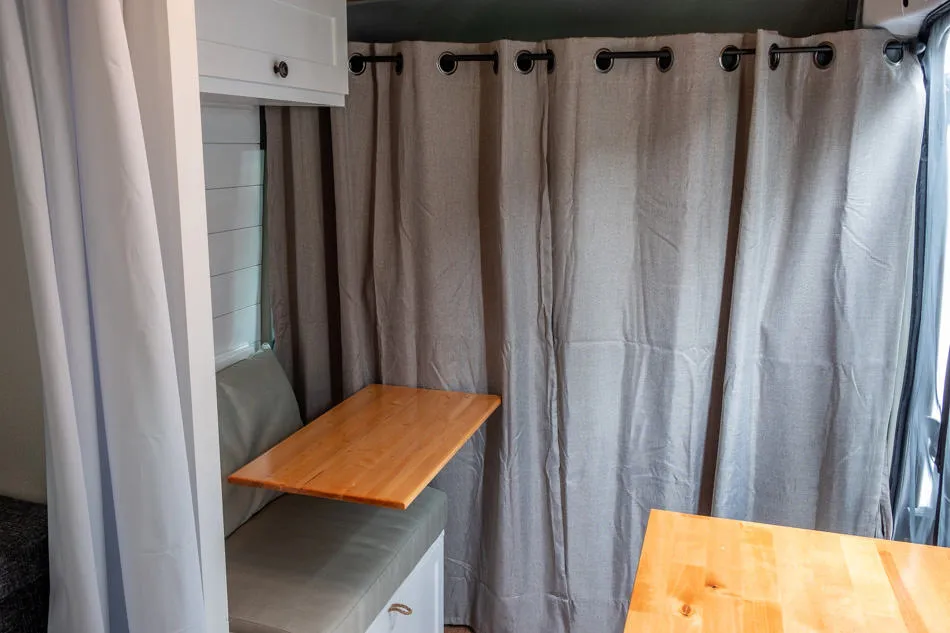
1. Curtain Tracks
To get things started, we’ll go with the simplest option: the one you’d use at your home. With a little work, you may make your own version of a kit for a given brand or model.
How it works
Your window should have a grooved rail installed at the top and bottom. When installing the rail around the window, you’ll need to use small screws to attach it to your van’s interior body. You’ll attach track pieces to your curtains and slide them into the grooves.
Keep the curtain in place by putting a stopper at either end, which will be provided with the curtain track if you buy new.
Keep your curtains open during the day by attaching tie backs to them with self-tapping snap fasteners or velcro to the wall of your vehicle (more on this later). To keep out draughts and unwanted light, use something to hold your drapes in place on both sides of the window.
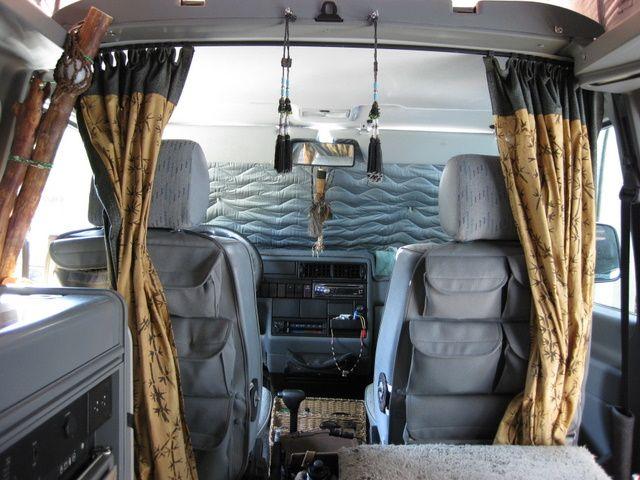
A wonderful way to minimize draughts is to install a curtain rail across the ceiling, which can serve as a separator between the cab and the living space. In this picture, you can see a cab curtain that is attached to the railway.
2. Magnets
Over the past few years, this one has been increasingly popular. The fact that no holes are drilled into your van is one of the primary benefits of this installation method. After experimenting with velcro and other adhesives, many people have found that magnets provide a more long-term solution.
How it works
Either corner of your fabric should have a magnet sewn into it, as well as additional magnets on each side if necessary. Your camper’s interior panel walls and doors will be magnetically attached by the magnets.
Among the most powerful magnets on the market are rare earth and neodymium magnets. Small magnets are all you need, and multi-packs are available from online stores like Amazon.
Despite the mixed reviews, we’ve found a terrific alternate application for the magnets here!
3. Velcro
Despite this, many camper owners choose Velcro since it is inexpensive, comes in various lengths, and has the added benefit of being adaptable.
How it works
In order to keep your van’s windows from drooping, attach a piece of velcro above and below each of the windows. All that’s left is to adhere the opposing strip to the top and bottom of your curtain.
This can soon degrade the curtain’s ability to function when it becomes clogged with minute fibers from the curtain itself or from other threads and textiles found in the campervan. Using velcro to secure curtain tie-backs has the same advantages.
In hotter climes, the velcro strips themselves commonly come loose because the glue that holds them to the van’s inside either melts or dries out. In addition to self-adhesive glue, some van owners employ something heavier, such as small screws or a staple gun, to attach the strips to the vehicle.
4. Blinds
Some campervans, such as the Mazda Bongo MPV, have blinds pre-installed, while others, such as larger RV motorhomes, have them professionally installed.
Even if you’re just starting out with a simple panel van, it’s something to keep in mind.
How it works
Factory-style blinds that you may install yourself are now available on the market. With the Vanshades you get a pre-made device with blinds attached that you just attach to the interior of your VW T4 or T5 vehicle. Honestly, I don’t know much more about it, but you may check out vanshades.co.uk for additional information. Non-affiliate (I’m not)
If you’re after a more industrial look, check out Impulse Roller Shades. For the second time, this is not an affiliate link.
5. Hook and Eye
This is a unique strategy that, if executed correctly, yields a neat result. Hook and eye fasteners are used in place of velcro tabs or magnets at regular intervals around the window frames in a manner similar to that of interspersing window frames with velcro or magnets.
How it works
Measure the cloth for your window covering and insert 12 eyelets using a hole punch and eyelet tool, one at each corner and two additional ones across the top/bottom/sides. Hold it up to the van’s window and make a mark on the vehicle where each of the eyelets is. Using your hooks, attach them to the van bodywork in the spots you’ve designated with a marker. Hook the fabric onto each eyelet and you’re done. Fold the cloth in half and sew a hem around the entire piece, either by hand or with a sewing machine, to prevent the threads from fraying. When taking measurements, make careful to account for this.
Wire Net for Curtains
There are several ways to hang curtains in a van, but this is one of the most simple. It won’t last long and won’t provide the same level of privacy, thermal insulation, or blackout that you’re looking for. I’ll include it nevertheless because it appears to be a common DIY method.
How it works
Xem thêm : How To Get Creases Out Of New Curtains? Comprehensive Guide
Fold the top of your curtain fabric inward. This seam should be sewed so that a net curtain wire can be slid through it. The wire should be the correct length and have a loop on both ends.
Screw two small hooks into the van’s bodywork, one on either end of the window. Again, using a little hook to screw into your panel will be difficult. Then all you have to do is attach the curtain on either end.
At the bottom of the window, you may also repeat the technique to provide a tighter fit and a better seal.
I’d love to see an example of this in action that is both effective and aesthetically pleasing, and I’ll add it to the post.
7. Extendable Pole or Tension Rod
To temporarily separate the cab at the front of your van or to cover your back doors, this is a good alternative for hanging a curtain from side to side across your vehicle.
How it works
These poles are commonly used to hold shower curtains in place along a bathtub. Using a tension rod, which has a spring inside to exert pressure on both ends, you may lengthen the length of a long pole.
They have rubber feet on either end to aid in grip, and they are easily tightened into position, exerting pressure on either side, to secure them.
A simple curtain can be made by draping a piece of fabric over a pole. Everyone will have their own opinion on this, but as always, it’s what you do with it! When there is no one around to disturb it, it is often active at night.
Nonetheless, here’s an example of how it may look lovely with some basic bunting and a handy closet to hide it under!
I wish you the best of luck with your curtain installation; may it be both attractive and useful!
My Pinterest board for campervan curtains and blinds is a great place to share your photos.
How To Put Up Curtains In A Camper Van: A Step-By-Step DIY Tutorial
In a camper van, a simple set of curtains may make all the difference between feeling completely exposed and feeling completely private. These are quite simple to create, and you don’t need too many ingredients. You’re one step closer to making your own curtains now that you’ve chosen your favorite color, fabric, and measurements.
To put it plainly, do you want to learn how to put up curtains in a camper van yourself? These are the instructions:
- Decide on your cloth, then cut it to the desired dimensions.
- To prevent fraying, hem all the edges.
- Make sure that the top side of the curtains has a 1.5-inch opening for a rod to go through.
- Before attaching the rod to the curtains, slide the rod through them.
- Adding buttons to your curtains will allow you to clip them closed when you need some privacy.
That is the sum total of the matter. In addition, you’ll learn about additional options, the insulating value of curtains, where you can hang them, and a number of other helpful tidbits. Right now, let’s get down to business.
Tools and Materials for the Job
It’s a lot easier than you think to make curtains for your camper van. If you’re an excellent seamstress, you can complete the project in less than an hour if you don’t require any special tools. The thickness of the rod you choose will have an effect on the size of the hems, and this must be stressed.
Prior to beginning the curtain-making process, gather the following tools and materials:
- Scissors
- A piece of cloth (preferably 0.015 inches or thicker)
- Snap the tape
- machine that sews
- hooks for mounting (remember to choose the size that corresponds with the curtain rod)
- A rod for hanging a curtain
- Glue made of fabric
- Strips of Velcro
As you can see, many of these goods are likely to be found in your own kitchen. If you don’t mind a few slivers of light peeking through, you can skip the Velcro strips, fabric adhesive, and snap tape.
This craft necessitates the use of heavy-duty scissors, so be prepared. It’s difficult to cut thick fabric with safety scissors or dull scissors. This includes thread for the sewing machine, which must match the cloth you’ve chosen.
Picking Out Fabric
There’s no doubt that the cloth is the most important item on the materials list. The light will shine through if it’s too thin. If it’s too thick, the engine may overheat because of the extra weight. Try to stick to the 0.015-inch suggestion, or at least somewhere in the vicinity of it.
The darker the better when it comes to color. All of these colors are excellent options: black, brown, dark blue, dark green, and dark purple. It’s best to avoid light colors like yellow or sky blue, which let in a lot of sunshine. As they degrade, the pigments in these colors become increasingly translucent.
Once you’ve decided on a material, there’s no such thing as a bad decision. Anything will work as long as the fibers aren’t slack and thick enough. Keep in mind that you’ll need more fabric than you think you would. Having too much is always preferable to having too little.
Try to purchase at least 55 inches x 75 inches of fabric if you need curtains for a camper van that measure 50 inches x 70 inches. A few extra inches in width and length will be needed to hem for the rod and prevent fraying at the cut edges.
The Step-by-Step Process to Make DIY Camper Van Curtains
The curtain-making process is now complete, since all of the necessary tools and supplies are at hand. Set aside about an hour and a half of uninterrupted time in an area where you won’t lose any of the smaller pieces. Step-by-step instructions for completing the project are provided below:
If you haven’t done, use the scissors to cut the fabric to the desired dimensions. You may have to buy a lot more material than you think you’ll need because most places sell it by the yard. The good news is that you can use the fabric to make one of the alternate alternatives outlined later in the article.
A sewing machine can be used for this step. There are a ton of hemming tutorials online if you’re not familiar with it. It’s as simple as folding the fabric 34 of an inch inward from each side. Sew a straight line all the way around the border to provide a nice finish.
Fold the top in about 1.5 to 2 inches before hemming it. As previously indicated, you’ll need some extra room to slide the curtain rod through. Laying the rod along the edge of the fabric makes this step a lot simpler. Then roll the fabric over it, and sew along the outside to hold it in place.
It’s best to fold the top 1.5 to 2 inches in before hemming. In order to slide the curtain rod through, you’ll need a little more room, as previously suggested. If you want to make this step as simple as possible, simply place the rod along the edge of the fabric. Sew around the outside of the fabric roll to keep it in place.
Other posts of interest
- Before you go camping, here are nine things you should know.
- The Finger Lakes Region of New York Has Some of the Best Campgrounds Around.
- To Prevent Condensation While Sleeping in a Van, Here Are 11 Tips.
The hooks must be wide enough to accommodate the curtain rod. Make sure you don’t get a vehicle that’s too large, because it will move around as you drive. Like a shower curtain, the curtain rod will stay in place if the right size is chosen. They are available, but they tend to fall out of automobiles when used.
Xem thêm : How To Make Camper Curtains? Easy Step-by-step Guide
In the fourth step, you’ll slide the curtains onto the rod and lock it into the desired length. Plastic centerpieces are common on curtain poles to keep them firmly in place. Set the curtain rod and curtains into the hooks after everything is in order. There shouldn’t be too much extension that it scrapes or damages paint, wood or other surfaces.
Fabric glue is used to affix snap tape to the curtain’s center. There should be a direct line of communication between the two sides. The best results can be achieved with a modest set of three buttons at the top, middle, and bottom. The major use of this is to block out light, however if you have overlapping curtains, this won’t be an issue.
Apply Velcro strips to outside of curtains, then place the same strips on camper van walls. The outer edges of the curtains will be darkened once you’ve attached both sides together. For those who do not wish to be awakened by the rising light, this is an excellent alternative.
It’s done. The expense of making curtains for your camper van is little, and the procedure is straightforward. Neither sewing expertise nor the usage of a few of the possible embellishments are required for this project. There are both advantages and disadvantages to using a single sliding curtain.
Should You Make a Single Curtain or Two Attaching Curtains?
Choosing between a single sliding curtain (like a shower curtain) or two attached curtains before making your curtains is an option (like most window curtains). It’s possible to achieve some seclusion and block the light with either method, but there are some advantages to one over the other.
The following are the positives and negatives of each possibility:
Advantages of Single Curtains:
- If you’re worried about the lines being too uneven, you won’t have to worry about cutting through the middle. It also eliminates the need for cutting tools like scissors (unless you have to reduce the overall size of the fabric bought with the store-set dimensions).
- Using snap tape or fabric adhesive is unnecessary, saving you even more money. Along with the reduction from needing less fabric in general, single curtains offer a cheaper solution.
- You’ll save even more money because you won’t have to buy snap tape or fabric adhesive. It is possible to save money by purchasing single curtains in addition to utilizing less cloth in general.
Disadvantages of Single Curtains:
- Single curtains have a severe aesthetic flaw: they can’t be slid open in the center to create a lovely sight. The best way to see the sun set or rise is via a pair of drapes.
- Velcro on one side will wear out faster than Velcro on the other since you’re pulling from one end to the other. Every time you open or close them, you’ll have to reattach the opposite side to avoid damaging the glue. In addition, when the curtains are open, there will always be an unequal weight on the curtain rod.
Advantages of Two Curtains:
- In the mornings and evenings of a camping trip, many people seek the aesthetic that sliding them down the middle provides. It’s also a lot more pleasing to look at on camera.
- The curtain rod and Velcro strips are protected from wear and tear because the weight is equally distributed. Additionally, because the strips don’t obstruct the view in any way, you’ll never have to remove them.
- Due to the fact that double curtains might be overlapping, sunlight and transparency are less likely to get in. Additionally, it makes it more difficult for onlookers to get a good view inside the car.
Disadvantages of Two Curtains:
- You’ll have to spend more money on materials if you use two different curtains. It takes a little longer to make two curtains since you have to hem the internal edges as well as cut them along the middle.
- As long as there are no slippery or non-porous edges along which the Velcro can be attached to the walls, light will be allowed to pass through the Velcro.
Do You Need Curtains?
It’s not everyone’s cup of tea to spend time and money on curtains for their camper van. You have to deal with them because they’re an additional amenity. For most camper van owners, adding curtains is a no-brainer because of the numerous advantages they provide. When it comes to making your own, remember that you don’t have to.
Even if you’re content with store-bought curtains, they’re essential for blocking light and ensuring seclusion. Store-bought curtains have the dual disadvantages of being more expensive and far too huge to fit in most camper vans. Specialty shops sell them, but they are prohibitively expensive.
Curtains are an essential part of every home. There’s no going back once you grasp and receive the benefits of them. Parking where you want, when you want, and without anyone peeking inside are just a few of the perks of owning a car.
Where Should You Put Your Curtains in the Camper Van?
When purchasing a camper van, there are four key places where curtains are placed:
- The driver’s seat is in front of you. When someone is gazing via the windshield and the front windows, this region provides full coverage. Additionally, you won’t have to worry about the light beaming down on your face in the morning if you park facing the rising sun.
- The side windows are located next to each other (if your van has them). When it comes to protecting your possessions, a curtain is the best way to go. In most camper vans, you can see the’meat’ of the facilities through the side windows.
- In the vicinity of the bed (if the bed is sitting sideways). Install the curtains directly in front of the bed if all you want to do is block out the sunshine and prevent others from spying on you while you sleep.
- A few feet from the back windows. Curtains can be added to the rear windows in addition to any of the other ideas described above. They shield you from the sun and the prying eyes of strangers when you’re getting ready for the day or attempting to get some shut-eye while you’re trying to fall asleep.
Take a look at our post, “Do Campervans Get Stolen?.” To keep your possessions safe, check out “A Guide to Preventing Theft” for more ideas.
If you’d like, you can combine two or three of these approaches. The optimum combination would be 1, 2, and 4, but it involves a lot of cutting, stitching, and money. With a limited budget, it may be more difficult to fit curtains on all sides. Curtains provide you the freedom to relax in the privacy and comfort of your own home.
Alternative Solutions
You can try one of these alternatives if you don’t want to utilize curtains or if you want to increase their effectiveness.
The process of making your own window treatments is quite simple. Reflectix, which can be cut to fit the exact dimensions of your windows, is a simple and effective way to reduce glare and increase comfort in your car. Because glass is the worst conductor of heat in a camper van, these covers are ideal. Blend in with your curtains by wrapping the covers in additional fabric from the drapes.
Camper van windows can be protected from the sun’s rays by using sun visors for automobile windows. They won’t be as effective as window coverings, but they’ll keep curious passersby from seeing what’s inside the car.
As a swan song, consider applying window tint as an alternative. It’s a terrific complement to curtains, even if it doesn’t completely block out all light and visibility. The good news is that some camper vans come with tinted windows already installed.
Do Curtains Add Insulation to Your Van?
insulation and privacy are the main reasons people choose drapes to cover their camper vans. Curtains give privacy, but many people question their ability to insulate their homes.
Curtains aren’t great at insulating the vehicle, but they do help keep the temperature down. How can this be? By reducing the amount of sunlight that reaches the interior. A vehicle gets hotter when it is in direct sunshine because of the heat radiating from the counters, cupboards, and metal edges of the vehicle.
Curtains don’t provide much of a barrier, and insulation is the best way to keep the temperature consistent throughout the house. They do, however, keep surfaces from getting too hot, which helps to keep the temperature down. Regardless of whether you use window insulators or not, the van stays cooler.
Our piece “How To Keep Cool Sleeping In A Van: A Very Practical Guide” has more information on how to keep cool in your camper van.
Making your own curtains is a cost-effective and time-saving option. If you’re looking for a unique way to modify your camper van’s inside, these are the best options available. Fortunately, you now know how to make the ideal set of curtains for your vacation vehicle using the procedures you’ve just learned.
Curtains can be hung in front of the side windows, the back windows, and the front windows, as well as in front of the headboard. You’ll like the privacy and heat reduction you’ll get no matter which type you select. In addition, the picture-perfect features are unmatched!
Conclusion
Van curtain-hanging is just like curtain-hanging in your home.
The top of the van has a concave contour, making it different from the rest.
Using track curtains is the most effective approach I’ve found.
Track curtains give a more polished appearance and are much more organized than other options.
In addition, it’s incredibly convenient and adaptable.
A little extra effort may be required, but the completed product will be worth it.
Nguồn: https://iatsabbioneta.org
Danh mục: Curtains


