Make these one-of-a-kind photo cushions from your Instagram photos. With Mod Podge, it’s a breeze! Check out the video at the bottom of this post to show how a picture pillow is put together.
Intermediate level of skill is required. There is some trial and error involved in using picture transfer media. Using a piece of fabric and one small image, you can practice making the larger pillow before attempting the larger project. In the next post, I provide some advice.
Bạn đang xem: How To Make A Photo Pillow? Special Tips and Tricks
As a pet owner, I’m afraid I have an Instagram problem since I post way too many photos of my pets on the app. To those who are following my broadcast and think “this lady is nuts,” I apologise for that. As charged, I hereby declare myself to be guilty!
Having so many Instagrams isn’t a problem; the issue is that I never (rarely?) do anything with them. Those Instagrams are covered by these photo pillows (or any smartphone photos, really).
Picture Pillows
My parents’ old Polaroids are also something I enjoy, so this is a great opportunity to get them out of the drawer. Do you use any special equipment to create these photo pillows? Photographic Transfer Medium. It’s a fantastic product, no joke.
Picture Pillow Perfection
In order to get the right pillows, you’ll need to be patient.
Before using water to remove the design from your customised photo pillows, you should let them dry for at least 24 hours.
Wet the pattern in a sink and rub it off the paper when it’s dry. You can always re-wet, let it dry, and then rub a little more paper off if you apply mild to medium pressure.
Keep in mind that the photo will have a retro feel when it’s copied to your computer.
There is a picture cushion tutorial waiting for you. Continue reading!
Personalized Photo Pillows
Compile the Necessary Materials
- Photographic Transfer Medium by Mod Podge
- Regular paper copies made on a computer with a dry-toner printer (not photo paper)
- Images you’ve selected yourself
- Brush made of foam
- A silicone mat for Mod Podge
- Water and a sponge
- I used white cotton for the front and patterned leftovers for the back of the cushions.
- Filling for a pillow
- With thread, a sewing machine
- Thread and needle
Make a pillow out of your favorite images by printing them out in the desired size. With the help of Instagram, I made an Instagram photo mosaic out of old Polaroids and scanned them. As an example, you may construct a collage by printing out multiple photographs and then putting them together in one enormous image.
Get copies of the photographs printed using a dry toner printer. Before attempting a photo transfer, I strongly advise that you test every inkjet printer you own.
Iron your fabric after it has been washed and dried. Because I wanted the photographs to pop against the white of the cotton cloth, that’s what I chose for the photo transfer.
You can use Mod Podge Photo Transfer Medium to transfer an image to a new surface.
Xem thêm : How To Make Your Own Body Pillow? Step by Step Instructions
You need to apply so much that the image is completely obscured. I covered my work surface with a cereal box piece, but a silicone mat would be preferable.
The image should be placed face down on the white fabric and smoothed quickly. Remove any excess picture transfer medium from the sides. The rest of the photographs can be done in the same way. Allow to air dry for at least 24 hours before using.
After the 24-hour period has passed, carefully dampen the paper with water and gently wipe it against the picture transfer to remove it. Let the transfer dry after rubbing off all of the paper. Take the time to read the product’s manual.
If you need to stitch your fabric into a pillowcase, follow these instructions.
In order to turn the cushion inside out, sew a small hole in the photo transfer onto the right side of the fabric you’ll be using.
When you turn the pillow inside out, you’ll see a photo transfer on the pillow’s outside. Fill the pillow to your desired level of firmness. Fill in any empty spaces with stowaway material.
The needle and thread can be used to close the hole by folding the edges over (you can use a sewing machine as well).
You can either keep it for yourself or offer it as a gift. Dog (or cat) lover? Make a ton of stuff with your pets on it. Creating them is a lot of fun.
How To Make Gorgeous Personalized Photo Pillows
Find out how to make your own personalized photo pillows with the help of this post. Great idea for a homemade present!
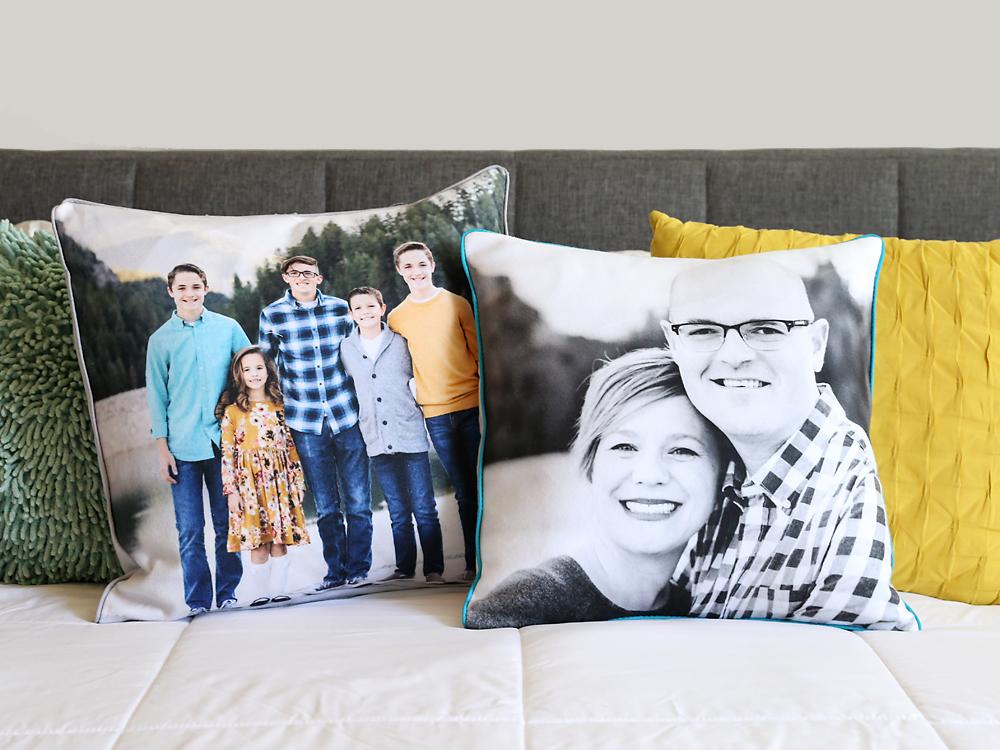
Finally, after a lot of research, I’ve come up with a terrific approach to make photo cushions. Pillows made from images may be ordered from a variety of photo sites, but the prices can add up quickly if you want to construct a large number of pillows. Making your own pillow covers allows you to add piping and trim, as well as change the color of the backing cloth to match your decor. It’s easy to make these photo cushions as gifts, too!
If you only need one photo pillow, you might as well get one from an online business and spare yourself the hassle. This isn’t my easiest photo project (this photo candle is! ), I’m not going to lie. This is more of an advanced project, in my opinion. This tutorial is for those who enjoy DIY projects like this, or who want to create several pillows as gifts for the holidays and are comfortable with only the most basic of sewing skills.
Before I started, I looked up photo pillow techniques online. Printing your photo on cloth with a home printer was the only method I could find for making my own. That approach has two flaws: Both the ink from inkjet printers and the photo you want to print are prone to running if they come into contact with water. I wanted large images (the largest I did is 2020) on machine-washable pillow cases.
How To Make Photo Pillows
If you want to use your images in this way, you must get them printed on fabric. This is done with Spoonflower. From a single yard of fleece fabric, you can produce six 18-inch pillows (or cotton twill). You can sew six pillow covers for about $40 if you use cheap backing fabric and pay only $30 for the product and shipping. My pillow inserts were from Walmart.) Despite their low price, I was blown away by the quality of the Crafter’s Choice inserts!
Your photos should be printed at the same size as your pillow insert. For example, if you want to use your photo to create a pillow cover that measures 18 inches by 18 inches, you’ll need to get it printed at 18 inches by 18 inches. A little less than 1818 inches will be left after sewing the cover, but that’s okay because the pillow cover will still fill it out well.
How To Make Multiples Of The Same Photo Pillow
In order to make this project go as smoothly as possible, it is recommended that you make multiples of the same photo pillow cover. If you want to make pillows as gifts, this is a terrific option. In this manner:
Xem thêm : How To Tuft A Pillow? Complete Guide for Beginners
Take a picture. For best results when printing at 18 inches, you’ll want a high-resolution photo with a large file size. Keep the resolution as high as possible while cropping your photo into a square. Crop it to 1818 inches at 150 dpi if you’re using a photo editor. The best way to do this is to save it as an image.
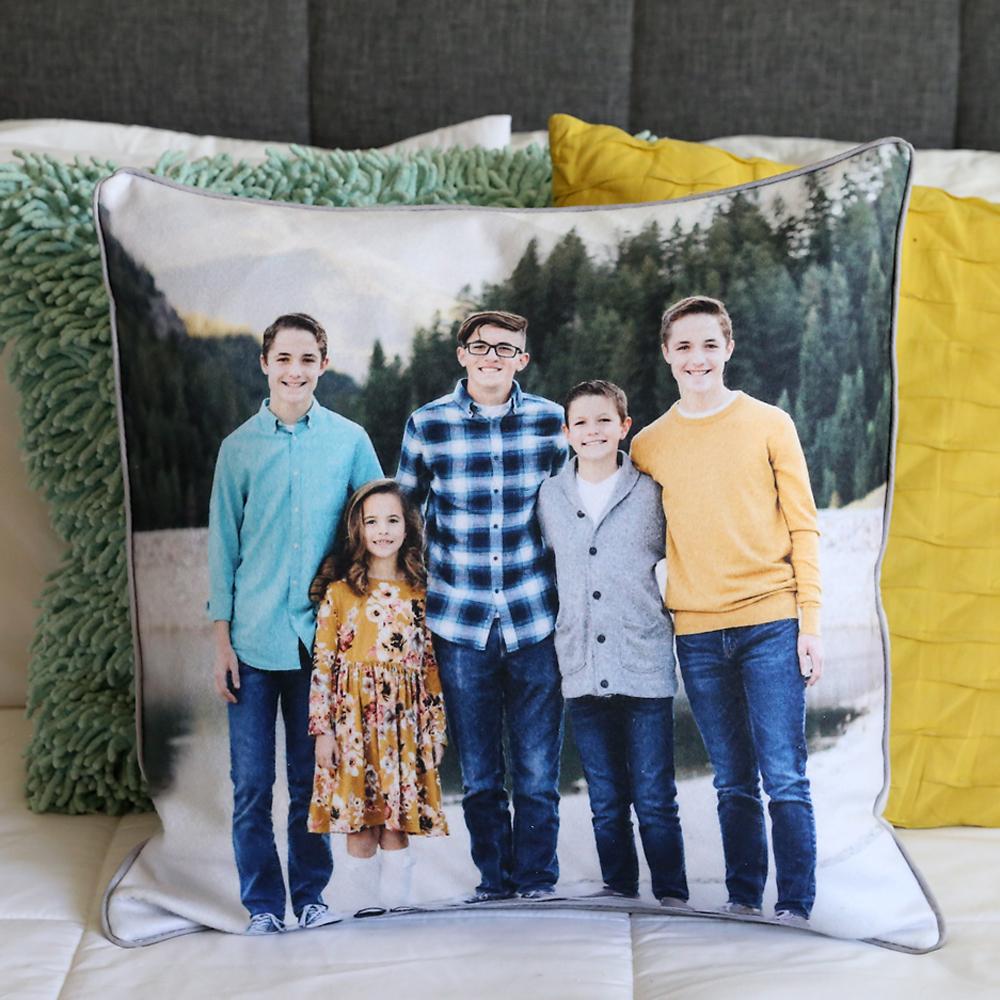
If you’re utilizing photos of people, be careful to crop the images so that their faces are in the center. When a pillow is placed inside the pillow cover, faces that are too close to the borders or corners appear odd.
Crop your photo and upload it to Spoonflower.com. Fleece is a good choice because it is soft and warm. Repeat by selecting the “basic” option. Until it states that your photo is roughly 1818 inches in size, click “smaller” or “larger” beneath the design size. (See the photo below)
Actually, after using the pillows I created, I’ve discovered that the fleece pilled quite a bit, so I’d suggest using some lightweight cotton twill instead!
You’ll get six copies of your photo this way, allowing you to produce six identical pillow covers as gifts. Give each youngster a photo of the family to display in his or her room.
How To Make 5 Or 6 Different Photo Pillows
For those who prefer not to have multiples of the same photo cushion, but rather a variety of them, there are two possibilities. If you don’t have or don’t know how to use Photoshop Elements, you can use Spoonflower’s Fill a Yard feature. You’ll be able to add a slew of images on your printed fabric with this feature.
With a tool like Photoshop Elements, you can mix and match different images and cushion sizes if you’re comfortable with it. Set the resolution to 150 dpi and create a 36-by-56-inch project. Crop your photographs (at 150 dpi) to the dimensions of the cushion forms and position them on your design.
Upload the.jpg file to Spoonflower after it has been flattened and saved.
It will be a 36-inch wide piece of fleece when it arrives. Here’s a look at mine:
How To Make Photo Pillow Covers
Cut out each individual photo first (remember, each photo should be the size of the pillow insert you want to use with it).
A backing cloth will be needed next. Because it’s soft and cheap, I used flannel for the back. I got it at Jo-with Ann’s a coupon. A simple cotton (like an inexpensive quilting cotton) would be a better option than flannel because it doesn’t pill. Two back pieces are required for each pillow cover. Front and rear pieces should be roughly equal in height and width. My back pieces were 18 inches tall by 11 inches wide for an 18-inch pillow cover.

Hem the long edges of each back piece. Sew a straight seam by first turning the seam under 1/4 inch and pressing it, then under 3/4 inch and pressing it again.
Place the pillow front (the photo piece) right side up before sewing the pillow cover. Then arrange the two back pieces, right sides down, on top of it. In the middle, the final edges of the back pieces will meet.
All around the cushion cover, pin and stitch, turning the needle at each corner. Sewing allowances of 1/4 or 3/8 inches should be used. To stuff your pillow form, turn your pillow cover right side out after sewing all the way around.
Pillow coverings can be embellished with piping, pom pom trim, or tassels if desired. Pom Pom Trim: I applied it to the pillow below and the pillow above:
Add pom-pom trim in this post and learn how to pipe it on in this video. (note: I bought prepared piping instead of creating my own – it’s smaller but so much faster! I highly recommend it!)
Nguồn: https://iatsabbioneta.org
Danh mục: Pillow


