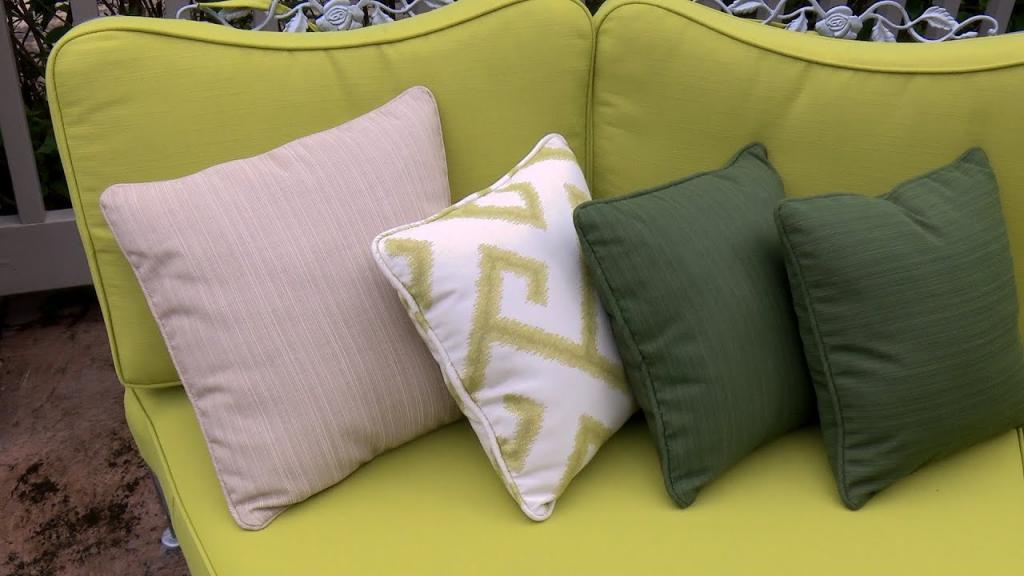
Supporting your back in a deep or uncomfortable chair is a great use for lumbar pillows, but they can also be used purely for decoration by adding another color or shape to an already existing pillow arrangement on a bed. Whatever your reason for needing a lumbar pillow, we’ll show you today how to make one.
These lumbar pillows are a complement to the cushions we covered in the How to Recover a Bullnose Patio Cushion guide (#300004XHT). Although the original brown lumbar pillows were in serviceable condition, they no longer went with the new teal seat cushions we had purchased. Thus, we repurposed the old pillows by first using them as patterns and then stealing their filling. We’re making use of an indoor/outdoor upholstery fabric for our pillows because they’ll be used outside. Throw pillows made from performance fabrics are a great addition to any outdoor space thanks to their high resistance to water and UV rays.
Bạn đang xem: Added: How To Make A Lumbar Pillow? Comprehensive Guide
MATERIALS LIST:
- Artistic Textile for Cushions and Sofas
- String for a chimney sweep, model #105599
- The Number 104467 Polyester Filler Fiber
- Hand-held needle, curved, no. 100100
- UV-Resistant Polyester Thread
- Automatic Sewing Machine
HOW TO MAKE LUMBAR PILLOWS WITH PIPING
First, measure your current pillow.
The second step is to use those dimensions to cut your material. Because we wanted the panels of our pillows to be identical on both sides and the central flower of the fabric’s pattern to be in the exact center, we based our measurements on the position of the flower.
It’s time to get your panels slashed.
Step 4: Stack your panels right-side up so the patterns are aligned.
To make the pillow corners plumper, we cut off a small amount of fabric from each corner. Mark a distance of 4 inches from one corner of each fabric panel. Back at the corner, move your tape measure over half a centimeter. Make a slanted line between the two dots. Proceed with the incision along that line. Repeat on the opposite side of the corner. As soon as you’re done with that corner, move to the next one.
Trim the two remaining corners by folding the fabric over and using it as a guide.
7 Create piping from a bias cut to decorate the border of your pillow. To accomplish this, please refer to our bias piping tutorial (#X-HT-200665).
Pin the completed piping to the right side of one of your pillow panels, starting at the bottom center and working your way up. In order to make the pipe easier to bend around corners, a relief notch should be cut into the flange.
Let the piping overlap itself by a few inches when you return to the beginning of the run, and then trim the excess.
10 Remove the stitching from one side of the piping flange using your scissors.
11. Pin the covered piping in place, then fold the fabric back to reveal the piping cord.
In order to make the exposed cord of the piping match the other end of the piping precisely, cut it.
13 – Fold the leftover fabric at an angle, and then lay the other end of the piping on top of it, so that the cording ends meet.
14 – Fold the slanted fabric over the cording at the top and secure with pins. Now the end of the piping can be finished off neatly.
Sew close to the piping cord all the way around your fabric panel’s perimeter, beginning just before the piping junction, using your piping or zipper foot.
There should be two panels at this point, one with pipes and one without.
Repeat step 17 with your panels, this time laying them on top of one another with the right sides facing each other and the patterns aligned symmetrically. It’s time to put the cording between the panels.
Keep the piping cord out of the way as you sew around three sides of the assembly in step 18. Cut a slit in the bottom of the pillow, about the size of your hand, to insert your hand. The stuffing will be placed here.
Remove the bulk from the corners by trimming the fabric.
Twenty, flip the pillow cover inside-out, right side-out, and poke the corners out so they can be stuffed.
Xem thêm : How To Start A Pillow Business? Comprehensive Guide
Twenty-first, you should start stuffing your pillow right now. Although new polyester fiberfill is available, we hacked open an old pillow and used the stuffing in it again.
When it has puffed up nicely, step 22 is to fold under the raw open edge and secure it with pins.
23. Sew a slip stitch over the pinned edge, using a curved needle. The needle and thread are inserted through the underside of the fabric on one side to begin a slip stitch. This will ensure that your thread’s knot remains undetected. Then, starting on the right and working your way to the left, run your needle through a small section of fabric.
It’s time to put your pillow to bed!
At Sailrite, you’ll find everything you need to make a lumbar pillow for your couch or patio.
Make a Stylish Lumbar Pillow in 3 Easy Steps (No Sewing Required)
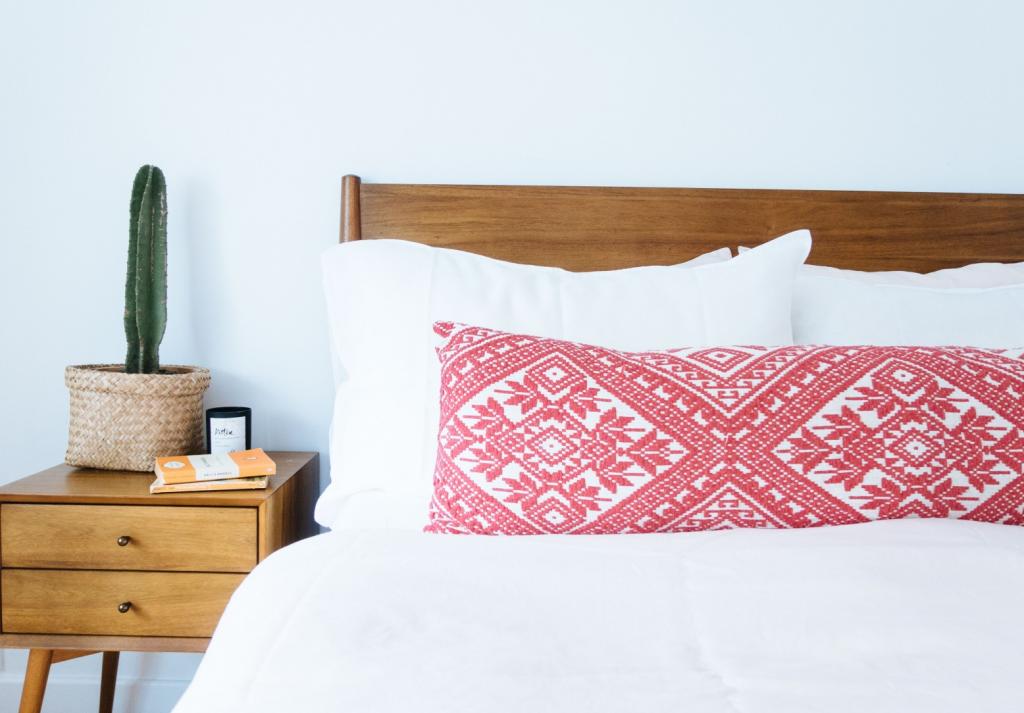
Many Apartment Therapy users swear by their lumbar pillows. You can easily complete the look of your bedroom with them. Put on that one long statement piece in front of your regular shams, and wham! Easy fashion in an instant. But if you can’t find what you’re looking for, or if you just want that one pillow from Anthropologie to be a different color (and a lot cheaper), we have a do-it-yourself tutorial for that.
What You Need
Materials
Unique Stitch Adhesive is the industry standard for no-sew pillows, but any fabric glue will do.
1-1.5 yards of a flimsy to moderately sturdy fabric (I worked with a medium-weight, bleached linen).
Embroidered border
Tassels, as adornment
form of a pillow

Tools
Shears for pinking (preferred but not required)
Instructions
First, use pinking shears to cut a fabric square to the same dimensions as your pillow form. The front of the item is this. You can achieve a more full appearance if you make all of the components the same width as your form.
Make two back panels by slicing the length in half and adding 1 inch. The shape of an envelope will be made by this additional overlap.
My pillow cover is 14 by 36 inches, so I cut the front panel to be 14 by 36 inches and the two back panels to be 14 by 19.
First of all, pinking shears are great for preventing the edges of your fabric from fraying, but if you don’t have any, don’t worry! As soon as the glue dries, the ends will be secure.
Then, placing the “good” sides together, lay the back panels on top of the front piece. When turned inside-out, the cut edges will be completely concealed.
A line of glue should be applied where the blue line is in the above diagram, and the back pieces should be pressed against the front.
Second, if you’re feeling particularly inventive, you can use the fabric’s already-hemmed edges as the back’s “hemmed” side. Thus, you can avoid a frayed edge caused by their overlapping.
Third, once the glue has dried, the item is turned right-side-out. Time to start sewing in those tassel trim pockets! To prevent any gaps from forming, I used this technique instead of the standard method of gluing the tassel trim in between the front and back pieces before sewing.
Press the hemmed edges inward and iron the new fold down to create the appearance of stitching.
You can now insert the tassel trim inside the pocket and apply glue liberally. It looks like it was sewn on from every angle. Taking out the chain stitch at the base of the fringe will allow it to fluff up nicely.
Just apply glue along the back spine and adhere the flat trim in the same manner. Once the embellishments are dry, you can insert the pillow form.
In this case, you have a lot more wiggle room if you let the tassel fringe and trim do all the heavy lifting. All it takes to make a cute new roommate is a little glue and some time.
Which new styles in pillows do you most want to try?
Have you created a fantastic do-it-yourself project or tutorial that you’d like to share with others? Share that information with us! We get so much inspiration and new ideas from seeing what you guys are up to these days. Simply use this link to send in your finished project and accompanying photos when you’re ready.
I will show you how to make your own envelope pillow case.
You may already know that I am rather partial to envelope covers for my pillows.
In addition to all pillows.
Xem thêm : How To Make A Shirt Pillow With A Collar? Complete Step-by-Step Guide
I enjoy doing so frequently because it keeps things interesting.
As promised, here is a tutorial on making your own DIY Envelope Style Lumbar Pillows.
For the simple reason that they are necessary accent pillows.
That’s not hyperbole; they’re the main attraction.
Use your ‘best’ or favorite fabric on the lumbar pillow, as that’s where it will be seen most often.
Not to mention, they are the ideal finishing touch for any color scheme.
Just like they did in our lovely summer living room that I showed off during my summer home tour….
You may remember that I used the same gorgeous fabric in our Master bedroom when I revealed our Master Bedroom Refresh…. These floral pillows in a stunning color scheme complemented the room’s coral, turquoise, pink, and grey furnishings.
As well as on our Spring Home Tour….
In this tutorial, I show you how I made a lumbar pillow cover with yellow chevron patterns for my son’s bed.
To make this pillow I used:
– a scrap of fabric (at least twice as long as your pillow form, with an extra 8 inches added so that it can overlap the top of the pillow form).
– a rotary cutter and mat (or you could use a straight edge and scissors).
Equipment for sewing, including a needle, thread, and a sewing machine
Accessories: – an ironing board and iron
– A tape measure
Finding the right size for your fabric is the hardest part. The pillow form’s dimensions must be determined first. Also, be precise with your measurements. Compact it to obtain a precise measurement with sharp corners. The tag on my pillow said it was 16×28, but there was a lot of wiggle room inside the form, so I squashed it and got a measurement of 14×24 inches. I cut my fabric to 15 inches wide by 56 inches long, allowing for a 1/2-inch seam allowance along the non-envelope portion and an 8-inch overlap at the back.
The fullness of the form you’re using should also be a consideration when deciding on the size of the fabric you’ll need. Check out my other guides on making an envelope pillow and a pillow case for more information.
In this case, I used a rotary mat and cutter to cut the fabric, but you could just as easily use a measuring tape, a straight edge, or a ruler to make faint markings on the reverse side, and a pair of sewing scissors to make the necessary cuts.
Then, take the ends and iron a hem before running them through the sewing machine to create neat, finished seams along the overlapped fabric on the back of your envelope pillow.
With a fabric width of 56 inches, I was able to skip this step and use the raw sewn edge that came with the fabric for the demonstration pillow. Sometimes I don’t sew the edge, but other times I do so that it has a nice, clean look.
After the fabric has been cut and the raw edges hemmed, it should be laid out with the right side (or the pretty patterned side) facing IN. It was exactly 15 inches by 56 inches, so I pinned it into place after checking the size.
After a quick steam press, it fit perfectly.
I pinned the sides open and sewed them closed.
Basically turned it inside out
Put the pillow form inside the envelope pillow.
Each boy has their own ‘color’ – our oldest son’s is red, while our youngest son’s is yellow.
Truly, they are so easy. Especially once you try a few and really get the hang of things. They take minutes!
Nguồn: https://iatsabbioneta.org
Danh mục: Pillow