nted home accent items could be the best way to warm up a room. Throw cushions and pillows knitted from soft yarn work just fine and are currently fashionable.
Knitted pillows can be found on the pages of any interior design magazine.
Bạn đang xem: How To Knit A Pillow
I’ve compiled ten simple knitting patterns that are both free and quick to knit. All of these patterns call for worsted weight or heavier yarns, making them perfect for a relaxing evening of knitting while you catch up on your favorite shows.
Affiliate links are possible in this article. For more information, please review my disclaimer.
10 FREE PILLOW AND CUSHION KNITTING PATTERNS
#1. DOWN THE LINE PILLOW FREE KNITTING PATTERN
If you are a beginner knitter looking for a first project, this free pattern is for you. This pillowcase can be whipped up in no time flat thanks to the use of a bulky yarn like Bernat Maker Big.
To be used with a pillow case that measures 24 inches square.
Large-sized yarn was used.
Produced in the Yarnspirations Studio
- Get Knitting Pattern for a Linear Throw Pillow
- Get Large Bernat Knitter’s Yarnin this context,
#2. SUPER CHUNKY PILLOW FREE KNITTING PATTERN
Using bulky yarn and big needles, you can whip up a stylish, long-lasting pillow in no time.
Uses yarn of an extremely large gauge
Yarnplaza’s Original Design
- Get Totally Free Knitting Instructions for a Huge, Fluffy Cushion
- Get Hometown USA Lion Brand Yarnin this context,
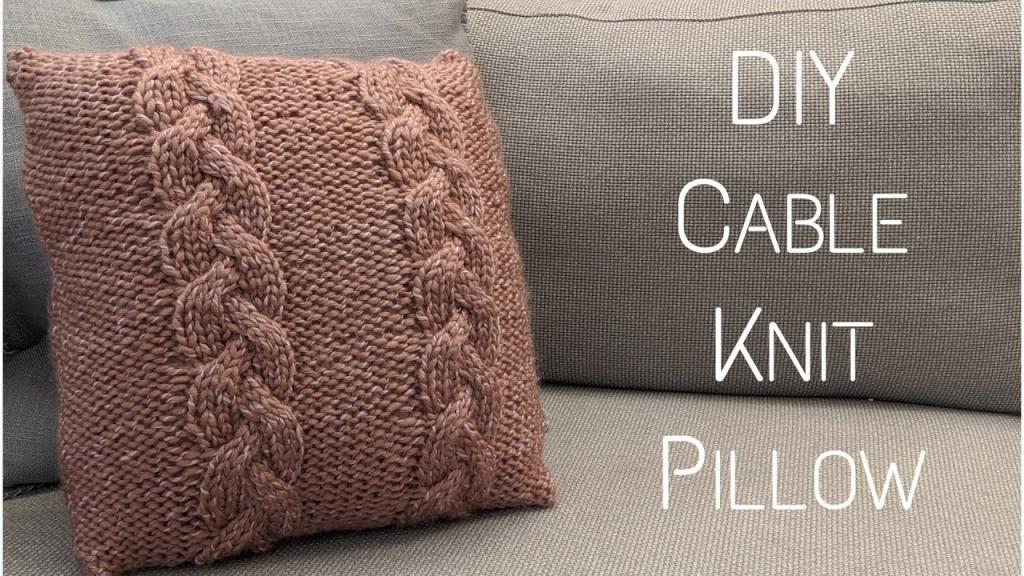
#3. SMUSHION PILLOW FREE KNITTING PATTERN
Worked in the round, this cushion cover has a soft, squishy texture. The front is worked in a series of thick and thin cables, and the back is worked in moss stitch to create visual contrast. When the cover’s moss stitch button flap is pressed, it can be unbuttoned and taken off for washing.
Made with a thick, heavy yarn
Emma Folds created the design.
- Get How to Knit a Smushion Pillow for No Costusing Ravelry
- Get Super Bulky Knit Picks Bravafor this endeavor
#4. CABLED PILLOW COVER FREE KNITTING PATTERN
This simple, cabled pillowcase will liven up any space.
Comfortably Accommodates a Square Throw Pillow of 17 Inches
Larger pillows can be accommodated with the help of instructions included in the pattern.
Made with extra-heavy yarn
Created by Emily Mizer
- Get Knitting Pattern for a Cabled Cushion Cover
- Get Hometown USA Yarn by Lion Brandwithin the scope of this endeavor
#5. BASKET WEAVE PILLOW FREE KNITTING PATTERN
This textured, cozy throw pillow can be knit in no time at all thanks to the super bulky yarn used.
While the instructions are written for a pillow that is 20 inches square (approximately 50 centimeters square), they also include suggestions for adjusting the size to make it a perfect fit.
Made with extra-heavy yarn
Authored by the notorious Kathy Lewinsky
- Get Totally Free Knitting Instructions for a Gorgeous Basket Weave Pillow
- Get Using Lion Brand Wool-Ease Thick & Quick YarnWith respect to this Task
#6. HERRINGBONE PILLOW FREE KNITTING PATTERN
made with yarn that is extremely thick and heavy
Developed by the minds at Lion Brand Yarn
- Get Knitting Pattern for a Herringbone Pillow, Free to Download
- Get Thick and Quick Lion Brand Wool-Ease Yarnas part of this endeavor
#7. CHUNKY THROW PILLOW SET FREE KNITTING PATTERN
It won’t take you long to knit one of these textured, chunky pillows. Using two strands of yarn held together, they are knit in the round before being seamed to close the gaping holes at the ends. They range from simple (the garter stitch) to moderately complex (the herringbone stitch) in terms of complexity.
Made with doubled-up, extremely thick yarn
Destiny Meyer’s Design
- Get Pattern for a Set of Chunky Throw Pillows
- Get The Lion Brand Wool-Ease Thick & Quick Yarnin this context,
#8. HURDLE STITCH PILLOW FREE KNITTING PATTERN
Even if you’re just starting out in knitting, you can do more than garter and stockinette. Knitting is a lot of fun and there are many interesting stitches that can be created using only knit and purl. The Hurdle Stitch is one such method. This comfortable pillow features a stylish design that can be turned inside out: the Hurdle Stitch.
Made with extra-large yarn
Created by Gina Michele
- Get Free Knitting Pattern for a Lumbar Support with a Hurdle Stitch
- Get Bernat’s Big Yarn, the Makersin this endeavor
#9. ELEGANT STRIPES PILLOW FREE PATTERN TO KNIT
The pillowcase for the Elegant Stripes pillow is knit in one continuous piece and then sewn up the sides. Three buttons on the envelope’s closure make for simple removal if necessary.
Fabricated with yarn of the worsted weight
Conceptualized by Elita Lase
- Get Knitting Pattern for a Pillow with Stunning Stripesvia Ravelry
- Get Yarn by Knit Picks, the Mighty Stitch Worsted Weightregarding this endeavor
#10. TWO SIMPLE CUSHION COVERS FREE KNITTING PATTERN
Unmotivated knitting. No fasteners of any kind are present. Added nothing. A simple tube, seamed at both ends. Changing or washing the covers is a major pain. But I figured I wouldn’t darn in the ends, just leave them inside the pillow, and if I ever needed to take the covers off, I could just unravel the seams.
How to Make a Chunky Knit Pillow Cover in Under an Hour
Xem thêm : How To Add Cording To A Pillow? Step-By-Step Guide
KNITTING, FIBER ARTS, and OTHER CRAFT PROJECTS
Those just learning to knit will enjoy making this pillowcase out of chunky yarn. If you know how to knit and purl and have made something simple like a dishcloth or scarf, this is the project for you.
This one can be put together in under an hour, and there are no complicated patterns or fancy seams involved.
Also, using this pillowcase is a great way to give some worn out pillows a new lease on life. A new look for your couch is just a ball of yarn and some time away.
Like the one I have in my breakfast nook.
I’ve said it before, but I’ll say it again: I’m not the best knitter in the world.
Please refrain from sending me messages and emails about the quality of your stitches, as that has nothing to do with this project. Instead, focus on learning some simple stitches and creating something you can be proud of, even if you’re just starting out and making a few mistakes.
This blog encourages its readers to experiment with DIY home decor projects, regardless of their level of experience.
But don’t twist your purl rows like I did if you want a perfect stockinette stitch.
Both of the extra cushions were sewn by hand as well. I made a comprehensive guide for that if you’re interested.adorable rosette throw pillowat the very end
SIMPLE AND QUICK KNITTED PILLOW COVER
For me, this was a chance to use up some old supplies.
I purchased a wide assortment of jumbo yarns for aA Comparative Analysis PostI did that last summer. So that I could redo the sweater, I decided to experiment with different jumbo yarns.massive knitted throwand which I knitted by hand.
In that article, I reviewed several different yarns, including Lion Brand’s Wow. It turned out to be a favorite of mine (despite the inevitable shedding!), but I just couldn’t decide what to do with it.
Wow yarn is not great for larger projects like scarves and blankets because it tends to shed and pill.
I mean, it could make a stunning blanket, but I fear the constant shedding would render it useless in no time.
On the other hand, a pretty pillow? This is the perfect use for this yarn!
Isn’t that lovely?
MATERIALS AND TOOLS TO MAKE A CHUNKY KNIT PILLOW COVER
Affiliate links are possible in this article. You won’t pay anything extra, but if you click on one of my links and make a purchase, I may get a commission.
Only the equipment and supplies that I find useful myself are ever suggested. Additionally, I conduct thorough quality assurance checks on all of my work prior to release, and I never distribute anything that has failed to meet my standards. ~
That’s why I worked with Non-Dairy Creamer Lion Brand Wow jumbo #7 yarn for this. It’s the ideal shade of creamy white, and it went great in my farmhouse-style dining nook. Absolutely fantastic; I adore it.
Nonetheless, I’m not crazy about the cost. So, let me suggest a more affordable alternative –
Intriguingly, Michael’s sells a yarn that looks very similar to the one in question. Suspectingly, because the color is identical. Spirit is the name of the yarn by Loops and Threads.
Loops & Threads’ Spirit yarn is surprisingly affordable. I’ve seen Spirit yarn on sale a few times, and each skein has twice as much yardage as comparable brands.
Materials
- Pillow Cases for 14″ x 14″ Throw Pillows
- To make 3 skeins ofWow Yarn by Lion Brand, Non-Dairy Creamer by Lion Brand,
(to save money, shop at several different yarn and craft stores) - OR, head over to Michaels and pick up two skeins of the Loops and Threads Spirit Yarn (it’s on sale a lot!)
- Needle and thread, miniature
Tools
- Knitting Needles, Size 50, Susan Bates Xtreme Wood, 14″
STEP 1
Knot off 12 stitches
STEP 2
Start by knitting the first row.
Knit the second and purl.
Repeat.
A straightforward stockinette design gives our pillow a timeless look.
(that’s it; that’s all there is to it.)
STEP 3
Make sure to knit and purl every row for a total of 29 in.
STEP 4
I knit until the end of my pillow form, then sewed the ends together.
Overlap is both unnecessary and undesirable. The pillow case should stretch just a little bit to ensure a snug fit.
Before sewing the pieces together, I measured the circumference of my knitted piece and found that 29 inches was just right for encasing my pillow form.
Xem thêm : How To Use Breastfeeding Pillow? Comprehensive Guide
There will be no leaving port! Keep knitting, there’s no point in stopping now.
As you can see, it really is that simple (I told you so!)
STEP 5
You’ll also need to join your yarn balls at some point.
With such thick yarn, it’s best to just sew the two ends together, as shown in the picture below. To ensure a secure finish, I added 10 stitches about half an inch from the end.
The thickness of the yarn makes it impossible to tie off or perform a magic knot. It only takes a few minutes and prevents the yarn from looking lumpy and bumpy when you use this sewing technique.
STEP 6
Attach the pillow form inside the cover of your chunky knit pillow.
In order to better demonstrate how I stitched them together, I used a contrasting color of yarn in the image below.
Grab a single 75-inch skein of yarn (you won’t need it all, but it’s better to have too much than not enough!) You can begin threading your yarn through the knitted loops of your pillow cover’s bottom corner.
Never go over, only under!
If you look closely at the picture, you’ll notice that the first weave in from the right side was done over the loops rather than under them.
I did it on purpose so you could see how abnormal crossing the line looks. Start at the bottom and work your way around the pillow until you reach the far side.
Doing it this way will make the seams between the woven pieces invisible.
STEP 7
I thought it would be helpful to demonstrate what to do with the remaining knitting needle once you reach the end of the yarn.
Simply remove your knitting needle and keep working to join the two sides. Be sure to grab the top loops of knitting.
STEP 8
Once you’re finished, fluff your chunky knit pillow and weave in any loose ends.
The photo has dog hair in it, but you shouldn’t worry about that. My labrador is currently shedding like crazy, and despite my best efforts, dog hair can be found virtually everywhere.
Leave a comment if you understand what I’m going through and want to share some empathy.
In all seriousness, it seems to be everywhere…
A CHUNKY KNIT PILLOW COVER ANYONE CAN MAKE
Indeed, it is a simple enough knitting project for a newbie. There is no need for tedious row-by-row stitching or finicky finishing techniques.
When using super jumbo yarn, the entire chunky knit pillow can be completed in under an hour. Knitting that pillow took me exactly forty minutes, two cups of coffee, and one phone call to complete. Putting the pillow cover together involved another 5 minutes of weaving the sides together. Plus, you’ll waste another ten minutes brushing off the dog hair.
I should also mention that you cannot use this pattern with any yarn other than the two I specified. Even though they may be labeled as such, not all jumbo yarns are the same massive dimensions. Also, if you use a different size of knitting needles, I have no idea how the pattern will turn out.
These clarifications are included solely because I’ve heard that some novice knitters found myQuickly knit a basketConsequently, I felt it necessary to insert these caveats here for clarity’s sake.
How to Knit a Button Pillow
Knitting pattern
Garter stitch knitting entails knitting each stitch on every row. Please read the yarn label carefully and follow the instructions when substituting wool types. Front
These instructions are for the cast-on row. Make a swatch with 100 stitches of blue and 100 stitches of orange by casting on 100 stitches and knitting in both colors.
Cross the threads of the opposite color at the back (the inside of the pillow cover) when changing colors. The transition between the two colors in the middle can be designed however you like. After 30 ridges, we decided to switch up our outfits in the photo. When you reach 80 ridges, your project is done and ready to be bound off.
Back
With the same color scheme in mind, cast on 100 stitches. Knit a row of blue, turn the work, and knit a row of orange. Bind off after 80 ridges, crossing the various threads each time.
Your finished pillow cover
Crochet the undersides of the two pieces together (single st 1 ch), and then continue with a round of crab stitch into the foundation chain.
Remember to leave a small opening at the bottom for the pillow stuffing; once you’ve stuffed the pillow, you can easily sew up the opening. Putting the finishing stitches on yourlabels wovenYour knitted pillowcase is finished now.
You see? After all, knitting a pillowcase wasn’t so difficult. When it comes to making pillowcases, you can get as creative as you like. Instead of going with another provider, why don’t you giveSewing a quilted pillow cover: a step-by-step guide.

Don’t miss these blog posts from Wunderlabel:
A Tutorial on Sock Knitting
An Easy Guide to Knitting Your First Scarf
Free Pattern for a Knitted Triangle Shawl
Do You want to save this idea for later?
To easily return to this blog post at a later time, simply add the URL to your list of “Favorites” or bookmark it.
Learn how to keep the guide by following these steps:
- Depending on your browser, you can access this menu by clicking the asterisk ( ) or the three dots ( ) in the top right corner, or the book icon ( ) in the top left corner of your screen.
- Select the options menu (three dots) and then the asterisk (*) on your Android device.
- To save this link to your iPhone’s bookmarks or book list, tap the book icon at the bottom.
Knitted pillows are a great accessory for your favorite chair or sofa, and they can be completed in a reasonable amount of time. To show how much you care, knit a button pillow (or a few).
The project’s materials and key statistics are as follows:
- Depending on the needle size and the weight of the yarn, the finished dimensions will be different.
- Need about 400 yards of yarn for a standard 14-by-14-inch pillow form.
- Yarn Needle (for Seaming): One pair of needles in the correct size for the yarn chosen (check the ball band to be sure).
- Some Extras: One pillowcase measuring 14″ x 14″; one to three (or more) large decorative buttons
- Variable depending on yarn weight and needle size.
Make a cute button pillow in no time at all:
- If you want to make a pillow with a standard size, multiply your gauge by 14 (the width of the pillow form), plus 4 stitches.For a pillow with a width of 14 inches, you would need to cast on 60 stitches (4 times 14 plus 4), using a yarn that has 4 stitches per inch.
- Cast on enough stitches for your pillow’s height plus four inches, knit until the piece measures that amount, then bind off and block.Knitted items that haven’t been blocked are more prone to curling.
- When you have a 14-by-14-inch square, fold the bottom up and seam the sides.In this stage, the main part of the pillow is made.
- Make your loop fasteners and sew them where they should go.Knit a variety of loop closures, just make sure they are long enough to go around each button.
- Overlap the upper portion by four inches, then sew on the desired buttons.Distribute them uniformly beneath the flap’s base edge.
- Put the form inside the pillow.Successful completion!
Nguồn: https://iatsabbioneta.org
Danh mục: Pillow