For some reason, bolster pillows have always caught my eye. They were the pillows I pictured princesses using under their canopy beds when I was a little girl. But even though I’m well out of my “princess” phase as an adult, I still find bolster pillows to be a fun way to spice up my bed. A bolster pillow is probably the last thing on your mind when you think of switching things up in the bedroom. However, bolster pillows can be used to change things up on a standard sofa or chair.
- How To Tuck Pillowcases Like Hotels Do? Complete Step-by-Step Guide
- How To Wash A Snoogle Pillow? Complete Step-by-Step Guide
- How To Fluff A Polyester Pillow? Comprehensive Guide
- How To Make A Weighted Pillow? Step by Step Instructions
- How Many Pounds Of Buckwheat Hulls To Make A Pillow? A Must Read!
Making a long, dramatic pillow for your bedroom, like I did, or adding a couple of custom bolster pillows along the arms of your sofa, like on Emma’s tailored sofa, is actually quite simple. Here’s how to do it, if you’re interested.
Bạn đang xem: How To Make A Bolster Pillow? Comprehensive Guide
Supplies:
-fabric (I’m using an old one here)
optional trim
-Poly-fil or flimsy batting
-rigidly positioned pins
Needles for darning
matching thread to the fabric’s primary hue
-automatic sewing machine
First, choose the size of the pillow’s circumference and add one inch to that number. Use this measurement to cut your fabric. Your bolster pillow’s long side should match up with the width of the fabric you’re using. Remember to add an extra inch to this for the hem.
Second, with the right sides together, pin the trim (I used pom poms) to the ends of the fabric, as shown above. Once you’ve decided where you want it, stitch it in place, being careful not to get too close to the trim’s clean edge or your stitches will show on the finished pillow.
Third, fold the fabric in half lengthwise with the right sides together, as shown above. Stitch the raw edge of the folded fabric into place. You should pin the edge, and then stitch along it, stopping about half an inch from the edge.
Turn the sleeve you just finished sewing right-side out, and measure its length. Simply multiply this number by two to get the correct circumference for your pillow’s end caps. I used a dish that was just a hair bigger than that to mark where to cut the fabric for the hems.
Five, as a stencil, cut out the fabric pieces for the ends using a round object roughly the size of your circumference (make the circle larger or smaller as needed).
Using the right sides together, pin the end pieces onto the pillow sleeve with the wrong sides facing out. Be sure to keep to the arc of the fabric circles. If your fabric isn’t exactly the same diameter as the circumference of your pillow, you may need to remove the pins and readjust them once or twice.
Once you’ve got the end caps pinned exactly where you want them, you can stitch them in place by moving the needle to the trim’s edge or using a zipper foot.
You should only fully enclose one pillowcase end. To add the stuffing, you’ll have to put your hand inside.
Seventh, once the pillow has been turned right-side-out, stuff it with batting. Maintain a consistent, tightly packed filling. If the pillow has any creases or bumps on the inside, try to smooth them out before closing the cover.
The eighth step is to sew the pillow’s open end shut with a darning needle and slip stitch. If you are unsure of how to perform a slip-stitch, this video will be very helpful.
We didn’t choose that green paint for the walls, but I think this bolster pillow will be a great place to start when I finally get around to decorating our bedroom. Perhaps if I painted the walls a deep, dramatic color and used a crisp white duvet cover, the room would really stand out. Do you have any thoughts? –Mandi
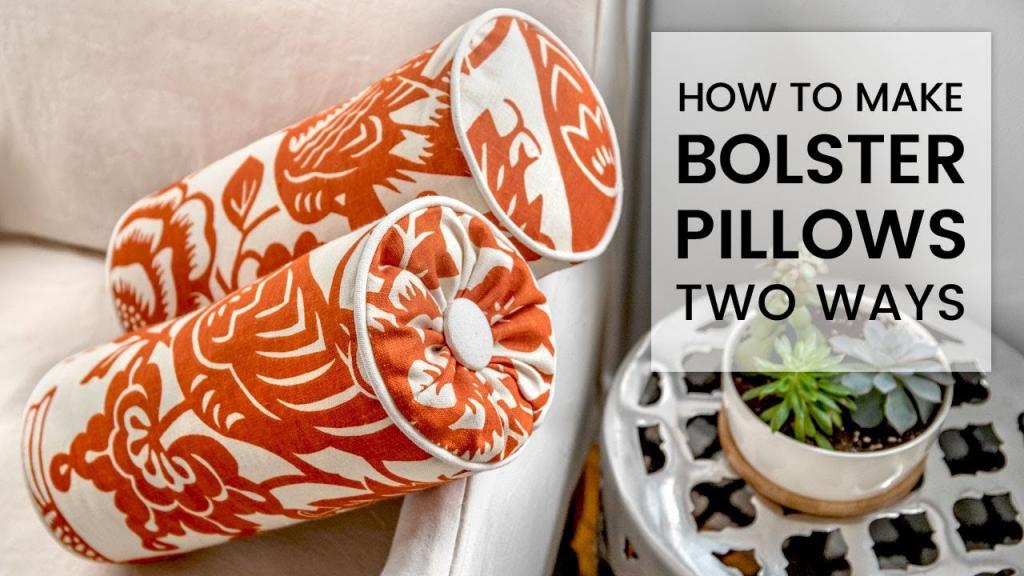
How to Make a Bolster Pillow (2 Ways)
MATERIALS
- One Yard of Decorative Material
- Add filler to pillowcase
- Equipment: shears/rotary cutter/mat
- Ruler
- Thread
- Thread for upholstering
- An ink marker for use on fabric
- Buttons
- Piping
- Velcro
- Attachment devices, such as pins or clips
- Ironing board and iron
- Machine for sewing
INSTRUCTIONS
Flat End Bolster Pillow – Step 1: Measure & cut the fabric
The dimensions of my pillowcase will be 21” x 14”.
This pillowcase has a 14″ circumference and I am making it to fit a 6″ diameter pillow.
To get the circumference, multiply the diameter by 3.14 to get the required size for the pillow case.
Then, tack on an extra four inches for the Velcro and the seam.
Multiplying the pillow’s circumference by its length yields the case’s width.
Additionally, two circles equal to the size of your pillow should be cut out.
Step 2: Sew the pillowcase
Make sure the Velcro pieces are an inch shorter in length than the pillow.
To create a neat, flat closure, fold the lengthwise raw edge in twice and sew it in. The Velcro fasteners should be sewn into the folded edges, but should be on the wrong sides of the fabric.
The piping was already made, but if you need help with this process, check out our comprehensive guide on how to make and sew piping.
Finally, attach the piping to the rounded edges by pinning and stitching. Sew the piping to the right side of the fabric using a zipper foot, making sure the raw edges are aligned.
To both ends, please.
You should also overlap the ends of the pipes and secure them. You can do this by folding in the raw edge of one side of the piping and sewing it closed around the edge of the other side.
Step 3: Combine the pieces
Using the same zipper foot, pin one end of the body to one of the circles with the right sides facing.
Repeat on the opposite side, too.
Step 4: Finish
After turning the case inside out, you can insert the pillow form.
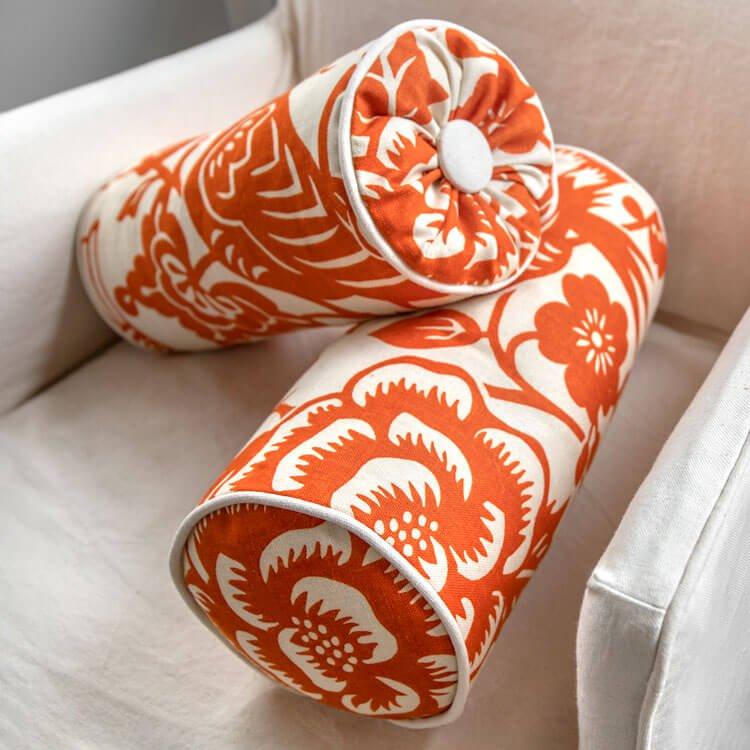
Tufted Bolster Pillow – Step 1: Measure and Cut the Fabric
Make a swatch by dividing the bolster pillow’s circumference by its length.
If you want to be fancy about it, you can either measure around the pillow or calculate its size by multiplying its diameter by pi (3.14).
To make two equal-sized pillows, divide the pillow’s circumference by the radius plus half an inch.
Gather two piping lengths equal to the diameter of the circle. You have the option of buying prefabricated piping or creating your own. For guidance on creating and sewing piping, check out our how-to guide.
Step 2: Sew together
Remove 1″ of cording from each end of the piping.
Make a sandwich with the piping between the larger fabric piece and one of the smaller pieces, right sides together.
A sewing machine’s zipper or piping foot must be installed. Don’t just sew around the piping; get as close as you can. To finish, just reverse the process at the opposite end.
The smaller pieces should have their edges tucked in by 1/4″, ironed, and stitched.
The fabric is folded in half lengthwise, with right sides together. Use a 1/2-inch seam allowance when you sew.
Invert the tube so that the opening is facing up.
Step 3: Gather the ends
Xem thêm : How To Make A Weighted Pillow? Step by Step Instructions
Place the pillow insert in the middle of the pillow case.
Create a running stitch along the edges using a hand needle and upholstery thread. The ideal length of the stitches is half an inch.
Gather the fabric and secure the end by pulling the thread. Tie a knot in the end of the thread. Now, with the opposite end.
Step 4: Tuft the ends
Hide the buttons with fabric. For information on how to use Dritz half ball cover buttons, check out our how-to guide.
Make a long strand of tufting twine or upholstery thread and thread a button down the middle. Weave both ends of the thread through a long upholstery needle.
The needle should be inserted into the pillow from the end. Put the needle through the center of the pillow and pull it through the same spot on the other side.
Tie a slipknot at one end of the thread and attach the other button to it. To learn this knot, simply tie a loop in one end of the thread and don’t pull it too tight before threading the other end through it.
Adjust the tightness until the buttons are drawn to the desired length. Double-knot the thread and trim the ends.
Things Needed In Making A Bolster Pillow
Let’s take a look at the tools we’ll need before we move on to the procedures:
- You’ll need 1 yard of fabric for your bolster pillow, the precise dimensions of which will depend on your personal preferences in both color and design.
- Shave off one yard
- Use a 25-inch-or-larger circular pillow guide or form to create plump pillows.
- Tools for making marks, such as pencils and tailor’s markers
- Thread and fabric-cutting scissors
- Yard
- Measurement tape
- Pins
- Spun-cotton thread
- Needles and thread Sewing machine
Steps In Making A Bolster Pillow
Here are the measures to be taken:
Step #1. Cutting off your bolster fabric
Take the circumference, length, and width measurements you want for your bolster pillow.
To begin, please leave at least half an inch of seam allowance on the sides when cutting the fabric for the perimeter of your bolster pillow.
For the bolster shape, you can also use a plate that is at least 25 inches in diameter.
Step #2. Stitch the seam to the bottom
After removing the newly trimmed piece of fabric for your reinforcement pillow, wrap it around the pad with the other side facing out.
If you want to install the bolster after the cover is finished, you’ll need at least 10 inches of space in the middle.
It’s important to use pins to keep the seams together at each end.
If you follow the pin, you can trim the fabric away from the bolster pillow shape on either side. Now is the time to sew along the marked pins; when you’re done, you can throw away the pins.
The cover of your bolster pillow can also be made from old bed sheets or tablecloths, as this is merely decorative.
Step #3.Sew all the trim edges
The bolster pillow’s fabric must now be flipped so that the right side is showing.
The unfinished edges must point in a single direction.
Locate the point of intersection and cut it out, making sure to leave a half inch overlap for the seam.
When the opposite end of the bolster pillow begins to slip, you’ll need to do the same thing all over again: pin all the raw edges together. Finish off by stitching up the raw edges and then taking out the rest of the pins.
To finish, it’s time to sew the bolster pillow form together by taking out all the pins.
Step #4.Sew the ends of the pillow cover
Put the bolster’s opposite cover into the cavity.
Attach a circular piece of fabric to the pillow’s cover using pins, making sure the patch’s raw edges are tucked inside the pillow.
Follow the same steps on the opposite side of the pillow.
After that, remove the cover and sew the two ends of the pillow together, making sure to check each end twice.
Finally, while holding the cover, carefully flip it over and insert the pillow form inside the body of the bolster.
Step #5. Sew and close the openings
Close the opening by manually folding the raw edges in and pinning them in place one to two inches apart.
In this final stage, you’ll need a needle and thread to hand stitch the closed seam, and then you can remove the pins one by one and check for any stray stitches or threads before you’re done.
If you did find any, lop it off.
The 10-inch gap we left in the middle of your bolster pillow’s body can be permanently stitched shut or a zipper installed.
How To Make A Bolster Pillow Cover?
Do you agree that it’s fantastic to create your own bolster pillow? They’re simple to put together and won’t break the bank.
Why don’t you make a cover for your bolster pillow because looking at the same pattern every day for the past however many months is getting boring?
Since it’s so simple to whip up, you’ll have no trouble cranking out a bunch.
Enhancing the vibrancy and color of your home.
You’ll need bolster pillow patches, rubber bands, safety pins, and whatever fabric you like to make pillowcases out of.
To sew a cover for a bolster pillow, follow these instructions.
Step #1. Fold
Xem thêm : How To Make Burlap Pillow Wraps? Step-By-Step Guide
Wrap your bolster pillow in the fabric of your choice, wrong side out. Cover the entire bolster pillow; don’t leave any exposed spots.
Step #2. Secure
Carefully do it one at a time, and if there is any excess fabric, fasten it with a rubber band. The solution is to do that on both ends of the pillow.
The finished pillow will resemble a candy wrapper.
Step #3. Replace
Now that you’ve turned them right side out, you can replace the cover.
Both ends may eventually be concealed within the covering, making them invisible.
Step #4. Swap
Since the cover is now inside out, you should use it to replace your other support pillow.
Check to see if the bolster pillow is full, and if it is, smooth out any lumps or ridges for a more finished appearance.
This ensures that the bolster cover contains no extraneous materials.
Step #5. Protect
Use safety pins to secure any frayed threads, but a glue gun can be used to coat the entire piece of stitching if you’re not confident with the process.
HOW TO MAKE A NO SEW BOLSTER PILLOW
Hello, and have a pleasant Labor Day! This weekend, instead of going away, we’re staying put and making the most of the last few days of summer at home. Given that Mark and I will be taking two trips in the next two months, staying put over a holiday weekend isn’t such a big deal even though most people will be out of town.
Here in this post, I’ll explain how to make a bolster pillow without using a sewing machine.
Coming up, we have a vacation to Destin, Florida, and later in the month of October, we’ll be spending a week in Cape Cod, and we can’t wait! I asked for recommendations on restaurants and attractions to visit during our trip on Instagram. Mark is looking forward to showing me around since he has been there multiple times and is familiar with the area. I’ve never been, but visiting this stunning region of the United States has long been a goal of mine.
Meanwhile, I’ve been remodeling the master suite and the adjacent sitting room, and I thought I’d show you the results so far. Everything is shaping up beautifully. We still want to do a few more things in the master, but I’m getting there. The living room is finally done, and as soon as I get some decent pictures of it, I’ll post them here for you to see.
I’ve completed a few home improvement projects and thought you might enjoy seeing how simple it is to cover a bolster pillow, one of them.
THIS …
I needed to cover the bolster pillow form I bought at the fabric store in my town.
The bolster pillow’s fabric matches the drapes in the master bedroom, and I purchased the navy Greek key trim specifically for those drapes.
The credit for this new sew bolster pillow tutorial goes to my friend Richella, whose blog is called Imparting Grace; if you want to see how she did it, I recommend checking out her tutorial as well. Her approach was one of my favorites for doing so. I’ll detail the process I followed to get the bolster pillow cover to fit perfectly, but you’ll see that it’s actually quite simple.
Make sure the fabric is large enough to wrap around the pillow and has enough excess on both ends to create a knot.
To make the right side of the fabric show, you will flip the pillow over after placing it on the right side of the fabric. Do you get it?
If you’re interested in the rug that’s currently in my master bedroom, here’s a link to it (affiliate link).
Secure the ends of the fabric with rubber bands. My fabric was heavier than the one Richella used, making it more difficult to work with, but after turning it inside out and pulling on it, I was able to achieve a satisfactory result. Put it snugly against both ends of the pillow. You should iron your seam before proceeding with this step. Before I wrapped it up like a candy, I gave the seam a quick ironing.
If you remove the pillow form, you’ll be left with a hunk of fabric. Next, you should flip it over so the right side is out. Too much fabric built up around the rubber bands inside the pillow, so I lopped off a section to reduce the bulk; however, you may want to wait until the pillow is snug and secure before you do the same. Turn the pillow case right side out, and adjust the ends of the fabric to your liking. The rubber bands are pliable, so you can adjust the fabric to your liking.
I also used some leftover material from my bench upholstery project and embellished the ends with covered buttons. These are simple to make and include all the tools you need to create the button. I bought the biggest buttons available at my local fabric shop.
And here you can see how my buttons turned out after I wrapped them in pretty fabric.
And here we have the completed pillow after I reinserted the bolster form and glued the seam. Although the ends required some tugging to achieve the desired appearance (and are far from perfect), I am very pleased with the outcome of my pillow. You can choose to repair the seam with stitching, but I found that the fabric worked just fine and dried quickly enough without it. I, too, affixed the cloth-covered button with glue.
Here you can see the glued-together seam where I used fabric glue. A dab of glue will do the trick, and while that was drying I tacked it down with a few pins. Even though glue guns are available, I find that fabric glue works just fine for my needs.
The finishing touch was a strip of Greek key trim that I sewn around the entire pillow, beginning at one end and working my way to the other.
Here it is, lying on the bed. Ultimately, I’m very pleased with the outcome. The pillow’s covered buttons and Greek Key trim are particularly eye-catching.
The final touch on my custom drapery panels was the Greek Key trim. Connie at Fringe Benefits, a local business, does an excellent job on my panels. At this point, it has been at least five years since I first had her make my drapes. All of the panels in both my previous home and this one were crafted by her. Her rates are incredibly low, costing only $55 for labor on single-width panels. I bring her my fabric for the panels and she charges me a small amount to have her line them. She also made a set for the sitting area of the master bedroom, which I can’t wait to show you. Now that the curtains are up, I can focus on taking pictures.
I used fabric glue to attach the Greek Key trim exactly one inch in from the top edge. With the help of a measuring tape, I made sure I was settling into the correct spot. The process of installing this molding is quick and easy.
Once I finished the tops of both panels, I was ready to hang them.
The rod hardware I used to hang the drapes was inexpensive (around $25) and simple (just black metal). They are so lovely and delicate looking over our three windows in the master bedroom.
The living room, which we have also been working on, is now completely painted. Having completed the doors, I turned my attention to the walls. The TV and Mark’s desk were covered with plastic, and the rug and two swivel chairs and ottoman were removed.
I painted two coats on the walls and two coats on the ceiling, taping off the crown molding and other trim to protect it from paint. Mark lent a hand as I painted the ceiling, and we both finished the job ourselves.
The walls are painted a Sherwin-Williams’ Moody Blue. We’re huge fans of this color because of how calming it is.

It’s not as bright as the photo makes it look, but it’s still a beautiful shade that gives the room a wonderful, enveloping atmosphere. What a relief it is that we also painted the ceiling.
The finishing touches, including the hanging of the drapes and the placement of the furniture, are nearly complete, so stay tuned for that! Even though I haven’t had a chance to take pictures just yet, I still wanted to let you all know how far I’ve come. The progress in our bedroom has been wonderful, and we are enjoying the peaceful and relaxing atmosphere it provides. A wonderful place for us to relax!
Conclusion
Finally, you have it! You can make as many bolster pillows as you like now that you know how to make one.
Extremely helpful for providing support for your back, neck, and arms in addition to enhancing the decor of your home.
My goal in writing this article was to help you find your inner creative and give you the tools to create your own bolster pillow. Have fun with your needle and thread!
Nguồn: https://iatsabbioneta.org
Danh mục: Pillow