When it comes to hanging long curtains, you have options. Hang them close to the window to create a framed textile effect. To make the room seem more expansive, position them so that they are slightly higher and wider than the window. Long, flowing drapes in a wide range of colors and patterns are available in Ikea’s curtain collection. Following these instructions, you can successfully install your Ikea curtains.
The problem with Ikea’s curtain systems is that you need to buy the parts separately, so you won’t find comprehensive instructions in the box. Buying rails will come with detailed instructions on how to measure, cut, and join them together. Wall brackets are sold separately from ceiling brackets and come with instructions on how to install them.
Bạn đang xem: How To Hang Ikea Curtains? Complete Step-by-Step Guide
If you buy the curtain panels, you’ll also get instructions on how to properly install the curtain hooks. If you buy the hooks, we’ll show you exactly how to hang the curtains. In spite of this, everything relies on everything else. Curtains are hung from the rails in a manner that is only depicted in the directions for the curtain hooks, and the instructions for the brackets only show how to connect the rails to the brackets.
Here then is a comprehensive look at hanging curtains from Ikea. The required supplies and tools are as follows:
- Tibast drapes (or panels) from Ikea, along with some pleating tape.
- Suture barbs
- Rods for curtains with eyelets
- Iron
- Needles and thread (optional)
Step #1: Measure your Window’s Dimensions
The first thing you need to do is measure the overall size of your window, including the casing. Your curtains can be hung to any desired width and height.
Using this method, you can determine whether you need a curtain panel that is 84 inches, 96 inches, or 98 inches in length.
Step #2: Attach the Pleating Hooks
Ikea’s Thibaut curtain panels come with pleating tape already attached. If your curtains do not come with pleating tape, you can purchase some and sew it onto the back of the panel. Curtains that have been pleated require the use of pleating hooks, which can be purchased from retailers like Amazon and Ikea. If you want your hooks to be effective, consistency is key.
You can use the fourth slot for the first prong of our four-pronged hook, and then every third slot after that. Do this for each pleat, and then use a single-pronged hook at each end to keep the panel in place.
A word of caution before you proceed: make sure your pleated curtains are long enough to cover the window. If you plan to open and close your curtain, consider investing in extra wide panels instead of pleated ones.
Step #3: Add a Stitch in Each Pleat
There’s a risk of the pleated curtains looking too flat if you stop here, but a simple stitch will give them the pinch they need. To secure the pleat, flip the curtain panel over and use a needle and thread to sew it near the pinch’s base. I started by knotting the thread at the base, then threaded it through the pleat once, then back again before drawing it taut and knotting it. If you want the thread to go unnoticed, choose a color that is close to the one of the fabric.
Step #4: Iron
Curtains that have been ironed look much better. Flatten and press on a medium setting while ironing.
Step #5: Hang Curtain Panels Using Rings with Eyelets
Hanging your curtain panels from rings with eyelets will help tremendously. If the hook on the top of your curtains keeps popping out of the eyelet, you can either tighten it with pliers or make a loop out of it. This is essential if you frequently draw the drapes.
What to do when curtains become yellowish?
Rinse them again in 15 minutes using 1/2 cup of Great Value Bleach and cold water. Curtains should be washed at least twice per cycle. Hang them up to dry for a day or dry them in the dryer. Do this until the whiteness you want is achieved.
Bear in mind that the more you use this method, the longer your curtain will become. In this manner, the garment’s size is altered.
Do all Ikea curtain rods come with screws?
Be sure to use the anchors and screws specified in the materials section, as these are not included with the BETYDLIG brackets. To give you an idea of their appearance, here is a larger kit-blue example.
How to properly wash Ikea curtains?
Wash the curtains in the washing machine with a mild detergent. Adjust the thermostat as directed on the product’s care label. Put some detergent in the washer. In most cases, bleach should not be used on the Ikea drapes.
How to dry Ikea curtains?
There is a proper way to dry Ikea’s curtains. Curtains should be hung up to dry after being washed. Avoid drying in a dryer.
I finally decided that now was the time to get around to installing curtains in our living room. After the flood, I was glad to find that I still had six panels of the RITVA white linen curtains from IKEA, which I had previously used in my bedroom. Saved funds, hooray! They shrank after I washed them. In addition, they were a yellower, almost creamy color than I had recalled. But now that I’ve tried this and that, they’re not only whiter, but they’ve also grown!! See, this is the method I used to accomplish it all! DIY Curtain Rods and Tracks from IKEA.
***NOTE*** If you make a purchase after clicking on one of the affiliate links in this post, I will receive a small commission. View my personal information sharing and protection policies here. Much appreciation is due for your help.
How To Hang Curtains: IKEA Tips & Tricks
FIRST THINGS FIRST:
First, let me say that there is a lot to consider when hanging curtains, but I’ll do my best to simplify and streamline the process for you.
If you try to do too much “calculating” and “measuring,” you will end up punching holes in the wall that you didn’t need to, I promise you.
SECOND:
By doing some research, I was able to track down this helpful diagram from World Market that details the steps required to determine the appropriate curtain size for your windows.
Panel fullness and standard mounting dimensions for exterior windows are as follows:
- Three to twelve inches should be added to the top of the window frame, with six being the sweet spot.
- Extend the frame of your windows by at least 6 inches on each side.
- The rod length on both ends should be increased by 3′′ for the larger finial sizes.
- Curtain rings will require an additional 2.5′′-3′′ of curtain length.
- Two panels for every 50 inches of rod length.
These are merely suggestions, but they should give you an idea of where to put your curtain rods and finials and how wide to make your rings and hooks, and how full to make your panels.
Here are the Steps: How To Hang Curtains
STEP #1: MEASURE YOUR WINDOW DIMENSIONS
To begin, take accurate dimensions of your window in height and width, including any casing. The height and width of the curtain rods can be adjusted accordingly.
Xem thêm : How To Make Long Curtains? Complete Step-by-Step Guide
If you’re lucky, you’ll be able to use a prefabricated curtain panel in a standard length, such as 84 inches, 96 inches, or 98 inches.
- Back window dimensions were 111 1/2 inches by 95 1/2 inches, and side window dimensions were 50 inches by 96 inches.
So I needed:
- a longer rod extending from 83″ to 152″, plus a shorter rod spanning 47″ to 83″ in length.
- This 95 1/2′′H – 96′′H trim (yes, this happens often, window widths will also be slightly different) required either a 96′′L curtain plus 2 1/2′′ – 3′′ rings/clips or a curtain that was 98′′L or longer to properly cover the top trim and windows.
Here’s the math:
For my living room, I measured the height of the trim to be 95 1/2 inches, and the height of the curtain rod to be 98 1/2 inches (three inches higher) because I was using curtains that were already in my possession and measured 98 inches in length.
I decided on this height so that I could hang both the 98-inch long curtains sold by IKEA and the 96-inch long curtains sold by other ready-made brands (including rings and clips) without having to make any alterations.
First, I was able to mount a curtain rod at 98 1/2 inches high, which meant I could hang curtains at 96 inches or 98 inches in length, depending on whether I used rod pocket panels or curtain rings.
As a clarification, the ROD HEIGHT is 98 1/2 inches, while the actual mounting bracket is 99 1/2 inches high.
STEP #2: DECIDE HOW YOU WILL HANG YOUR CURTAINS
The next step, after determining the size of your window, is to select a curtain style and determine how you’ll hang it.
The placement of the curtain bracket or hardware is determined by the design of the curtain, as evidenced by the following six examples.
For instance:
- Choose a rod pocket, grommet, or back tab design if you need a shorter curtain.
- You can choose from a tab top, ring with clips, or RIKTIG style for a longer length.
Knowing I would be hanging my 98-inch-long IKEA RITVA curtains made preparations a breeze.
Even though it’s tedious, I felt it was necessary to go over all of this because deciding on a frame and hanging method is crucial.
Bracketing goes quickly after you’ve decided where to put them. Keep fighting the good fight!
STEP #3: MEASURE YOUR CURTAIN LENGTH
In order to figure out how long your curtains should be, you would first need to measure your windows. However, since I already had one, it was like asking which came first: the chicken or the egg. haha!
MEASURING:
You should begin by determining the total length of your prefabricated curtain panels. Taking a second measurement is always a good idea as a general rule of thumb.
Aside: I washed my RITVA curtains after the flood, and they all shrank!! I was able to determine this by measuring each one.
I was stuck with six panels of varying lengths (93′′L to 96′′L) – ANNOYING! As a result, the three curtains that measured roughly 93 inches in length were rendered useless.
CLEANING AND BLEACHING:
Also, they were a lot yellower and creamier than I remembered, but I was still confident that these six drapes would do the trick.
Second Tip: After washing them in cold water with 1/2 cup Great Value Bleach (on the 15-minute cycle, with 2 pieces of clothing), I hung them up to dry over my ironing board for a full day.
The next day, I left them draped over my dining room chairs. And they expanded in size and lightened in complexion.
Even though their lengths ranged from 96 inches to 98 and a half inches, they were finally usable.
A second wash should bring out a brighter white in these. After just one wash, they softened to a “white linen” hue that fit in with my color scheme.
The use of Clorox was also unsuccessful in my case.
Since the flood had necessitated so much bleaching, we had some Great Value left over, and I managed to bleach something out by accident.
Needless to say, I was already aware that it whitened and bleached.
So, how about we stop talking and start hanging the curtains?
STEP #4: MARK HOLES FOR ANCHORS
My measurements for the left side of the larger back window were 7 inches wide by 3 inches high, and the right side of the side window was also 7 inches wide by 3 inches high.
Take note that I did not say “make a hole,” only “mark.” That’s because I had to double-check that all of the corner brackets fit with the same dimensions.
Xem thêm : How To Hang Scarf Curtains? Easy Step-by-step Guide
I knew I’d have to do some adjusting with the two corner brackets, and sure enough, I did.
That’s the route I took. Since each of these IKEA BETYDLIG brackets has a short side and a long side, I simply flipped one of them to make both rods usable.
At the bottom, the left bracket is more extended than the right one, while the opposite is true for the right one. A similar method was used for the central support bracket on the longer (rear) window’s shorter side.
Unfortunately, I was unable to take a picture while simultaneously holding both brackets and the phone, so the screws are not visible in this image.
***NOTE*** If you’re using finials and want to make sure they fit in the corners, that’s great, but if you’re not, make sure the corner pieces are the same size.
Trust me; otherwise, one of the curtain rods won’t fit.
STEP #5: INSTALL ANCHORS/SCREWS & BRACKETS
After the holes have been drilled, the brackets can be mounted. The BETYDLIG brackets don’t come with anchor/screws, so the ones I recommended in the materials list are essential.
See what blue ones look like in this larger package.
TRICK #3: NO-DRILL HACK
These are great because I can use them for my quick and easy no-drill hack.
Once you’ve marked your holes:
- Use a larger nail to puncture the wallboard.
- Increase the opening with a nail and some twisting.
- Gently insert a medium-sized screwdriver into the drywall.
- Hammer the anchor into the ground.
- Mount your bracket by screwing in both of its anchors.
Each bracket requires two screws, which can be attached with a screwdriver. To avoid stripping the screws, I use a manual screwdriver, but an electric one would work just as well.
STEP #6: PUT ON CURTAIN ROD HOLDERS
These IKEA BETYDLIG brackets are the best I’ve ever used, and I’ve put up a lot of curtains over the years (I used to sew and install curtains, back in the day).
- For both the long and short lengths, a cover bracket is included to conceal the screws.
- You can prevent the rods from moving within their brackets by using this small rubber insert (thin or thick, depending on rod dimension).
- Plus, it raises things up a notch, which is great for coordinating varying curtain lengths.
- If you ever decide to hang longer curtains, you can simply slide the bracket up.
One adjustable cover for the bracket and two of the non-slip grippers are included in the package.
The cover snaps on easily.
This is the more substantial grip we spoke of earlier.
STEP #7: PUT ON CURTAINS, RINGS, & FINIALS
You can now hang the curtains by attaching the rings to the rods.
There are a few different ways to use these curtain rings ( my hanging curtain hack), so I broke it out into its own step.
These SYRLIG rings from IKEA are fantastic because they provide two different hanging options, and they cost only $4.99 for a pack of ten.
These days, you can find plastic ones. But I didn’t mind because they’re so featherlight that they don’t put too much strain on my curtain rod’s smaller diameter.
Ways to Use Rings:
- use the clips to attach them right to the rod (see #5 in the list of curtain designs)
- hooks, and attach them using RIKTIG pins (see #6 above for curtain types).
- OR, you can use my hack (shown below) where I use the hook option and gather the back tabs.
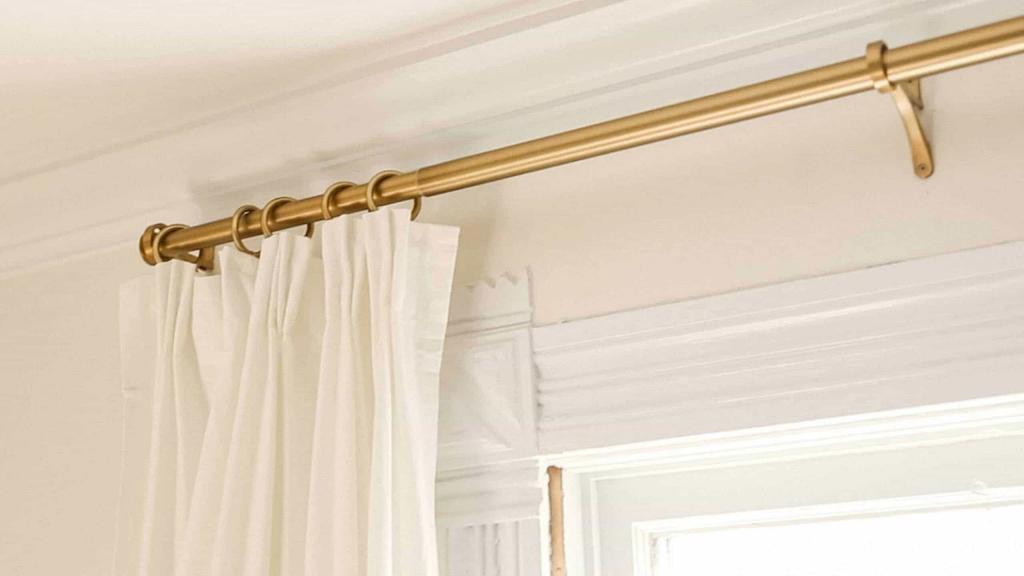
Consequently, the aforementioned image demonstrates how the curtain hangs nearer to the rod than the one employing the rings with clips version.
If you don’t happen to have any RIKTIG pins on hand, this is yet another option for creating pinch pleats.
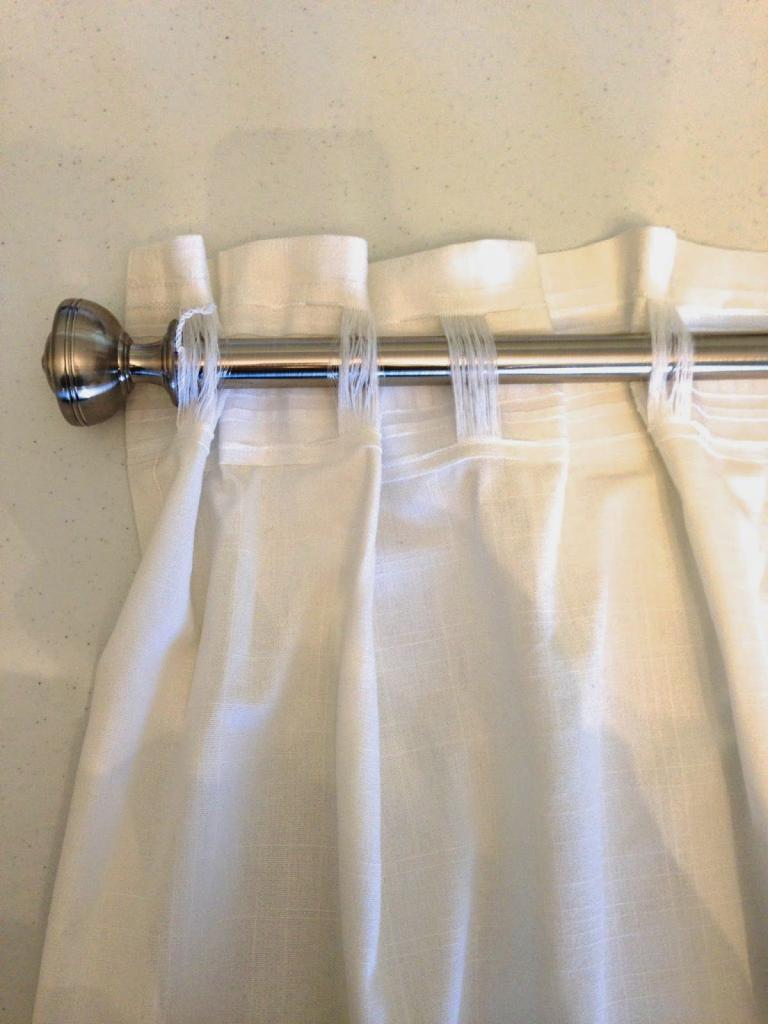
Hint #4: This One’s a HACK for ME
- To create the classic pleat, gather the two back tabs and slide them onto the hooks.
- You can achieve this look with just five rings.
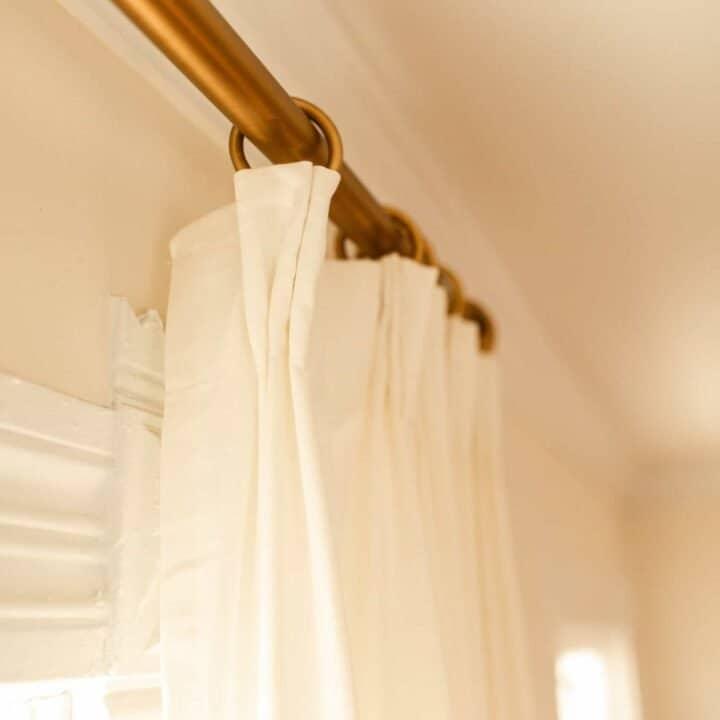
To finish off your ensemble, don your finials.
These finials were chosen because they offered a “tidier” aesthetic and were the only ones that could be squeezed into the nook where they were installed.
Conclusion
You can hang your Ikea curtains by following these instructions. Since Ikea typically distributes a user guide alongside their products, this shouldn’t be too much of a problem. This is a simple guide that can be used with Ikea curtains, but keep in mind that some confusion is inevitable even with the manual.
Nguồn: https://iatsabbioneta.org
Danh mục: Curtains


