There are a few things to keep in mind while hanging pinch pleat curtains created by hand, such as using a specific type of hook. As a result, if you’ve never seen or hung pinch pleat curtains before, the notion of sticking an incredibly pointed hook into your brand new curtains can be intimidating and overwhelming.
But don’t let it put you off: They’re easy to use, and once you get past the initial hurdle, you’ll be well on your way. In our experience, no one has ever destroyed their curtains. Hanging curtains is a breeze if you follow these simple instructions:
Bạn đang xem: How To Hang French Pleat Curtains? Comprehensive Guide
Lay the top of the curtain on a clean, flat surface with the bottom facing up.
As soon as you’ve reached this step, turn the curtain lining side out so that only the pin hook’s sharp point is visible, and slip it up and under each stitch in the back of the pleat.
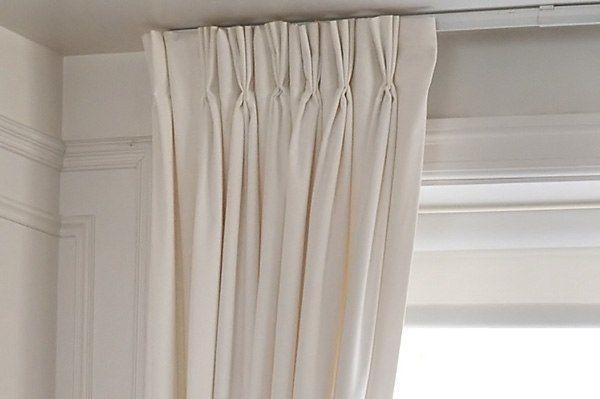
When hanging curtains, make sure that the hook is as close to the top of the curtain as feasible while yet concealing itself. This allows the curtains to fold neatly into a concertina shape.
It’s a good idea to place a few hooks, then hang the curtain from the pole or track to make sure it’s the correct length. Here, you can always make a small adjustment to ensure that the curtain hangs correctly. The weight of the curtain may cause the curtains to ‘drop’ by up to a centimeter after a week or so of hanging.
It’s a good idea to measure from the top of the curtain to the insertion point and add a little pencil mark on each pleat once you’re satisfied with the hook placement. This will keep the curtain from drooping unevenly and eliminate the inconvenience of dangling hooks.
Add one pin to the outer edge of each curtain, and one to the inside edge of one curtain, by inserting a pin into each pleat. One side of the curtain should be left open so it can overlap the other to ensure that there is no gap between the two.
The number of pin hooks on your curtain should match the number of rings or runners on your pole or track that you intend to hang the curtains on.
![How To Hang Pinch Pleat Curtains [5 Steps] - Home Decor Bliss](https://iatsabbioneta.org/wp-content/uploads/2022/10/how-to-hang-french-pleat-curtains-img_6346a7fd1614f.jpg)
Working your way outward from the center of the curtain ring, place each hook into the eye there to support the drape. With this method, it is possible to remove the extra hooks or rings without having to take the entire curtain down again! End stop or last ring should always be used between the finial and bracket.
Pinch pleats on the top of the curtain should be pushed backwards to provide a more finished look. Afterward, the curtains should be entirely drawn back. Press the pleats as you go along the curtain’s length with your hand.
Tie three strips of lining or fabric around each curtain for a truly stunning finish. However, they should not be so tight as to leave indentation lines on the folds. Wait at least two or three days before taking the ties out and drawing the drapes. Set the folds, and they’re ready to go.
In general, it’s not difficult to hang pinch pleat curtains. Curtain rods with or without gliders are both acceptable options. The steps are as follows:
- Hang the curtain with one hook attached.
- Hanging hook to curtain hardware, measure how far apart they are from each other on the rod.
- In accordance with your measurements, hang curtain hooks on each panel. Stack one in each pleat and one at either end.
- Each pleat’s space should be folded together.
- The rings or gliders can be used to hang each hook.
We’ll go over each step in further depth in this guide. If you have any queries about pinch pleat curtains, please keep reading.
Hanging Pinch Pleat Curtains
Xem thêm : How To Make Curtains In Maya? Step-by-Step Tutorial
Curtains with decorative pinch pleats are known as pinch pleats. The curtain material is at least twice as broad as the curtain rod. To create a pleat, gather the surplus material into a compact bundle. Stitching and bundling the surplus material is then done. As a result, it creates a more ornate, luxurious looking curtain with rich, elegant folds.
Curtain hooks are used to hang the curtains. Hooks are included with some pinch pleat curtains. What kind of hooks should I get if I have to buy my own?
It will need a total of six hooks to complete the project. A traverse rod with gliders or a curtain rod and rings can be used. Gliders and rings are required for every hook, regardless of the method you choose. If your curtain has 10 pleats, for example, you’ll need 12 curtain hooks and rings (or gliders).
Measuring The Curtains
Hook one of the hooks into the ring or glider of the curtain. Determine how much room you have between where your curtain rod and hardware meet at the bottom of the hook and where the curtain rod ends. To keep the curtain rod hidden, you’ll need to know how far down on the curtain the hooks should be placed.
Flatten the curtain on a counter or other comparable surface at this point. Pinch pleat curtains are particularly susceptible to bunching and wrinkling if they aren’t handled with care.
Attach Curtain Hooks
Make a mark on the curtain at the appropriate location using the above measurement. Use a pin at the top of each pleat to mark the right depth for the curtain hooks.. Placing one hook at each end and in each pleat is how the hooks are to be inserted. It’s important to watch out for hooks that go right through the curtain and rip it apart.
To test the panel, hang a few hooks and see if they work. To ensure that the pins are put at the correct height, hang it from the curtain. Adjust them if they’re too high or low and won’t hang properly from the rod. Finish installing the remaining hooks until you’ve achieved the desired “hang.” The hooks on either end of the hem allowance should hang in the middle.
Each time you insert a hook, make sure it’s the same size as the previous one. Each hook’s aperture should be similar in length. Squeeze or tighten the hooks together if one appears to be looser than the others. As a result, the curtain will hang straight and flat.
Fold The Pleats
Before hanging the curtain, fold the gap between the pleats to keep the pleats looking polished and smooth. A curtain rod and ring system allows you the option of folding in or out the space between pleats. Fold the pleats outward toward the curtain’s front if you are utilizing a track system with gliders.
Fold the material in between the pleats as you pinch and bunch it. The hem allowance should be folded in half at the end of the panel to finish it off.
At this point, some individuals prefer to tie the curtains together. The curtain can be banded together with a piece of string or ribbon. This protects the folds from falling out. Because of this, hanging the curtain may make it easier to deal with the situation.
Hang The Curtain
Each hook should be slid through the eyelet of the ring or glider’s eyelet with the hook’s loop. You must be quite meticulous in your work to ensure that every hook is placed precisely where it should be. You’ll have to go back and recreate every hook if you miss one. So pay attention and don’t skip any. Until all of the curtain hooks are in place, make careful to keep the curtain weighted down.
If necessary, add a second curtain panel and puff it up. Each pleat and fold of cloth should be tucked into place until the curtain drapes as desired. Ta-da! It’s done!
Want more assistance? Take a look at the following video:
Xem thêm : How To Make Swags And Tail Curtains? Easy Step-by-step Guide
In case you’re still unsure about how a traverse rod and gliders function, here’s a link to an explanation.
How Do You Hang Pinch Pleat Curtains With Clips?
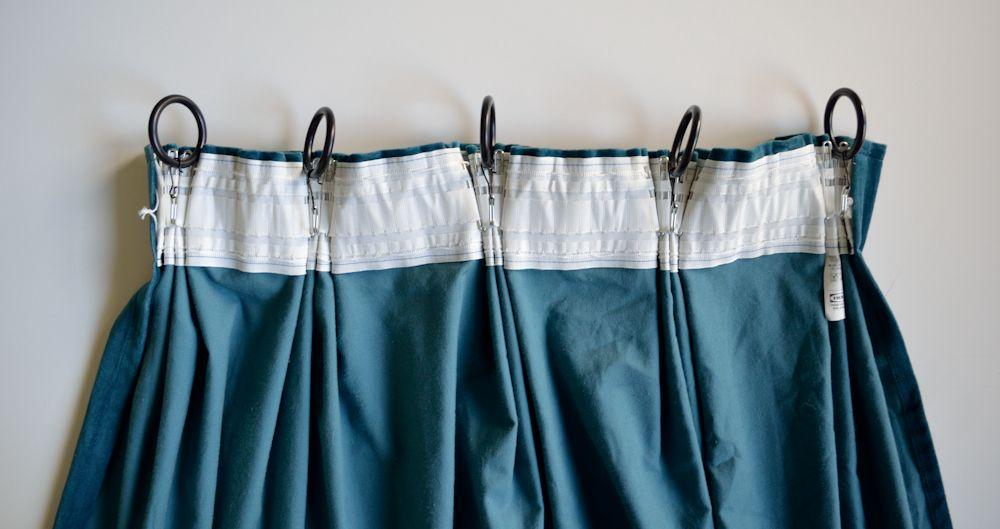
It’s fine if you’re not a fan of the idea of a bunch of tiny curtain hooks. Ring clips have grown more popular as a straightforward, no-fuss method of hanging curtains. Pinch pleat curtains are also a good match.
Attach one clip to the top of each pleat and one clip at each end. Replace the hook with a clip. For the most part, the rest of the process remains the same.
How Do You Hide Curtain Ring Clips?
The curtain will have some variation in this. Each collected pleat towards the header should, however, have an opening where a clip can be attached. Measure and install the clip accurately, just like you would with the hook system. Go as far down as the curtain header will allow you to conceal the clip and any other hardware on the curtain.
When it comes to sewing a pleat, certain curtains are simpler to work with than others. Traditional curtain hooks are always an option if you’re having trouble.
How Much Space Should Be Between Floor and Curtains?
Curtains are designed to be hung all the way to the floor as a general rule. The length of a curtain can be customized in a variety of ways. A pooling curtain, for example, has several inches of surplus material that pools on the ground. Luxurious or romantic, these go great in every room. However, when it comes to everyday duties like vacuuming, they can be a pain in the butt.
Floating curtains, on the other hand, stop just a few inches above the floor. These are perfect for locations where you don’t want to have curtains right under your feet. You can find out more about the many styles and standards for curtain length here.
How Much Space Do You Need Between Pinch Pleats?
The distance between each pinch pleat is between four and six inches. 4 or 5 pleats in total are typical for a 54-inch curtain. When it comes to how full you want the curtains to be, this can vary.
When it comes down to it, each pleat is around six to eight inches long. Again, the amount of cloth in each pleat is up to personal discretion. A 54-inch panel, for example, may require five pleats spaced four inches apart. Each pleat has 6 inches of fabric, which adds up to additional 30 inches of cloth. For a two-inch seam on each end of the curtain, you have four inches to spare.
You might be happier with more material and fewer pleats, on the other hand. For example, 16 inches of fabric is needed to make four four-inch-wide pleats. You’ll need an additional 32 inches of cloth to construct eight inches of pleats. Including the six inches that are left, this totals 48 inches of cloth. As a result, there is a three-inch seam on both sides.
It is possible to design beautiful drapery with either of these calculations, but your personal preference may make one solution more appealing than the other. Just keep in mind that you’ll need additional material for the curtain’s seams at the end. However, the width of this material need not be greater than the distance between the pleats.
What Is The Difference Between Pinch Pleat And Pencil Pleat?
The more “regular” standard for curtains is pencil pleat. The material at the very top, which hangs from the rod, is just loosely bunched. These curtains may be pulled as flat as you desire, allowing them to hang as if they were a sheet.
Pinch pleat, on the other hand, gathers material into a single pleat for a fuller, more aesthetically pleasing appearance. Permanent pleats or folds in the curtain are created by folding and pulling the fabric together before it is sewed together. This sort of curtain is designed to ruffle, so it won’t hang perfectly. Compared to a pencil pleat curtain, each of these contains almost three times the amount of fabric in it.
In Closing
When it comes to putting up pinch pleat curtains, the process isn’t all that difficult. Clip rings or curtain hooks can be used at each pleat. If you have a traverse rod with gliders or a normal curtain pole, you can use hooks to hang your drapes. Both methods will result in beautiful, full draperies that will catch attention.
Nguồn: https://iatsabbioneta.org
Danh mục: Curtains


