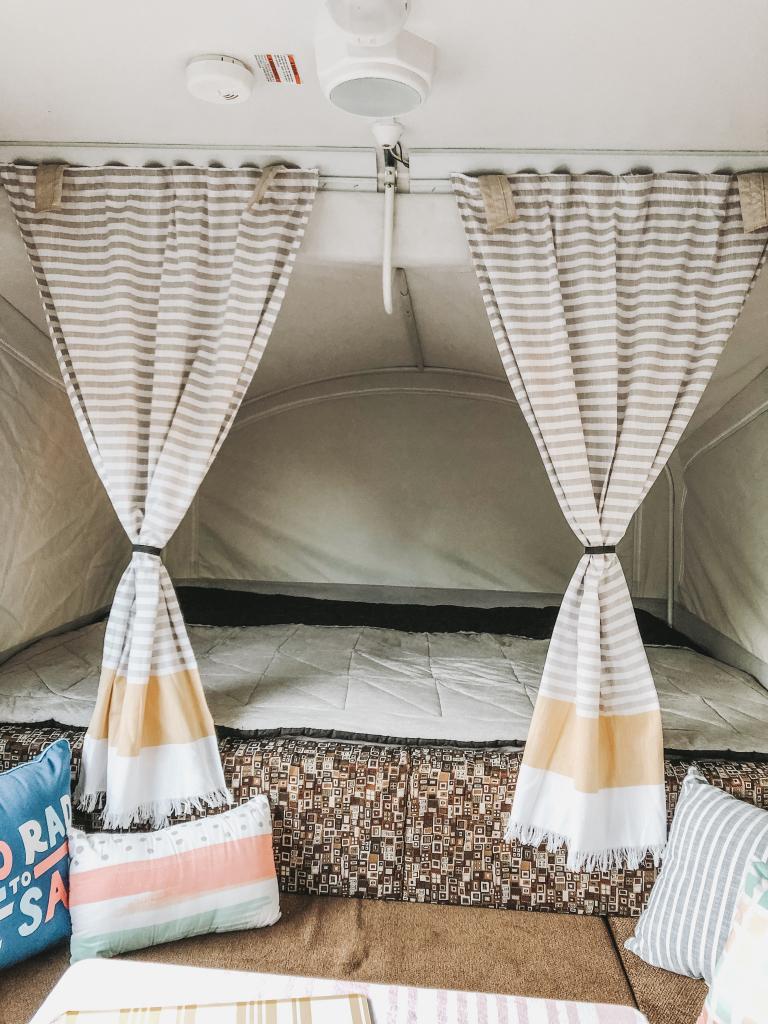
Our second camper restoration is currently underway. Here’s the first one we did: The R.V. curtains’ fate had already been decided, despite a plethora of other design decisions to be made. A few years ago I made these curtains for our RV, and they were a huge success! A lot of people liked them, so I finally decided to write out the process I used for making these RV curtains that bring a lot of character to the space.’
TOOLS USED
- A rotary tool
- Mat for Cutting
- Edge of a Straight
- Machine for Sewing
- Embroidery Needles for Upholstery
- Pins, Straight
- Drill
- Saw
- Drill Bit, 1/8 inch
- Drill Bits 1/4″
SUPPLIES NEEDED
- Cloth that drops down
- Lobster Claw in Brass
- D-Rings in 3/4-inch brass
- a leather strap measuring 5/8′′ wide
- String of white (Thin)
- rapid fusion of DAP
- Button Head Screws, 1 1/4′′ x 1/4′′
- Spray-on Gold Metallic Colors
- Spray Paint in Oil Rubbed Bronze
- Select Prime 1′′x2′′ Boards
- Dowel Rods of 3/4′′
R.V. CURTAIN PANEL MATERIAL
Take a measurement of the overall width of the curtain that you desire. In order to account for some overhang, I measured the window to get an idea of how wide I wanted my drapes to be.)
Bạn đang xem: How To Make RV Curtains? Comprehensive Guide
Fabric Width = “Window Width” + “Overhang “(Opt.) + 1.5′′ Hem + 1.5″ Hem
6.5′′ Top Rod Pocket + 5” Dowel Rod Pocket = Fabric Height for Window Height “+ Over Hang “(Opt.)
We’re ready to begin cutting now that we’ve double and triple checked our measurements. Ironing the fabric is a step I do before cutting any fabric. I use a rotary cutter, a straight edge, and a cutting mat when cutting large amounts of fabric. All of your patience and some scissors will suffice if these instruments are unavailable to you.
R.V. CURTAIN: SIDE HEM
Once the fabric has been cut, determine the curtain’s orientation. We’ll start by hemming the curtains’ sides. Top and bottom are omitted.)
Turning over the edge by half an inch, I ironed it to make the crease. After that, I repeated the technique, but this time I lowered the fold by 1 inch before ironing it to reinforce it.
I began sewing the hem once both sides had been ironed flat. On the front side of the curtain, I sewed about 3/4′′ from the edge. On both sides of the curtain, I repeated this.
R.V. CURTAIN: TOP HEM (1×2 POCKET)
The upper pocket will hold the curtain rod, which is a 1 x 2′′ board.
A crease was created by folding the fabric in half and ironing it.
After pinning the cloth in place, I then ironed the fabric a further 3 inches down from the iron crease. The 12′′ board will slide into this pocket.
Stitch 2 3/4′′ from the edge of the fabric when the fabric is pinned in place and facing up. (The fold will be stitched shut with this stitch.)
R.V. CURTAINS: BOTTOM HEM (ROD POCKET)
Afterward, I sewed a hem down the bottom and made a pocket for the dowel rod. The first step was to measure 1 1/2′′ from the edge of the fabric, fold it up, and iron it.
I then followed the same process, folding up 1 1/2′′ from the bottom hem and pressing the fabric with an iron.
After measuring and ironing the hem/pocket to perfection, I flipped it over and sewed it on my sewing machine. I sewed about 1 1/4′′ from the bottom fold of the fabric. The dowel rod can then be inserted into this lengthy pocket.
R.V. CURTAINS: STRAPS
To be continued, the straps for securing the rolled-up curtains! Using this strategy in my second camper has been a great experience for me. I’ve also spent a lot of time searching for the best hardware and straps, and I think I’ve found the best of the best. These leather straps were purchased on the internet. With a 72-inch roll of leather strips, I was able to make two entire curtains from it. As a result, I divided the strap into four equal sections, each about 18 inches long.
My first stop was the shop after cutting the straps. I could have used a drill to sew through the leather strap, but I preferred the simplicity of a drill. I flipped the strap over and drilled two holes with a 1/8-inch drill bit. On both ends of each strap, I applied this method. As a result, each strap should have a total of 8 holes, four on each end. As you can see in the photographs below,
To secure the “D-Ring,” I drilled all the holes. This time around, I scoured the internet and came upon these vintage brass ones. I used an upholstery needle and some strong thread to stitch these d-rings into place (Cross-stich floss should do the trick). D-rings are sewn into place in the following steps.
On one end of the strap, attach the d-rings and then attach the lobster clasp in brass.
A little DAP RapidFuse glue on the last knot is a good idea in my opinion. Makes sure everything stays put after all that hard work!!
R.V. CURTAINS: INSTALLING ROD
Using the “curtain rod” will be the last step in the process. The technique by which the curtain panel will be hung is not a curtain rod at all. A normal prime 12 pine board worked perfectly for this project. My board’s length was determined by adding three inches to the finished curtain width. Allowing a 1.5-inch gap on both edges of the panel.
Choose a stain or paint color before installing. I went with Varathane’s Briarsmoke. A few inches of either end will be revealed if you want to stain the entire board.
A 1/4′′ drill bit was used to pre-drill a hole in both boards once the stain had dried. I centered mine at a distance of about 3/4 inch from the board’s end. This was done on both ends by myself.
PREPPING INSTALL HARDWARE
At this stage, the board can be mounted using the method of your choice. Because I was going for a vintage industrial look, I used a large button head screw and spray paint to achieve that look.
Here’s how I made my RV drapes seem as they did in the ’70s. My screws were sprayed and then lightly coated with Oil Rubbed Bronze after the Rustoleum Metallic Finish Gold Paint had dried. When it came to curtain straps, I found this to be an excellent fit with my choice of d-rings and lobster clips.
Slide the 12′′ board into the top after it is dry (wider pocket). If all of your calculations are correct, the 12′′ board should extend out of the pocket by about 1 1/2′′ on both sides.
A little screw was used to secure the straps and the RV curtain panel in place so that they wouldn’t shift.
Drive the screws through the 12′′ board into the wall using a drill. To keep the curtain in place, you may need to enlist the assistance of a mollie (depending on the type of wall and placement).
Slide the bottom dowel into place last for these R.V. curtains.
These, in my opinion, are the ideal RV curtains! However, despite their unassuming appearance, they have a big impact on the overall look of a room. There aren’t many spots in a camper where you can add decor, so this is a fantastic way to spice things up!
We’d love to hear from you! Please check out the rest of this toy hauler refurbishment and our first camper makeover in the links below.
- Transform Your RV Using a roller to apply paint
- Renovation of an RV’s Bathroom
- Upcycling an RV Couch and Dinette
- The R.V. Makeover Reveal
- Toy Hauler for the Kitchen & Dining Room
- Toy Hauler for the Living Room (Coming Soon)
- Dorm Room- Toy Transporter (Coming Soon)
- Toy Hauler for the Rest Room (Coming Soon)
- Toy Hauler/Dining Room Table (Coming Soon)
MORE FROM MY SITE
- Virtual Get-Together at Your Local Home Improvement Store
- Coffee Table with Rustic Farmhouse Style
- Storage for Hair Tools Add an Armoire to an Existing Cabinet
- Crate Dresser with a Nod to Pottery Barn
- The Dollar Tree has a high-end Christmas tree for for $1!
COMMENTS
Your DIY curtains have me head over heels in love! That’s a fantastic idea, and it gives us some curtain options.
PRIMARY SIDEBAR
POPULAR PROJECTS
- Faux Brick Wall Tutorial
- Curtains in White at a Low Price
- Creating a Rustic Apothecary with Ikea Cubbies
- Repurposed Cabinet Becomes Kitchen Island
- Workbench for Assembly in the Workshop
- Transform Your RV
MEET COREY
We’re here. This is Corey, and the problem I’m having is… I’m unable to let things go on as they are… Using a variety of power tools is often the most effective kind of therapy. As a result, when I’m not occupied by my two gorgeous, energetic, sons, I’m usually found crouched over a sewing machine or covered in sawdust. All in the name of striking the right balance between form and function in our own home.
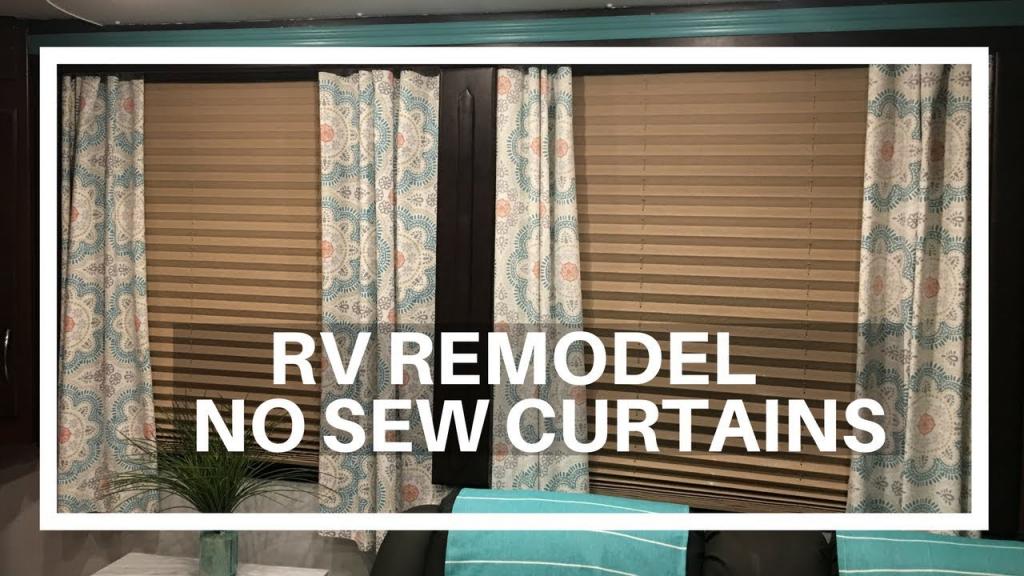
How to construct an inexpensive, no-sew RV curtain for a bathroom cupboard in less than an hour.
Okay, I’ll be honest… To be honest, I’m not a big fan of sewing. I can do practically anything with a saw and a paintbrush.
Sewing, on the other hand, is a different story.
The cabinet next to the toilet in our RV needed to be covered while I was doing some maintenance there.
Our shower plumbing is located in this area, so we wanted to make use of the extra space, which turned out to be ideal for storing things.
Because it’s so close to the toilet, a door isn’t an option. An easy solution was needed to hide the opening while still allowing easy access.
AWESOME RESPONSES TO YOUR EMAILS FROM US Sign up for our newsletter to get the latest DIY Projects and exclusive access to our Resource Library.
Xem thêm : How To Hang Curtains With Valance? Complete Step-by-Step Guide
That idea didn’t sit well with my skeptical partner. He didn’t believe it would look right, and he was afraid of what might come out of the toilet in the form of anything nasty.
I agreed with the second argument, yet I remained resolute.
Of course, I ignored him and went on with my plans, regardless of what he said. This was my first time making a curtain, and it was really simple.
Supplies for a cheap no sew curtain
- fabric
- No-sew hem tape
- To use a tape measure
- long, thin, and sharp pins
- iron
- a measuring rod
- chalk
- scissors
- rod of tension
Measuring for curtain fabric
After determining the size of the aperture, I went out and purchased my fabric. It was around 36 × 30 inches in size.
A piece of 54 x 35, 1 12 times the width (or 54′′), and the length was 30′′ plus 2 inches for the bottom hem and 3 inches for the rod pocket was what I needed, according to my calculations..
Two yards of a plain gray cotton fabric, with a little of weight to it, were purchased.
Because it was 50% off, I only had to pay $10 for the fabric.
When my fabric and supplies were in order, I set to work on my curtain’s creating process.
Making a no sew curtain
I used a tape measure, a yard stick, and chalk to mark the 1′′ hem on both sides of the curtain.
After that, I pinned a 1″ fold in place.
Remove the pins by pressing the cloth with a hot, dry iron on both sides to create a crease.
I cut a piece of no-sew tape to the length of the fabric and pressed it into the crease of my ironed 1-inch hem.
I used a hot, dry iron to seal the hem after folding it over.
For the other side of the curtain, I followed the same procedure.
The bottom of the curtain needed a hem, so I went back to Step 1 and repeated it.
In order to achieve crisp, angled corners, I trimmed my no-sew tape to the edge of the hem’s side seam.
I used my iron to push the seam.
In order to ensure that the tape had done its job, I let the seam cool for a few minutes before moving on.
A triangle of no-sew tape was applied to the fold when it had cooled down.
Then I used my hot iron to push it into place.
Voilá… Angled corners are as easy as pie with this tool!
On the other three corners, I did the same.
Creating a rod pocket for a diy no sew curtain
The tension rod’s upper rod pocket was the final step.
To begin, I followed Steps 1 & 2 to sew a 1′′ hem on the bottom and pressed it.
After that, I measured down 3 inches and made another hem.
A 2′′ rod pocket was created by securing a piece of no-sew tape to the edge of each piece of cloth.
Finally, after several attempts, I managed to secure the hem tape by ironing it a few times on the highest setting.
The curtain was ready to be hung in the RV after a fast press.
It took me about an hour to complete the entire process, but it was time well spent. I’m really happy with the final result! The no-sew option was clearly the better choice.
Oh, and what about the husbands?
He also thought it was good.
Do you want to know how to construct curtains for an RV?
You don’t have to worry about it because we’ll provide you all the information you need.
It’s a curtain, but it’s made out of a cooler material and has a different design.
It may appear that way at first glance, but if you follow the instructions we’ll provide, your expectations will be unreasonably high.
This curtain, on the other hand, stands out from the rest of the pack.
The size of your curtains may not match, but it’s still a lot of fun to make.
The most important thing you can put into this project is your own unique perspective and perspective-taking abilities.
Additionally, the supplies are only a short distance away.
The process of making RV curtains isn’t difficult, although some of the stages may be unfamiliar to you.
Steps To Make RV Curtains
Do you want something that’s a little bit different?
Xem thêm : How To Make Tie Up Curtains? Complete Step-by-Step Guide
One that will give you the courage to take the leap of faith and give it a go.
In order to see how creative and innovative your imagination is, you should have RV curtains.
How do you make RV curtains?
To make your job easier, you’ll want to follow these procedures.
Then, stay put and pay attention!
Step #1. Measure the window
Getting the measurements of your windows is the first step in making your curtains.
To avoid making a mistake, take your time and do it correctly.
Depending on the breadth, an overhang of one or three inches can make a big difference.
It’s only a matter of raising the hem and adding the rod pockets.
For the hem, you can add 6 inches, and for the pockets, you can add 5 inches.
Step #2. Cut the fabric out (drop cloth)
After ensuring that you have the correct measurements, cut out the fabric..
But before you do that, make sure that it is flat, or iron it to ensure that there are no uneven sections.
For those who prefer cutting by hand, they can do it using scissors or cutters.
Step #3. Make the side hems
Next, you’ll want to finish off by cutting and ironing the side hems of your garments.
Then you may backstitch it for a more professional finish.
This layer should be about an inch and a half thick.
The fabric can then be ironed flat, resulting in a crease.
A decent design will not jump out if it is bold and the lines are firmly pressed.
Step #4. The top rod pocket
In this phase, we will not be making a typical rod pocket that looks like your regular rod pockets.
As a rod, we’ll be using a 1 x 2 piece of wood.
So make sure the fabric is big enough to cover it.
The same method you used for the side hems can be used to fold the fabric again and press it on the top to restore the crease.
Step #5. The bottom rod pocket
This particular curtain is truly one of a kind, as it features rods on both the top and bottom.
Rod pockets can be made in the traditional manner.
Because the rod we’re using has a cylindrical shape, we ask that you make the bottom pocket smaller than the top pocket.
Step #6. The straps
Leather straps can be purchased online based on personal desire.
Once you’ve drilled a small hole in it, insert a piece of thread through it.
When you’ve inserted a D-shaped ring, fold it over just enough to secure it in place.
The next step is to attach a d-shaped ring and hooks to the strap’s other end.
Make sure they’re both the same length. ‘
As a result, when the curtain is opened, it will remain securely in place.
Step #7. Install the rods
After the top rods are in place, slide the wood piece into your pocket and secure it with the straps.
Drill the straps and the wood, and if necessary, screw them in place to keep the curtain in place.
Make sure you do this on both sides, and you’ll be set to go.
The cylindrical rod will be slipped into the bottom pocket of the bag as the next step.
You can use the hook to keep the roll-up in place when you wish to open your window.
Your RV curtains will look like they’re wearing suspenders if you do this.
Using a wood varnish or painting your rods dark brown will give them a more authentic look.
The final step is to drill a hole through the wall for your top rod wood.
Conclusion
Now we’ve accomplished our goal. Please take the time to reflect on what you’ve just read.
The fact that we were able to learn how to construct RV curtains together is a blessing.
You can now boast to your family and friends that you have a new ability and knowledge to impart.
With these instructions, anyone can make RV curtains. Simple as 1, 2, 3, 4, 5, 6!
Nguồn: https://iatsabbioneta.org
Danh mục: Curtains


