Pleated curtains are a great option for any room. If you’re wondering how to make your curtains stand out, you’re not alone:
To your surprise, pleating curtains is a simple task.
Bạn đang xem: How To Make Pleated Curtains? Complete Step-by-Step Guide
It’s true that it’s basic, yet it can have a significant effect on the look of your room.
Because our window is often referred to as the house’s “eye,” I believe it’s acceptable to state that the curtains in every house serve as the house’s “brows”.
It’s like eyebrows in that it comes in a variety of shapes and sizes. To give the face an overall accent and detail, it is as important as the rest of the face’s features.
Curtains are now an essential part of any home’s design and attractiveness.. It’s not just there to keep the light out of our house.
Curtains come in a variety of materials, depths, styles and designs as well as in a wide range of colors and patterns.
Pleating is another another method of enhancing the curtain’s aesthetic appeal. Keep reading to learn more about how to manufacture pleated drapes.
Steps To Make Pleated Curtains
Simple sewing techniques and abilities are all that are required to make pleated curtains.
When compared to commercially available curtains, sewing your own will save you money while still allowing you to construct custom-designed drapes.
Here are the things you need to follow in order to transform your plain curtains into something more interesting. Just keep going down the page, please.
Step #1. Prepare the needed materials
To begin, you’ll need a fabric for the curtain’s outer layer. The market offers a wide range of materials.
Silk, cotton, linen, polyester, acrylic, and lace are some of the most popular materials for curtain fabric.
Another piece of cloth is required, but it can be used to line the curtain. White or cream are the most common colors for these linings.
Using pleating tape is the greatest way to ensure that your pleats are exact. Inside the top of the curtain panel, a specific tape should be sewn.
Drapery hooks and weights are the tools you’ll need.
If you’re fortunate enough to own a sewing machine, the process will be a lot simpler for you. Without it, you can just use your hand to get the job done
Pins, scissors, needles, and an iron are among the basic sewing supplies.
Step #2. Measure the dimension of your window
Your curtain’s proportions are determined by how well you measured the width and length of your window.
Also, the length of the fabric that you’ll cut will be determined by this stage.
The first step is to measure the finished length of your curtains by taking a measurement from where the curtains will be attached to your curtain rod.
Check to see that it reaches the place where you want the curtain to terminate.
Make a note of the measurement you took. You must add eleven inches to the ultimate length of the fabric while cutting it.
After that, measure the length of your curtain rod and add four inches to the ultimate width.
Hanging a curtain that’s the wrong length is a pain, so be sure to do this step right before you hang it.
Step #3. Cut the fabric to the desired length
To avoid any mishaps, you must use caution when carrying out this procedure.
It’s difficult to keep things straight and even while working with enormous fabric sizes, so find a wider area where you have more freedom to move around.
Alternatively, you can do this on the floor or in a larger area, then place the fabric on it comfortably.
To cut pieces that are straight and even, make use of the fabric’s selvage.
Xem thêm : How To Hang Balloon Curtains? Step-by-Step Tutorial
An edge that is “self-finished” to prevent fraying and unraveling is known as selvage.
It is here that the fabric is fastened to the loom during production.
It frequently comes in a variety of hues and is imprinted with the name of the producer.
However, it is necessary to cut the fabric during the sewing process in order to avoid wrinkly seams.
Sew parallel to the selvage ends while using a straight rule and pencil to make the foundation line.
Step #4. Sewing
In order to attach the lining to the external fabric, lay the two pieces out on their right sides.
A half-inch seam allowance should be given while sewing the two sections together.
Step #5. Insert the weights and attach the pleating tape
Once the hem is sewn and the weights are inserted, you’re done!
To connect the pleating tape, simply cut it to the same length as your curtain panel.
Then align the tape with the top of the curtain panel and secure it in place.
Finally, place the pleating hooks into the pleating tapes’ pockets.
Your pleated curtains are complete.
WHY SEW PLEAT TAPE INTO YOUR CURTAINS?
Pleat tape can be sewn into your curtains for a variety of reasons. Pleat tape allows you to hang your curtains in a variety of ways.
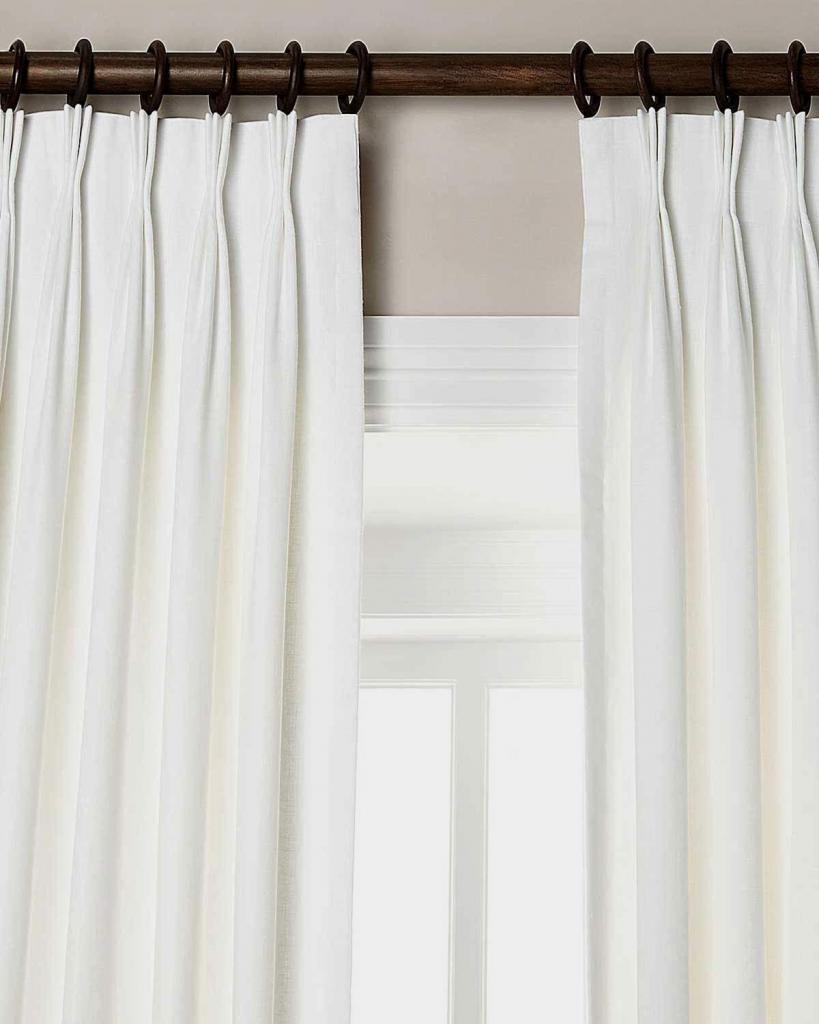
It’s possible to make a variety of pinch pleat styles after sewing in the pleat tape. Double or triple pleats, euro pleats, casual pleats, goblet pleats, knife pleats, box pleats, and many other types of pleats are available.
Pleats, as you can see, are quite the art form. However, each of these solutions is a significant increase to your drapes. In most cases, the same pleat tape and hooks can be used for all kinds of pleats.
In addition to adding depth and dimension to the top of your curtains, all of these options will allow them to gently ripple and rest elegantly against your wall.
When compared to simple gathered, grommet, or tab top curtains, I prefer this style.
With those alternatives, putting in the pleat tape was by far the simplest curtain I’ve ever made.
This pleat tape may be easily added to any pre-made curtains.
Pinch pleat curtains can be created by sewing pleat tape on the back of the top of curtains that have a basic casing where the rod or clips can be inserted.
HOW TO MAKE PINCH PLEAT CURTAINS FOR YOUR LIVING ROOM
I bought fabric yardage and used it to make curtains for our living room. Pure linen in a dark natural tint is heavier and more durable than regular linen.
Anyone who has known me for any length of time is well aware of my unhealthy adoration with fabrics made entirely of linen. In fact, I’ve just launched a new shop selling my handmade linen products to you. Check out the new goods and colors I’ve added recently!
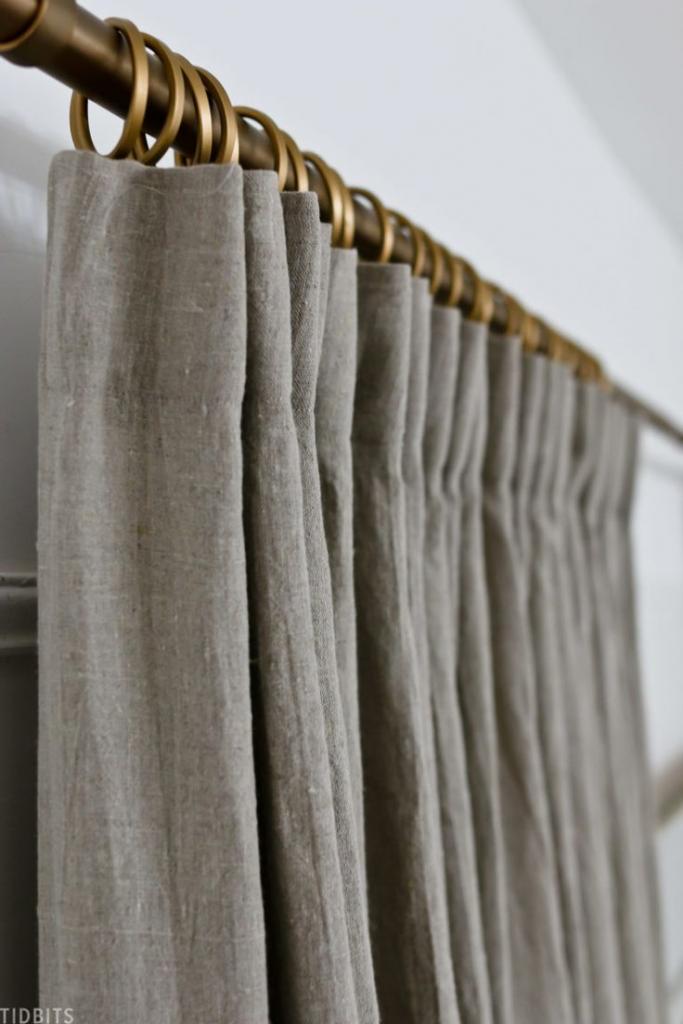
Having sewn in the pleat tape, I pulled out my hooks and experimented with them until I found the style I liked best. I ended up falling in love with the aesthetic of a casual goblet or cartridge pleat, which has a pretty tight gathered look.
In order to achieve this appearance, I just placed one side of the prong into the slot. The other prong was inserted after five pleat spaces were counted. Below and in my video above, you’ll be able to watch this technique in action.
In contrast to typical pinch pleats, which are firmly gathered and then spaced apart, this one provided a wonderful continuous pleated or gathered effect that I found appealing.
SUPPLIES FOR DIY PINCH PLEAT CURTAINS
Let me show you how to make your own curtains from start to finish, so you can save money and time.
PLEAT TAPE
Pleat tapes come in a wide variety of styles. An inch apart is how far between the pleat casings are on this basic, multi-purpose model.
Pull pleat tape is available that contains strings that you may pull to create a really tight pleated effect.
Pleat tape is a staple of many outfits, and I love how versatile it is.
PLEAT HOOKS
Pleater hooks are required, and these, too, are available in a variety of designs. The four-pronged hooks are the greatest all-around hooks for me.
CURTAIN RINGS
Use curtain rings with eyelet holes to hang the pleat hooks, and make sure the rings are the proper size for your curtain rod.
FABRIC
Xem thêm : How To Wash Curtains? Effective Guide For You!
Your fabric or pre-made curtains are obviously required.
As a reminder, you should plan for at least half the width of your curtain panel when all is said and done because of pleats.
My fabric was 50 inches wide, and I realized that even after pleating, half of that wouldn’t be enough fullness. As a result, I purchased two pieces of fabric and sewed them together along the long edge to form a panel that was 100 inches wide.
Finally, after a lot of pleating, I was left with a nice fullness in the top.
In fact, I bought a half-yard more than I needed, hung them on the floor, and then hemmed them to my desired length.
HOW TO MAKE PINCH PLEAT CURTAINS WITH SEWING MACHINE
Standard sewing materials are required in addition to these. To get the best results, you’ll need to press your garments.
STEP 1: PREPARE FABRIC
To avoid shrinkage issues when washing the curtains in the future, I washed and dried my fabric. Linen gets softer and tastier when it is washed.
As well as extremely wrinkled, therefore I spent a lot of time pressing my cloth to get rid of all those wrinkles.
STEP 2: HEM SIDES
Initially, I simply hemmed the sides of the fabric by tucking in the raw edges.
STEP 3: HEM THE TOP OF PANEL
Stitching the raw edge down about 12 inch was all that was needed to prepare the top of the curtain for the pleat tape. Preparing the raw edge before starting to pin the pleat tape in place will be much easier using this method.
STEP 4: PIN IN PLEAT TAPE
On my ironing board, I pressed the fabric, then folded the panel’s top edge over where the pleat tape would be applied.
As a result, I used the pleat tape to measure how much the cloth needed to be folded over before pinning it in place.
After that, I pinned the pleat tape in place and pressed that fold down. Rather than exposing the raw edges of the pleat tape, the tape’s edges are folded over.
STEP 5: SEW EVERYTHING TOGETHER
After that, I sewed the pleat tape into place along the panel’s top, bottom, and edges using my sewing machine.
If you stitch the prong apertures in the pleat tape, you won’t be able to insert the prongs.
For both the front and back, try to maintain a consistent seam allowance as you sew around.
Afterwards, I recommend ironing all of the hems and seams to ensure that the panel looks clean and polished.
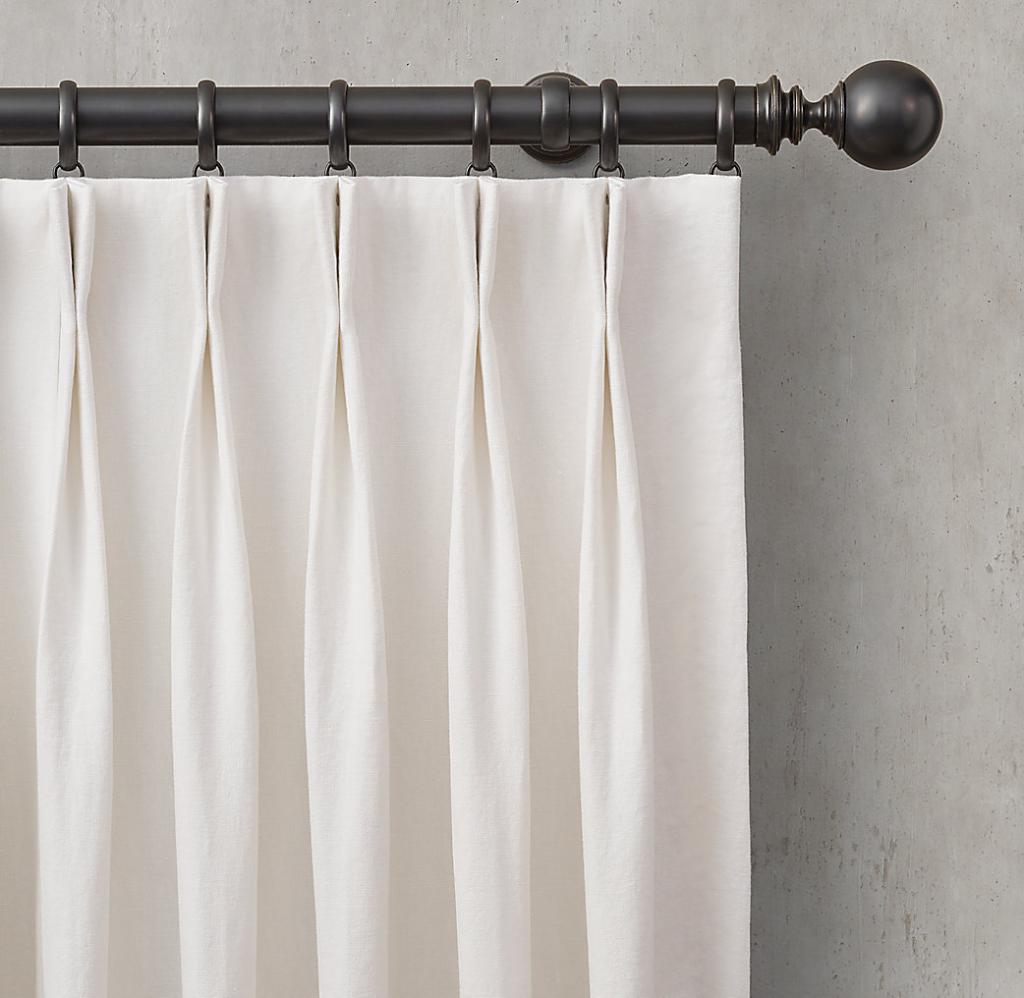
Every fifth pleat spot, I inserted a prong, and I did this for all of the panel width.
Inserting the rings onto the hooks is easy once the prongs are in place. Just use the eyelet point on the rings to guide them onto the hooks.
The rod fit into the rings much more easily when I was on the floor than it did when I was hanging, and it was much quicker to do it that way.
Then you may display your hard work on the wall!
ARE DIY PINCH PLEATED CURTAINS RIGHT FOR YOU?
Pleated curtains have one drawback… Your curtains won’t be able to un-gather and close to cover your window because they’ve been pinched together.
They’re more for aesthetics than practicality, but don’t they look great and feel great?
Natural blinds are available if we need solitude or want to reduce the amount of sunshine coming into our home.
These are the Spree Studio Bali Natural Shades, which I purchased from Blindsgalore.com. They can be raised and lowered without the use of any ropes or pulleys. Their blinds are gorgeous!
Pinch pleat curtains can be made by sewing pleat tape into your curtains. I hope you found this tutorial helpful. Definitely give it a shot!
Just in time for the holidays, I’ve finished redecorating my living room.
Come back later to see the progress of my seasonal decor and then the reveal of my living room!
Final Words
I hope this article has answered all of your questions on how to manufacture pleated curtains.
You may save a lot of money by making your own pleated curtains.
You’ll only need the necessary equipment and some free time to get the job done. Voila! Now you have the pleated curtains you wanted.
Please know how much we appreciate your commitment to finishing the piece.
Nguồn: https://iatsabbioneta.org
Danh mục: Curtains


