Created by sewing four four-patches together, this mini-quilt top features a stunning patchwork design. If you need more information or a refresher on 4 Patch blocks, I have a great tutorial for you. Please join me as I demonstrate how to make this patchwork quilted cushion!
You’ll quickly see that making a quilted patchwork cushion is no easy task. In terms of size, it’s ideal for either a bed or a couch in your living room. It’s not like sewing and quilting a full-sized quilt, even if the project is hefty in size.
Bạn đang xem: How To Make A Patchwork Pillow? Special Tips and Tricks
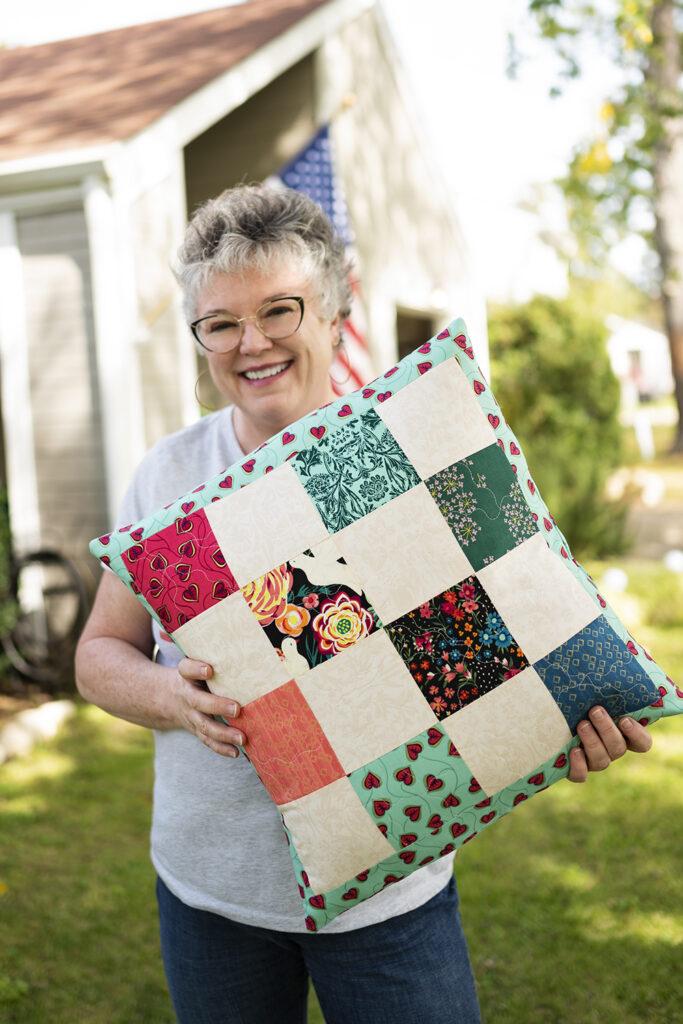
I think this pillow is a wonderful example of a quilting project that doesn’t require a lot of time and effort to create. And there’s no complicated quilt binding to deal with in the end.
How to construct the patchwork mini quilt top:
- Make four different four-patches. ‘ Charm squares, which are 5′′ squares, were left over from my larger quilt project.
- Trim each finished 4 patch to an 8.5-inch square, then sew them together.
- The four patches should be sewn together into a single piece.
- Make sure the end product is 16′′ square.
Here’s the beautiful mini Quilt top before I added the border fabric and sewed it into an envelope pillow.
Envelope pillows have two pieces of fabric sewed together so that they overlap the opening on the back of the finished cushion. If this is new to you, let me explain. Adding and removing the pillow stuffing is made simple by using a pillow form. This makes it simple to switch out the cushion cover whenever the mood strikes. Alternatively, the cushion cover can be readily washed as needed.
Here is the Material list for the Quilted Patchwork Cushion Project.
- 16 x 16-inch finished size for the Mini quilt. A panel print or a solid cut of fabric could be used instead of a patchwork quilt if that’s what you prefer.
- Two strips, each 20 x 2.5 inches long, are required. The top and bottom borders are here.
- Cut two 16 x 2.5-inch strips. To the left and right, there are borders.
- 1 piece of 19 x 15-inch background fabric.
- A 19 x 12 inch piece of background cloth.
- 19 x 19-inch squares of quilt batting. Small projects like this one necessitate the use of fusible quilt batting.
- Cotton thread.
- The pillow form is 18 x 18 inches in size.
Tools for making the Quilted Patchwork Pillow
- a quilting ruler that measures 6 feet by 24 feet.
- A rotary tool
- A pair of fabric scissors or pinking shears
- Chopping Block
- Presser Foot for hemming the envelopes
- 1/4-inch piecing press foot
- Quilting the cushion top with a walking foot.
- Stitching Device
- Iron with Hot Water
- a board for pressing clothes on
- Gauge the Seam
- Using a Starch Mist
Instructions for constructing the Patchwork Pillow:
- Using the instructions above, make the 16 x 16 inch patchwork mini quilt top.
- Finish the edges of the backing fabric with hems so that the pillow form may be inserted and removed from the cover with ease. Sew a 1-inch hem on the 19-inch side of the fabric with the seam gauge. Place by pressing firmly. Steam the raw edge into place after pressing it under and meeting the press line. Using this method, you may conceal the exposed raw edge of your fabric. Topstitching is done using a needle and thread. The stitch length was 3.5mm, and the stitch width was 3.5mm.
- The border strips should be attached to the patchwork fabric with a 1/4′′ seam allowance. The east/west axis of the quilt top is a good place to start. The cloth used for the sides was cut to a size of 16 inches wide by 2.5 inches high. Make sure all sides are on before pressing the seams open.
- To complete your patchwork front, sew the remaining strips to the top and bottom with a 1/4″ seam allowance each time. The north and south axis of the quilt top are seen here. Press the seams open after they’ve been sewn together.
- Using the manufacturer’s instructions, lay down the quilt batting on the surface.
- In order to finish the mini-quilt, use the walking foot to quilt it.
- The sides of the quilted mini quilt top should be squared up. Make a 19-inch-square cut.
- Lay the patchwork front right side up on a flat surface. Position the bigger hemmed back piece into place, lining up the raw edge at the top of the patchwork front and flipping the cloth right side down.
- Position the smaller hemmed back piece into place, matching raw edges along the bottom edge of the patchwork front.
- To keep the parts together, use a lot of pins.
- All the way around the pillow, sew with a 1/2′′ seam allowance. Using a 2.5mm stitch length, sew twice or three times where the rear panels connect. In order to create a more consistent sewing, I used a walking foot to sew things together.
- Trim the pillow’s perimeter using pinking shears once you’ve completed sewing. This prevents the fabric from fraying over time. Trim the corners with care for the best results.
- Remove the pillow from the case and re-steam it.
- Insert the cushion or pillow shape. Polyfil can be used to fill in the corners if desired. But I did it in mine, and the corners look great.
- Enjoy!
Some tips and Tricks for putting the Patchwork Quilted Pillow together:
It’s preferable to first sew two finished blocks together to make rows and then stitch the rows together while sewing together the four patches.
There is a lot of piecing involved in this project, but it can still be accomplished in just a few hours. Finish the pillow the following day after you complete your small quilt top. It is possible to piece the quilt top in the morning and finish the pillow in the afternoon if you are so inclined.
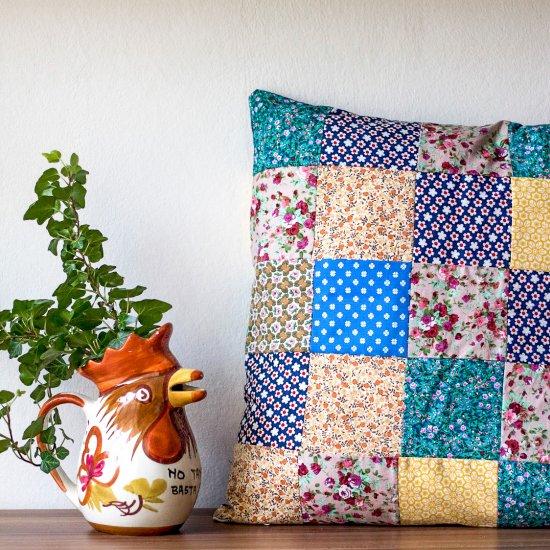
A patchwork pillow is a great way to use up scraps of fabric or to experiment with a gorgeous charm pack. In the event that I acquire a charm pack, I always get a yard or two of a neutral and another coordinating yard or two of a vibrant print in the same line to use for backing, sashing, or binding. As a result, you’ll always have matching fabrics in your charm packs when the proper project comes along if you buy them together.
As someone who prefers visual instructions over written ones, I hope you like this video on how to make a patchwork quilted cushion for yourself.
A Closer Look at What Patchwork Is
Sewing small pieces of fabric called “patches” together forms a patchwork, which can then be used to construct a larger piece of fabric. In other words, you can simply opt to build patchwork by putting together pieces of similar-shaped or even identical patches.
Xem thêm : How To Use Twin Z Pillow? Comprehensive Guide
Despite the fact that this form of material assembly is commonly referred to as patchwork, others use the term piecework to describe it. Even though some quilters and crafters continue making these pieces by hand, others prefer to utilize sewing machines.
What are the Different Types of Patchwork?
If you’re not already aware, patchwork comes in a variety of forms and is categorized accordingly. The number of components in each quilt block or the specifics of the patchwork’s overall layout are used to name these categories. Here are a few examples of these types:
One patch quilts
The recurrence of similar shapes is a common feature of these designs.
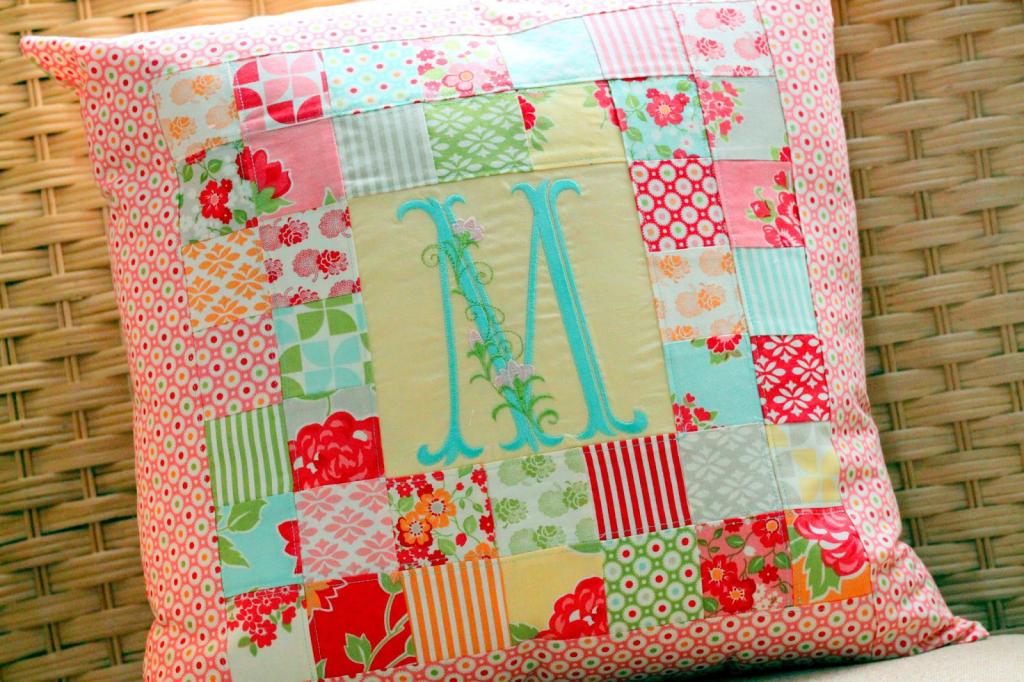
Four patch quilt blocks
Four patches or pieces of cloth are put in twos across and down in this style of patchwork, as the name implies. Patchwork forms can be broken up into multiple sections in some circumstances.
Five patch quilt blocks
A total of around 25 patches are included, grouped five patches across and five patches down. It is also possible to divide each patch.
Seven patch quilt blocks
Across and down, there are seven distinct patterns. It is possible for each piece to take on a new shape. Seven patch blocks, on the other hand, are extremely uncommon to come by.
Your Guide on Making a Patchwork Pillow
Making a patchwork cushion can be as simple as looking for a variety of patterned fabrics and cutting them into squares. The cushion will be made up of a variety of materials, resulting in a visually appealing final product.
Using historical patterns is also a good idea because they are now in style. Sewing patchwork pillows that match your actual or desired interior style will save you time and money over paying for them at the mall.
Step 1: Prepare all materials needed
All you’ll need is a central pattern for the center cut, fabric stocks, 18″ square batting, spray basting (if you choose to go that route), a Hera marker, matching or neutral thread, an envelope back measuring 16″ by 13″, and a top envelope measuring 16″ by 8″.
A 16-inch square pad and broad binding measuring 70″ x 1 34″” are also required, as with sewing supplies like scissors, rotary cutters, rulers, mats, and thread for sewing machines.
Xem thêm : How To Add Cording To A Pillow? Step by Step Instructions
It’s a good idea to divide the parts into basic sizes because there are no defined proportions. For example, if your center cut measures 4 12′′ high and 3 1/2′′ wide, the fabric pieces you’ll need to add are 412′′ in size.
Step 2: Getting started
To begin, find the center of the batting by folding it in half halfway through. Then place your fuzzy cut’s centerpiece on top. This initial piece can be sprayed to blend.
Use a Hera marker to draw a line down the center of the fuzzy motif. Both a horizontal and vertical line can be used. Until all necessary lines are drawn, this first line will serve as a guide.
Use a neutral thread and a long stitch length to sew the lines together. Before cutting the fabric, sew on each side of the line. For the following lines, a 3.25 stitch length can be used as a guide.
Step 3: Stitching other fabrics
You can now use a different pattern on each side. For example, if your pattern measures 4.5 inches in length, cut a piece of cloth that is 4.5 inches in length and measure how big it is.
Remember to provide for a quarter-inch seam allowance at all times. After that, align the ends of the cloth on your side and place the first section on the second piece on the right side. For a quarter inch, sew along the seam’s outside edge.
Step 4: Work on the back part
The back of the cushion cover is now ready to be worked on. Cut a different cloth to use for the back. Every extra inch should be left around the edges and a complete inch down.
It is possible to hem the lowest portion of the backcloth. This is another another attempt to limit the number of raw ends on the cushion cover. You can do two ironings and a quarter-inch of stitching to finish it out.
Step 5: Install a zipper
Zippers are now an option for you. Then, with the zipper in place and the fabrics facing the correct direction, attach the two ends with safety pins. This is where the French sewing method got its start.
After that, flip the cover over and sew around the edges on the backside. Every time you sew this piece, you can do so twice. As a result, it would be a nuisance if a seam were to tear while inserting the pillows into the cover.
Final Thoughts on How to Make a Patchwork Pillow
When making a patchwork cushion, choosing a range of fabrics is the most crucial stage. Because they will be sewed together, it is best if the designs and motifs on these fabric pieces match. In any other case, the pillow cover would be an eyesore!
When it comes to making a patchwork pillow, this tutorial is a breeze if you follow the instructions carefully. You don’t have to go to the mall to find pillow covers; you can easily create your own cover that is perfect for your house.
Nguồn: https://iatsabbioneta.org
Danh mục: Pillow


