I’m now working on a number of other projects, which I want to present to you in the near future. I’ll do my best to take better pictures so you can see exactly how I built these things. For the time being, I’m occupied with new endeavors!
SUPPLIES FOR NO-SEW BRAIDED-EDGE FLEECE PILLOW:
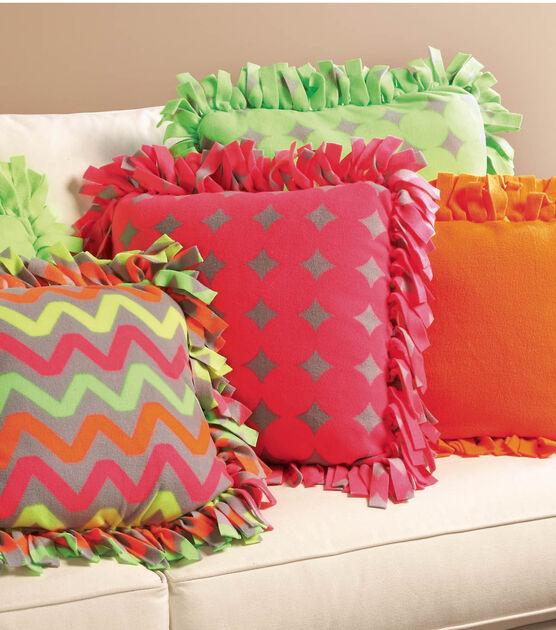
Half a yard of two complementary fleece colors, a 16-inch Poly-fil Soft Touch Pillow Insert (or other size as specified). I like to pair a colorful print with a more subdued solid color to create a cohesive look. Using a half-yard each of two different fleece fabrics, you’ll be able to cover three pillows. You’ll just need half a yard of one color of fleece if you want the front and back to match. When utilizing a different-sized pillow, you’ll need to buy enough fleece to cover the pillow’s dimensions, plus 2 inches. For a 20-inch pillow, you’d need a piece of fleece 22 inches long, and so on. Fleece, on average, is 60 inches long.)
Bạn đang xem: How To Make A Fleece Pillow? Complete Step-by-Step Guide
Tools:
- Scissors with a tape measure, or a rotary cutter and a cutting mat
- A pair of scissors with a keen point
- a big crochet hook or paperclip
- a piece of tape used for masking (optional)
I used my cutting mat and rotary cutter to make an 18-inch square for my 16-inch pillow. It’s best to cut your fleece squares at least 2 inches larger in each direction than your cushion. In addition, scissors and a tape measure can be utilized. It’s okay if some of your squares are a touch wonky… This undertaking is extremely forgiving.
The masking tape is not really necessary, but I use it to mark two inches in on each side to make cutting the fringe easier. The shot doesn’t show it, but I also cut out my blue square. In other words, it sits immediately on top of the tie-dye fleece.
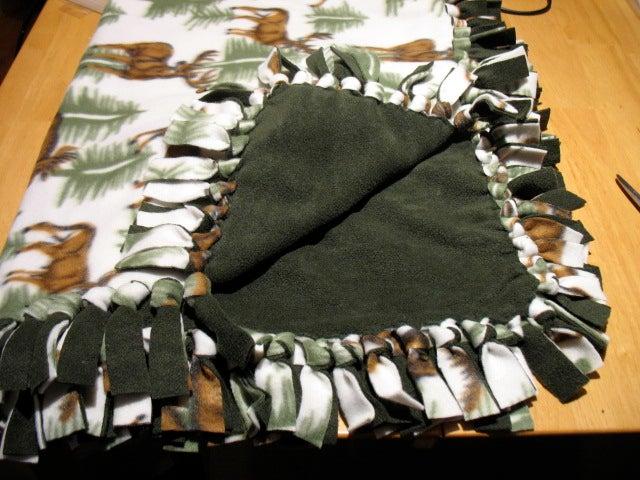
However, as I lack a large crochet hook, I prefer to partially unwind a paper clip to use as a hook. You’re now ready to put the pillowcase on. One piece of fleece should be placed on top of your pillow, while the other piece of fleece should be placed on the bottom. Keep the softest side facing outward.
Choose one of the fringe pieces in the middle of the fleece bottom piece. Catch the matching bit of fringe from the top piece of fleece with the paper clip through the slit. Pull the bottom fringe all the way up to the top of the headband.
Using a paper clip, attach the top fringe to the paper clip at the bottom by slipping it through your first fringe piece and pulling it through again. It’s up to you.
Make sure to alternate between the top and bottom of each piece of fringe as you go around the corners.
Slit it in half, and you’ll have two little pieces of fringe instead of one large one.
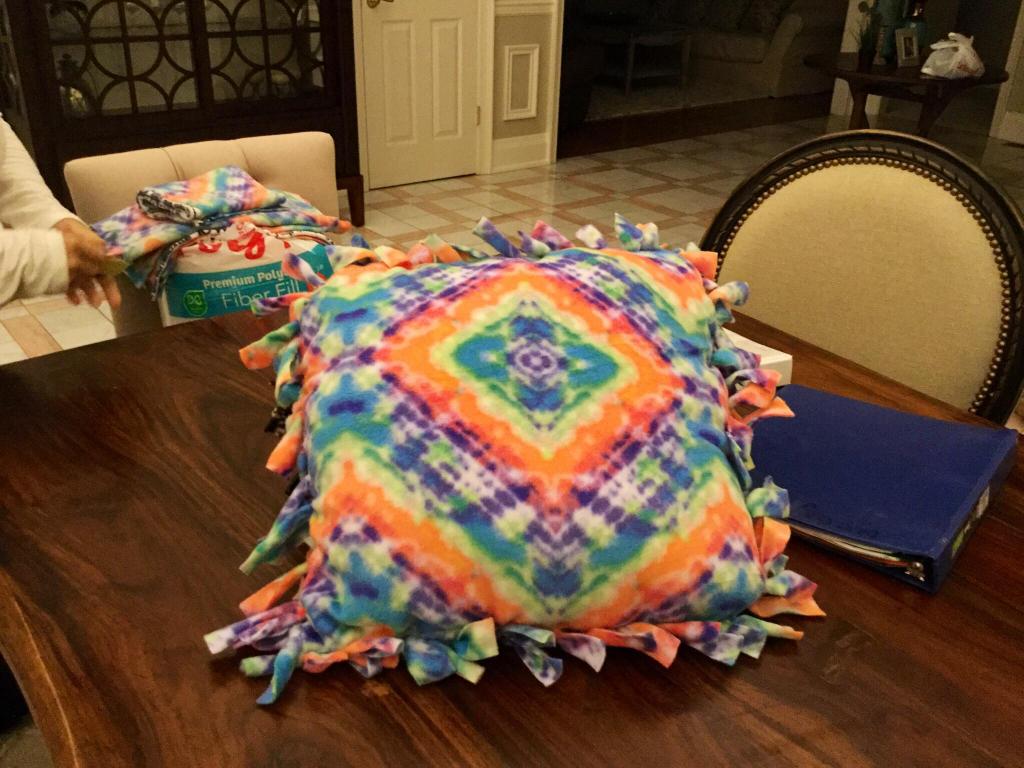
These can be used to make a double knot around the fringe you started with. Make a knot in your hair and tuck the ends inside your pillow.
There you have it! Your new cushion is waiting for you, so enjoy it!
There are a lot of people who question me if this “braided” method works. The pink blanket in this photo was produced about 4 years ago and is still in excellent condition.
Make a single or double-thick fleece blanket using this method. By clicking on the photos below, you can access my tutorials.
Steps To Make A Fleece Pillow?
Is this a pillow you made yourself? Great! In this tutorial, I’ll walk you through the process of making a fleece cushion from start to finish.
Step #1. Completing the materials needed
Xem thêm : How To Quilt A Pillow? Everything You Need To Know
Because of this, we couldn’t begin this process until we had all of the supplies we would need. For this project, you want to make sure that the materials you use are of the highest quality.
To do this project, you’ll need any color of fleece, a needle, and yarn.
In addition, you’ll need a cushion or polyester fiberfill, a glue gun, and glue sticks, which are optional but highly recommended.
If you’d like to decorate your cushion further, some of this is optional. Nonetheless, it is up to you to decide what you like.
Step #2. Cutting out
You’ll need a 23-inch width and a 19-inch height for your fleece. Cut two pieces of the measurements I previously provided..
The two pieces should be placed on top of each other and cut equally, avoiding any uneven cuts. We’re ready to go on to the next step now.
Step #3. Stitching the fleece
In order to hand stitch the fleece, you just need to sew three sides of the fabric.
Polyester fiberfill cannot be used to fill the cushion if the four sides are sewn.
Before sewing the cushion, you need to ensure that the texture doesn’t shift. Make a double bunch near the edge of the pad at this point.
It is time to start stitching after assembling the bundle.
Your line should be about a half-inch above the texture, and then you should go under the rest of the texture by a comparable distance.
Step #4. Putting in the pillow
Before you apply the pad, you must first turn the padded fleece back to the front.
The polyester fiberfill can be used to stuff the pad cover, or a normal cushion can be used.
The fleece pillow is just a few more steps away.
Your efforts will be well-received as long as you keep your patience.
Step #5. Stitching the last path
Xem thêm : How To Clean A Bamboo Pillow? Everything You Need To Know
To finish the craft, all that is left to do is sew the final piece of your cushion together.
It would be excellent if you followed exactly what you read in the previous section. After this, you’ll be done with your project. You can, but it’s an additional cost.
Step #6. Attaching the letter of choice
Let me know if there’s anything else I can do for you! Here you have it. You’ll get a better idea of what to do next after going through this phase.
Think of a letter that would set the tone for your entire day if you saw it first thing in the morning.
Using a different color of fleece, cut out whatever letters you wish to add to the cushion.
The letter can be removed by cutting it along the line that corresponds to the letter on the pad that you need to delete. It’s up to you whether you want to sew the letter in or simply glue it in.
Step # 7. Putting decors
We’ll be putting the finishing touches on this area soon. In this case, the yarn I mentioned earlier will be employed.
Pom-poms can only be made using hair picks that have been folded over at least a hundred times.
When you’re done wrapping, tie a piece of twine around it and cut all of the circles in the pom pom.
Cause number four, and then use the extra string from the tieing to tie it to the pad’s edge.
If you’d like, you can add more embellishments to the pillow.
Step #8. Patting the pillow
Enjoy the effort you’ve put into your pillow’s fleece. To learn something new is always a positive thing. With your fleece cushion by your side, take in the sunrise.
Conclusion
It is true that you performed a fantastic job! How to Make a Fleece Pillow is now a thing of the past!
You can buy one online if you don’t have the time to make one. There could be a slew of choices available to you.
There is only one way to ensure that your fleece cushion meets your needs to the letter. It’s a very different experience when you do it on your own.
Nguồn: https://iatsabbioneta.org
Danh mục: Pillow


