Hanging curtains can be a frustrating task. The following are five methods for hanging curtains without causing damage to the walls or window frames:
No one understands this better than us: hanging curtains is a pain. Frustrating is an understatement when you get out the ladder, take measurements, drill into the wall, and then discover your curtain rods are crooked.
Bạn đang xem: How To Hang Wall To Wall Curtains? A Few Tips to Remember
Fortunately, there are quicker and less time-consuming methods for hanging curtains.
Whether you rent or own your home, you’ve come to the right site if you’re looking for a simple way to hang curtains. Today, we’ll go over a few solutions that will allow you to hang curtains without the use of nails, screws, or drills in your home.
Read on to learn more about how to properly hang curtains.
Let’s get started, drill and spackle at the ready.
Hundreds of articles have been written about the many uses of Command Hooks. To hang artwork, photos, and keys, or to mount anything on the wall, including window treatments, you can use hooks like this one.
1. Use 3M Command Hooks
Command Hooks for Curtains: A Quick and Easy How-To
- To hang your curtain rod, you’ll need at least two Command Hooks. You’ll need a third Command Hook to hold up the middle of a window that is broader than 30 inches.
- Measure your curtains and note where each hook will go on the wall.
- Apply the Command strip adhesive on the hook by peeling the backing off of it.
- For at least 30 seconds, press the Command Hook firmly into the wall and repeat with the other hook.
- Hang your curtains at least 30 minutes once they’ve had time to dry.
PROS:
- The application and removal processes are quite simple.
- Available in a range of colors and textures.
CONS:
- To achieve an even hanging, you must measure and mark your wall.
- Only thin curtain rods are compatible with Command Hooks. It is impossible to use a Command Hook with a curtain rod that is thicker than 3/8″ in diameter.
- Heavy curtains or drapes, as well as those subjected to the regular use of children and dogs, should not be hung from a large Command Hook, which can only carry seven and a half pounds.
- Command It is impossible to use hooks on wallpapered walls since they require a flat surface.
We’ve reached the following conclusion regarding command hooks:
Price: Command In addition to individual hooks, you can purchase hook sets. Size and finish have a significant impact on price. Both online and in brick-and-mortar retailers sell them.
2. Use Kwik-Hang Curtain Rod Brackets
Hanging curtains can be made much easier by using Kwik-Hang curtain rod brackets, which eliminate the need for precise measurements and the resulting damage to walls.
Kwik-Hang alleviates the agony of both of these chores. Their new bracket design is easy to install, requires no measurements, and does not damage the wall. Additionally, they can support up to 20 pounds, allowing you to hang heavy draperies with ease. Kwik-Hang curtain rods can be installed without the use of a drill, resulting in consistently aligned drapes.
How to Hang Curtains with Kwik-Hang Brackets
- Curtain rod brackets should be placed at the window’s four corners.
- Once you’ve tapped them in with a hammer, the job is done!
PROS:
- With just a few hammer hits, this may be placed in a matter of seconds.
- Screws, nails, and drills are not required.
- You can pick from a wide range of colors and textures.
- Supports a maximum weight of twenty pounds.
- If you remove the brackets, there will be no holes in the wall.
CONS:
- This product is only suitable for framed windows.
Kwik-Hang gets a thumbs-up from us.
Price: Kwikhang.com’s sets start at $11.99 each.
Our no-drill, no-damage curtain rod bracket technique is patented by Kwik-Hang.
3. Use Tension Rod Curtains
Xem thêm : How To Store Curtains? Everything You Need to Know
Adjustable tension-rod curtains are able to cover a wide range of window sizes by extending from one side of the frame to the other. There are no difficult measurements or installation required to put them in place.
How to Hang Curtains Using Tension Rods
- Choose a tension rod based on the dimensions of your window frames as closely as possible (measured on the inside of the frame).
- To see if the tension rod is working properly, turn it in and out of the window frame until it is snug.
- Your curtain should be threaded onto a metal curtain rod before being reinserted into its window frame.
PROS:
- No measurements or hardware are needed for installation, making it a snap.
- For sheer or light curtains, tension rods are the best option.
- Cafe curtains can be hung from the top or middle of the window.
CONS:
- Drapery and blackout curtains can’t be supported by tension rods since they’re too heavy.
- In the course of use, tension rods might become brittle and slip.
- Custom rods, which can be expensive, may be required if your window is particularly large.
Tension Rods Get Our Approval:
From $5 per rod, available at home improvement and/or retail stores.
4. Get Creative With Coat Hooks
Coat hooks can be used in a variety of ways. You can hang curtains from them as well as use them to carry raincoats and luggage.
How to Hang Curtains using Coat Hooks
- Determine how many curtain hooks you’ll need to hang them.
- You’ll need to add a couple of inches to this measurement to account for the extra length of your curtains.
- The distance between your coat hangers should be evenly distributed.
- Hang your curtains on hooks attached to the wall or window frame with care.
PROS:
- Traditional curtain rod hardware is more difficult to install than coat hooks.
- You don’t need to drill holes to hang coats with coat hooks.
- Coat hangers are a low-cost, but interesting, addition to any room’s decor.
CONS:
- For uniform distribution, precise measurements are needed. This measurement procedure can take a long time.
- It’s tough to open and close curtains that are strung from coat hooks.
With regard to coat hooks, our verdict is:
Cost: Starting at $5 per hook, these hooks may be found at department stores and home improvement stores alike.
5. Try Magnetic Curtain Rods on Metal Doors
If you don’t want to drill holes in your walls, consider using magnetic curtain rods. If you’re looking for a way to hang curtains over a metal door, consider magnetic curtain rods.
Instructions for Hanging Curtains on Magnetic Curtain Rods
- Make sure you know what size window you have by taking a measurement.
- To ensure your magnetic curtain rod bracket will fit in the area between the window and door edge, measure this distance beforehand.
- After attaching the bracket to your metal door, you’ll need to string the curtain rod through the loops and secure it in the bracket.
PROS:
- Installing is a breeze.
- Adjustable widths are an option.
CONS:
- Heavy drapes aren’t suitable for magnetic curtain rods, such Command Hooks. Only eight pounds can be supported by the curtain rods shown here.
- If utilized in an area with a lot of traffic, it can become out of alignment.
- Fabric sway is best controlled with top-and-bottom rods.
- Not as cheap as comparable non-drill curtain alternatives.
Magnetic Curtain Rods: Our Opinion
Materials and finishes affect the price. It costs $41.99 to buy the magnetic rod displayed.
The #1 Way to Hang Curtains Without Wall Damage
It’s always best to use Kwik-Hang damage-free curtain rod brackets and holdbacks to hang your curtains without causing any damage to the walls.
You can hang curtains without drilling with Kwik-Hang!
- Supports various types of drapes and fabrics with its sturdy, solid design.
- There is no need to measure, drill, or make any other modifications.
- Obtain consistently aligned drapes.
- Every room in your house can benefit from this low-cost option.
- Elegant and harmoniously blends in with the rest of your home’s dcor
For single and double curtain rods, Kwik-no-drill Hang’s hardware comes in a range of colors. For curtain rods longer than 30 inches, center support brackets are also available.
Xem thêm : How To Hang Pocket Rod Curtains With A Pin Hook? Step-by-Step Tutorial
Try Kwik-Hang right now!
How to Hang Curtains in 4 Easy Steps
Gather Your Equipment and Supplies
- Curtains
- Hardware for curtain rods
- Ladder
- Measurement using a piece of tape
- Pencil
- Level
- a drill and a bit
- a pair of goggles
- Stumping device
- In-wall anchors (if needed)
- Iron
Secondly, take measurements
For curtains and rods, measure your windows to ensure that they are the right size. Measure the width of your window and add eight to twelve inches to get the rod’s length. Your window’s width should be the minimum width of each curtain panel. Curtains should be at least two inches long, measured from where the rod will be mounted (typically four to six inches above the window). If you want the draperies to pool, add extra length.
Installing Brackets is the third step.
The holes for your brackets should be marked with a pencil first. Brackets should be positioned four to six inches from the window frame at the height you previously calculated. (You’ll be able to fully open the drapes this way.) Unless you double-check your pencil marks to ensure that they are all level, your window treatment will look off. Check the alignment of your brackets with a stud finder. Once you’ve drilled the holes, you’ll need to add wall anchors. Screw the brackets to the wall after drilling holes in them.
6 Pro Tips for Styling and Hanging Curtains
1. Fake high ceilings by hanging your curtains as high as possible.
You may make your flat feel more spacious by lowering the height of your drapes. When this is done, it will provide the impression of a higher ceiling.
2. Find a classic design that won’t go out of style.
Interior designer Melissa Warner Rothblum, who owns the Los Angeles-based firm Massucco Warner Miller with partner Julie Massucco Kleiner, adds that making a decision on curtains that are “quite permanent” is overwhelming. Finding a design that doesn’t feel fussy and won’t go out of style is the most important aspect. According to Kleiner, “people think draperies are outdated, but they don’t have to be.” Adding tape trim or sewing multiple fabrics together to create a personalized pattern gives them a contemporary edge.”
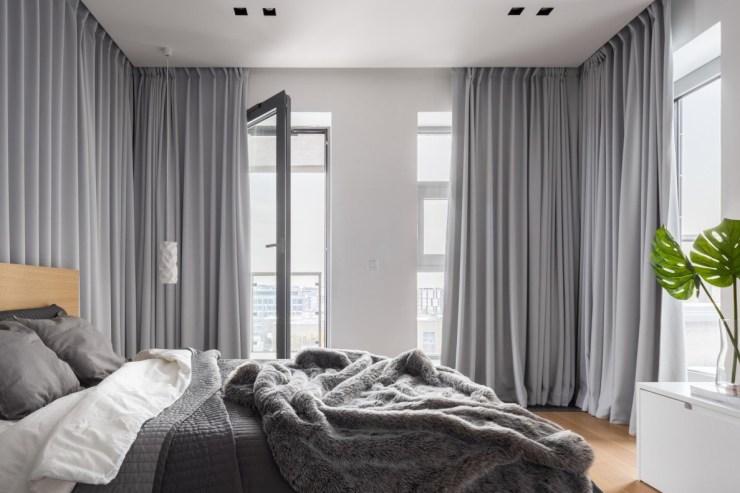
3. Opt for curtains that graze the floor.
Consider the proportions; the length should just touch the ground. By a few inches too short, the most common drapery mistake is made, says Rothblum, “and they don’t appear like they fit.” Make sure the fabric is at or below the floor or an inch above the floor. If the length you require falls somewhere in the middle of the available options, go with the longer one. If they’re excessively long, have your dry cleaners or tailors hem them.
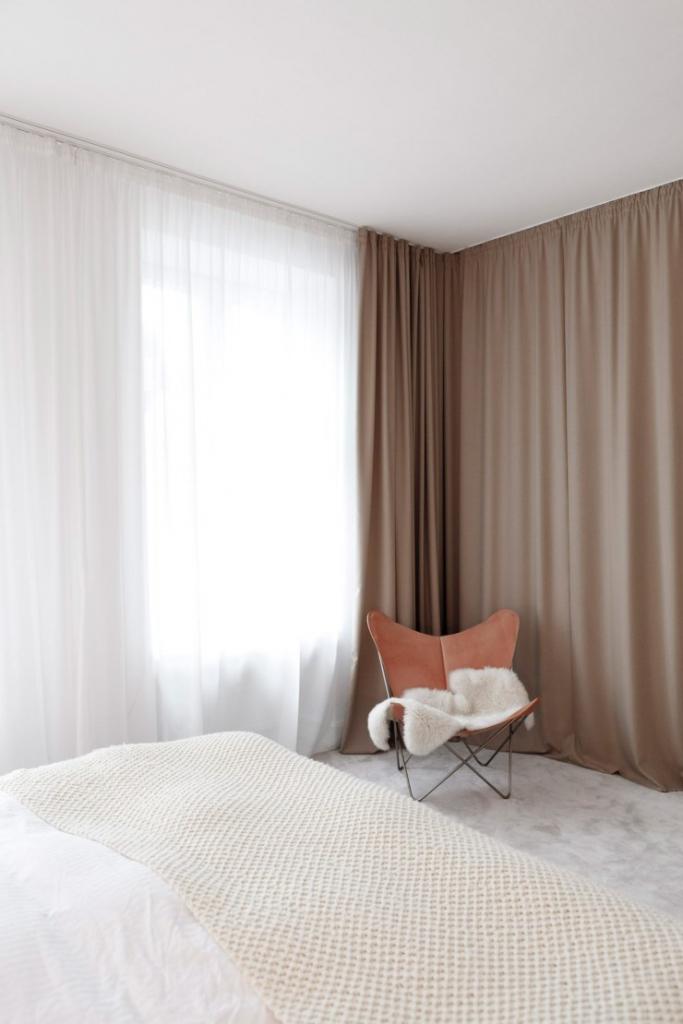
4. Do choose a fabric that compliments the vibe of the space.
Check to see if the cloth complements the décor. Lavish textiles like linens, which allow more light into the room, are ideal for living rooms. Light will be blocked and privacy will be provided by velvets and other heavy textiles. Thick window treatments might help keep drafts out if you live in a colder region or in an older home.
5. Coordinate your hardware with the curtain fabric and the room’s existing metals.
Your curtain rods and finials should match your curtains. Sheers can be hung on narrower rods than heavier drapes since the sheers are heavier. The curtain rods and finials should match the metal highlights in the space, such as a gilt pendant light or brass-framed coffee table.
6. Order curtain fabric samples.
To prevent your curtains from appearing lifeless, aim for fullness when choosing a fabric that hangs well. It’s possible to do this simply feeling the natural body of a cloth sample in your hands.
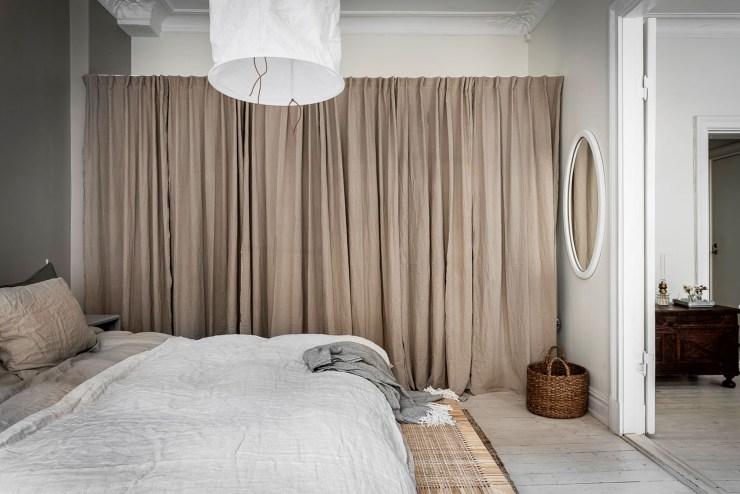
How to Use Curtains to Cover a Wall
Cracks, old wallpaper, shelving systems, bicycles, closets, and laundry baskets can all be concealed with curtains hung along a wall. A full wall of curtains, on the other hand, adds depth, texture, and color to a room. Using electrical conduit as a curtain rod is an option if you can’t find one long enough to cover the full wall. To transform your wall into a curtained focal piece, take these simple steps.
The length and width of the wall space you want to cover can be determined by using a tape measure to get an accurate reading. Make sure you measure from the ceiling to the floor in order to cover the entire wall.
Make your choice of curtains. You may give depth to your room by using textured drapes like corduroy, linen, or silk. Choose damask or velvet curtains if you want to conceal an unsightly shelving unit, closet, or damaged walls. To reduce the glare from the sun, drape sheers or lace across your windows.
Remove all of the junk from the area around the wall you intend to cover. There’s plenty of room for you to utilize your ladder and make your own curtain rods in this area.
Set-screw conduit couplings can be used to join 10-foot lengths of conduit until your rod is the appropriate length. If required, use a hacksaw to remove extra conduit. Screwdrivers can be used to tighten the couplings.
When you’ve finished making the curtain rod, place it on the floor next to the wall where you intend to hang it. The finished rod will serve as a point of reference for the conduit clamps later on.
Use a pencil to draw a little X in the area where the clamps will go. A large X will be positioned on the ceiling where the wall and ceiling meet, as seen in the illustration. Attach each clamp to the X with a drill and anchor screws in each corner. There are clamps that look like horseshoe shapes, with a screw at one end and arms that hang down. The rod can slide between the arms.
Use a tape measure to locate the rod’s center. In order to determine its center point, divide its length in half. Use masking tape to mark the rod’s center point by measuring from one end to the other. The center of a 120-inch curtain rod, for example, is 60 inches wide. Place the tape at the 60-inch mark after measuring out 60 inches from the rod’s end.
Take a hold of the rod and place it at the point where the wall and ceiling meet and hold it there. You may need help with this step. Find and mark the location where the center tape meets the ceiling on the room. The middle conduit clamp should be installed in this position. Follow the steps in Step 6 to complete the installation.
Nguồn: https://iatsabbioneta.org
Danh mục: Curtains


