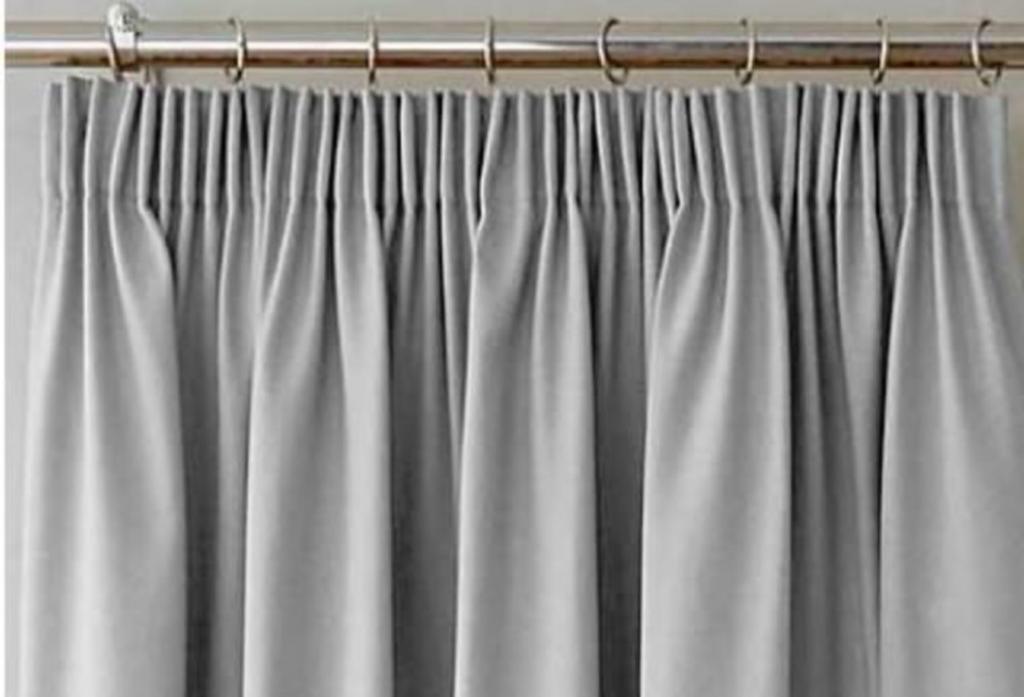
With their tightly gathered heading and stitched top, pinch pleat drapes provide a touch of elegance to any window treatment. Although these curtains are considered to be old-fashioned, they never go out of fashion. They are, in fact, the most popular choice for those who desire more privacy and control over light.
There are two ways to hang pinch pleat curtains: on a track or on a pole. What’s more, how can you hang pinch pleat curtains so that they look their best? The solution is right here in front of us.
Bạn đang xem: How To Hang Pleated Curtains? Step by Step Instructions
Step-By-Step Guide to Hanging Pinch Pleat Curtains
The first step is to make sure you have enough curtain rings or gliders to hang the curtain on a pole or track. Use one ring for each outer bracket on the poles. The hooks can now be inserted.
Hooks are attached to the pinch pleat curtain by laying it down on a flat surface and leaving a small amount of room at the top for adjustment.
Step 3: Hook each curtain panel to one side of the pinch pleat and work your way outwards from there. The hook must penetrate both the curtain’s outer material and its pleated inner material. Ensure that the hook is clearly visible by pushing it all the way through
Next, insert a couple more hooks while still grabbing hold of the pinch pleated drape to hang it on the track or pole. To ensure a proper conclusion, make sure the bottom and top locations are checked. Using a tape measure, note where the hook should be inserted if you need to reposition it. Gently insert the straight end of the hook behind each cinched pleat of the curtain with the hook’s straight end now through the top of the curtain. Each end of the curtain should have a flat piece of curtain.
Putting the curtain back on the level surface and inserting the remainder of the hooks at the same distance from the curtain’s top is the final step in the installation process. Hooks should now be attached to every pleat.
Step 6: The curtain’s outer edge must also have a hook. On both the inner and outer edges, two hooks should be placed close together.
Step 7: Hang your pinch pleated curtains on a pole or a track.
Best Hooks to Use For Pinch Pleat Curtains
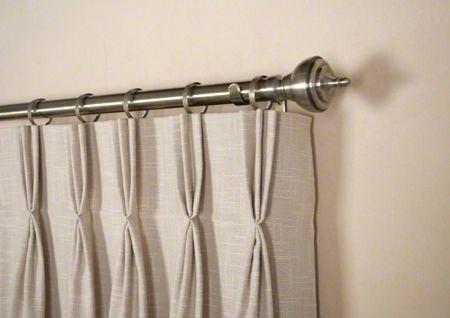
It’s crucial to know that pinch pleated curtains can’t be hung with pencil pleat curtain hooks. The upper section of the pinch pleat type hook has a sharp tip, despite its resemblance to a pencil pleat. It is possible to hang these curtains using pinch pleated hooks in h shape because the pleats are stitched into the upper section of these curtains.
Each of the pleated curtain’s sides can be pierced by these hooks. As an alternative, there are hooks with a spike on the back that can be slipped through the pleat with ease.
In this case, you can choose between four different hook positions, allowing you to precisely choose how high you want the curtain to be above the floor.
Each hook is the same size, so you must pick where to pierce the fabric before you begin sewing. Ready-made hooks for pinch pleated curtains and various window sizes are listed below:
- Choose two 75 cm wide curtains for a 120 cm window.
- For a 180 cm window, two curtains of 105 cm in width are recommended.
- A 240cm window will require two 135cm-wide drapes.
- Two 165-centimeter-wide curtains will cover a 300-centimeter-wide window.
If you’re using sheer pleated curtains, you’ll want to use different curtain hooks. Because they are termed pin hooks, these specific hooks for sheer pleated curtains must be installed correctly. The hook comes with a pin that is inserted into the pleated curtain’s back seam.
Good to Know
Make sure the number of curtain rings or gliders is equal to the number of hooks before hanging pinch pleated curtains.
– To hang your curtains, begin in the middle and work your way outwards. This saves you the trouble of taking the curtains down to add more rings if you need to.
If you want to be sure your pinch pleated curtains are the right length, hold each one up to the track or pole. Make sure to leave a 1-inch gap in the centre of the curtains so that you can fully close them.
In order to establish the number of rings needed for the hooks if you are using a track to hang your pinched pleated curtain, count the fixed end stop.
When shutting the curtain, place the first ring on the outer edge of the curtain at the end of the pole. This will prevent the curtain from slipping into the middle of the track. After shutting the pinch pleated curtain, there will be no sliding motions.
Wait a couple of weeks for your pinch pleated curtains to settle and for any creases or folds to fall out before you style them up. Take a piece of rope or ribbon and tie it loosely around each curtain to give it a finished look. Keep the pleats in place with this method A unique and even-pleated effect can be achieved by leaving the ribbon or rope in place for at least two days.
Steps To Hang Pleated Curtains
Pleated curtains: how do you hang them?
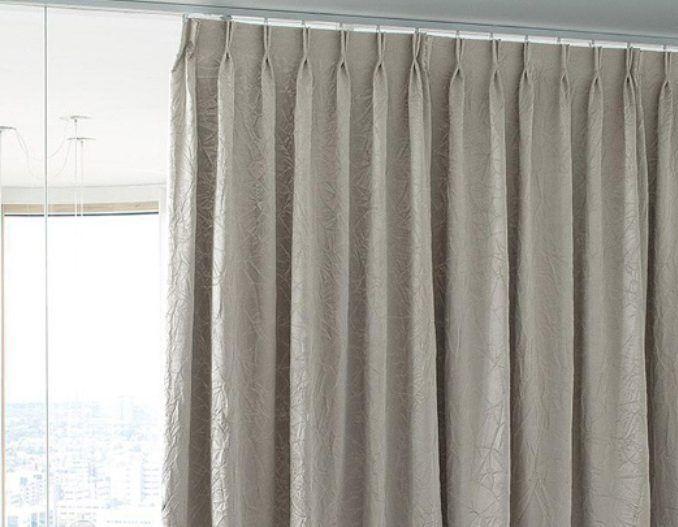
With floor-length drapes or a valance, these pleated curtains appear to have been pinned together, making them a beautiful choice for the home.
Step #1. Wash and dry curtains
Curtains are a boring subject for some designers. It’s better when you’ve gotten a good level.
As a result, your stay will be enhanced by a more appealing accommodation.
As the first step, you can simply wash your curtains.
Xem thêm : How To Make Swag And Jabot Curtains? Complete Step-by-Step Guide
Proper curtain cleaning requires knowledge of how to do it.
Your curtains’ textiles will last longer if you take good care of them.
Curtains must be handled with care.
To get the best results, use light fabric conditioner first.
Also, when it comes to drying the curtains, use caution at all times.
Once your curtains have dried, you can iron them.
Step #2. Measure the length
After that, you’ll measure the length of your curtains.
Reduce by roughly three-eighths of an inch.
After that, decide where you want the curtain hems to be aligned.
The ladder is required, especially if your window is high from the bottom measure to the top part.
You can use the pencil to label it so that you can easily identify it later on.
It’s critical that you mark and position your brackets correctly because you’ll be putting them in place later.
Step #3. Mounting the bracket
Align your bracket with the pencil mark.
Keep your bracket in place so that it is facing the front of the stage.
Use a pencil to mark the locations of the screw holes using the other hand.
Working with both hands means that your work will be easier to see.
Use your drill’s 1/8-inch drill bit as a tool to drill the pencil markings in the holes you made.
After that, switch out the drill bit for a screwdriver bit.
Then, using the holes in your brackets, reinstall them.
The mounting screws can then be driven in at this point.
Step #4. Continuing step 3
In the middle of your window, place a ladder.
Then attach your rod to the bracket you’ve already put in place, as well.
But not only on one end, but also on the bracket on the other side, even if it is not attached to anything at all.
You can use a level instrument or just look to see where the weight is evenly distributed.
Replicate and follow step 3 after that.
Step #5. Inserting pins
Once you’ve located the center of the pleat, you may insert your drapery pins.
By hooking on to it, it’ll keep your rod in place.
Xem thêm : How To Measure Yardage For Curtains? Step-by-Step Tutorial
To make the hooks the only thing visible, slide the pins below the stitches of your pleats.
A manufacturer of curtains, Castec, and a ceiling-mounted curtain have to adhere to certain guidelines.
Your drape should be one-fourth of an inch away from these curtains when they are pinned.
On the other hand, if you want to pin your drapes to the wall, they need to hang 1 and a third of an inch higher.
Step #6. Hooking the rod
The first pin can now be attached to your fishing rods.
Traversing enemies have a larger carrier slide (master) than other rods.
However, there are situations when only the hue differs.
When you open your curtains from the centre of the sides, these master slides are your key.
The curtains will open outward from the middle when they are hung.
The panel to your left is the best place to begin installing the drapes.
In this case, the hook closest to the slide should be taken into account.
In the middle of your window, you can begin working.
You need to be sure it can handle the weight.
As a result, the pins can’t be lowered.
Throughout the panels, keep repeating this.
Step #7. Pleats
Pleats can be broken. In most cases, plastic is used to generate and separate the ruffles.
You should next open your curtains completely and pinch the stiff material squarely in the middle of your head.
If you do this, you’ll get folds that stick out.
The curtains can be closed now.
It’s possible to reopen it if you wish to test the pleats.
When making pleats, folding, hemming, and other tasks will take up a lot of time.
You may be fooled by how it appears.
At first glance, it appears beautiful and understated.
However, putting it up can be a real pain, so thank goodness for the contemporary method of curtain-making.
Conclusion
We’re done with this piece now. We hope that you have gained a lot of knowledge from today’s discussion!
Thanks to our answer to the age-old question, “How do I hang pleated curtains?” You’ve gained a new piece of information.
It’s not difficult to hang a pinch pleat curtain if you know how. Your finished product will look just like it does in this tutorial. Pinch pleated curtains in your living room or bedroom can be customized to fit the height of your window.
Nguồn: https://iatsabbioneta.org
Danh mục: Curtains


