Here are some excellent crochet patterns on Instructables for using granny squares to create things like afghans, hats, scarves, bags, and more. However, I was unable to locate instructions for creating a granny square. It is my sincere desire that this Instructable serve your needs. You’ll learn the fundamentals of drawing this form from it. There are numerous images and a comprehensive video outlining the procedure. If you have any questions, you can reach out to me at any time. Have fun!
Beginning with the single crochet stitch is a good place to start if you’re feeling overwhelmed. For those interested in learning how to crochet, I have created this instructable.
Bạn đang xem: How To Finish A Granny Square Blanket? Step by Step Instructions
What is a granny square?
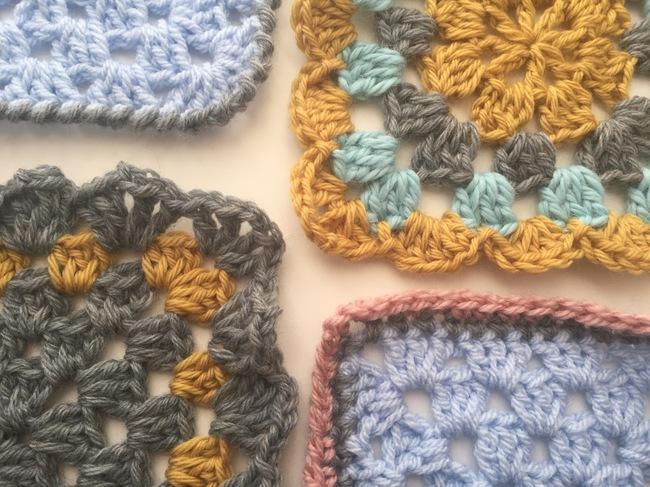
Granny squares are a staple in the crocheting community. Simple crochet stitches like the chain and double crochet were used to create this item. The square form and lacy look are telltale signs of a granny square.
Because of their little size, Granny squares are ideal for working up from remnants of yarn. Granny squares can be worked in a single color or with a different color of yarn for each round.
Crochet blankets, afghans, scarves, and sweaters are just some of the larger objects that can be constructed by joining multiple grannies together.
Construction Method
Using joined rounds, the fundamental granny square design is worked from the center outward. The granny square is constructed with a pattern of granny clusters and chains that are worked in rounds.
A granny cluster is created by working three double crochet (dc) stitches into the same place.
Chain-1 spaces divide each pair of granny clusters, while chain-3 spaces separate each pair of corners.
Granny Square Variations
There are countless possible permutations of the granny square. Besides the traditional square, you can also crochet a solid square, a solid square with no gaps, a sunburst square, and even a granny hexagon.
However, in this guide, I will demonstrate the traditional method, which consists of four rounds of double crochet clusters sewn into the intervals between the chains.
How to Crochet a Classic Granny Square
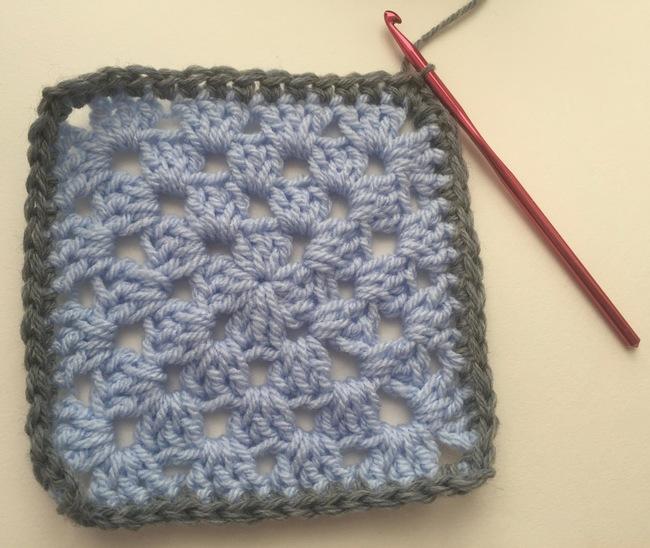
In this guide, I’ll show you how to crochet a classic granny square, which happens to be one of my favorite projects.
This pattern is great because the resulting granny squares are perfectly flat. To prevent the corners from becoming rounded, I employ chain-3 spacing in those areas. (Later, when sewing the grannies together, it will be much simpler to do so.)
Supplies
Making a granny square requires only a tiny bit of yarn and a hook that is the right size for the yarn.
- As for the yarn, it’s a worsted weight.
- Size H (5.0mm) crochet hook here.
- A couple of stitch markers to use as markers for the beginning of rounds.
There is no need to go out and buy any special yarn for this; any scraps you have lying about will do. As a result, I always recommend that novices use a worsted weight yarn in a light color and smooth texture. To put it another way: (Your stitches will be more visible.) After that, select a hook size that corresponds with the recommended yarn gauge.
This is a simple granny square that I want to crochet in one single color. Each round can be worked in the same yarn color, or a new color can be used.
Pattern Notes
- These instructions are prepared using US crochet terminology.
- Granny squares are made by joining rounds and working them continuously.
- For each round, you should face the right side of the work.
- Instead of knitting into the stitches of the previous round, you will be working into the chain spaces.
Stitch Abbreviations:
You can crochet a granny square if you know the basics. Please refer to this list for the pattern’s abbreviations.
- Shorthand for “chain stitch”
- Chain Space (abbreviated as ch-sp)
- abbreviation for “double crochet”
- Insert hook, yarn over, pull through stitch and loop on hook; this is a slip stitch.
- Slang for “stitch” (es)
Special Stitches
The granny square’s corners are worked from granny clusters connected by chain spaces.
Xem thêm : How To Remove Cord From Electric Blanket? Easy Step-by-step Guide
In crochet, a granny cluster is formed by working three double crochet stitches into a single stitch or space. The granny clusters in this pattern are spaced out by rows of chain stitches.
3 Ways to Start a Granny Square
You can begin a granny square in one of three ways. You can begin with a single chain stitch, a ring of chain stitches in the center, or the magic ring method, depending on your preference.
Option 1: Start in a single chain.
While this method is quick and easy, it can be difficult to get all of the stitches into a single chain stitch.
Chain 3, then work the next stitch into the top of the first chain you made. The first chain stitch will be constructed from all of the clusters in the first round.
Option 2: Chain Stitch Center Ring
While this is a simple and fast procedure, the resulting square will have a larger hole in the center.
To make a central ring for a chain stitch: Create a circle by chaining four stitches and joining them together with a slip stitch. The next step is to integrate your initial round into the ring.
Option 3: Magic Ring (aka Magic Circle)
The third possibility is the use of a magic ring, commonly known as the magic circle method. By following these steps, you can expect a solid core free of cracks or gaps.
Read this magic ring lesson to find out how to begin your granny square with a magic ring.
For this guide, we’ll be using the chain stitch center ring, but feel free to substitute your preferred method!
Classic Granny Square Pattern
To crochet a granny square, please refer to the following written pattern.
Foundation Ring:
Make a middle ring to begin the granny square.
In the first chain of your fourth chain, insert your hook. As a further step, do a slip stitch connecting all of the chain threads together to complete the circle.
Round 1
The first round of the granny square is described in great detail below. Below is a condensed version of the manual.
- 3 chains in a row. As the initial dc of the first granny cluster, this counts as the starting point.
- Put 2 double crochets into the magic circle. What you should see now is 3 dc adjacent to each other. You’ve reached the first cluster of granny smith apples. Ch 3.
- Make another cluster of granny squares. Three double crochets should be worked into the magic circle. Ch 3.
- Make the third cluster by working 3 double crochets into the central ring and then chaining 3.
- Then, construct the fourth grouping. Work 3 double crochets into the center ring, then chain 3.
- The four corner ch-3 spaces and the final ch-3 gap at the end should now divide four granny clusters. Slip stitch (sl st) into the top of the first chain three to make a square. Round one is now over.
Here are the identical Round 1 instructions again, this time in the shorter form that is more commonly used:
Beginning Round: Ch 3. To begin, construct a ring with three double crochet stitches (dc) and a chain of three (ch). Join yarn with a slip stitch at the top of the first chain 3.
Round 2:
- Chain 4. (This also qualifies as the first dc and ch-1 space.)
- Work the following sequence of stitches in the next corner space (the space between the third and fourth chains): 3 double crochet, 3 chain 3, 3 single crochet.
- Step 2 should be repeated twice more, for a grand total of three.
- Work 3 double crochets, 3 chains, and 2 double crochets in the final chain-3 space.
- Using a slip stitch, attach yourself to the third chain from the hook when working the foundation chain.
The second round has now finished.
Round 3:
- Chain 3. (This counts as 1 dc.)
- Next, stitch 2 dc into the ch-1 spot from the previous round down. (This is the initial cluster of granny squares for this iteration.)
- Work the following sequence of stitches into the next corner space formed by three chains: (3 dc, ch 3, 3 dc, ch 1).
- Repeat from * across, ending in the first chain space.
- Return to the beginning of the chain and perform steps 3 and 4 again. Sl st to the top of the initial chain three to complete.
Round 4:
- Chain 4. (This is equivalent to 1 dc and the ch-1 space.)
- Put 3 double crochets into the next chain one slot, then chain one.
- Into the next ch-3 corner space, work 3 dc, ch 3, 3 dc, ch 1.
- Work 3 dc, ch 3, 3 dc, ch 1 into the next corner space made with chains.
- Join with a slip stitch at the top of the foundation chain 3.
Making Larger Granny Squares
The size of the completed granny square can be adjusted by working additional rounds. For larger squares, simply repeat rounds 3 and 4 as many times as necessary.
Finishing the Granny Square
When you’re finished with the last circle, leave a six-inch tail before cutting the working yarn. A final step is to draw the yarn through the stitch. Weave in the ends with a blunt yarn needle.
And that wraps up our discussion! You have successfully completed a traditional crochet granny square.
Changing Colors in Granny Squares
Once you’ve got the hang of crocheting single-color granny squares, it’s time to branch out and try out some multi-color variations.
Make a slip stitch join at the end of the round using the new color of yarn to make a color shift. (Remember that a slip stitch is used to link each round to the top of the first chain three.)
Check out this comprehensive instruction on how to switch yarn colors in crochet for additional details.
More Granny Square Variations
Since you already know how to crochet a granny square, you may be interested in trying out more advanced patterns.
A handful of the more out-of-the-ordinary granny square patterns are as follows:
- Strong crochet square
- Granny square with a sunburst motif
- It’s a square with a fountain in the middle and it’s called Rosie Posie Gra
- Puffy square crocheted pattern
- Constructing a Granny Hexagon
- Put a circle in a square. phrase crocheted in a square pattern
Patterns Using Granny Squares
Do you have a bunch of granny squares and no idea what to do with them? Multiple tasks! The squares are versatile, as they can be used on their own or combined to create a wide variety of items.
Make anything you can imagine with these suggestions for using granny squares.
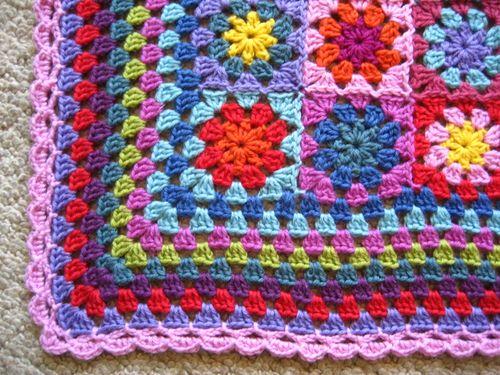
- Granny Square Patchwork Blanket
- Pillowcase Made From A Granny Square Pattern
- Square Potholder Made with Granny Squares
- One-Half Shawl Worked in the Stitch Pattern Used for the Granny Square
- Square-Jacked Knitted Sweater
- The Granny Square Bag
Explore More Crochet Patterns
If you like this free granny square pattern, you might also like these others:
- Free Crochet Pattern for a Simple Granny Square
- Create a Granny Square in Crochet That Is Completely Solid, Even if You Can’t Crochet
- Traditional Folded Cuff Baby Booties in Crochet – Free Pattern
- Free Crochet Beanie Pattern for a Warm Winter Headcovering
Have questions? Join the Facebook Group!
My goal in writing this guide was to help you. Join my Facebook group and ask away if you have any further concerns. This is a place for you to showcase your work in progress, discuss issues, get feedback from other artists, and generally be helpful to one another, thus I made it.
What’s Next?
Save this image for later: You can pin this instruction to your boards and return to it later.
Leave a Reply to: Your comments are much appreciated. Leave a comment and let me know!
If you make this and want to share it with the world, please do so on Instagram or Facebook and include a tag to my account, @sarahmaker. Your finished products always amaze me.
Conclusion
You might find that learning the last steps to completing a blanket made from granny squares is more challenging than you anticipated.
The beauty of your crochet blanket, though, comes from the variety of patterns and methods you use to complete it.
In addition, if you choose contrasting colors, finishing it will make it look much better.
If you don’t finish it off properly, your blanket will have a rough appearance. Although, ultimately, the choice is yours to make!
Nguồn: https://iatsabbioneta.org
Danh mục: Blanket


