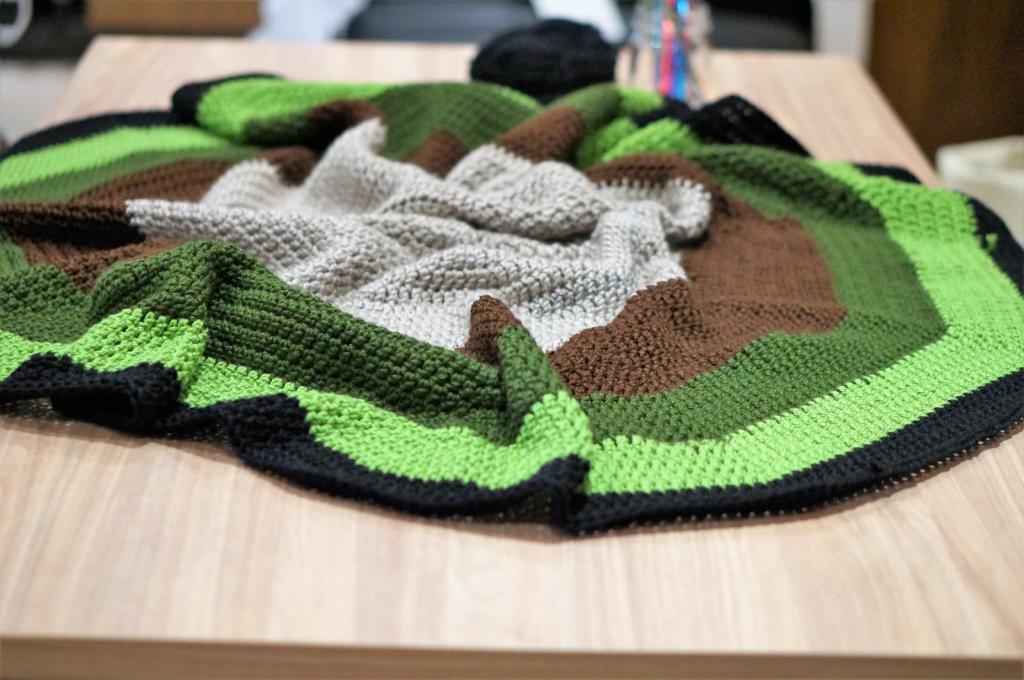
A double-sided Minky blanket is easy to sew and requires only a few materials. You need only gather your supplies, sew, and tack together two pieces of Minky fabric. The instructions for sewing a reverse-faced Minky blanket are provided below.
What Is A Double-Sided Minky?
Double-sided Minky is an exceptionally plush and luxurious fabric with a plush, silky raised pile on both sides. It retains its softness and does not pill even after multiple washes.
Bạn đang xem: How To Make A Double Sided Minky Blanket? Easy Step-by-step Guide
For this reason, it is called “double-sided,” as both sides of the fabric feature the trademark plush Minky pile. Since the weave is not flat on either side, this fabric cannot be used for wall coverings.
Despite this, the piles it creates are still different. The front of the fabric has a shorter Minky pile than the back.
Toys, blankets, and robes made from this material are as cuddly as they come.

How to Make a Double-Sided Minky Blanket?
Step #1: Preparation of materials
You’ll need your sewing machine, some Minky fabric, some straight pins, and some fabric scissors for this project. Use your imagination and make the two sides of this blanket out of contrasting colors of Minky fabric. Choose thread in a pale hue if this is the case. It will be a perfect match if you wear white.
Step #2: Preparation of the Minky fabric
Put the right side of your Minky fabric down first. You can begin your blanket with a yard and a half. The second material is then applied on top, with the correct side facing out. Use this to make precise cuts in the fabric to achieve the desired results. It’s essential to make sure your materials are identical in size and form.
Then, fasten the pins to the fabric’s edges. The material won’t be able to shift into unintended directions. This is a necessary procedure for proper alignment of the fabric.
One useful piece of advice is to make use of the polka dots on the Minky material. Use it to get accurate readings and set up your pins in a grid.
Since your fabric’s face sides are reversed, you’ll need to reverse your edge finishes. Make sure to leave stuff between the two pins that are holding your fabric in the correct orientation.
Step #3: Sewing the fabric together
Get started by sewing together the raw edges of your Minky fabric. When sewing, you have about an inch of depth. Never lose sight of the fact that you are working with needle and thread and fabric at all times. You’d rather not have even one of them fold in on itself.
Complete the edging, but don’t forget the massive opening we created for turning. Turn the fabric right-side out once the pins have been aligned. Be sure to cut off any excess material from the corners so that your finished product will not look bulky when turned right side out.
Step #4: Closing the gap
Seal the opening with a pin. Don’t forget to fold it so that the sides line up. Then, finish off the blanket by sewing a top seam around the perimeter. With this, the door can be sealed. Create a top seam that is between a quarter and a half an inch. Stepping here completes the overall Minky blanket on both sides.
What if you want both of the fabrics tacked together?
We have only stitched the edges of the two Minky fabrics together, so they can still come apart. To avoid this, you can quilt the middle part of the blanket in a crosswise motion. This will prevent the two fabrics from becoming separated.
What is so particular about Minky blankets?
Xem thêm : How To Make A Mexican Blanket? Easy Step-by-step Guide
In comparison to other materials, minky blankets are extremely comfortable to cuddle up in. This fabric stays softer for longer, even after being washed multiple times. Most blankets are made of fleece, but this polyester material is much thicker and cozier. Moreover, it lasts longer than the average blanket. It retains its warmth and suppleness for a long time.
Just a quick laundry tip for your Minky blankets: don’t wash too many at once. Shedding is a common problem with minky. It is recommended that you use regular laundry detergent instead of pod detergent when washing Minky fabric. It extends the life of your Minky blankets.
Are Minky blankets safe for babies?
Many parents sought out this Minky blanket so they could wrap their infants in its supple warmth. Is it safe for them to use, though? Fortunately, yes! Fabrics made of soft minky mink are ideal for newborns. They can stay warm and cozy with this blanket, and there are even hypoallergenic versions made of Minky material.
What if it loses its softness?
The use of a fabric softener could diminish the fabric’s suppleness. If this occurs, you can attempt restoration by washing the affected item in cold water with vinegar (but no detergent).
How to sew a double-sided baby blanket
Back in 2015, I believe, I made my first baby blanket. In honor of my friend Caroline’s second impending daughter, I tackled my first baby-related sewing project. For the simple reason that Caroline is a fantastic friend of mine, and because she inspired me to start making double-sided baby blankets for friends who are expecting, this undertaking holds a special place in my heart.
Since then, I’ve crocheted five blankets—one of which was for my own daughter—but haven’t documented the process. Until I made the one I just did for Erin, who is also a very old friend of mine. Both of us attended the same kindergarten. When R is 23 and her kid is 20, I can’t wait for R to be the hip older friend who buys her kid a beer.
But let’s go back to the baby blankets for a second. First one I ever made, for Caroline’s daughter in 2015. This method is easy to understand and implement.
Easy baby blanket tutorial
To be clear, I make no pretenses about my sewing skills. Someone with exceptional sewing skills. But I can make a baby blanket because they are so simple. I’m not a complete novice with a sewing machine, but I’m only comfortable with the most basic tasks. It fits into that category, too. This is an easy project for anyone who can sew a straight line, as the baby blanket features two different designs on opposite sides.
How much fabric do I need for a baby blanket?
To ensure consistency, I have made all of my baby blankets about 30 inches by 40 inches. However, they can be scaled down, as I did with the most recent one I made and photographed for this guide. We can estimate a size of about 28 by 35 inches. Infants are itty-bitty.
For this project, I needed three different kinds of fabric, so I purchased one yard (36 inches) of each: the animal print fabric, the solid gray flannel, and the fluffy cotton batting. The bag of soft cotton batting was already cut to a yard in length, so there won’t be much fabric left over. Don’t forget to pre-wash and dry all of your garments to eliminate the possibility of shrinkage.
What is the best material to make a baby blanket out of?
Go to Jo-Ann Fabrics (or a similar store if you don’t have one near you) and look at the nursery flannels. Despite how tempting some of the super-soft minky fabrics and stretchy fleeces may be, I wouldn’t recommend them if you’re just starting out.
Simply put, stretchy knits are a nightmare to sew. Without the appropriate needle and foot, your sewing machine may jam and cause you a lot of trouble. Nursery flannels, which are thinner, are ideal. They don’t stretch, are simple to cut and sew, and look great.
So here’s what I used.
- Baby-friendly flannel; I bought two yards, one of a decorative fabric and one of a neutral gray for the backing.
- For this project, I used 1 yard of 100% cotton batting.
- Stitching Device
- Needlepoint needles, thread, ruler, and tape measure
And here’s my easy double-sided baby blanket tutorial!
Step 1: Cut the pieces
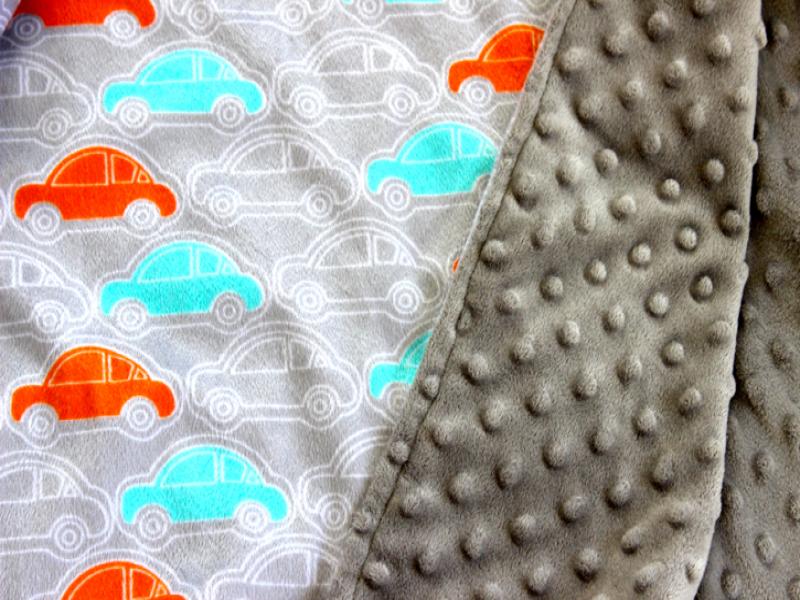
Make three identical fabric cuts in the sizes you prefer. A blanket measuring 30 by 40 inches is ideal for a newborn, as mentioned before. Most of mine have been that size, but the most recent one I got was a bit shorter. The animal print fabric is your first main/decorative fabric. Second, the back (or in my case, gray) section. Finally, we get to the batting used on the inside.
To make sure your cuts are straight, use a yardstick or other long, straight edge to mark off your cutting area. The use of a rotary cutter can help simplify the process. Fabrics with patterns, like the ones I use, can be helpful to lay out with the pattern side up so you can see exactly where you want to make your cuts.
Xem thêm : How To Fold A Blanket For Display? Complete Step-by-Step Guide
After you’ve finished cutting, stack the pieces like this. I know what I’m saying sounds strange, but bear with me! And don’t worry too much about which side is “up” or “down” on the inner batting layer; there isn’t one. It’s possible that the back panel doesn’t have a “wrong” side, either.
You dig this how-to, right? Learn to sew with me by reading my guides on making a DIY wrap cardigan and an envelope laptop sleeve.
Step 2: Pin fabric in place and sew
Put as much effort as possible into aligning the fabric’s corners before pinning it in place. An anchor pin inserted through the center of all three sections is my preferred method of assembly. After that, I pinned it all together.
Create a straight seam around the entire fabric, stopping about 6 inches from the end. One of the best places to do this is right up against a corner. The blanket needs to be turned right side out at this point.
When you’re done sewing, clip the corners for cleaner edges. Be careful not to snip the thread you just sown! (Yes, that has happened to me on multiple occasions when sewing pillow covers.) Remove any surplus material from the fringe of the blanket.
Step 3: Turn right-side out and pin the small opening shut
Carefully pull the blanket through the 5-inch opening and turn it right-side out. Don’t give up if the fabric isn’t cooperating. Take your time and think it through. After turning it over the right way, gently poke out the corners to make it look neat.
To conceal the sloppy cut, locate the 6-inch slit you used to pull the blanket through and fold it in. In order to get a nice fold, you may need to trim the batting. It may help to press the folded seam area with an iron (careful not to get the iron on the pins, as they will get hot) if you’re having trouble keeping it neat.
Step 4: Sew the opening shut and sew a seam round the blanket’s entire perimeter
Use a straight stitch to bind the edges. Seeing as this seam will be on the outside of the blanket, I prefer to use a French seam to conceal it. This not only adds a little bit of flair to the finished product, but also guarantees that the opening will stay securely stitched shut.
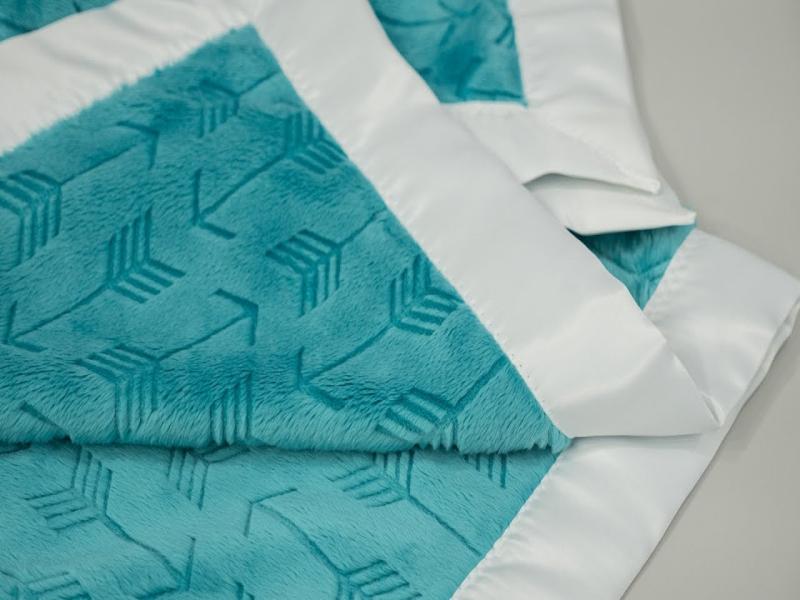
What’s a French seam?
It’s an air of pretentiousness that belies reality. When the blanket is turned right-side out, the unfinished edges are concealed within. However, it doesn’t appear to have been polished very well around the edge. To finish the raw edge of the fabric on the inside of the blanket, a French seam is simply sewn straight all the way around the perimeter of the blanket.
It makes the blanket appear more professional and flat from the outside. Does the distinction now become clear? For example, the first blanket is simply the same blanket turned inside out. In the second image, you can see that the baby blanket has been finished with a French seam.
The first baby blanket I ever made clearly displays a regular seam. The blanket does not have a “French” seam because I did not take the time to sew an extra seam around the edge.
And here’s the finished double-sided baby blanket
OK, that’s all there is to it! I kid you not; it’s really that simple to whip up a useful present for friends who are expecting. This blanket can be washed in a machine and dried in a dryer, making it convenient to maintain. I wouldn’t dream of giving anything to a new parent that couldn’t be washed in a machine.
The leftover scraps from the blanket could be used to make burp clothes, for which I also have a simple tutorial. Please check out this post about my daughter’s chic, gender-neutral nursery!
Conclusion
Making a blanket with Minky on both sides is easier than it sounds. The Minky fabric itself, a sewing machine, some scissors, and some pins are all you need to get started. It will take you an hour to complete the process from start to finish, giving or taking depending on the size of your blanket. It’s time you made a double-sided Minky blanket for you and your family.
Nguồn: https://iatsabbioneta.org
Danh mục: Blanket