We’ll cover the process of dying cotton curtains in this post. If you don’t have the necessary skills, dying might be a time-consuming and tough procedure. The information in this article, on the other hand, will make dying your window treatments a breeze!
Dyeing is the process of immersing a fabric in a solution containing water and dye powder for an extended period of time. Cotton can be difficult to color without pre-treatment, but for the majority of materials and dyes, the procedure takes less than a day.
Bạn đang xem: How To Dye Cotton Curtains? Step-By-Step Process
Steps on Dying Cotton Curtains
A dye bath or pot must be prepared before anything else can begin. In order to dye or powder your fabric, you’ll first need to boil water and then add it to the container you intend to soak it in. This will depend on your project, but don’t fill your container more than halfway. A dangerous situation could arise if too much dye and cloth combination is discharged into the air during the boiling process!
The next step is the second one. A good-sized batch can usually be made with two gallons of water. As soon as you’ve prepared your fabric, you may add the dye or powdered fabric to the boiling liquid and let it all dissolve!
You will need to wash the fabric in hot water to prepare it for dyeing. The more sweltering, the better! This will assist remove any oils or residue from your material, allowing them to soak up all of the brilliant dyes that are waiting for them!!
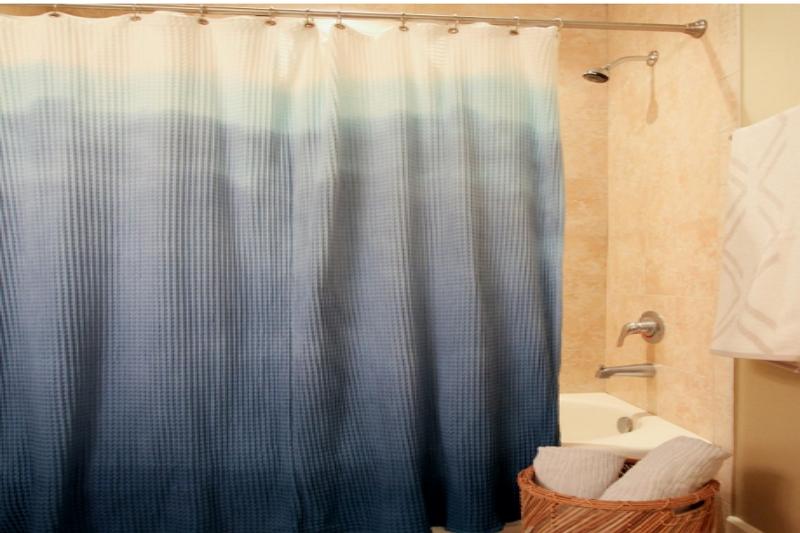
If you want a lighter shade, hang it to dry a bit before dipping it in the dye pot. If you want a darker shade, dunk it right in.
Using a low dip and a quick pull-up motion, thoroughly saturate the fabric in the dye pot. This will ensure that you don’t have any white cotton splotches leaving at the end of the process, as this will ensure that everything is uniformly saturated with color.
It may help to stir it with your hand if you’re having trouble getting the color to spread evenly across the fabric.
Dip it twice for most folks, but if you’re feeling particularly daring, go ahead and dunk away! Adding faux flowers or pine cones, or simply pouring out any remaining dye in the pot, will make a stunning display once all of your materials have been dyed.
The deeper and more saturated your final product will be the longer you keep the fabric in the pot! You may want to use a spoon to stir things up from time to time to ensure that everything soaks evenly before returning to the surface.
If you’re dying a large number of curtains, be sure to evenly distribute the fabric and provide yourself enough space to stir.
Xem thêm : How To Clean Silk Curtains? Curtain Cleaning Do’s and Don’ts
You’ll also want to keep an eye on your water consumption! There will be inconsistent colors if you don’t have enough water in your pot (either because you didn’t add enough or some of it evaporated).
You can either add some fake flowers or pine cones for a great aesthetic, or you can start over from scratch.
How to wash dyed cotton curtains?
It’s a good time to talk about how to wash your newly dyed curtains now that they’ve dried. The same processes can be used with any other type of material. Prior to cleaning, inspect the curtain for any stains or snags that could get caught in the washing and drying machines. Cool water must be used in this method to avoid setting the dye.
Can I iron dyed cotton?
After washing, you can iron the curtains if they are made of 100% cotton! You can do it in just a few simple steps: Place your iron on the damp curtain and heat it up to medium heat.
When ironing, place an old t-shirt or towel between the curtain and the heated surface to catch any colour that may have escaped.
Once you’ve pressed the iron on the curtain for about 10 seconds, proceed to a different region of the fabric and repeat the process until you’ve covered the entire piece with steam in wide strokes from top to bottom.
Can I bleach-dyed cotton?
If the curtains are made entirely of cotton, then yes. You should not use bleach to clean any other sort of fabric. Pre-treating stains and grime with a mild laundry detergent like Tide or Woolite before washing in warm water with oxygenated bleach is an option if your material is colorfast.
After washing, soak the fabric in white vinegar for 15-20 minutes to remove any remaining stains.
Can I dry Clean Dyed Cotton Curtains?
Dry cleaning colorful cotton curtains is not an option. Dry washing is not recommended for coloured textiles because it might cause shrinkage and other harm to the fabric.
HOW TO DYE FABRIC – THE DO’S & DON’TS
We worked on a basement project over the weekend, which included IKEA drapery panels, as I stated earlier this week. If you’re trying for a minimalist or neutral appearance, it’s easy to buy affordable curtains that meet your budget, but when it comes to color, let’s be honest… IKEA doesn’t offer a wide variety of colors. I decided to colour my hair after trying three different options and not liking any of them. Creating a bespoke color and manipulating cloth or textiles to achieve the look you want may seem complicated at first, but it’s not. If you’re looking for a quick tutorial and a few pointers, look no further. Over the years, I’ve got a lot of experience with both, and now is the time to share it with others. The finished drapes can also be seen in the basement.
My background is in textiles, and I used to do this sort of thing all the time in art school, if you’ve been reading for a while. Experimenting in the dye lab was a daily occurrence for me. It was an enjoyable experience for me. Although I used to dye fabric on a weekly basis, it feels strange to be doing it for the first time in years. To be honest, I was feeling a little rusty when I wrote this. If you want to alter the color of your curtains or fabric, this is your go-to guide for what to do and what not to do.
The following are a few basic rules or facts to be aware of prior to getting started…
- You can change the color of a piece of fabric by making it darker, bolder, or more saturated, but you can’t make it lighter.
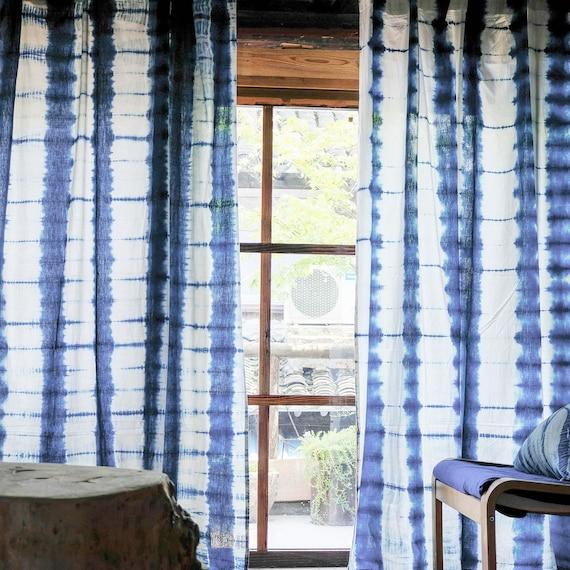
- Color uniformity is more difficult to achieve than an organic or accidental pattern on a piece of cloth (like shibori).
- Don’t freak out if your cloth comes out splotchy. Overdyeing it is possible.
- The more harder it is to dye a large item or piece of fabric, the larger it is.
- The dye batch and color should be tested before being applied to the fabric.
- For each type of material or cloth, there is a certain dye that should be used.
SUPPLIES + TOOLS
- a bag, a jug, or a container (in my experience, storage totes work best)
- richard ritchie dye (natural or synthetic, depending on your fabric)
- water that has been warmed up
- vinegar (I use rock salt)
- Gloves made of rubber
- Mixing utensil of stainless steel
- glass jug for measurement
- Laundry soap
- cloth (curtain panels in my instance)
- a sharpie is
Xem thêm : How To Make Camper Curtains? Easy Step-by-step Guide
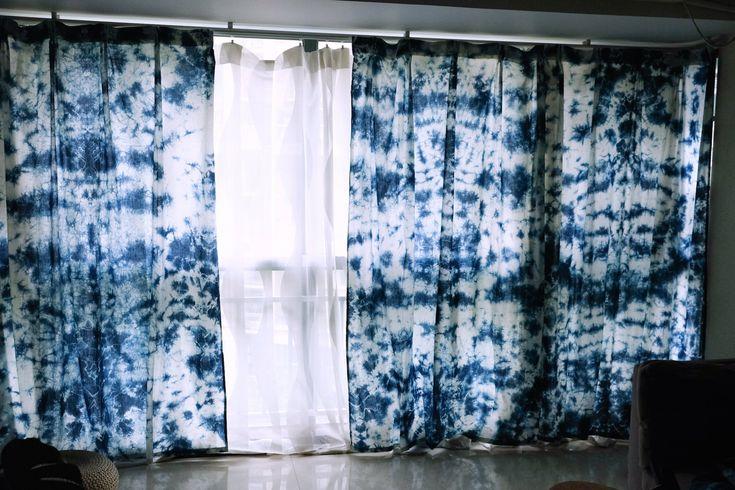
IKEA Tibast cotton curtain panels (seen above) were ordered because I liked the style but not the color scheme. I was in desperate need of a navy blue curtain. Because I decided to colour them, of course, this is the purpose for this post. Here’s how I went about it:
Step 1 / Decide on the color you want to use. Due to the fact that my curtains were made entirely of cotton, I dyed them using Rit dye. Synthetic materials can also be dyed using their product. Determine the proper dye for your project by inspecting your fabric.
Step 2 / Soak or prewash your fabric before using it. In my kitchen sink, I washed my fabric with warm water. The fabric will color more evenly if it has been soaked in water.
Step 3 / Locate a dye container and begin coloring. Prepare your dye bath while the fabric is in the water. A container big enough for your fabric is the first step. This project will go more smoothly if the container is larger. With a 5 gallon bucket, I quickly realized that wasn’t the best choice. I was able to agitate and manipulate the fabric more easily with the help of the plastic totes.
This is the final step in the process. To dye my cloth consistently, I used a marker to mark the fill line on my containers. Having a “fill line” made it easier for me to fill the containers without having to measure the water every time.
Add the ingredients in the fifth and final step. The fill line was topped off with 4 ounces of blue dye and 2 ounces of black dye, all of which were dissolved in hot tap water. In order to ensure that the dye bath was completely dissolved and equally blended, I agitated the mixture.
Step 6 / Drop a color sample into the fabric to see how it looks. Check the color of your dye using a white paper towel or scrap of fabric dipped carefully in the dye bath. Submerge your fabric if everything appears to be in order. A single curtain panel at a time was all it took for me to complete the dyeing process.
Step 7 / Gently twitch. Set a timer and agitate the fabric every 5 to 10 minutes to ensure an equal dyeing process. As a result, I kept a journal for each cycle… It’s best to start agitating, wait seven minutes, and then repeat the process. Make sure the fabric isn’t crumpled or folded on itself by moving it around. If there is any resistance, the dye bath will result in lighter or splotchy dyed results By agitating, you can ensure that the dye reaches all of the spots and covers the fabric fully. I dyed my fabric for 30 minutes, but you may go as long as 60 minutes if you want a more intense or saturated color.
Rinse off the soap. It’s important to take care when removing and rinsing the fabric out of the dye bath. To keep the mess to a minimum, I utilized the yard hose.
/ Step 9 / Rinse off After that, use a light or gentle detergent to wash the garment. Because I was aiming to shrink my curtain panels, I washed them on the warm setting.
It’s done! I was pleased with the results of my tumble-drying my fabric. Again, it required some trial and error to master the technique and figure out how to dye evenly, so I figured sharing some “do’s and don’ts” could be beneficial. They ended up like this…
DO:
- A large container is recommended.
- Ascertain whether or not the dye will work with your chosen cloth or material.
- Set a timer for when you’re most agitated.
- Invest in a pair of rubber gloves and a pair of old clothes (it gets pretty messy).
- Your formula, dye time, and other notes should be recorded.
- Before adding the fabric to the dye water, make sure the color you want is what you want.
- A measuring cup is the best way to do this..
DON’T:
- Before dying, don’t forget to moisten the fabric.
- Set your agitation timer and forget about it.
- Measurements of the eyeball.
- Don’t use any vinegar or salt.
- Inflate the dye bath to its utmost capacity.
- Mixing multiple dye colors is not a bad idea.
That’s it, I believe! If you have any questions, please don’t hesitate to get in touch with me. In preparation for our basement renovation, I colored a TON of curtains. I completed 16 panels of dyeing. Even though it took a lot of time and effort, the finished product was well worth it, and doing it myself also saved me a lot of money. I was also able to find the exact shade of color. I’m hoping no one would notice that I spent less than $200 for what appears to be high-end custom curtains.
Nguồn: https://iatsabbioneta.org
Danh mục: Curtains


