Obviously the person who stated “you can sleep when you’re dead” has never had a baby. Getting enough shut-eye is essential to your health. Mine, and if I don’t have enough, the others around me will suffer as well.
You should also know that I have quite particular tastes in window coverings. Because I am so particular about how things should look and feel, we don’t have too many in our home.
Bạn đang xem: How To Make Regular Curtains Blackout? Complete Step-by-Step Guide
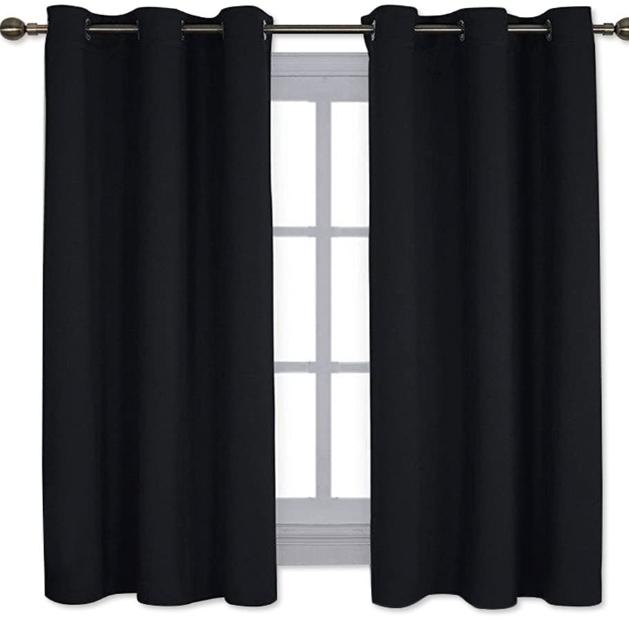
We needed blackout curtains for his nursery immediately, and we were having a hard time tracking down a set without a grommet top design—a style I generally dislike. For our daughter’s bedroom, I’ve been looking for white blackout curtains, but that’s beside the point.
Gray blackout curtains were a need for the small boy’s bedroom. I couldn’t pass them up when I saw them in Ikea, and when I saw the price, I knew I had to have them. Unfortunately, they weren’t made of blackout material. So, I decided to use my imagination.
I’m sure I’m not the first one to think of this or notice this, but I figured it couldn’t hurt to spread the word! So, are you all set?
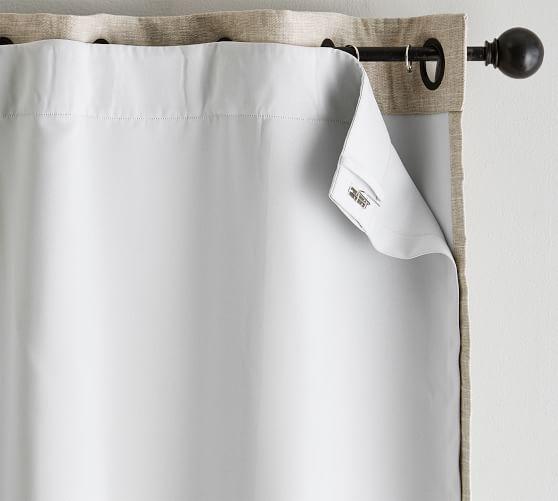
BLACKOUT LINER!
Yeah, you heard that correctly, guys: no sewing machine! Just curtains of your choice and blackout lining fabric!
Yes, that’s right, fellas: no sewing machine! Curtains with a blackout lining and no other accessories are required.
Simply put, this was a breeze.
Two pieces should be hung here, one each in the middle and at the bottom of the current curtain panels. There is no need to sew, embroider, or embellish this item. Glorious.
Xem thêm : How To Keep Curtains Together? Step-By-Step Guide
Then, I simply clipped them into place using the rod brackets we already had and voila, instant inexpensive blackout drapes! Likewise, you are capable of accomplishing this. Pretty curtains and a couple of blackout liners will do the trick.
Due to the height of the windows in this room, we opted to use clips instead of just hanging the curtains and blackout panels from the rod. We purchased 95-inch curtains and blackout panels, which I hemmed to the proper length. I am a beginner seamstress, so I decided to utilize the clips to make a slight height adjustment before beginning to hem. This is not a blog about sewing. It’s an average renovation blog. We shouldn’t kid ourselves. So long! Wow, is that true?! Our is the second shortest do-it-yourself task on this blog. This is the second instance; the first may be found here.
UPDATE: See these curtains in the completed nursery reveal here!
Again, this is probably already out there in the blogosphere, but I was so relieved to find a way to make my own blackout curtains that I felt compelled to spread the word!
What are the Benefits of Using a Light Blocking Curtain
There are two primary motivations for their use:
- Their primary function is to obstruct the sun’s rays, which they may do well at the 99% mark, making the interior of a building look like a cave day and night. This is perfect for daytime nappers and people who work night shifts but like to sleep during the day. As an added bonus, they can also make viewing TV more enjoyable by reducing the glare of the sun.
- The use of blackout curtains all through the year can reduce a household’s energy use by as much as 25 percent. To keep the space cool in the summer and warm in the winter, these are the perfect solution.
Do you want to learn more? Browse our in-depth explanation on how to choose the finest blackout drapes.
Materials You Need
Fabric
You should budget for roughly six yards, but the actual amount will depend on the dimensions of your windows. For the hems, you should add another ten inches. If you’re thinking that the fabric must be black, you’d be wrong. All hues are OK.
Blackout Lining
The cloth lining is crucial since it is what blocks the sunlight from entering the room. White, heavy cotton will dominate the selection.
Grosgrain Ribbon
Grosgrain ribbon, which is utilized here because it is more sturdy than satin, is what is used for the tabs. This is especially important with heavy blackout curtains.
Thread
Make sure you use white thread while putting everything back together.
Pins
Xem thêm : How To Get Wrinkles Out Of Polyester Curtain? Comprehensive Guide
Before you start sewing, use pins to keep the fabric in place.
Scissors
Select a pair of fabric-specific, heavy-duty scissors that is both sharp and sturdy. In order to ensure accuracy and longevity, the blades should be made of stainless steel.
Meter Stick
A measuring tape might not stay perfectly flat and steady, and rulers can only go so far. A meter or yardstick is an easy way to get accurate measurements because it is flat and lightweight.
Marker
If you need to make a note on the material, keep a marker handy. Just use a pencil instead.
Iron
If you want your seams to be nice and crisp, press the edges and corners before you stitch. Make sure the fabric is smooth and free of creases before you start sewing.
Instructions on How to Make It
- Figure out how much material you’ll need. To ensure that your curtains hang properly and do not look saggy, measure the width and height of your window from the top of the curtain rod to the floor and add eight to ten inches for the hems on both the top and bottom.
- Spread the fabric out on the floor and measure it, adding a little more for the hems.
- Mark the fabric with the yardstick and draw straight lines to indicate where to make your cuts. Next, start slicing.
- When making your blackout lining, follow these steps again. The only difference is that you won’t have to buy extra material to finish the hems.
- Smooth out the wrinkles when you’ve finished cutting the fabric.
- Hemlines should be folded over and ironed to ensure a neat fold.
- Get everything together and spread it out on the floor with the right side down. Blackout lining should be inserted into the fabric with the right side up.
- Pin all the edges and corners after folding the hems over the blackout lining.
- The next step is to attach the lining to the curtain by sewing together the raw edges.
Frequently Asked Questions
How to attach a blackout lining to curtains without sewing?
Linings don’t require any sewing to attach. The liner comes with clips to attach to your existing curtain rods. Do it first. Liner fabric must be cut to the size of your fabric. Then, apply hemming tape instead of sewing a hem. One that can be fused together with an iron is the one you want.
What type of fabric is the best to use?
Blackout cloth, as the name implies, is thicker. Choose the “3-pass” variety if possible. This indicates that there are three distinct layers, plus some foam, within the structure. The fact that it can also be used to reduce noise is a nice bonus. You can get by with “2-pass” if you’re not worried about outside noise intruding on your sleep.
Can you just add a lining to existing curtains?
Without shelling out for a whole new set, this is a great option to personalize them instead.

Can you do it with paint?
Indeed, this is the case quite often. This is a fantastic method for creating a new appearance. Ironing the fabric before painting is the first and most crucial step. Forget about skipping this step at your peril. Create stripes or a design with painter’s tape. If you’re not, start painting immediately. Make a custom paint by mixing fabric paint with regular paint. In this approach, the material won’t dry out too rigidly.
Conclusion
See? You realize it’s not that difficult, right? Making your own blackout curtains is a great way to save money and get exactly the size and design you want if you have some free time on the weekend or just want to make your own.
Nguồn: https://iatsabbioneta.org
Danh mục: Curtains


