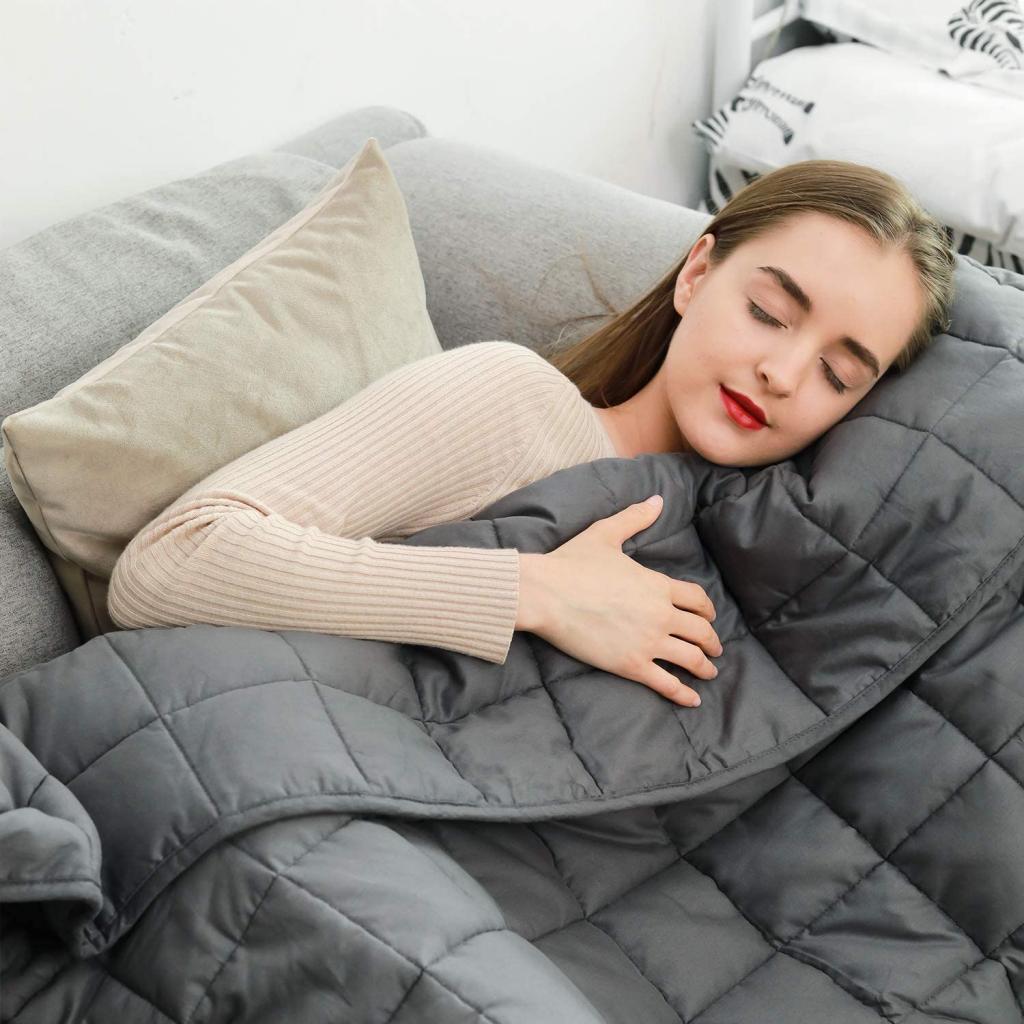
Children, adults, and those with special needs can all benefit from using weighted blankets, which are a type of therapeutic blanket. They help alleviate the stress and anxiety associated with sensory disorders like autism and ADHD. However, these blankets may be pricey, so we’ve put together this instructions to help you construct your own cozy weighted blanket.
DIY Weighted Blanket
The time and effort spent on creating your own weighted blanket will be well worth it. For those on a tighter financial budget, making their own weighted blanket is a great option. The activity in and of itself can be a great way for the family to spend quality time together. Involve your kids in every step of the process, from picking out the fabric to weighing the fillers and putting together the finished blanket. Let me now demonstrate the process of creating a weighted blanket.
Bạn đang xem: How To Make A Weighted Blanket With Glass Beads? Everything You Need To Know
DIY Weighted Blanket Materials
- Fabrics for the upper and lower body that are thick and long-lasting
- Beads that can be stuffed with weights
- To a lesser extent
- Adjustable tape measure
- Scissors
- Excellent yarn
- Pins
- Clothing chalk
- Ruler
- Machine for sewing
Assembling Your DIY Weighted Blanket
1. Determine the size of the weighted blanket
Make a decision on the appropriate size for your weighted blanket. The user must be completely encased in the weighted blanket. Choose a weighted blanket that is the same size as the user’s bed, or one size smaller. Make the blanket smaller than the one you use on your bed so that it may be easily transported.
Figure out how big you want the squares of weighted stuffing to be. The squares should be a size that is a multiple of your weighted blanket’s size minus four inches.
2. Determine the weight of the weighted blanket
You can use the 10% optimum body weight + 2 lb method to determine how heavy your weighted blanket should be. A therapist or other medical professionals should be consulted regarding the appropriate weight of a weighted blanket for a child.
One must also think about the weight of the fabric, which may add another pound or two to the total.
3. Sew the fabrics together for the front and back of the blanket
Use tailor’s chalk to make markings 2 inches in from each long side and 1 inch in from one short side. Make sure the proper sides of the cloth are facing each other before you start sewing. Don’t close the bag completely; leave a gap on one of the shorter sides so you can add the weighted stuffing beads.
4. Turn and press
After you’re through sewing, you should flip the fabric inside out. Use an iron to flatten the seams. Stitch a top hem 1/2 inch in from the edge.
5. Prepare the grid for the weighted blanket filling
Use tailor’s chalk to draw a grid on the remaining space of the blanket according to your specifications. Sew together all the vertical lines. To avoid getting lost or having the fabric pucker, it’s best to sew the center vertical line first, then the lines on either side of it.
6. Fill the bottom row pockets with weighted blanket beads
When you’ve finished sewing the vertical lines and double-checked that there are no gaps in between, it’s time to cram in the weighted beads.
The correct number of beads for each square must be precisely measured. Calculating pellet weight per square is as simple as dividing the total blanket weight by the total number of squares.
Put the right number of stuffing beads in the squares along the bottom row. You should shake the blanket until all the beads fall to the ground. Beads can sometimes get stuck on the fabric, so you’ll need to feel around for them and gently push them back into their designated areas.
7. Sew horizontally across the filled row
Follow the marked horizontal line to sew shut the bead-filled row. Hold the beads in place with pins and move them out of the way as you sew to avoid any collisions. This will prevent you from accidentally stitching over a bead.

8. Fill in and sew other pockets
When you get to the last few squares on the top row, repeat steps 6 and 7 again. Keep loose beads away from your stitching line so you don’t damage your needle. Be cautious to hold the weight of the blanket as you sew because it will get heavier as you go.
9. Sew the open end of the blanket
Xem thêm : How To Make A Wool Blanket? Complete Step-by-Step Guide
Finish off by stitching the final horizontal line once you’ve filled in the final row of squares. After that, you can fold in the scraps and secure them with a topstitch. You have successfully completed your own homemade weighted blanket.
How to Choose Weighted Stuffing Beads
Fillers, also known as weighted stuffing beads, come in a wide variety of shapes, sizes, and materials. Poly pellets, micro glass beads, and steel shot beads are all examples of common fillers.
Plastic Poly Pellets
Poly pellets, made of plastic, are frequently used to fill weighted blankets. It is safe and harmless because it is made of ABS virgin plastic. A weighted blanket filled with poly pellets has the added benefit of being machine washable.
One drawback of weighted blankets made from plastic beads is a little rustling noise they make when moved. Noise can be reduced by using a thicker cloth or by stuffing it with cotton in addition to the poly pellets.
Micro Glass Beads
Micro glass beads are considerably more diminutive than poly pellets made of plastic. Glass beads, which are almost the same density as sand, are more comfortable to wear since they do not rub against the skin. Micro glass beads are smaller and denser than plastic poly pellets, therefore a weighted blanket packed with them can be thinner.
The tiny glass beads are easily broken or chipped. The jagged edges of a shattered bead might cause the fabric to rip. Because of their size, micro glass beads can easily fall out of a stitch if it isn’t designed to hold tiny objects in place.
Steel Shot Beads
Larger and heavier than micro glass beads, steel shot beads are an alternative to the more commonplace variety. A weighted blanket stuffed with steel shot beads is similarly more compact. Due to the greater size of these beads, you won’t have to worry about any of them falling through your stitches. Steel shot beads are more durable and less likely to break than glass beads. Steel shot beads may be cleaned in the washing machine and dried without incident because they can withstand high temperatures.
However, their size and the resulting rustling sound can be annoying, and the lumpiness of some of them can be off-putting.
Organic Fillers
Organic fillers like as grains, stones, and sand can be used as a substitute for more expensive weighted fillers. They’re inexpensive and convenient.
These organic fillers, however, are perishable and have a shelf life. They can cause mold growth and even draw bugs to the blanket. Wet and improperly dried, they can become lumpy, compromising the blanket’s ability to evenly distribute body weight.
How to Choose Fabric
It’s possible to select from a wide variety of fabrics for your weighted blanket, just like you would for a standard blanket. However, the material must be sturdy enough to support the added mass of the weighted fillings.
Cotton
In terms of material, a weighted blanket made of cotton is a common choice. There are both organic and conventional cotton fabrics available for purchase. Because it is grown without the use of dangerous chemical pesticides, organic cotton is a healthier option. As a more cost-effective substitute for pure organic cotton, a hybrid of the two types exists.
Minky
Because of its extreme softness and plushness, Minky is the fabric of choice for baby goods. It’s also a fantastic companion for plastic poly pellets because the fabric’s thickness dampens the rustling sound they make. The minky’s plush feel may be maintained with regular washings and careful handling.
However, because Minky is so toasty, it’s not ideal for the summer or for those who struggle with heat.
Flannel
The same way that minky works well with plastic poly pellets and steel shot beads, flannel does the same with these other materials. In addition to dampening the sound of steel shot beads and plastic poly pellets, its thickness also makes them less noticeable. Be careful while pouring plastic poly pellets over flannel cloth, since the pellets have a tendency to stick.
Why Make Your Own DIY Weighted Blanket
Inexpensive alternative to commercial ones
The financial burden of purchasing a weighted blanket might be substantial. Children’s weighted blankets can be purchased for around $150. If you’re going to buy anything online, then you need to factor in the cost of shipping as well. Make your own weighted blanket if you’re on a tight budget and you know how and have the materials to do so.
You can choose your fabric and design
Xem thêm : How To Block A Knitted Blanket? A Perfect Guide For You!
Sometimes the size and weight of a weighted blanket are just right, but the color is off-putting or the cloth irritates your skin. If you want to give your child a weighted blanket but are hesitant to buy one, consider making one instead. In addition, you’ll have the freedom to try different things out and pick the cloth that best suits your tastes.
You can customize the weight and size according to your preferences
There may not be a commercially available weighted blanket that is the perfect size and weight for you. When making your own weighted blanket, you can adjust the weight by adding or removing a few pounds. Alternately, you can sew your own clothes to the exact measurements of your physique.
You do not have to worry about trial periods and warranties
It takes some experimentation to find the right weighted blanket. Weighted blankets can vary widely in quality, with some manufacturers including a trial period and warranty and others not. However, if you make your own weighted blanket, you can tailor it to your needs without worrying about the expiration of a trial period or guarantee.
How to Care for Your Weighted Blanket
It’s not cheap or simple to make a weighted blanket. Because of this, it is important to understand how to maintain your weighted blanket.
Consider the water temperature when washing your weighted blanket
Your weighted blanket may need to be washed occasionally, but you should think about the fabric type first. While most materials benefit from being washed in warm water, the suppleness of minky, for example, may be diminished.
Never put poly pellets, which are made of a material that melts at body temperature, into a washing machine. However, it is normally safe to clean glass beads and steel shot beads in warm water.
Do not mix the weighted blanket with other fabric
It’s not recommended to wash your weighted blanket with any other fabric to prevent abrasion. Abrasion can diminish the fabric’s quality and texture, therefore it’s preferable to clean it separately.
Washing a 20-lb weighted blanket
We recommend taking weighted blankets weighing 20 pounds or more to the laundromat for a thorough cleaning. A weighted blanket can impose unnecessary strain on your washing machine, which can lead to premature wear and tear.
Hand wash if possible
Hand washing is recommended for fragile materials. To accomplish this, fill a tub with hot water and a small amount of gentle washing detergent. Put the whole weighted blanket into the tub of water and knead each area carefully. To remove all traces of soap from the blanket, fill the tub with fresh water and let it sit for a while before draining the used water.
Drying the weighted blanket
Your weighted blanket can be dried in either the dryer or on a clothesline. Tumble drying is acceptable, but only on the lowest heat setting. It’s not good to dry things in the dryer, as that can ruin their softness and quality. Another option is to use a robust clothesline to dry your weighted blanket. It’s not good to hang your weighted blanket by one end because that can put stress on the stitching and ruin the blanket.
Add a removable cover on your weighted blanket
Wear and tear on your weighted blanket can be avoided by limiting how often you wash it. A weighted blanket with a removable cover can be used without constant washing. Thinner, lighter, and more convenient to wash is a cover that can be removed. Furthermore, it may be easily replaced at a lower cost than the weighted blanket itself.
What Are The Pros Of Making It Yourself?
The most obvious benefit of making your own weighted blanket is the money you’ll save. One weighted blanket might cost upwards of $60. When you make your own, you can save money.
In addition to this, you can tailor your blanket to fit your specific requirements and tastes. Many people find that commercially supplied weighted blankets fall short of their expectations. If you make your own blanket, you know it will be warm and cozy.
Why Should You Get A Weighted Blanket?
Research has shown that using a weighted blanket leads to deeper, more restful sleep. They are effective in reducing restlessness, soothing worries, and facilitating better sleep.
Conclusion
You have now learned the steps for creating a weighted blanket with glass beads. As was previously said, there are many advantages associated with using these blankets. Reduced anxiety and better sleep are two of them.
It’s never been simpler to make your own than with the resources and instructions provided in this post.
Nguồn: https://iatsabbioneta.org
Danh mục: Blanket


