Wool blankets are distinctive because of their enormous volume and loopy, voluminous appearance. The number of people who buy these blankets because they’re attractive keeps expanding. They’re great for lounging and sleeping, but they’re also attractive and a source of pride if you make them yourself.
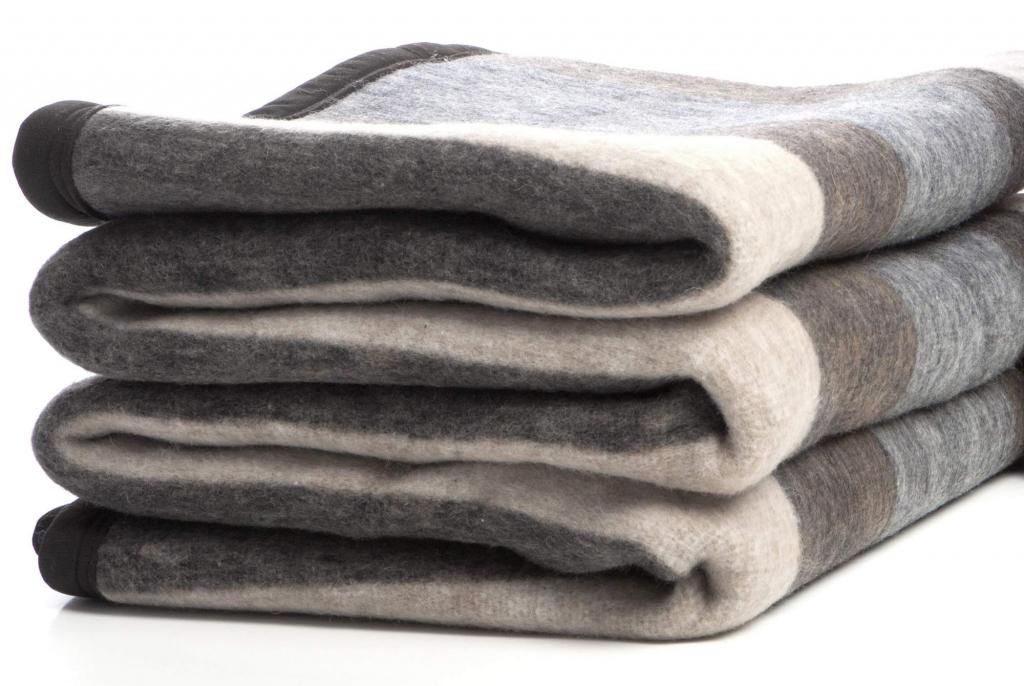
On the surface, they could appear to be quite intricate. Although the sight of such complex loops may put off newcomers, learning how to create them is actually rather easy. We are here to help you make your first wool blanket because we know how pleasant you will find it.
SUPPLIES
A wool army surplus blanket (I bought mine for four dollars from the Fleet Farm near my house).
a measuring stick or tape
perhaps some pins or chalk
$10-$15 for red and white roving.
Price range: $10–$20 for a needle felting mat.
DIRECTIONS
Spread out your wool blanket. Wool is essential for a blanket to have the authentic appearance of a Swiss Army blanket. Needlestitching only works with wool, by the way. Needle felting, by the way, is the name of the crafting method employed here.
My $4 blanket is a wool and artificial material blend that gave off a gasoline odor when I first opened the package. I didn’t give mine enough time to air out before starting the project, and I ended up with a headache from the scent. Once my blanket was out of the package for a few weeks, there was no longer any noticeable odor.
Spread your blanket out on a spotless floor to begin. It took me a bit of rearranging to make room for my 60-by-80-inch blanket. Create a straight line down the center of your blanket’s shorter side using a ruler and chalk or pins. You’re free to place your line wherever you like, but for maximum precision, it’s best to keep it no more than 12 or 16 inches from the blanket’s edge at most. Since I’ve seen many different types of Swiss Army blanket stripes, I merely chose one at random. Once you’ve pinned or chalked down your first line, draw a second line parallel to it. You can choose the width at will, once more. Specifically, I decided on a width of 4 inches. In this case, if the first line was placed 16 inches from the blanket’s edge, the second line should be placed 20 inches from the edge. If you have any trouble or need assistance deciding on specific dimensions, please let me know by leaving a comment below.
The next step is to lay out your red roving and cut it into strips. The roving should be spread out on the blanket and equally spaced between the pins or chalk lines.
Please keep in mind that the sample shown here is only meant to illustrate the general principles of needle felting. As a matter of fact, your blanket will feature a continuous length of roving at its bottom. Don’t worry if your length of roving is shorter than the width of your blanket. I’ll demonstrate how to seamlessly incorporate additional roving to hide imperfections and lengthen the yarn. I assure you it’s a breeze.
An intro to your needle felting tools
Since this is likely to be your first needle felting experience, I’ll explain how the instrument operates. The most majority are driven by a spring and feature a plastic safety barrier in addition to a lock. Needle felting needles are extremely pointed and have small barbs on them to assist press the roving into the wool (or into itself, if that’s the kind of project you’re working on – see my beginning needle felting tutorial for an example of another way to needle felt). If you want to know how to use, clean, and maintain your needle felting tool, go no farther than the instructions that came with it.
Check out this video I found from Clover, the maker of the needle felting equipment I use. The video is helpful since it demonstrates how needle felting is actually done.
Back to the project.
Xem thêm : How To Make A Polyester Blanket Soft Again? Comprehensive Guide
Once you have your roving organized and are comfortable with your needle felting instrument, it’s time to pull out your mat. So, tuck it under your wool blanket, take your needle felting instrument, and start poking! Just poke up and down and left and right across the red stripe until the roving is evenly distributed throughout the blanket.
Once you’ve stabbed the roving a few times into the blanket, you may curl up on the couch with your needle felting pad and tool and work on the project while watching a movie. If you want to protect the blanket from sliding off your lap, use the mat. The needles are, in fact, very sharp.
If your blanket is as big as mine, you’ll be needle-punching (the correct term) for a while. If you believe you’re finished, it’s a good idea to make a few more needle passes up and down the length of your blanket. The aforementioned image serves as a visual representation of your future fitness level.
Dealing with thin patches & adding more length to your stripe
See how the grey blanket peeks through in a few places? Small sections of roving should be cut or torn off a larger piece and thinned out significantly. Set them on top of the area where you want the stripe to be thicker, then position your mat on top of that. Needle (stab) them into place.
Wool is enjoyable to deal with because it sticks to itself, much like velcro. As an added bonus, it’s a master of camouflage. If you want your stripe to be longer, just lay down another strip of roving like you did at the beginning, overlap the new roving with the old, and needle it so that it blends in seamlessly.
Adding the cross
When the red stripe is finished, you can add the white Swiss cross and finish your blanket! Take a small amount of white roving, thin it out by pulling, then roll it into a ball the size of a cotton ball. In the same way that the width of the stripe is customizable, so too is the size of the cross. Center it on your blanket (you’ll have to measure this) and sew it onto the red stripe using your tool and mat.
If the cross shape begins to weaken, stab it into submission. When I use my needle felting tool to freehand appliqué shapes onto cloth, I like to do what is seen below. I use the plastic protective cover on my tool to sort of scoop off any roving that is protruding in the wrong direction, and then I stab it into place. For my purposes, this is perfect.
Wings are required for a cross once the first stripe has been added. Make a tighter cylinder out of the white roving, and then stretch it out into a thin tail. Stitch the thicker end onto the red stripe, and the thinner end onto the cross’s center. The cross’s form can be adjusted by scooping or by patching in additional white roving.
Ta da! Now you can needle felt like a pro. Plus, you just avoided spending at least a hundred dollars on a throw blanket for your home.
None of the firms I referenced paid me to do this. I simply provided a link to some materials I’ve seen at local craft stores.
Steps On How To Make A Wool Blanket
Once you have your wool ready, you may start knitting. Knitting a wool blanket is a great beginner project because it doesn’t call for any specialized equipment. You can find wool yarns at online shops that ship worldwide; a large blanket will require about 300 yards.
Here are the current instructions for knitting a wool blanket:
Step #1: Prep your wool
Cleaning and drying dishes is an important part of prepping. Since wool shrinks after being washed, you can gauge the true size of the finished blanket by washing it before you start knitting.
Washing your yarns is as simple as squeezing them in a towel and then letting them dry on a rack. This will aid in setting them straight as well. Do not dry your wool in a machine or expose it to direct sunlight.
Step #2: Unravel
As the step suggests, unspool the yarn. Ensure that you remove all knots before you start knitting so you won’t have a problem later on.
Step #3: Knit
Xem thêm : How To Fold A Blanket Into A Flower? Complete Step-by-Step Guide
Unspool the yarn, as the instruction instructs. Avoid frustration by untying any knots in your knitting before you begin.
The slip knot is tied by inserting the tail’s extension into the loop from above. While keeping the shorter side folded inside the loop, pull the longer side. To secure the blanket’s fabric and prevent it from unraveling, tie a slip knot.
Now, using gentle downward pressure, insert the head into the newly formed loop. Keep in mind that the size of the hole you make depends on the length of the head you draw. Keep it big enough to support the subsequent layer of the loop that will be attached to it. Repeatedly draw the head downward into the formed loop.
You should repeat this procedure nine times in a row. Squeeze the produced loops to make them regular in size adjustments. If you tug the head too hard, you’ll undo the knots you just tied.
This first segment, on which the width of the finished blanket will depend, can have as many loops as desired. One should keep in mind that additional loops require more yarn. You shouldn’t risk running out before the job is done.
To insert the head, begin counting two loops from the bottom of the third loop (from the ninth loop, the last loop of the first section). See to it that this new loop seems vertical if the first part was on a flat surface. If this is the case, insert the head into the next bottom-most loop of the first section to begin constructing the second section.
Make sure the second section’s loopholes are the same size as the first. If you want to keep your blanket from unraveling, you should give the last loop of the initial section a gentle tug occasionally.
The slip knot marks the end of the second portion. The final step is to place the head into the second section’s bottom loop. You still have some distance to go before you reach the second section’s initial loop.
You have just finished the third and final section. Insert the head into the bottom of the third section’s second loop and proceed to the fourth one. Make sure you skip the first loop. The third portion should be looped until it reaches its second subsection.
Make more divisions using this structure. Each new row begins with the first loop from the previous part, and each new row ends with the last loop from the previous section. Remember that it appears like a snake that winds around and around, with each new portion beginning at the tail end of the previous one.
It is recommended that the wind blow alternately in a clockwise and counterclockwise direction. Make as many rows as you need for the blanket to be the length you want it to be.
To complete, thread the head through the bottom of the preceding section’s final two loops. To make a new coil, enter the second-to-last loop and leave via the final one.
Place this loop next to the fourth-to-last one, and then thread the head through the bottom of the loops above it to form a new coil. Hold this new loop next to the fifth-to-last one and thread the head through all of them.
This process must be repeated until the first loop of the final portion is reached. Finish by attaching the head to the final loop you made.
Shake up the shape of your blanket until all the loops are the same diameter. Yarns with larger holes can be gently manipulated to make room for smaller ones. Careful not to yank so hard that you ruin your work of art!
Conclusion
Learning to knit is similar to studying how to produce a wool blanket. Making a wool blanket is a breeze for those with experience, and they can experiment with a wide variety of designs. You can also weave blankets, garments, and decorative items, in addition to knitting.
Nguồn: https://iatsabbioneta.org
Danh mục: Blanket


