Why not utilize a DIY pillow box to make a gift more unique for a friend or loved one this year? To make a quick and simple gift box, just print and fold this printable pillow box design.
There are affiliate connections on this page. I get a tiny commission if you buy something after clicking on one of my links, but it doesn’t cost you a dime more!
Bạn đang xem: How To Make A Pillow Box? Helpful Information
Updates have since been made to this post, which was originally published in 2018.
Pillow Box Template.
Looking for a unique gift box? Otherwise, welcome to your new home. Let me teach you how to make your own adorable printable pillow boxes today.
Assembling them is a breeze because they’re so simple to put together. Your pillow boxes will be ready in minutes after you download and print out the free printable template.
If you read the blog, you know how much I adore receiving presents in the mail. Putting them together is a blast, and the results are stunning, even for a simple present. They rank near the top of my list of all-time favorite recipes.
When it comes to packaging sweets, party favors, or tiny gifts like jewelry, this style of box is one of my favorites. In addition to utilizing patterned cardstock, you can decorate them with ribbons, tags, stickers, and other embellishments such as glitter.
You may make a DIY gift box for any event, such as birthdays, Christmas, Valentine’s Day, baby showers, and even wedding favors.
Simply download the template, print it on your preferred cardstock, cut it out, fold it, and glue it together. That’s as simple as it gets!
DIY Pillow Box.
If you’re interested in constructing these DIY pillow boxes from scratch, I recommend checking out my post from a few years ago, but if you’d rather skip the measuring and scoring, this pillow box template is for you.
Want to add an extra special touch to your handmade items?
Xem thêm : How To Measure A Throw Pillow? Easy Step-by-step Guide
Of course, these boxes can be used for more than just gifts. A small business selling handmade jewelry at craft fairs or through an online Etsy shop would benefit greatly from the use of these boxes. You can keep them flat until you need them, then open them up to insert your own special gift.
SUPPLIES:
- Templates for Printing
- To make this card, I used Maggie Holmes Gather scrapbook paper, which is unfortunately no longer available but you can still acquire her Bloom cardstock, which is just as gorgeous.
- Bone Folder or Embossing Tool
- Ruler
- Sticky tape, glue stick, or double-sided adhesive.
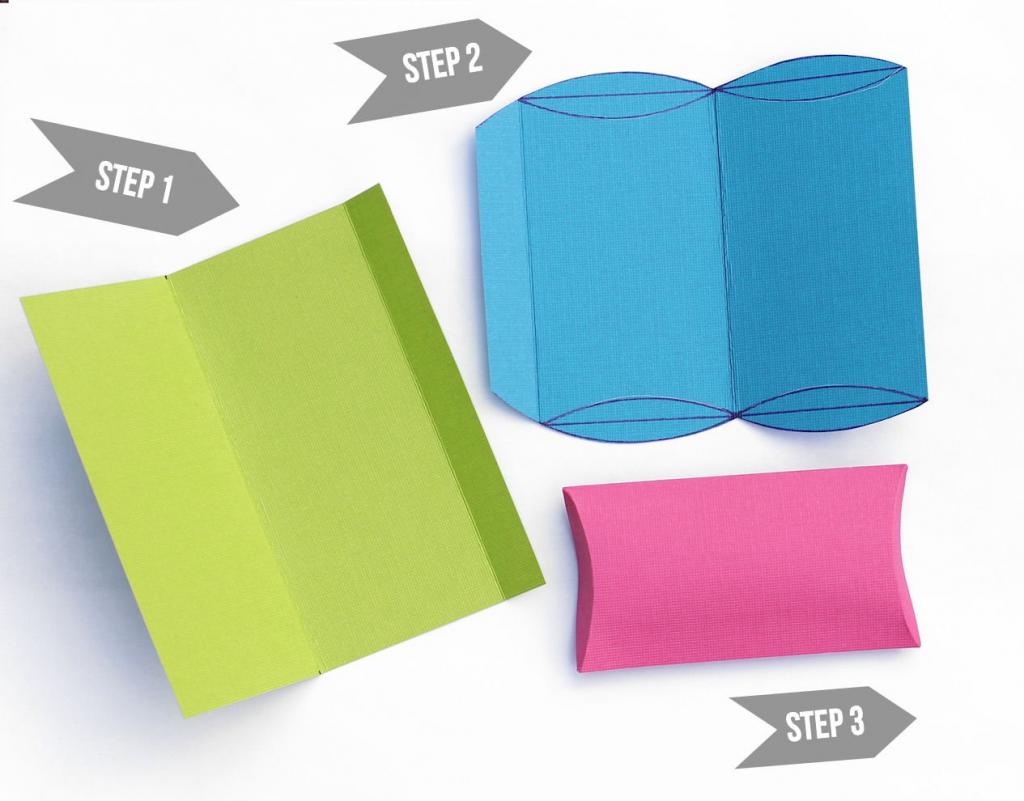
How to fold a pillow box:
1.The template can be downloaded by signing up below.
2. Put it on the reverse of the card (plain side of your patterned paper).
A4-sized scrapbook paper, trimmed to 1212-inch dimensions, was printed using a home printer. To make my boxes, I like scrapbook paper since it is more durable than regular ornamental paper but is not as sturdy as cardstock. Make sure your printer is up to snuff before using a cardstock of any kind.
3. Use a craft knife and a ruler to cut out the design.
4. The lines should be scribbled on.
For the straight lines, I used an embossing tool and a ruler, while for the curved lines, I used a bowl. If you don’t already own an embossing tool, a ballpoint pen will do. Before you begin, make certain that all of the ink has been used up.
5. Make sure to fold along the score lines.
Curved score lines may require the use of your fingertips to carefully produce a crease.
6. Use paper glue or double-sided adhesive tape to adhere the box’s sides together.
7. Gently push the sides, forcing the top and bottom to bend out, to create a rounded shape.
Push the two bottom flaps together to close the box’s one end.
Xem thêm : How To Embroider A Pillow? Complete Guide for Beginners
In order to keep your box closed, you don’t need to use glue. This is made easier by the box’s curvature.
Add your sweets or gift to the container.
To close your box, fold the top flaps inward.
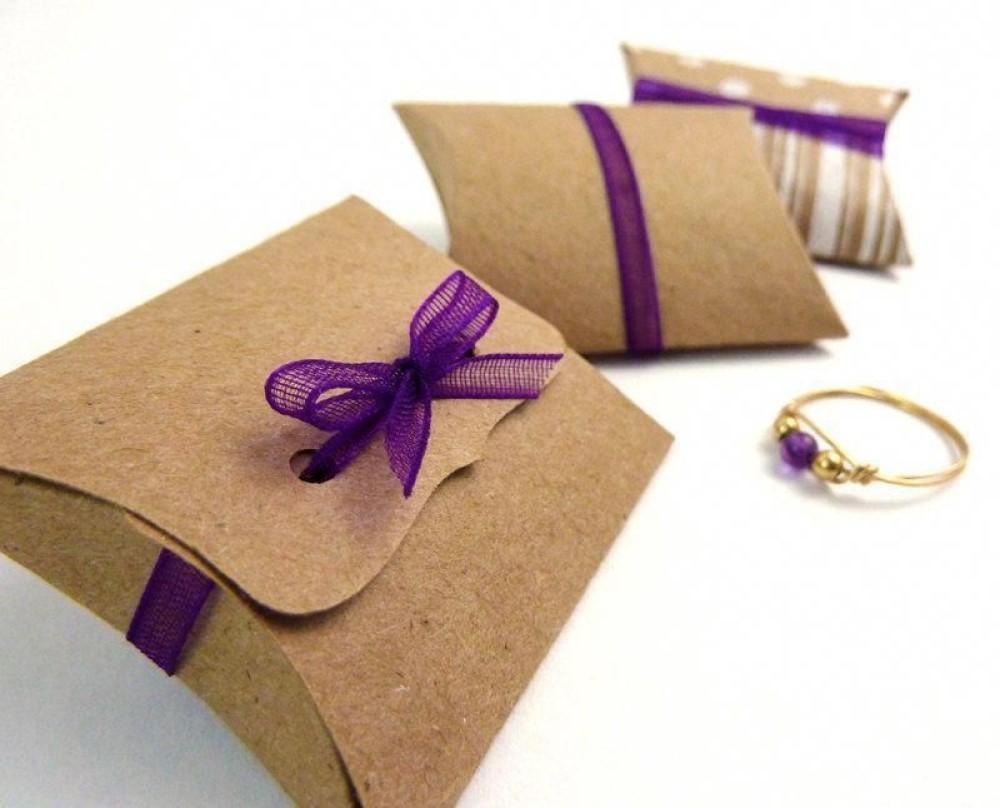
Adding a tag or ribbon to your pillow box is optional. Let the ornamental paper be the star of the show.
Make Your Own Pillow Boxes
Pillow boxes can be used for a variety of purposes, from present giving to party favors and wedding favors packaging. If you’d want to make one of your own, here’s a step-by-step guide on how to do it. So many options are out there for you to explore.
A gift card wouldn’t fit in one of my pillow boxes because they were too small. A larger version of this image is available at the bottom of this post. Alternatively, you could simply print off a template, cut it out, and assemble it, but that’s more time-consuming and requires more steps. Making these boxes from the ground up saves time and money.
A piece of cardstock that is 4.5 inches by 4.5 inches is needed for the first step. 4 1/2 by 6 1/2 Matstack was utilized)
Make two rectangles that measure 2 inches by 3.5 inches by drawing lines half an inch from the top and bottom. For each line segment, draw an arc above and below it with the help of a CD. Step 2: Cut the outside arcs so that you get the shape shown in Step 1 (above). A dull knife or pair of scissors can be used to softly score the paper over the inner arc of the circle. Make sure you don’t cut all the way through the paper if you’re using scissors.
Apply glue to the half-inch flap by folding it over and gluing it. Maintain pressure on the glue until it has cured fully. (Be sure to cut this flap along the CD’s arc as well.) Your simple pillow box is now ready to be filled with almonds.
Decorating is the final step in the process! Think outside the box. You can use everything from buttons and ribbon to twine and thread to scrapbook paper and washi tape to paper punches and stickers. My embellishments included a piece of washi tape, a flower-shaped paper punch (similar to this one), and a button.
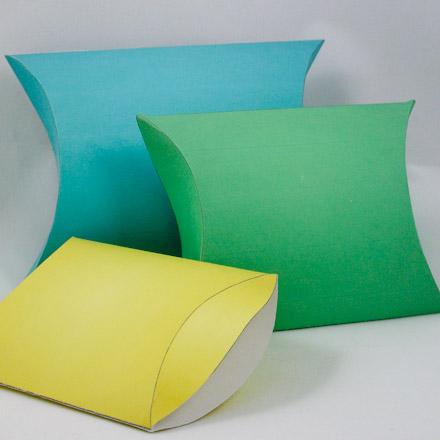
These boxes can be made in a variety of sizes. I created a larger version that worked out great for me. Half an inch is a quarter of an inch. Then In order to create the arches, draw a rectangle that is 4.5 inches long. A gift card will fit in this larger size.
Nguồn: https://iatsabbioneta.org
Danh mục: Pillow


