Is the thought of making a pillow bed occupying your mind? Have you ever considered creating your own pillow bed for a more relaxing and restful night’s sleep?
For me, resting soundly is impossible without pillows. It’s very painful to rest your head on a flat surface.
Bạn đang xem: How To Make A Pillow Bed? Easy Step-by-step Guide
When you wake up, your neck is stiff and you have a splitting headache. What a lousy way to start your day, right?
When we first open our eyes in the morning, we love to rest our heads on a pillow. Like drifting off to dreamland on a cloud.
This, however, is only the case if you sleep on a pillowtop mattress.
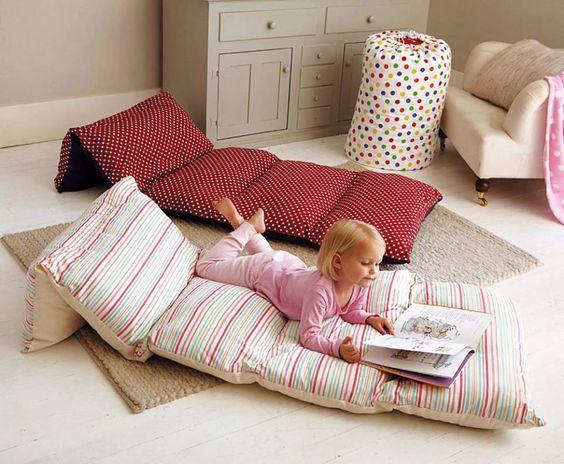
Those in search of a giant cushion on which to rest or sleep will find their match in a pillow bed.
The bed is made with pillows that are merely stacked and secured together. A strong connection between the individual pads is ensured by the stitching along the edges.
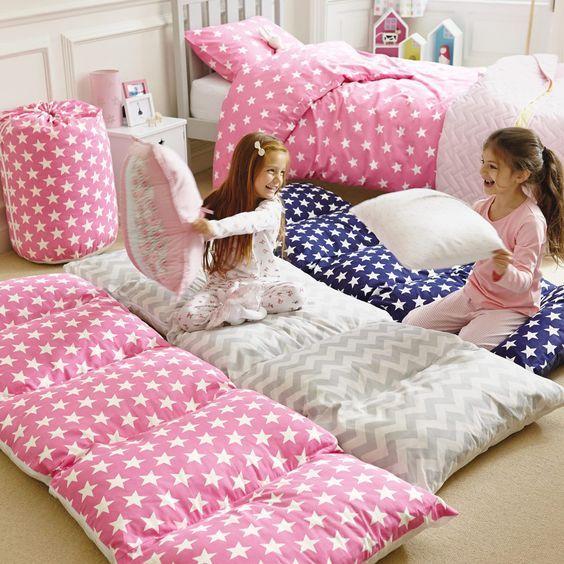
You can take it with you anywhere you go because it compresses down to the size of a regular pillow.
Therefore, it’s no surprise that such pillows are the most popular choice. But the ready-made versions can cost a pretty penny.
Nobody, however, implied that you couldn’t succeed on your own. This piece is intended to assist you in arranging your pillows into a comfortable bed. Keep reading then!
Steps To Make A Pillow Bed
Because of its portability, a pillow bed can be taken along on trips or camping excursions where a sleep might be in need.
Simply fold it up and stow it in the trunk or a bag for convenient hand-carrying.
The bed of pillows is yours to make if you so desire. When you put in the effort, the process is straightforward.
Here is a detailed explanation on how to construct a bed from pillows:
Step #1. Gather the materials you’ll be using
To complete this task, you will require the necessary supplies. You should expect to sew the cushions together since you will be joining them.
Needles and thread for your sewing machine are a must. You’ll need pins to keep the pillowcases in place.
You’ll need a pencil or tailor’s chalk to make the necessary markings.
Don’t go home without your pair of scissors and measuring tape, either. Two 2-meter-long pieces of flannel fabric, each with a different design, would create an alternate pattern.
Xem thêm : How To Fluff My Bamboo Pillow? Comprehensive Guide
If you choose, you can have the cover be all one color and design.
Step #2. Trimming some of the pieces
Both pieces of flannel should be trimmed to a dimension of 34.5 by 75 inches.
If you misjudge the size of your flannel fabric, you’ll have a major problem on your hands.
Make several notches with the tailor’s chalk and a tape measure. Cloth can be kept together by pins.
Step #3. Pinning sides
Once the flannel is cut out, you may begin pinning the seams. This will make sure that the pillowcases are properly positioned.
It is recommended that both flannel pieces be hung so that the right sides are showing. Both open slots should be used.
Leave some room on both sides before you start pinning.
Step #4. Sewing
When machine stitching the three sides that you have pinned together, be sure to leave a 1/2-inch seam allowance.
It’s important to stress the importance of using extreme caution at this stage.
If you use a sewing machine, be careful not to catch your fingers in the needle.
Step #5. Trimming
This may be the simplest procedure, but it must be carried out with great care.
Remove or trim any surplus material from the seam allowances.
You shouldn’t cut too closely to the seam. This procedure guarantees tidiness in your job.
Step #6. Folding over
We seem to have missed stitching one side on our initial foray. Pin the flannel in place and fold it over to produce a seam of approximately a half inch.
Step #7. Sewing the seam
You have completed the last step, which was to pin a seam, correct? That will be a finished edge stitch for you.
Turn it out while you are machine stitching to remind yourself that you should not sew it with both sides but with each side.
Step #8. Dividing it
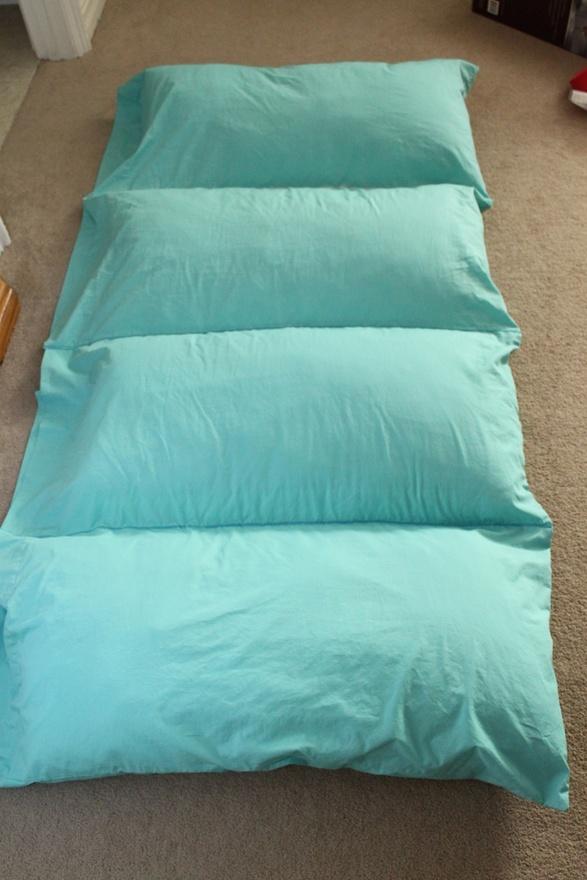
When you arrive to a length of approximately 18.5 inches from one of the short ends, draw a parallel line to it and repeat until you reach the other short end.
There will be four individual sleeping areas on your pillow bed. You should have four pillow pockets when you’re finished.
Step #9. Stuffing
Piling on the cushions is the last touch to your pillow bed.
Xem thêm : How To Make A Throw Pillow With Piping? Everything You Need To Know
Make sure it’s completely intact, then fluff it up. There’s a gap on the other end for inserting your pillow.
Closing it off with ornaments or buttons is an option. However, I don’t see why you couldn’t just leave it open.
Start with a blank canvas.
Invest in a high quality set of white sheets to complement any kind of ornamental bedding. “I like to use a white fitted sheet and shams as a base and then add in color,” says Ross, who used Peacock Alley linens in his own master bedroom.
Bring in color with a flat sheet.
Invest in a high quality set of white sheets to complement any kind of ornamental bedding. “I like to use a white fitted sheet and shams as a base and then add in color,” says Ross, who used Peacock Alley linens in his own master bedroom.
A coverlet works best for warm sleepers.
Purchase a high quality set of white sheets that may be used with any color scheme or design scheme for the rest of your bedding. Ross, who utilized Peacock Alley linens in his own master bedroom, says, “I prefer to use a white fitted sheet and shams as a background and then add in color.”
Get your hospital corners crisp.
Tuck in the loose ends and fold the paper into hospital corners (see Lifehacker’s guide for details). This time-honored method instantly gives the impression of a custom-made mattress on any bed.
Add a duvet for extra warmth.
Prefer a cooler environment? (Or would you just prefer to simulate sleeping on a cloud?) A warm and cozy night is guaranteed under a soft and lofty duvet. Keep it folded in thirds at the foot of the bed; if you get cold at night, just pull it up.
Place shams in the back…
When you want to sit up in bed to read (or binge-watch Netflix), shams behind your pillows will provide you the extra support you need. Because they don’t get dirty as quickly, they can also be used for ornamental purposes, unlike regular pillowcases.
…then standard pillows.
Ross matched the top sheet and pillowcases with a decorative pattern. He explains: “It’s another chance to bring in color.”
Finally: Go to town with throw pillows!
Pillows, whether square, rectangular, bolster, patterned, or plain, are a great way to spruce up a bed. Simply switching them out for something else will give you a whole new color palette to work with. Ross’s number one rule for good style is to start big at the back and work your way forward.
Whatever You Do, Avoid These Bed-Making Mistakes:
1.You lay your top sheet with the pattern up.
You may best appreciate the vibrant print by displaying it with the design facing down. When used as shown, the sheet’s top is folded over a duvet or comforter to expose the pattern.
2. You don’t make your bed every morning.
Your bed supposedly needs “airing out,” right? It’s just a bunch of nonsense. If you get into the habit of making your bed first thing in the morning, you may eventually feel that you haven’t fully begun your day until you’ve finished.
3. You don’t iron your sheets.
It’s annoying, sure, but it’ll transform the way your bed looks and feels. While flannel sheets don’t require ironing, linen and cotton sheets do. Wrinkled linens make for an unappealing bedtime companion.
4. You don’t use the duvet ties.
Use the ties on your duvet and the slots in your comforter! If you have a finicky duvet, these will help keep it in place all night long, no matter how much you move around in your sleep.
Conclusion
If you keep at it, you can make a pillow bed in no time. While you may find it for sale in stores and on the internet, making your own is incomparable.
It’s satisfying to witness a home-made item being put to use within the house or taken on the go to ensure the user’s comfort.
Pillow beds are versatile in many ways. It serves many functions.
And that concludes, “How to Make a Pillow Bed?” I pray you’ll be able to get some writing done and get ready for bed.
Nguồn: https://iatsabbioneta.org
Danh mục: Pillow


