Floating beds are a type of bed that are both sturdy and well-supported, yet they give the impression that they are floating because of its minimalist design and invisible legs. Floating beds have a modest profile since their legs are situated near to the mattress’s core.
Floating bed frames, like conventional ones, typically include the usual accessories like a headboard, nightstand, storage drawer, and sometimes even an LED light at the foot of the bed.
Bạn đang xem: How To Make A Floating Bed? Comprehensive Guide
Before You Begin
The building plans that follow are for a standard Queen-sized bed that’s 60 x 80 inches, but the dimensions can be modified to accommodate any sized bed. If doing so, just ensure that the center boards and support blocks line up on both the base platform and top frame.
When assembling the two frames, it’s recommended to use self-tapping screws that don’t require pre-drilling. However, you can use standard screws as long as you pre-drill the holes with an appropriate bit. Otherwise, you risk splitting the wood.
Safety Considerations
This project involves the use of potentially dangerous power tools, including a miter saw and a circular saw. You should only attempt this project if you know how to safely handle these tools, and if you possess the necessary safety equipment. Always wear eye and hearing protection.
![King Size Floating Bed Frame [Easily build your own!] - YouTube](https://iatsabbioneta.org/wp-content/uploads/2022/07/how-to-make-a-floating-bed-img_62e3995454df3.jpg)
What You’ll Need
Equipment / Tools
- 10-inch compound miter saw
- Circular saw
- Impact driver
- Tape measure
- Carpenter’s pencil
- Speed square
- Safety glasses
- Framing square
- Chalk line
- Woodworking clamps (c-clamps, pipe clamps, etc.) (optional)
- Straight edge (8-foot spirit level or straight lumber) (optional)
Materials
- 2 1/2-inch self-tapping wood screws
- 1 5/8-inch self-tapping wood screws
- Wood glue
- 2×4 lumber
- 3/4-inch plywood
- Construction adhesive
Instructions
Cut the Lumber for the Base Frame
Using a miter saw, cut your lumber to the following dimensions:
- 2 x 2x6s at 48 inches
- 3 x 2x6s at 56 1/2 inches
- 6 x 2x6s at 22 1/2 inches
- 10 x 2x4s at 11 inches
2 x 2x6s at 60 inches
3 x 2x6s at 78 inches
10 x 2x6s at 28 1/2 inches
Cut the Lumber for the Top Frame
Using a miter saw, cut your lumber to the following dimensions:
Cut the Plywood for the Top
Use a circular saw to cut two sheets of plywood down to 40 1/2 x 60 inches. Depending on your level of skill with a circular saw, you can use a chalk line to mark your cut, or clamp a 8-foot straight edge—like a straight piece of lumber or a spirit level—onto the plywood to guide the circular saw. Using a straight edge to guide your saw will produce a straighter cut, especially if you have limited experience with using a circular saw.
Assemble the Base Frame
Measuring from the end of one of the 48-inch boards, make a mark at 23 1/4 inches on the top edge of the board. Use a speed square to mark a straight line perpendicularly onto the face of the board at the mark. Mark an X on the outside—on the opposite side you’re pulling the tape measure from—of the line.
Lay the 48-inch board you marked edge to edge with the second 48-inch board, and transfer the mark onto the second board with a framing square. These marks are where the center support board will go.
Secure one of 56 1/2-inch boards to the outside of one of the 48-inch boards. Rest the edge of the 56 1/2-inch board on the face of the 48-inch board, holding the end of the 56 1/2-inch piece flush to the top and outside edge of the 48-inch piece. Drive two 2 1/2-inch self-tapping wood screws through the back of the 48-inch board into the end of the 56 1/2-inch board.
Repeat these steps on the opposite end of the 48-inch board with another 56 1/2-inch board.
Place the edge of the third 56 1/2-inch board—the center support board—onto the X of one of the 48-inch boards. Ensure that the edge of the board is flush with the straight line you marked at 23 1/4 inches, and the top edge of the 48-inch board. Drive two 2 1/2-inch self-tapping screws through the back of the 48-inch board into the end of the center support board.
Install the Base Frame Blocking
Measuring from one end of one of the 48-inch boards, make a mark every 13 1/4 inches along the top edge of the 56 1/2-inch board fastened to it. Use a speed square to mark a perpendicular line across the face of the board at each one of these marks, and mark an X on the opposite side of the line that you pulled your tape measure from.
Repeat these steps on the other side of the frame, and on the center support board. This will be where your support blocks go.
Place the edge of one of the 22 1/2-inch boards—the blocks—onto one of the Xs you made on one of the outside 56 1/2-inch boards. Ensure that the edge of the block is flush with the straight line you marked at 13 1/4 inches, and the top edge of the 56 1/2-inch board. Drive two 2 1/2-inch self-tapping screws through the back of the 56 1/2-inch board into the end of the block.
Rest the other end of the block onto the corresponding line and X on the center support board. Toenail two screws—top and bottom—from one side of the block into the 56 1/2-inch board, and toenail one screw through the center of the other side of the block into the 56 1/2-inch board.
Repeat the above steps for all six blocks on each of the marks you made.
What Is Toenailing?
Xem thêm : How to Give A Bed Bath? A Step-by Step Learning Guide
Toenailing is the act of fastening two boards, oriented perpendicularly from one-another, with screws or nails driven at a 45-degree angle.
Install Vertical 2x4s Onto the Base Frame
Place one 11-inch 2×4 into each of the four inside corners of the frame, where the three 48-inch boards meet the two 56 1/2-inch boards. Stand the 2x4s upright so they protrude 5 1/2-inch from the top of the frame. Hold the 3 1/2-inch face of the 2×4 against the 5 1/2-inch face of the 48-inch board, and drive two screws through each 2×4 into the 48-inch boards.
Repeat this process on each one of the blocks, by securing the remaining six 2x4s to the inside corners of the blocks and 56 1/2-inch boards.
Tip
When screwing into the 2x4s, stagger the screws so they’re oriented diagonally from each other. For example, drive one screw into the top left-hand corner of the board, and the other into the bottom right-hand corner. Doing so will keep the wood from splitting.
Assemble the Top Frame
Measuring from the end of one of the 60-inch boards, make a mark at 29 1/4 inches on the top edge of the board. Use a speed square to mark a straight line perpendicularly onto the face of the board at the mark. Mark an X on the outside—on the opposite side you’re pulling the tape measure from—of the line.
Lay the 60-inch board you marked edge to edge with the second 60-inch board, and transfer the mark onto the second board with a framing square. These marks are where the center support board will go.
Secure one of 78-inch boards to the outside of one of the 60-inch boards. Rest the edge of the 78-inch board on the face of the 60-inch board, with the end of the 78-inch board flush to the top and outside edge of the 60-inch board. Drive two 2 1/2-inch self-tapping wood screws through the back of the 60-inch board into the end of the 78-inch board.
Repeat these steps on the opposite end of the 60-inch board with another 78-inch board.
Place the edge of the third 78-inch board—the center support board—onto the X of one of the 60-inch boards. Ensure that the edge of the board is flush with the straight line you marked at 29 1/4-inch, and the top edge of the 60-inch board. Drive two 2 1/2-inch self-tapping screws through the back of the 60-inch board into the end of the center support board.
Install the Top Frame Blocking
Measuring from one end of one of the 60-inch boards, make a mark every 13 1/4 inches along the top edge of the 78-inch board fastened to it. Use a speed square to mark a perpendicular line across the face of the board at each one of these marks, and mark an X on the opposite side of the line that you pulled your tape measure from.
Repeat these steps on the other side of the frame, and on the center support board. This will be where your support blocks go.
Place the edge of one of the 28 1/2-inch boards—the blocks—onto one of the Xs you made on one of the outside 78-inch boards. Ensure that the edge of the block is flush with the straight line you marked at 13 1/4 inches, and the top edge of the 78-inch board. Drive two 2 1/2-inch self-tapping screws through the back of the 78-inch board into the end of the block.
Rest the other end of the block onto the corresponding line and X on the center support board. Toenail two screws—top and bottom—from one side of the block into the 78-inch board, and toenail one screw through the center of the other side of the block into the 78-inch board.
Repeat the above steps for all 10 blocks on each of the marks you made.
Attach the Top Frame to the Base Frame
Using a helper, lift the top frame onto the top of the base frame, resting the top frame’s center support board onto the base frame’s center support board. The blocks on both frames should be aligned with one-another, and the vertical 2x4s protruding from the base frame should rest against the face of the top frame’s blocks.
Drive two screws through each of the 2x4s into the top frame’s blocks.
Attach the Plywood to the Top Frame
Use a caulking gun to spread construction adhesive evenly over the top edges of the top frame. This includes the four sides, the center support board, and the 10 blocks. Place the plywood onto the top frame, with the two 40 1/2-inch sides meeting in the center, and the 60-inch sides flush to the outsides of the frame.
Drive 1 5/8-inch self-tapping screws every 12 inches around the outside perimeter and down the center of the plywood.
So why should you choose to build a floating bed?
- These bedsteads give the impression of more space in the bedroom.
- Your rugs and decorative items can find plenty of room there. In contrast to a regular bed frame, a headboard typically has extra drawers on one side.
- You won’t have to spend extra money on a box spring when you opt for a platform bed.
Floating beds are an innovative space-saving solution that may be the focal point of a minimalist bedroom. If you’re interested in a floating bed frame, but don’t want to spend the money, you can save money by building one yourself using one of the many free plans that we’ve provided below.
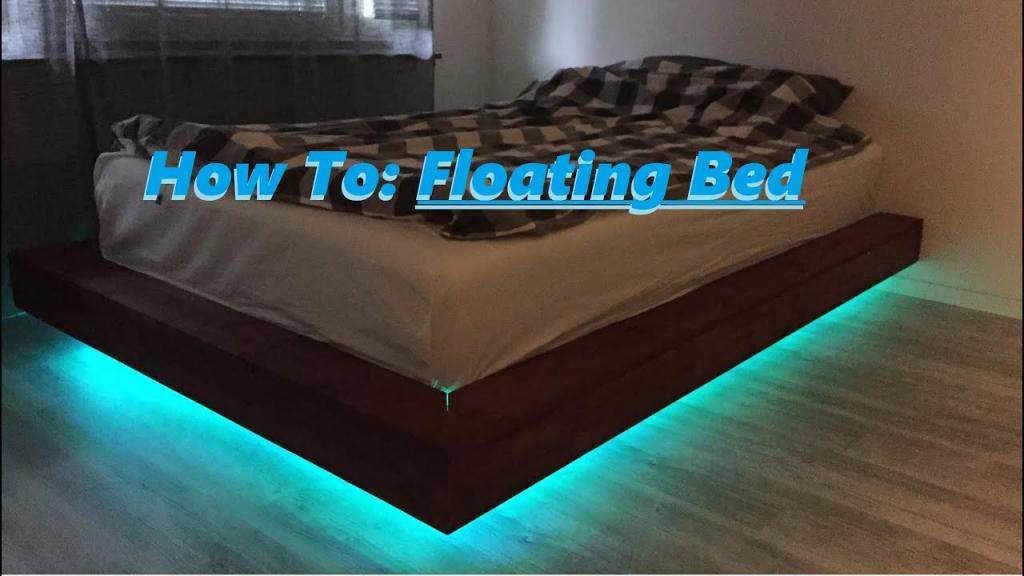
1. Floating bed frame with light
This floating bed design is unique, not to mention beautiful and straightforward to construct. You may get a good night’s rest with the bed’s soft glow keeping you company. And at night, when the lights are turned on, it’s even more beautiful.
Xem thêm : How To Build A Log Bed? Easy Step-by-step Guide
The space-saving design is ideal for a bachelor or studio apartment. The bed’s integrated lighting is a nice touch.
Here you will find a comprehensive breakdown of the tools, resources, and procedures needed to construct your own floating bed frame.
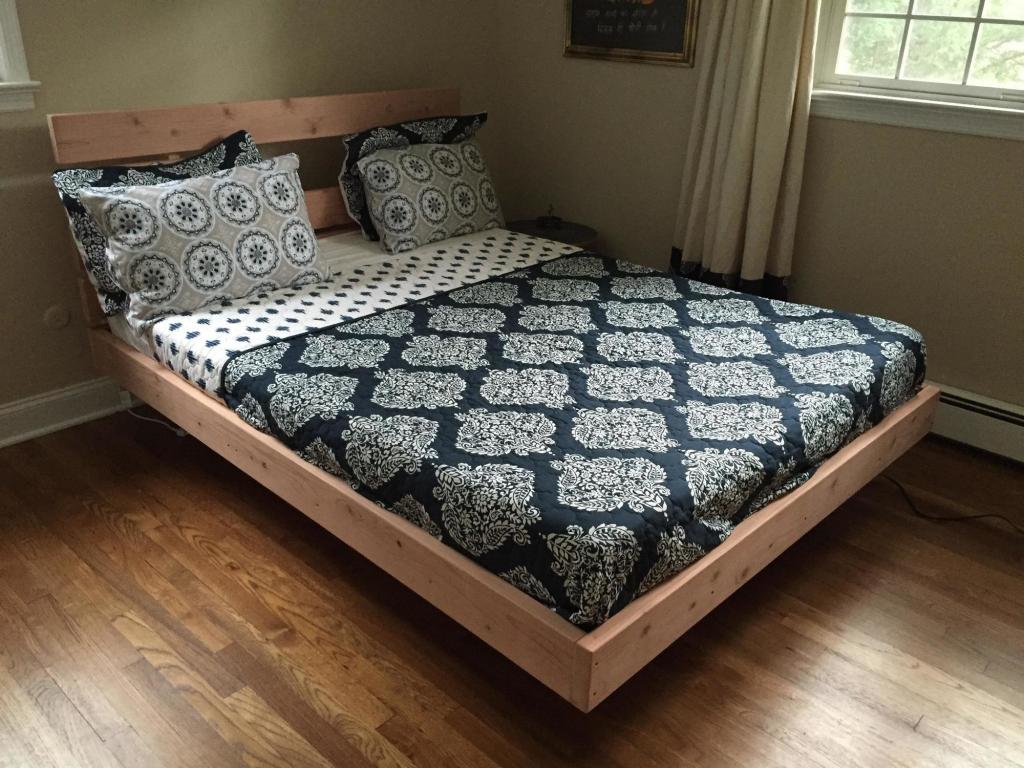
2. Floating bed frame with regular lumber
You can build your own floating bed frame with framing lumber from a home improvement store. In spite of the fact that the plan calls for a queen-sized mattress, you may easily adjust it to fit any shape or size of bed you have. The wooden structure can then be trimmed to size.
A video is available with detailed instructions for implementing the plan.
3. Full-sized Queen floating bed frame
This woodworking plan is intended to help you construct a queen-sized platform bed. Invest in high-quality supplies. For a finished floating bed frame that seems like it was made by a specialist, it’s important to get precise measurements.
Building the bed frame from scratch is a weekend project at most if you follow the plan closely. The instruction provides an exhaustive inventory of what you’ll need to bring with you to the hardware shop. There are a few helpful hints included in the guide as well.
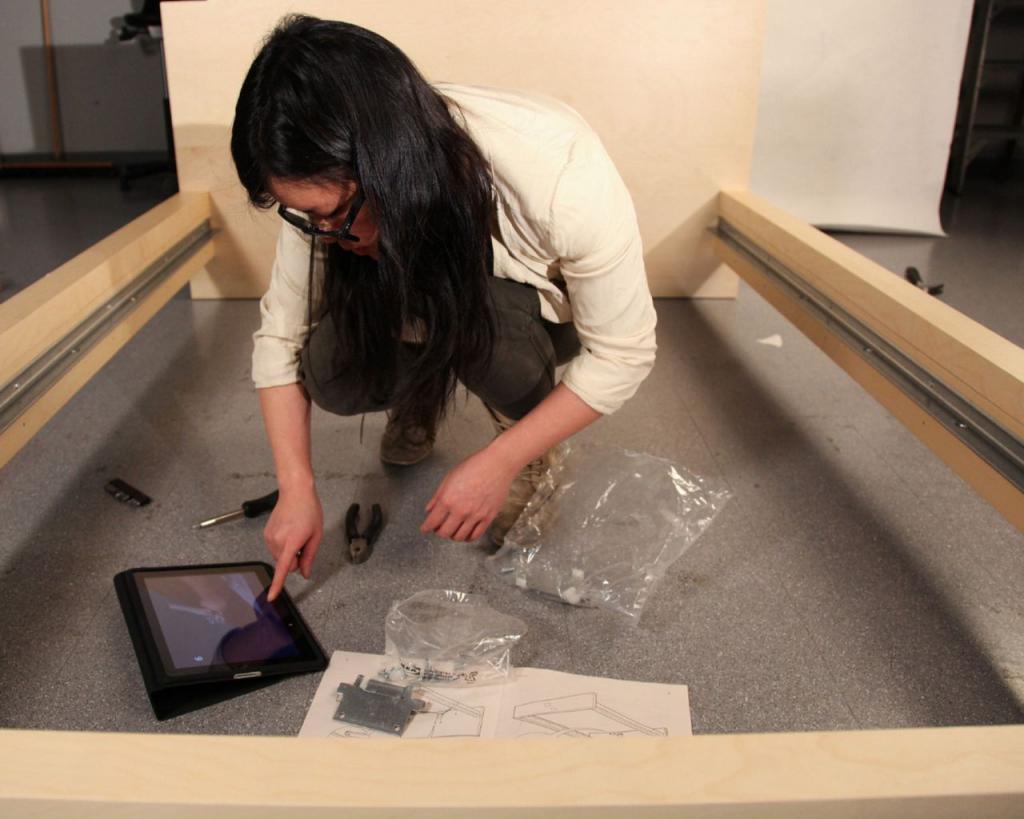
4. King-sized floating bed frame
This blueprint has everything you need to know to construct the nicest-looking floating bed frame for your master bedroom. The plan includes step-by-step instructions for constructing the bed’s platform, base, and slats. DIY your own floating bed frame by following the detailed instructions provided.
Floating beds are known for their airy comfort and unobtrusive design, both of which are present in this particular model. The structure, including the base, is solid. This comprehensive guide will provide you with all the information you need to successfully plan and execute your project.
5. Easy to build floating bed frame
This is the appropriate plan if you want to construct a robust and visually arresting floating bed frame. Take your time going over the strategy and focusing on the task at hand. Preparation helps you avoid stress and saves money.
Waterproof glue for the joints and sturdy woods like redwood or pine will strengthen and stiffen the construction.
6. DIY floating bed with light
Check out this comprehensive video that shows you every step of constructing a bed that floats on water. You may find the specifications for constructing a floating bed of any size in the description section below.
The video demonstrates how to construct a floating bed frame for a queen bed, but the dimensions for a twin and king bed are included in the explanation. The methods of construction, however, are consistent.
7. Inexpensive yet beautiful DIY floating bed frame
The bed frame is a must-have piece of bedroom furniture and often serves as the room’s focal point. Bed frames may be found at a variety of price points, with the higher-quality options costing quite a bit. Check out this floating bed plan if you don’t want to spend a ton of money but also value aesthetics and durability in your bed frame.
8. Elegant looking floating bed frame
Do you want to replace your platform bed with something more luxurious as part of a bedroom makeover? In that case, maybe you might consider putting your bed on a floating bed frame. These are nice to look at, and you may design your room around them.
From the initial planning stages until final assembly, there are several procedures to follow. Frame measurements and general layout are determined at the planning stage. Just as you would draw up a floor plan to help you visualize a building’s layout, so too should you write down and strictly adhere to a plan. This article serves as an all-inclusive manual for constructing a bed that floats.
9. Floating bed frame with built-in LED strips
The methods for putting together the floating bed frame are demonstrated in this video. The bed’s LED lighting makes it stand out and adds a touch of modern style to the room.
10. Wooden DIY floating bed frame
To that end, this guide will show you how to construct a floating bed frame out of timber wood, the material of choice for beds. It’s a queen-sized bed with a full materials list and step-by-step instructions. In order to make the process more manageable, we break down each stage into sub-stages.
11. Simple floating bed frame design
Here is a simple yet clean design for a floating bed frame, perfect for a modern or minimalist bedroom. The headboard of this king-size bed frame extends to the side rails. There is also a floating nightstand included.
12. Sleek floating bed
If you’re interested in building a bed frame that floats but would prefer not to use wood, this is the blueprint for you. The bed’s frame is designed to give the appearance of floating but actually floats on air. The headboard is made of cedar, and the whole bed is sturdy and attractive.
13. Modern floating bed frame design
The atmosphere coming from this floating bed frame idea is incredible. Since it’s made of wood, it may be stained or painted to complement any decor. The bed frame is solidly made, and its floating nightstand and attached headboard complement the style of the bed.
14. Floating bed frame DIY from scratch to finish
Want to give your master bedroom a more modern feel and style with a floating bed frame? If that’s the case, you might be interested in this blueprint for a bed frame that doesn’t touch the floor. The video’s straightforward layout makes it easy to follow along and create your own floating bed frame.
15. Sturdy floating bed frame
Here is an alternative, yet sturdy, design for a floating bed. This strategy goes into great depth. The inner workings of the floating bed frame’s assembly can be seen in the accompanying tutorial video.
Conclusion
Read through these do-it-yourself floating bed ideas to construct a new bed for your bedroom or to update an old one. This is a sizable but not overly intricate job. You can pick from a wide variety of formats, ranging from the simplest to the most intricate.
The finest plan for a floating bed frame is the one you find by comparing your needs with those described above.
Great plans for building a bed that floats on the floor, in case you want to build one yourself.
Nguồn: https://iatsabbioneta.org
Danh mục: Bed