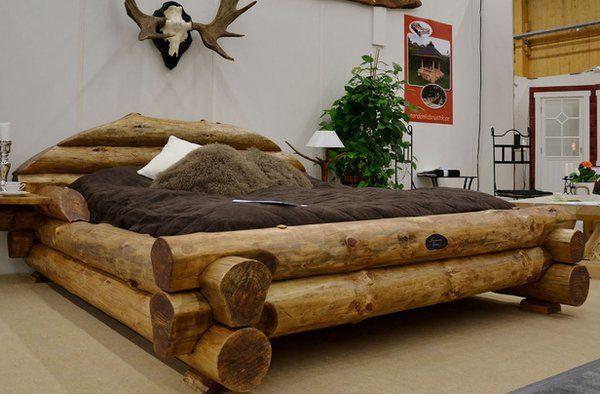
Since roughly a year ago, this has been going on. Our eyes were drawn to a cedar bed frame when perusing handcrafted furniture stores with my wife. This piece was given a “rustic” makeover by being sanded and then shaped into a log. However, the $1,000 price tag put us off. That’s why I assured my wife that I would be there. Six months after that, I started working on it, and so on.
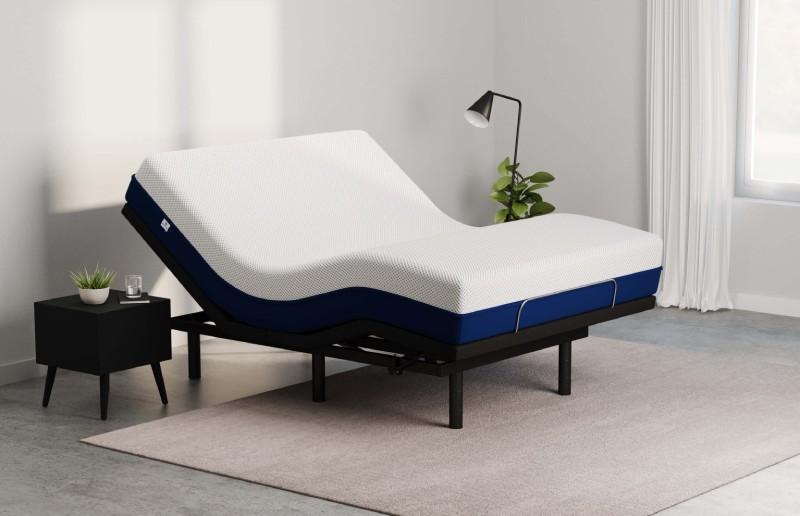
- How To Reprogram Remote For Blackstone Adjustable Bed? Comprehensive Guide
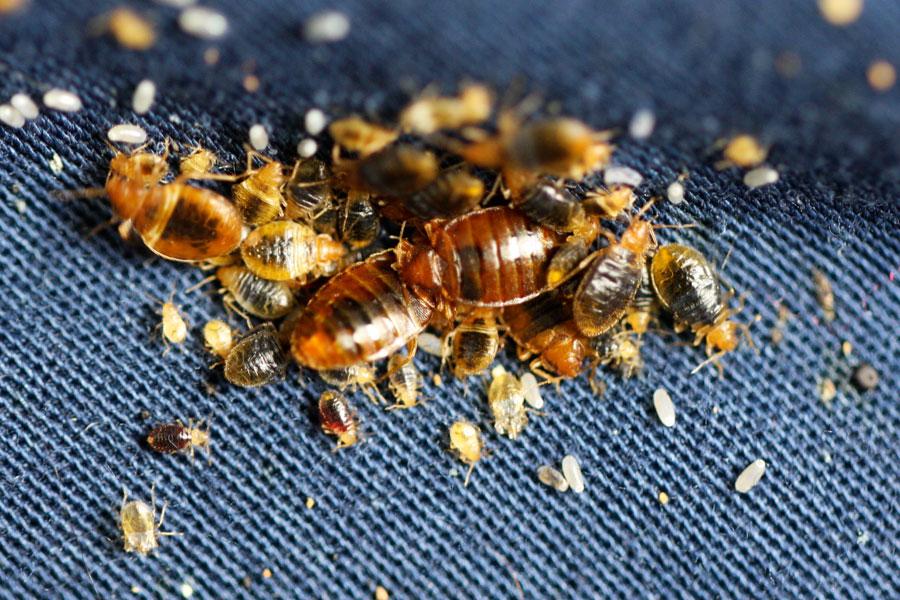
- How To Make A Bed Bug Trap? Where to Buy Bed Bug Traps?
- How To Attach Headboard To Dorm Bed? Our List of The Best Dorm Headboards to Buy
- How To Use A Feather Bed? What You Need To Know
- What Is The Size Of A Split Queen Adjustable Bed? Helpful Information!
Hand tools are all you’ll need to build this Adirondack AKA Rustic bed frame (power drill was used). Hand saws and chisels were used for most of the rest. It takes a lot of time and effort, but the final product is worth about $50. If you want to stain and polyurethane the wood, you’ll have to buy the materials separately. A “Golden Oak” stain and Clear Gloss polyurethane were used to create the finished product you see here.
Bạn đang xem: How To Build A Log Bed? Easy Step-by-step Guide
Even though it is a queen-sized bed, I’m confident that it can be made to fit any bed size if you provide the exact measurements. I’ve just done some research online. It is impossible for a Queen Bed’s inside to be smaller than 60×80 inches. I added an extra inch or two to each side in case I made a mistake of my own.
Step 1: Tools You Will Need
Because of this, you will only require a few tools. Just a ton of time and effort required. By the conclusion, your ability to use a chisel will have substantially improved.
Rubbish hammer (for hitting chisel)
-New and sharp chisels (1 inch, 1/2 inch) will save you a great deal of time.
Was able to catch a glimpse of it (I used a hand saw as I did not have a chain saw, but that would make it much easier)
-Drill with electric motor (actually is optional, but putting screws in later for support will make it more sturdy and easier in some places). It’ll be useful for drilling holes for pegs, too.

A total of five 2×4 boards are required (make sure they are very straight)
Wood glue is used in the construction of wooden structures
A minimum of two clamps is required.
– Take knife from sheath (for removing bark)
-Hatchet – this was used to cut down tree limbs
60, 120, and 220 sheets of sand paper —
A measuring tape is an essential tool.
-Level
Additional Resources:
In most cases, investing in an electric sander will prove to be a time-saving move. It’s possible that you don’t need the draw knife as much as you believe.
Step 2: Finding the Trees
A few white pine trees are required. In each case, the size ought to be reduced (large, medium, small). Avoid making them too thick at the bottom, and make sure they’re not too thin at the top.
As you seek for your trees, keep this in mind. “Medium Tree” and “Large Tree” bases are the beams for your headboard and footboard. Try to avoid purchasing a bed that is too heavy to move.
Small and other two trees form the bed’s spindles and rails, which are then joined together. You’ll need more than you think, so don’t wait until the last minute to buy what you need.
As a “medium” tree, I used a tree that split at the base so it wasn’t as thick and didn’t kill the tree (seen in the picture). Because I couldn’t access my saw from the back because of the angle, I had to use a hatchet.
When it came to finding a “big” tree, I found one with a “Y” split not too far up the trunk. When it came to constructing the head board, the “Y” shape was ideal because it was large enough for the major beams and thin enough for the tops. It was a difficult part of woods to get to the tree because I didn’t carry my phone, and I didn’t want to risk damaging the tree.
Remove all of the limbs prior to shipping. I used a hatchet since it was fast and easy. However, in retrospect, using the saw instead of the hatchet may have made sanding the edges easier.
Step 3: Cutting – Still in the Woods
Because you have to chop the trees down, this is the most efficient method of transporting them. Cutting them to the correct length now will save you time in the future. The following is a breakdown of the lengths (Queen Bed).
2 x 5 ft. Headboard Beams (thickest beam)
2 x 4 ft. Foot Board Beams
4 x 88-inch rails
A total of four 68-inch connecting rails are required.
The sizes of the ten foot and head spindles vary.
8 Rail Spindles, varying in length from 10 inches to 15 inches
You can always estimate or get near and then cut things afterwards, as long as you don’t cut them too short. Keep the shorter limbs (spindles) longer until you determine their exact size, which is a long time later.
Step 4: Removing Bark and Drying
Remove all of the bark with your draw knife. After sanding, I discovered that the finer the grain seems, the deeper you go into the wood.
Allow it to dry after you’ve finished removing the bark. I completed the task after roughly three weeks of storing them in my barn. If you don’t wait for it to cure, the wood will shrink, causing measurements to shift, joints to loosen, and a worse quality stain or polyurethane finish. LET IT DRY!!!!!
Even if you leave it out in the sun, avoid setting it on the grass.
Step 5: The Big Four – Pieces Your Are Building
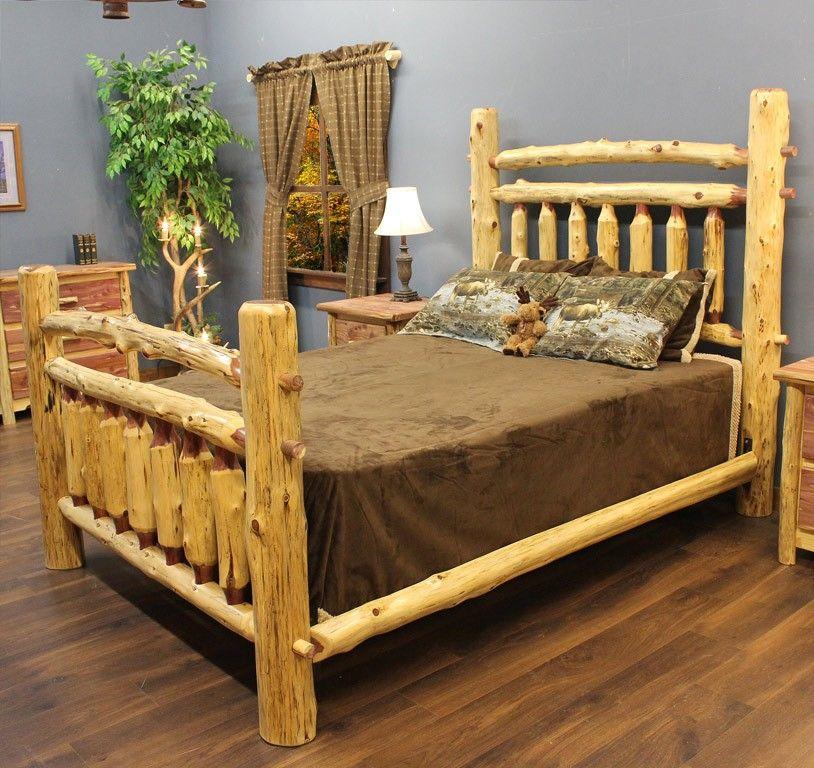
Keep in mind when you are done building, the bedframe will be 4 main pieces (not including the 2×4 slats). See Pictures above for the four main finished pieces. This will allow you to transport the bed.
When you’re finished, the bedframe will consist of four primary components, not including the 2×4 slats. You can see the four main sections that were completed in the photos above. This will make it easier to move the bed around..
The 88-inch logs should be laid out in a single row. A thicker (bottom) and a thinner (top) side should be present on each side. There is no problem if they are all the same size, but the bottom of the bed will bear all of the weight, therefore it needs to be thicker.
In order to have a showing length of 80 inches, make sure the final length is at least 80 inches.
-Don’t worry about the spindles just yet. We’ll make them later.
Railing on the Headboard
a thicker bottom and a narrower apex (68 inches long)
Xem thêm : How To Keep Bed Slats From Falling Out? A Few Tips to Remember
Make sure they only go 2 inches inside the Main Beams on either side if you decide to make them shorter, which you can (64 inches). Keep in mind that a 60-inch displaying length is required.
-As with the Footboard, these should be thicker than the ones used there.
Toe Bars on the Board
a thicker bottom and a thinner summit (68 inches). The “Head Board Rails” are likely to be the thinnest of the two because they are smaller.
I recommend naming them once you’ve paired them all together. For “Right” and “Left,” I used red and blue Sharpies, respectively. Just like I would if I were lying in bed, I choose left and right (which means facing the footboard). Afterwards, I would write “Top Head,” “Bottom Head” on either end. Because of the differences in color and size, I was able to determine whether a rail was going left or right.
Step 6: Chisel Time – the Rails
The 88-inch Beams are the primary rails.
Your Main Rails should be bare wood at this point. From both ends, mark a distance of 4 inches inward.
Now, 2 inches in from each end, create a mark.
From the end to the 2 inch mark, chisel out the rails to produce a rectangle. The rectangle should have a width of 1.5 inches and a length of 2 inches.
IMPORTANT!!!! Check to see that all of your squares are facing the same way!
Now the remaining two inches should be chiseled as a taper. See the image.
A taper should be carved into the last two inches. The image is here.
I made a one-inch square that measured two inches long. In fact, I extend the square insert all the way to the rail’s end. One inch was cut from the end of the rail to the end of the taper. This one’s taper didn’t extend into the Head/Foot Beams, however. It’s possible to make these rails 66 or 64 inches long so that you don’t have to chisel in as much.
Beams for the Head and Footboards (The Tops of Them)
To improve their appearance, I chiseled the top. This is all up to you. You can see what I mean by looking at the photo, please.
Step 7: Chisel Out Slots
With practice, you will be able to do this more quickly.
My goal was to have a 9-inch bottom rail. All four of the Head and Foot board Beams were marked. As a precaution, I traced rail ends around the area where I’ll be chiseling. Hammer and chisel are all that’s left now.
As you chisel, be sure to maintain it square.
Do extensive research.
As a general rule, the main rails should be 4 inches wide, tapering to a narrower width at the 2-inch line (this will give it a move of a funnel like entrance with a square hole at the bottom).
You’ll have to check, fix, check, fix each one till it’s able to go in and out effortlessly.
No taper is required for the Head and Foot Rails, which just need to be inserted by 2 inches (or perhaps by a quarter inch to better fit). Since they’ll be glued and screwed in afterwards, they need to be a closer fit.
About 8-14 hours will be needed to complete the 16 holes you’ll be playing. It took me nearly an hour to complete the first two, but I eventually improved my speed to approximately 30 minutes.
Step 8: Measurements
For your convenience, here are some additional measures for chiseling out the slots.
Sincerely, I apologize for the poor quality of the illustration.
Rails that connect the upper and lower decks
9 inches from the ground to the first main rail.
22 inches from the ground is the starting point for the second main rail.
Bottom Rails of the Headboard and Footboard
Make certain that the bottom rails are at least 14 inches apart from the main rails, or your main beams will be compromised if they are connected.
a crest rail on the headboard
Take it to the roof, if you like. I walked about four feet.
Top of Footboard Rail
Take it to the roof, if you like. I’d say I went 35 inches in total.
Step 9: Sanding
There are endless amounts of sand. An example of before-and-after sanding is seen above. Most of the sanding had been completed at the time of this photograph, but not all of it. The spindles on the headboard aren’t done yet either.
After sanding, you’ll wish you had never seen sand paper in your life.
I strongly recommend using an electric sander if you have one, as it will save you a lot of time and effort.
I also discovered halfway through that sanding your wood is a little simpler if you run the draw knife over it again to smooth it out, since the drying process sometimes leave it a little rough.
Grits range from 60 to 220 grits.
More than 40 hours spent here.
This is great news because it allows you to skip around to different steps and return to other parts. You can, for example, construct the entire footboard prior to beginning to chisel out the parts for the head board. Jumping around here will keep the sanding from driving you to distraction.
Step 10: Rail Spindles
3 Additional Photographs
These people irritate me.
Spindles must be sized to match the width of the rails as they progress down the length of a rail. I made some educated guesses.
Spindles should be about 10 inches in length (depending how wide apart you made your Main Rails). This is something you’ll have to do on your own.
Xem thêm : How To Become A Bed Tester? Effective Guide For You!
Remove the spindles by chiseling them out. Rather than making the male and female sections of the spindles square, I opted to make them rounded instead.
Also, sand these.
It’s time to remove the main rail holes as well. Again, a lot of trial and error. Make sure you measure the distance between the bottom and top rails before deciding where to position these.
Step 11: Head and Footboard Spindles
These, too, are a bit of a challenge.
You must locate the center of the Bottom Beams in order to create a Sunray design like mine. Set up a straight one that is equal to the distance between the two beams.
A 22.5-degree angle in the opposite direction is required for cutting the next two spindles (the ones on either side of that). Take a look at my sketch from a few steps earlier for inspiration. Both the location in which they will be placed and the length required to produce them must be measured. I don’t know because each bed is unique.
Finally, the final piece must have 45-degree angles. The lengths of these components don’t have to match.
In order to make it easier to glue and screw them in place, I carved out a “U” shape underneath them.
Step 12: Attaching Head and Foot Board Spindles
Because I was unsure how to carve at angles, I decided to screw them in.
The first step was to secure the spindles with wood glue and let them to dry. Then I proceeded to screw them into place (for the head board my wife help hold them in place and screwed them in while the wood glue was still wet).
To conceal the screws, use a bigger drill bit at first.
To avoid splitting the wood, use a small drilling bit to pre-drill the holes.
If you can, hide the screws inside the bed so that they are less noticeable. However, there are situations when this is unavoidable.
Fill them with wood puddy after you’re done.
Note: I used glue to insert small slivers of chisel waste into any gaps that remained, and then sanded down any rough edges that were left. I’m not sure if this will assist with stability, but I thought so.
Step 13: Slats – 2×4 and Chisel
To get the job done, you’ll need at least five 2×4. I decided to use only five because they fit the best among the Main Beam Spindles.
There is a 0.5-inch margin of error for the length.
Because the primary rails vary in width, the length of each one will also vary. Label your boards so you know exactly where they belong.
Take a look at where each one goes on each side and make sure it’s where it should be. So that the bed’s Box Spring doesn’t slide off the ends, I only went about three inches from the foot and head boards.
Between the spindles on each side, there were two more positions.
The 2×4 will need to be chiseled out so that it is flush with the surface of the Main Rail.
Make sure the rails are level after everything else is done. Then, sand them down on the inside.
Step 14: Stain and Gloss
You have the option to primary stain and shine the whole thing if you so desire. We were able to. We sprayed two coats of Gloss on the surface of the vehicle. I’m certain I’ll be bombarded with complaints and inquiries about the lack of specifics. Please feel free to contact me with any questions.
For those of you who aren’t fans.
While working as a lifeguard, I came up with this story in my thoughts. I’m sure there are more efficient ways of doing this. However, I lacked the resources to make this process more efficient, so I simply put in a significant amount of effort.
Please, if you make one, share it with me. Even though this was my first major project, I didn’t have any prior experience, therefore anyone can do it. Before you proceed, just take your time and consider your options.
Enjoy!
Step 15: Stability
The Main Rails can come off the bed if it moves around a lot. It’s not a great idea.
You’ll need these things:
Poplar Wood Dowel – 1/2 in.
Drill Bits -1/2
In order to drill through the chiseled part of Main Beams, drill the Head/Foot Board Beams. Locking them in place is as simple as slidgin’ the wood dowel through the holes. Make sure you can remove them in the future, or you may never be able to dismantle your bed!
Rustic Bedroom Ideas
If you’re going for a more rustic look in your home.
To assist you organize your room, here are a few things I’d like to share with you.
Natural light
Make use of the available light.
Lightweight window treatments or wider windows are two options.
Use calming colors
The use of relaxing and nature-inspired colors in a rustic style is highly encouraged.
Create contrast
Incorporate darker hues with lighter ones after you’ve established your natural color palette.
With a brown wood nightstand, for example, a cream sofa cover would be an excellent way to brighten things up a bit.
Conclusion
It is now possible for you to construct a log bed.
My best wishes for your rustic-themed room.
When you’re making your own bed, be careful.
Take safety precautions and exercise caution when performing the operation.
Here’s What You Need To Know About Building A Log Bed. There are only four simple steps to this process!
Nguồn: https://iatsabbioneta.org
Danh mục: Bed