When it comes to making long-lasting wood bed frames, manufacturers aren’t exactly renowned. As if everyone in the United States weighs 120 pounds as in Asia.
For this reason, they manufacture wafer-thin boards and ignore their customers’ complaints that their butts are falling to the ground.
Bạn đang xem: How To Keep Bed Slats From Falling Out? A Few Tips to Remember
The bed frame’s strength can be considerably increased by replacing the slats with 0.75″ or thicker plywood. You will need to cut plywood, place it on rails by measuring and sanding the edges of your current slats. For a full, queen, and king-sized bed, you’ll need two sheets of plywood with center support beams and posts.
Your butt is sagging at night because your bed slats are old and failing or the cheap manufacturer cut money by using weak slats. You are in the perfect location to solve the problem fast and inexpensively.
1. How to Replace Bed Slats for Twin Size Beds
- Remove the mattress and the rest of the bedding.
- Remove the screws from the existing slats. If nails are used to hold them in place, please see the link below for instructions on how to remove them.
- Take a trip to the hardware store and buy 3/4″ plywood. 4 × 8-foot plywood should be fine. The good side should face up while installing it so that the bad side does not pick up and poke the mattress. As shown in the video below, if you don’t have a truck, you may attach plywood to your car’s roof like this.
- The hardware store will typically deliver your order for $15 – 45 dollars if you are afraid to try this way of hauling plywood on your own. Even if it’s 50 miles away, they’ll typically deliver. Let your friend borrow your truck for an hour by offering him alcohol and pizza. Even in my small town, there is a taxi service with a delivery van.
- Cut plywood based on the dimensions of the bed frame. In general, 75″ x 39″ should be a reasonable estimate. An excellent demonstration of how to transport, carry, and cut plywood can be found in the video shown below. Unlike most videos, this one is worth your time. I’ve been using this circular saw for years.
- Make a big, bold X in the plywood’s bad side where you marked the center with a marker or crayon.
- With screws or nails, attach plywood to the bed frame so that it is more stable and less likely to move when weight is applied.
- The distance between the plywood and the floor should be measured.
- It is best to use a speed square, book, or the factory-end piece of lumber to mark your lumber.
- Using a piece of lumber, such as a 2×4 or 2×6, cut a piece long enough to fit in between the plywood and the floor. As a result, your bed frame’s platform is given an additional layer of stability thanks to this support leg. While driving 3.5″ nails or screws into an X-shaped piece of wood under a bed, try and get someone smaller to hold on to it for you. The platform’s strength is significantly increased with the addition of this one piece of wood.
- Re-install your sheets and mattress, then relax on your newly constructed platform bed frame!
The video below shows you how to cut a 2×4 with a circular saw. If you have to watch the video in order to cut a 2×4, you probably don’t have a speed square. Make 90-degree cuts on the board by using a book or by cutting off an inch from the backside of an existing two-by-four.

Read my post Should You Screw Down Bed Slats? to learn how to remove nailed-down slats from a bed frame. Scroll down about halfway to find the removal instructions.
You can save time and money by paying for your materials and delivery at the Contractor Desk at the hardware store. Contractors have their own area here.
Say you are working on a little project now and will begin a larger one next week. Tell them this (like a garage). It’s possible that they’ll forgo the delivery fee or offer a Contractor Cash Discount in lieu of it.
There is a 5 percent discount for cash contractors at one of the two hardware stores in my region, so it is worthwhile to inquire (unless you go to the big box hardware stores like Home Depot and Lowes),
Even if it’s only five percent, every dime you save adds up… I despise the phrase. More than half of a $1,000 weekly wage in the United States or Canada is taken away by taxes.
So, in reality, saving one penny nets you two.
For whatever reason, I wanted to know whether there was a clever way to receive a 12 to 20 percent discount at the large box stores, so I looked into it.
It’s something I hadn’t considered, but it could save some of you money.
2. Replacing The Slats in Full and Queen Size Bed
- It’s a good idea to use two sheets of plywood and a 2x4x10-foot piece of lumber instead of the instructions for a twin bed.
- Take a measurement of the bed frame’s width, which should be around 54 inches.
- Cut the two pieces of plywood to the desired length.
- Place one near the head of the bed on the bed frame.
- Cut the second piece of plywood to the appropriate size based on the remaining gap measurement.
- To make the bed frame, cut the 2x4x10′ to the proper length. Under the plywood, a central support beam will run from the bed’s head to its foot.
- Measure the distance from the plywood’s bottom to the floor, and deduct 1.5 inches from that measurement.
- From the leftover lumber, cut two 2x4s.
- At a distance of 12 inches from one end of the 24 beam, attach these two parts. In addition, Amazon is currently offering this cordless drill at a 70% discount… I may need to get a new one!
- Underneath the bed, arrange the beam and posts so that they are in the middle.
- Nails or screws should be driven through the plywood every 12 inches to hold it in place. The tapered screw heads should be countersunk (like this) to avoid damaging the mattress.
There are various ways to get free lumber to save money. There is an excellent movie on the subject from Wood By Write that includes several locations where you can acquire free wood, so I didn’t have to write about it.
3. How to Replace King and California King Size Bed Slats with Plywood
Only the length and width of the bed frame are different from the full and queen modifications.
When measured between the center post and the bed rails, Pacific Wood Products’ plywood has a clear span of 36 inches, meaning it can hold 54 PSF (pounds per square foot).
It’s good enough, but if you’re going to be attaching or jumping on the bed a lot, you might want to put in two beams and posts.
Xem thêm : How To Fix A Broken Bed Rail? 7 Easy To Follow Steps For You!
The load span tables for plywood from Pacific Wood Products can be found here.
For queen, king, and california king bed frames that require extra strength, some hardware stores carry plywood that is larger than 0.75 inches thick.
Even though the plywood is more expensive and heavier, it is worth the extra cost and weight if you and your significant other shop at plus-size racks.
4. Easiest Way to Replace Slats with Plywood
Install plywood over the existing slats to protect them from rotting or rotting away further. What’s the point of removing the slats that are already giving structural support? With the plywood on top of the existing slats, the mattress will only rise 0.75 inches.
Using plywood instead of OSB or MDF is a good idea. OSB is prone to tearing through the mattress cover, whereas MDF is just plain bad. There are no wood fibers to provide it much horizontal support, so it will warp and bend over time, especially if two people are laying on it.
Use 0.5-inch plywood on twin beds and 0.63 (5/8-inch) on large beds if your old slats are still giving support. This could save you some money.
If you can, round the plywood corners by slicing them off. Afterwards, sand the plywood edges using 40-60 grit sandpaper to avoid scratching the mattress or scraping your legs.
In order to learn more about how to work with Plywood, please check out my article here.
How to Stop Bed Slats from Falling: 3 Key Solutions
It’s not that difficult to get the slats to fall out. And we’ve come up with three solutions to this problem. There are advantages and disadvantages to each strategy.
Find out how to keep your bed slats from collapsing in the following paragraphs.
Solution 1 of 3: Checking the Pins of Slats
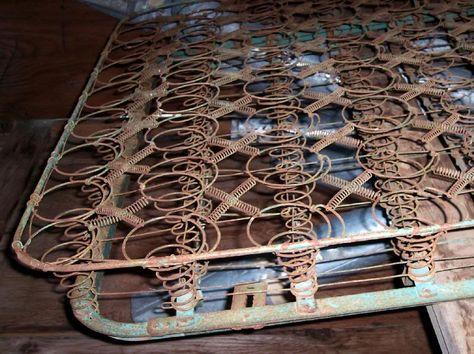
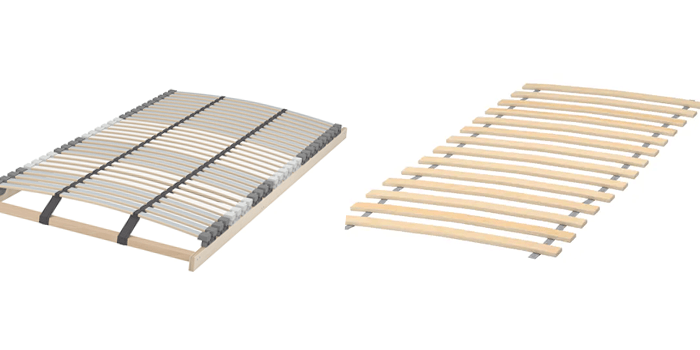
The top and bottom of your bed’s slats are supposed to be attached with pins. In the event of an accident, these pins could fall out of their sockets. The slats, on the other hand, are almost certainly doomed to the same destiny. Keep an eye on the pins in your bed slats to make sure they aren’t loosening or falling out.
Solution 2 of 3: Attaching Velcro to Slats
In order to keep your bed from coming apart, velcro is the answer. The versatility of velcro makes it a fascinating material to deal with. When painting metal lockers, you’d get started on this as well. As long as each slat has Velcro on it, you’ll be done in no time at all.
For this to work, you’ll probably need a different glue for your velcro. We’ve compiled a list of the three best glues for this purpose in this table. We’ve included the cost of each tube, as well as how long it takes to set, for your convenience.
In other words, based on your time and budget, pick your ideal method for mending slats!
Solution 3 of 3: Making Plywood to Support Slats
What’s that? When will you finally stop criticizing the poor, frail, and frail bed slats and offer them a friend? With headboards or plywood attached, for example! Because of this, you’ll need to stock up on some cheap plywood.
Next, measure each slat’s length and width, then cut plywood accordingly. Using short screws, fasten them to the slats on top of the next set of struts. That’s it!
If you’d like to make your mattress more comfy, don’t be a slacker and start cutting plywood on top of slats.
How to Cut Plywood Manually
Xem thêm : How To Know If Bed Bugs Are Gone? A Few Tips to Remember
Has this been your first time? Relax. You don’t have to worry about anything since we have you covered. Join us for some woodworking by bringing the following tools!
Tools:
- Cutting with a Handsaw
- Marker
- Ruler
Instructions
The first step is to determine how much plywood you’ll need. Place the marker and ruler on top of the slats to mark the plywood.
The size of your slats must be taken into consideration. So, take your time and be sure to check your work!
Get ready for some major action!
Pick up that hand saw and get to work. Before you begin, hold it firmly and uprightly in your hands. Start moving your hand now! Don’t be afraid! Start by making a notch in the wood’s edge. Then begin to cut through it. Remember to keep your saw at a 30-45-degree angle while you’re cutting.
Using a protractor to determine the angle is not an option. Relax! We know a trick that will come in handy for you.
Ensure that the corners of the two pieces of tape you’re joining do not overlap. Finally, fold the tapes that were attached to the tapes in half. If you look at the folded side of the tape, you’ll see a 45-degree angle.
Use the tape as a ruler to align the saw and cut along its length. It’s done!
You may have difficulties while cutting specific portions. How can this be fixed?
You can start by twisting the blade of the saw.
Grab the cut-off end with your other hand as you make your way toward the end.
See? It was a success thanks to your efforts! This should keep the slats in place and prevent them from dropping.
FAQs
Question: Should you screw down bed slats?
Answer: Screwed-in slats should be thick because they are frequently attached to the bed’s ends. The slats should be about 0.75 inches thick.
Question: Do bed slats break easily?
Answer: A slat can bend like a shepherd’s hook when extra weight is applied to one end of it. This will eventually lead to a breakdown.
Question: Which way do bed slats go?
The slats of a bed bend downward as a person lies on them. They return to their previous place as soon as the person is able to stand on their own again. Spring-like properties result from the slats’ upward curvature.
Bottom Line
We’re out of here. There are ways to protect bed slats from falling out that cost less than the cost of moving a garage!
It is one of the most important parts of the bed that bears your weight while you sleep. As a result, knowing how to maintain them fixed is critical if you want to avoid the agony of having your mattress sink lower.
Nguồn: https://iatsabbioneta.org
Danh mục: Bed