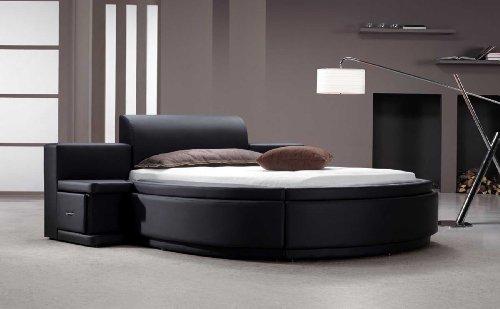
As much as people love the low prices and sleek designs of IKEA’s RTA (ready-to-assemble) furniture, they often struggle to put it together due to the wordless pictogram instructions and unusual hardware. Veteran purchasers of IKEA cabinets, beds, dressers, and other furniture pieces share a common source of wry amusement and frustration: the furniture’s alien assembly process.
Home decorating can be a tedious and time-consuming process, but it doesn’t have to be. Here are some pointers for buying and assembling IKEA furniture so you can rest assured in your next purchase from the Swedish giant.
Bạn đang xem: How To Assemble Ikea Bed? Comprehensive Guide
Stick to Your Skill Level
Although IKEA claims that their products are simple to assemble, those who are unfamiliar with the process may find that some IKEA products are significantly more challenging to assemble than others. This holds truer still if you lack even the most fundamental of handyman skills. IKEA furniture may be challenging to assemble, but you shouldn’t be surprised if you’ve ever had trouble putting together any other product, even those made in the United States with instructions written in clear, well-phrased English. Items that require assembly but come in more than two boxes can be a Herculean task for novices.
To foresee when you might be working on something that’s beyond your expertise:
- First, locate the flat-packed item you’re interested in purchasing on IKEA’s website.
- Simply move on to the following step and select manufacturing details.
- Look at the section titled, “Package measurements and weight. The number of boxes used to ship the product’s components is revealed. One Billy Series bookcase, which is relatively simple, can be shipped in a single, space-saving box, while another, more complex bookcase from the same series is shipped in no fewer than nine individual boxes.
IKEA has produced assembly instructions for eight of their most popular products, such as the PAX wardrobe, MASKROS pendant lamp, and HEMNES desk, all of which can be found on their website.
Don’t Buy That Dented Box
Envision this: You have just returned from a trip to IKEA and noticed that the flat-packed bookcase you purchased was damaged in transit. It wouldn’t be a big deal at most stores, but at IKEA, you shouldn’t buy anything that came in a damaged box.
When shipping their flat-packed furniture, IKEA uses minimal packaging materials and none of the common padding options like bubble wrap or crinkled cut paper. This is why it is usually safe to assume that the contents of a dented package are also damaged.
Xem thêm : How Long Does It Take For A Bed Bug? Comprehensive Guide
Don’t give up hope, but don’t let this happen to you either. In this way:
- Please check each box for damage before purchasing.
- It doesn’t matter how minor the damage is; if a package has been nicked, dented, or scraped, you should put it back, grab another, and inspect it again.
- No unharmed parcels on hand? If you point out the damage to the clerk or manager, they may agree to move the carton to the “as is” section and put a significant discount on it. There’s an element of risk involved here because the damage to the furniture inside the carton could be very slight and difficult to notice, or it could be substantial and noticeable.
Avoid Damage When Assembling
The melamine veneer on IKEA pieces, which makes cleanup a breeze, is also easily chipped and scratched. If you take the time to clean up your workspace before beginning assembly, you won’t have to worry about scuffs or nicks on your brand-new purchase. What You’ll Need
- There is a lot of empty room here. When deciding how much space you need to complete a project, multiply the dimensions by two.
- a pristine carpet or canvas drop cloth to conceal the floor of your workspace. The cardboard boxes your items came in can also be reused for this purpose. The thin veneer surfaces on IKEA furniture are easily scratched, even by small bits of grit and debris.
Don’t Be Intimidated
Confused by IKEA’s picture-only instructions? Each stage can be comprehended by remembering this:
- Prior to beginning, it is recommended that you read through the entire set of instructions.
- Take note of how each picture serves as a visual cue for putting the parts together correctly. Here’s an illustration illustrating how to properly orient the particle board’s exposed edges.
- Arrange the parts you’ll be joining in the same order as they appear in the IKEA diagrams.
- Do not start putting things together until you have a firm grasp of the process. Construct the object in your mind several times before you start working on it physically.
Use Glue
Loosely assembled flat-pack furniture not only looks cheap, but also poses durability issues. In theory, IKEA’s hardware should enable snug, secure assembly, but in practice, this is not always the case.
Using glue while assembling IKEA furniture will make it look more polished and expensive. If you use glue properly, your furniture won’t shake and will look great for years to come.
Those in the know advocate for the use of either white Gorilla glue or Gorilla construction adhesive for the assembly process. Gorilla white glue is a polyurethane glue that dries quickly and is completely waterproof; it is much more durable than regular carpenter’s glue. It works very well with a variety of materials, from wood and plastic to metal. In comparison to traditional polyurethane glue, Gorilla construction adhesive is significantly more sturdy and can adhere to nearly any surface. As it is applied through caulk-gun tubes, it is well-suited to construction of a considerable scale.
Keep in mind that polyurethane glues will spread out to fill any gaps. The glue must be used sparingly to avoid being visible along seams, but it is useful for bonding the porous edges of particle board panels.
Xem thêm : How To Make A Bed Military Style? A Perfect Guide For You!
Either Gorilla Glue product, when used properly, can produce indestructible furniture.
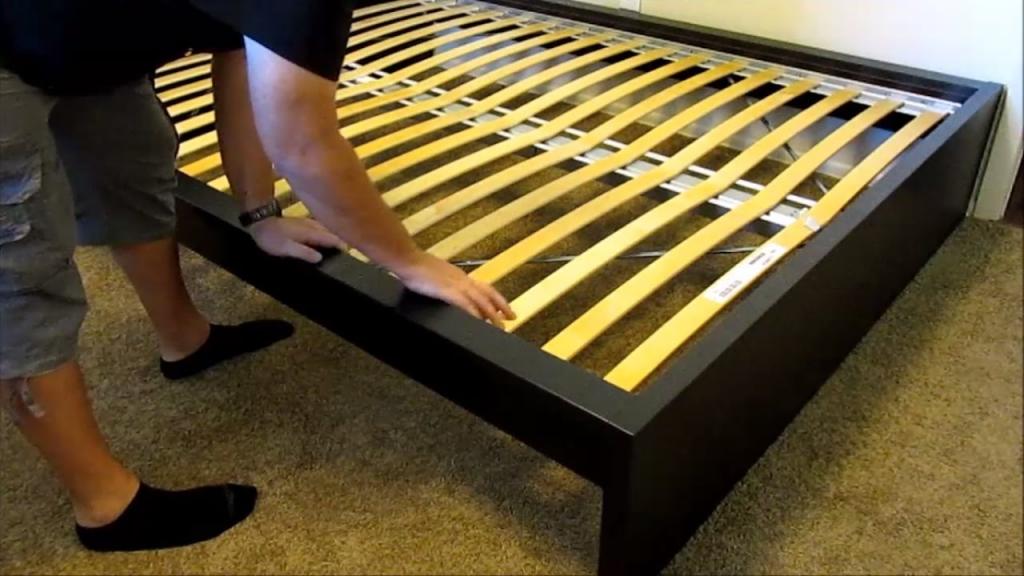
Hammer in the Dowels
Dowels made of wood should be positioned precisely and seated completely in the bored holes using a hammer or rubber mallet. Then attach them to the wall with some Gorilla Glue. The tiny holes make it difficult, if not impossible, to insert the wood dowels deeply enough to make a completely flush fit for the connecting pieces.
- Apply a small amount of glue to the wooden dowel’s tip.
- Insert the adhesive-coated end into the hole with a twist.
- Tap the dowel gently with a hammer until it reaches the bottom of the hole you previously drilled. About a third of the dowel should now be protruding.
- Remove any lingering glue with a damp rag.
Note that gluing each screw and cam lock together is a good idea as well.
Enlarge the Dowel Holes
When you’ve finished adding wood dowels, check to see if they’ll be flush with the next part. You could try tapping the back of the joining panel with a rubber mallet as you try to join it, but enlarging the dowel holes that have already been drilled into the panel would be much simpler. A drill bit of the same diameter as the wooden dowel is required for this. (Keep in mind that the holes at IKEA are usually sized to accommodate dowels of a slightly smaller diameter.)
- In order to prevent accidentally boring all the way through, switch to reverse while using the drill.
- The dowel hole can be enlarged with a drill. Don’t jiggle the drill bit around as you work. Making a hole that is just as big as the dowel is the goal.
- Next, attach the part with the dowels to the one with the enlarged holes. Dot the exposed part of the dowels with expanding glue before putting the parts together.
Don’t Worry About Missing Pieces
IKEA is only human, so it makes mistakes like you do. If any of the hardware or pieces of furniture you ordered are missing, the store will gladly send replacements at no extra cost. Providing the following data to their customer service department is required.
- Name and address
- Include your address and phone number for easy contact.
- The Order No.
- The part number for the product in question
- Details about what’s missing and why, including part numbers (you can find these for things like dowels and screws in the manual).
Ask for Help
If you’re not particularly handy or intimidated by the prospect of assembling flat-packed furniture, you’ll be relieved to learn that IKEA has your back. There is an in-store assembly service available at IKEA stores called Task Rabbit, with prices ranging from $36 for small furniture items to $350 for large wardrobes. Find out if your local shop provides this service by calling ahead.
Your IKEA purchase can be delivered and assembled by seasoned local professionals thanks to the company’s partnerships with such individuals. The minimum cost of assembly is $89 and increases with the MSRP of the product. Costs for delivering and setting up a sofa vary from $39 to $79.
If you want to skip the long checkout line, please read on. Hire a local furniture assembler through a service like YELP or Angie’s List to collect your online IKEA order, transport the pieces to your home, and assemble everything for you.
Nguồn: https://iatsabbioneta.org
Danh mục: Bed