Your bow pillow will be approximately 19″ wide x 11″ tall at each end when finished.
Sewing skill level: beginner
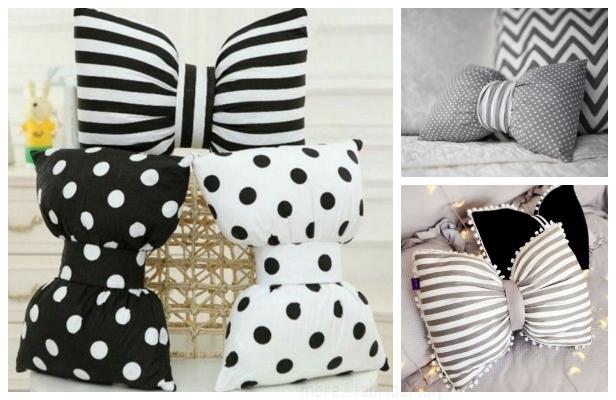
Bạn đang xem: How To Make A Bow Pillow? Easy Step-by-step Guide
Supplies:
100% Polyester Fabric*48″ x 12″ for the pillow 13″ x 6 1/2″ for the tiePolyester stuffingSewing machine and basic sewing supplies* Any fabric type is appropriate for this DIY bow pillow. 100% polyester fabric is recommended because it’s soft and stretchy, perfect for a pillow. Flannel cotton and fleece are very soft as well, perfect for children’s pillows. Check out the post on choosing fabric for sewing toys. This will give you the pros and cons for choosing the fabric for your pillow.
Happy stitching! Let’s begin.
Bow Pillow Tutorial
Welcome to See Kate Sew! If you’re new here, sign up for my email newsletter for access to free patterns, tutorials and all the latest sewing news! Tour my sewing room HERE!
In case you missed this last week, I’m reposting it here for you. Originally posted at
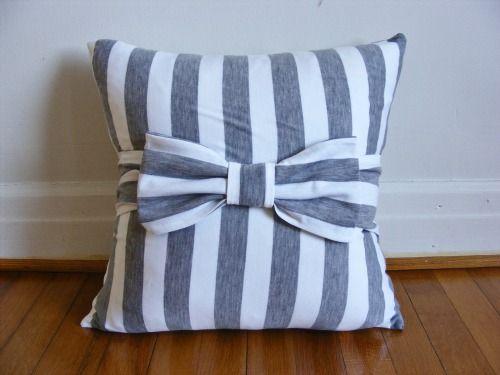
I’m on a bow kick. I don’t think there are ever enough simple bows. So I wanted one on my bed, too. I used an extra sheet for this project. After I made my ruffled duvet cover, I found myself with a few extra fitted sheets, since I purchased them in sets.
Let’s get started:
Once you’ve cut out all your rectangles, press them all so they are nice and crisp.
Grab you large rectangle and sew the 17″ edges together. Then turn it right side out so your seam doesn’t show. This piece is going to be your bow. Flatten the tube that you’ve just made with the seam on back. Now match up the corners with your 13″ by 17″ piece of fabric.
Pin three 1″ pleats on the short sides of the pillow to make the large and small pieces match up. Baste edges and remove pins.
Now press your little rectangle in half and sew up the edge. Turn it right side out to make another tube. We’re going to use this piece to cinch up your bow in the middle. Pin the edges together, around the bow.
Then sew the edge of the middle tie and spin it around. Just let it bunch up, it will be cute!
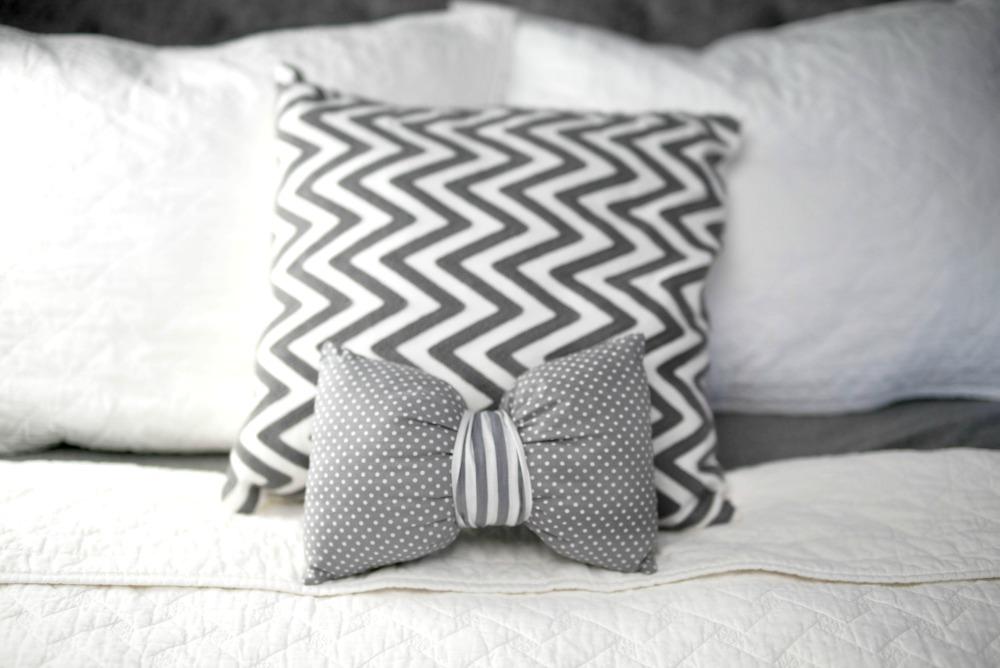
This is what you’ll have right now:
Next, cut your back piece in half and insert the zipper. (How to put in a zipper…if you need it)
Then sew your top piece to your bottom piece, right sides together. Turn it inside out and stuff in your pillow form.
Done!
Supplies And Tools You Will Need
Listed below are the things you need to give life to the project:
- Fabric (Preferably two, with different designs or colors)
- Polyester stuffing
- Sewing Machine
- Thread
- Pins and clips
- Scissors
- Ruler
- Pencil
Step By Step Instructions To Make A Bow Pillow
Finally, we have come to the part where you officially start creating your pillow.
Here are the steps on how to do it:
Step #1. Measure and cut your fabric for bow and tie
Take your fabric and lay it on top of your workstation. For the bow, you will need two identical pieces with a dimension of 13×9 inches.
Using your ruler and pencil, mark the measurements on your chosen fabric, and afterward, cut the pieces evenly using your scissors.
If you have prepared a different-colored or designed fabric, use it for the pillow’s tie. You can also make use of excess material from previous projects.
You can get creative when it comes to the fabric color and pattern combinations you would like to use, but make sure it matches the palette of the room.
Measure and cut the fabric to 6×11 inches, using the appropriate tools.
Step #2. Make the bow pillow
Get your two identical fabric pieces and place them on top of each other with right sides facing one another.
In doing this step, make sure that the material is in a horizontal position.
Mark the center part of the top of the fabric (the side that measures 13 inches). And place two pins on either side with about an inch of distance from the mark.
Take your clips and place them along the fabric’s edges.
Using your sewing machine, stitch starting from a pin.
Here’s a sewing tip when you reach the corner of the fabric. Bring down the needle, lift the presser foot, turn the material 90° and proceed on sewing the next side.
Stop sewing when you reach the other pin; this will leave an opening at one side of the pillow.
Remove the pins and flip your pillow through the opening, right side out.
Xem thêm : How To Wash Polyester Pillow? Step-By-Step Guide
Grab your Polyester stuffing and insert it inside the pillow. Ensure to fill it generously, especially the corners.
Fold the fabric’s seams and run it through the sewing machine to seal the gap. It may not look like a bow at the moment, but you are getting there!
Step #3. Create the tie
Now, you will make the other essential element of the bow-shaped pillow, the tie.
To create this, take your 6×11-inch fabric, and lay it on top of the surface horizontally.
Fold it crosswise, ensuring that the right fabric sides are facing each other.
Here, you can choose to use your pins or clips to secure the material in place. Remove them as you sew the edges.
After you have successfully stitched the previously pinned or clipped edges, the fabric will look like a tube. Flip it, right side out.
Lay the newly sewn fabric on your workstation and keep the seam in the middle so that when you fold the fabric in half, it will look neat.
Take the two openings and fold, and sew them together; at this time, the fabric must look like a square. Flip it, right side out.
Step #4. Assemble the bow-shaped pillow
The sewing part of this project has officially come to an end. Now, all you have to do is to insert the pillow through the loop of the tie.
You may find it frustrating to fit it inside the hole, but trust the process; it will all be worth it.
Push down the pillow with your hand and slowly insert it in the opening of the tie; it’s like you’re adding a band to the home accessory.
In doing this step, you have to be careful not to rip the stitches. Once it has reached the center, extend the tie’s sides to make it look neater.
You can also choose to explore and unleash your creative side by making another tie with ruffles or beads to elevate the bow pillow.
Also, if you have plans to make more in the future, you can always switch the ties and pillows and add embroidery if you want to.
Conclusion
Learning how to make a bow pillow is not as complicated and intimidating as it sounds. In just four simple steps, you were able to gain more sewing experience.
Moreover, you elevated the vibe of your home by creating the accessory yourself.
Gaining confidence and having a sense of accomplishment after finishing the project cannot be topped by a store-bought bow pillow.
Nguồn: https://iatsabbioneta.org
Danh mục: Pillow


