You may shorten curtains without having to cut them to length by stitching a hem, so you can keep the fabric if you choose. Folded curtains with buttons as fasteners can also be used to reduce the length of curtains.
A double hem is created by folding the curtain hem up. Because the thicker hem covers the raw edge and often enhances the hang, this double hem looks great on sheer curtains. These hems can be adapted to fit the dimensions of your window frames with some basic sewing skills. Keeping the original hem allows you to extend the length of the curtains if you like, and it also allows you to reuse the curtains in your future residence.
Bạn đang xem: How To Shorten Curtains Without Cutting? Step-by-Step Tutorial
Measuring the Curtain
1. Measure Before Your Shorten
The yardstick’s other end should be in contact with the curtain’s left edge, so place it vertically on the floor.

2. Mark the Fold
Use a washable fabric marker to draw a small dot or line on the lowest edge of the curtain. Move the yardstick about three or four inches to the right after each mark. In order to ensure that the curtain is always the same height from the floor, lightly mark it. As you make your way from left to right along the curtain panel, keep a light mark on it.
3. Create the Hem
Make a deep hem by folding the lowest portion of the curtain along the designated edge. There should be an extra hem allowance that faces the window. Straight pins can be used to tuck away any extra fabric. Hemming tape, according to Bristols6, is a washable and permanent alternative to pinning and sewing a hem.
4. Confirm the Length
Look at the new curtain length in relation to the floor and the window frame from a distance. This is important. Determine where the folded edge is and mark it on the flat surface of your curtain. Re-hang the valance from the curtain rod to check the hem.
5. Adjust Length If Necessary
Move the pins and adjust the hem depth to customize the curtain.
Baste the Hem Allowance
1. Remove Curtain From Rod
Ensure that you remove it from the curtain rod with care.
2. Position With Hem Allowance Up
Make sure the hem allowance is facing up when you place the curtain on a flat, clean surface.
3. Prepare Your Sewing Thread and Needle
Scissors can be used to cut about 18 inches of thread. Use this thread to sew a needle into a piece of fabric. Knot the thread at one end.
4. Base the Hem Allowance
In order to sew the curtain panel’s hem allowance to the cloth underneath, insert your needle along one side edge of the panel and close to the hem’s top edge. The needle should be brought up about half an inch from the first one. Stitch a loose line of stitching parallel to the bottom edge of the curtain by basting the hem allowance again.
5. Remove Your Pins
Remove all the straight pins from the board.
6. Replace Curtain On Rod
re-attach the curtain to the rod and close the door Allow the curtain to hang for a few days before using it. Adjust the hem allowance to make the curtain appear level if it is sagging.
Edgestitch the Hem
1. Prepare Sewing Machine
Sewing machines should be threaded with the same color thread as the curtain. The bobbin should be filled with enough matching thread. Insert a machine needle that is suited for the type of fabric you’re working with. A thread and needle chart is frequently included in sewing machine instructions, indicating the use of a heavier fabric and a thicker needle. To determine the proper stitch length for the fabric’s weight, perform a machine stitch length test on a discrete region of the garment. A stitch length of 10 to 12 stitches per inch, for example, would be appropriate when sewing cotton fabric together.
2. Select a Straight Stitch
Set the stitch selection on the sewing machine to a straight stitch.
3. Position Hem Allowance on Machine
Remove the curtain from the curtain holder. Bring the curtain panel up to the needle plate and sew it shut. Be careful not to trample the curtain. Place the hem allowance’s upper edge on the needle plate.
4. Edgestitch the Hem
Close to the top edge of the hem allowance and parallel to the bottom edge of the curtain panel, edge-stitch a straight line with a zigzag stitch. Stitch a few back stitches at the end of the row in order to keep the strands in place.
5. Trim Sewing Threads
Sharp scissors can be used to cut the threads close to the fabric.
6. Remove Basting Stitches
Remove the basting stitches from the seam.
7. Iron Curtain Panel
Using a warm iron, press the curtain panel at the proper setting for the fabric type. Try to keep the drape off the floor as you iron different areas of the panel. The curtain can be held up by placing a chair close to the ironing board in order.
Shortening With Buttons
Buttonholes can be sewn evenly throughout the panel, and buttons can be hand-sewn into the hem allowance. As long as the curtains are moved to a higher window frame, this choice will allow for a shorter curtain length. The folded curtain hem allowance will stay attached to the main panel if you hand sew pieces of robust, interlocking nylon grippers. Remove and reinstall the curtains with the help of another person.
Your curtain panel can be embellished by sewing a row of three buttons in the centre as well as buttons at the top hem. This will allow you to open your curtain at different heights.
Things You Will Need
Yardstick
Tailor’s chalk or a cloth marker that is washable
Pins that are perfectly straight
Thread
Scissors
A needle and thread
machine for sewing
An iron that automatically shuts off when it is no longer needed.
a board for pressing clothes on
On/Off Switches (optional)
Warning
Do not let small children or dogs near sewing machines, sewing tools, or irons. Step ladders should be kept away from windows.
Choosing the Length
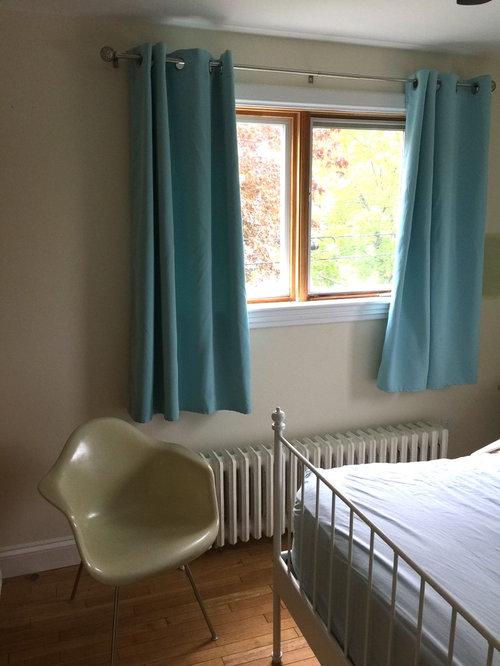
Decide on a starting point for your alterations to the curtain’s length before you begin. Shorter curtain options include window sill curtains, which are commonly used in kitchens and on high windows, providing a clean, short look. The length of apron curtains is often 4 inches below the window sill, giving you a little more length for your money. For example, if you have a radiator or other structure below the window in your dining room or bedroom, you can use them.
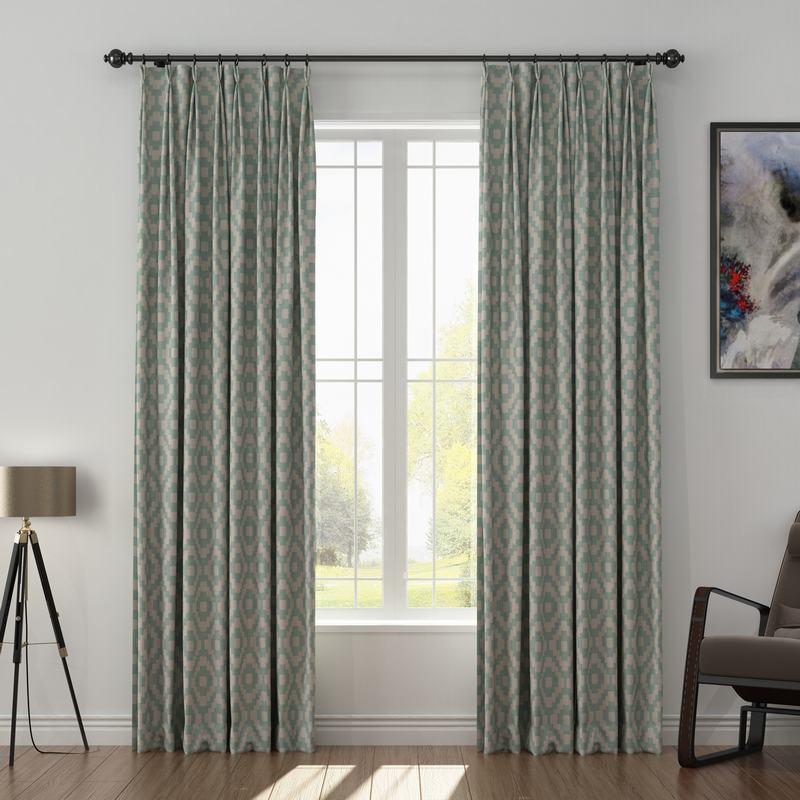
Floor-length and puddle-length curtains are examples of more voluminous window treatments. In order to maintain a traditional aesthetic, floor-length installations should end about 1/4 inch above the floor. Formal settings are a good fit for them. It’s common for puddle-length curtains to be at least 108 inches long. Typically, they have a little more fabric than the floor, which adds a dash of drama to formal settings.
Shorten the Top
To hang a rod pocket curtain, just insert the rod into the pocket at the top of the curtain. Because they don’t require hooks, these curtains are some of the simplest to put up. Fold the top of the curtain toward the back of the curtain to shorten it without sewing a hem. To make a new pocket for the rod, fasten the fold with safety pins. If you pin simply into the curtain’s lining, the pins won’t be visible on the curtain’s front.
Shorten the Bottom
Shortening a curtain from the bottom rather than the top is a great way to keep the pattern intact. By folding up the bottom of the curtain to the required length and pressing it with a hot iron, you can avoid cutting. As you would with the top of a rod pocket curtain, secure the fold in place with safety pins inserted through the excess material and into the curtain liner itself.
Alternative Hemming Methods
It’s better to sew a basting thread along the folded area of the curtain than to pin it. Curtains with basted hems look great on both the front and back. To keep the folded material in place, sew a long running stitch. Remove it by snipping off the knot and drawing out the thread.
In addition, self-adhesive hem tapes are available. Remove the adhesive paper from one side of the tape and adhere it to the curtain. After removing the paper from the front of the hem tape, fold the overly long curtain section in half and attach it in place. After you’ve applied some hem tape, you’ll need to iron it. It’s best to test a hem tape on a hidden section of the cloth first because some hem tapes leave behind a residue that can stain the fabric.
Curtain Rod Placement
The curtain rod can be moved to make the window appear larger and the curtains appear shorter at the same time. You can elevate the curtain rod by 4 inches if your curtains are an inch longer than they should be. This will necessitate the drilling of new holes for the rod mounting hardware. This approach is appropriate for a long-term solution on a window that doesn’t fit regular curtains, as the old hardware holes need to be patched and repainted.
Steps To Shorten Curtains Without Cutting
If you don’t know how to shorten curtains without cutting them, you’ll learn a lot more from this post.
Overly long drapes will ruin the aesthetic of any room they are intended to adorn.
For kitchen windows, sheers are preferable, especially if they reach the floor.
There is no way.
If you don’t want to trim the curtains because you’re scared they’ll go out of equilibrium, this alternative is for you.
Please bear with us as we walk you through the process and provide you with detailed instructions.
Step #1. Measure the curtain
First, you’ll need to figure out how big your curtains are going to be.
This new length must be shorter than the old one.
Distance from the window frame of 2 to 3 inches.
Here’s a cheat sheet for getting the measurements right.
Step #2. Put a mark where you will fold
In order to get accurate measurements, you need to know where to fold the fabric.
Xem thêm : How To Replace Blinds With Curtains? Easy Step-by-step Guide
A fabric marker pen or tailor’s chalk can be used to make it washable once you complete the following steps.
You can either do it continually or mark it on both sides.
As a result, it will be even more convenient for you.
It will assist you ensure that the curtain’s height is uniform throughout its length.
Step #3. Make the hem
You can fold the line where you already marked. In this manner, you can create beautiful hems.
You can also use pins or hemming tape to guarantee that it doesn’t bend while you’re sewing.
It’s also important to know how to apply hemming tape on curtains.
It’s washable and permanent, so that should make things a lot easier for you.
In order to keep the curtain in place while you work on the next steps, you can use pins around the curtain’s edges.
Step #4. Remove and sew
To sew, you’ll want to remove the curtains from the rod and put them flat on a work surface.
There is nothing wrong with not having a sewing machine. It is possible to sew it all by yourself.
Your hem will look even nicer, and you’ll be able to keep it secure as you sew it on.
To top it all off, you’ll be able to ensure that your curtains are at the correct height and won’t fall back on themselves any time soon.
There are a number of ways to include pins into your sewing process, including using them as a reference for where you’ll be stitching later on.
If you used the hemming tape, I’m confident you’ll still be able to tell where you left off.
You can use a stitch to secure the hems of your curtains there.
Step #5. Place it back on the rod
As a last check, hang up the curtain you lengthened without cutting.
This is your opportunity to see the final product.
Put it back on the rod and attach it to your windows with your existing rod-and-hook set-up.
Just like that, if your curtains appear clean, look at them closely, but if they aren’t, take a moment to ponder.
After that, you can go back over the steps and see if there are any mistakes.
Then you can verify that it was done correctly and that you had a successful process as a result.
You should always take the time to do the things that you were previously unable to perform.
With time and perseverance, you’ll get it right.
That’s how you shorten curtains without having to cut them down.
Conclusion
This is the end of our piece. Having spent the day with us, we sincerely hope that you have gained a great deal of knowledge.
The question of how to shorten curtains without cutting has been addressed, so feel free to share this one with your relatives and friends.
Take it one step at a time, and you’ll get there.
Nguồn: https://iatsabbioneta.org
Danh mục: Curtains


