Another monthly DIY competition is here, and this time the focus is on a project made from fabric! As my final project, I will show you how to turn ordinary drop cloths into chic window treatments for your home.
Putting up some drop cloth curtains is a great way to give your home a new look quickly and cheaply. As a result of their off-white hue and linen-like texture, they lend a space a soothing, relaxing vibe.
Bạn đang xem: How To Make Curtains Out Of Canvas Drop Cloths? Easy Step-by-step Guide
Making your own curtains is a much more cost-effective option than purchasing them. If you’re looking for an easy and inexpensive DIY project, the no-sew curtains I’ll show you how to make in this post are an excellent choice.
ALSO RAVED ABOUT: 30 AFFORDABLE POTTERY BARN COPIES YOU WILL LOVE
Because working with drop cloths is SO SIMPLE, I’m going to show you how to make curtains without sewing.
I made curtains out of a Home Depot drop cloth to hang in our master bathroom, and now I’m thinking about doing the same thing in our bedroom. The style and value are both perfect for me.
Check out the other fantastic fabric DIY projects that my fellow bloggers have created for this month’s #diyprojectchallange by scrolling down to the bottom of the page.
DIY Drop Cloth Curtains Tutorial
Just below, you’ll find a link to a downloadable PDF with all of the resources and directions.
Drop Cloth Curtain Maintenance & FAQ
It’s important to know how to maintain your drop cloth curtains if you’re going to make them. Before you get started on your homemade drop cloth curtains, let’s go over a few of the essentials you should know.
What are drop cloths made of?
Drop cloths are typically manufactured from canvas or plastic.
Canvas, a high-quality cotton material, is strong and long-lasting. The primary function of a drop cloth is to protect surfaces below from overspray, such as floors and furniture.
The fact that it is resistant to fading in the sun and snagging when the curtains are opened and closed makes it a great option for use as window coverings.
How do you wash a drop cloth?
Most drop cloths made of canvas can be laundered in a regular washing machine using a delicate cycle and dried using the dryer’s delicate cycle.
Some drop cloths, including the one I used (which was a leftover), are lined with plastic to increase their durability. You should wash them on the cold setting and let them dry naturally.
Do canvas drop cloths shrink?
Yes. Don’t forget to clean the drop cloths before using them to make the curtains!
How do you soften a drop cloth?
It’s a good idea to soften the canvas drop cloths before using them as curtains, as some people find their texture to be too rough.
Follow these easy steps to soften your drop cloth:
- Soak them for a few hours in a solution of bleach, hot water, and hydrogen peroxide. (Hydrogen peroxide to water ratio of 1:10; 2 cups of bleach)
- To clean them, simply toss them into a hot wash with some detergent, and then into the dryer.
- Iron.
Xem thêm : 5 Ideas On What To Do With Old Curtains
All right, I think we’ve got everything we need to get started on our do-it-yourself! OK, let’s get to work!
MATERIALS:
Drop Cloth, Canvas (The size you need will depend on the height of your windows and ceilings)
Hem tape for fabric
Rod for Curtains
Clips for Curtain Rings
TOOLS:
Adjustable measuring tape
Scissors
Iron
How to Make DIY No Sew Curtains out of Drop Cloths
STEP 1: MEASURE AND PLAN
Get your flexible tape measure out and determine the size of your window.
CONNECTED: FREE CHEAT SHEET ON READING TAPE METERS
The width of your curtains should be at least as wide as your window.
If you want to pull them closed without having to fight with them, they should be about 6 to 12 inches wider than the window itself.
You can make your curtains any length you like, from just the height of the window (like I did) all the way to the ceiling.
Get a drop cloth that’s at least as big as the final dimension you’ve decided on for your curtains once you know what that is. To get them to fit perfectly, we can (and probably will) alter the length and width.
STEP 2: WASH AND PREP YOUR DROP CLOTH
If you want your finished curtains to fit perfectly after being made from a drop cloth, it’s best to soften, wash, and dry the cloth first.
If you want to know how to maintain your drop cloths, read my previous section.
STEP 3: CUT AND HEM DROP CLOTH TO SIZE
Now keep in mind that at least two of the sides of each curtain should be finished with the pre-hemmed drop cloth. A drop cloth large enough to cover three or four people is preferable.
Your first step is to spread out your drop cloth on a large surface and make a cutting and hemming mark on the side you intend to cut and hem first.
Keep in mind that the hem tape will be folded over and used to hem the cut size, so make sure to cut at the final dimension plus 1′′.
I first made a slit in the middle of a drop cloth I had bought because it was the right width for our window when measured across the outside.
Then, run the hem tape all the way along the raw edge of the cut side.
Take off the backing of the tape, fold over the edge, and press with an iron to secure it in place.
Although ironing isn’t necessary to activate the tape, it does aid in securing the hemmed edge.
Xem thêm : How To Make Back Tab Curtains? Comprehensive Guide
Follow these steps again to complete the back of your no-sew curtains (the bottom in my case).
STEP 4: HANG AND ENJOY!
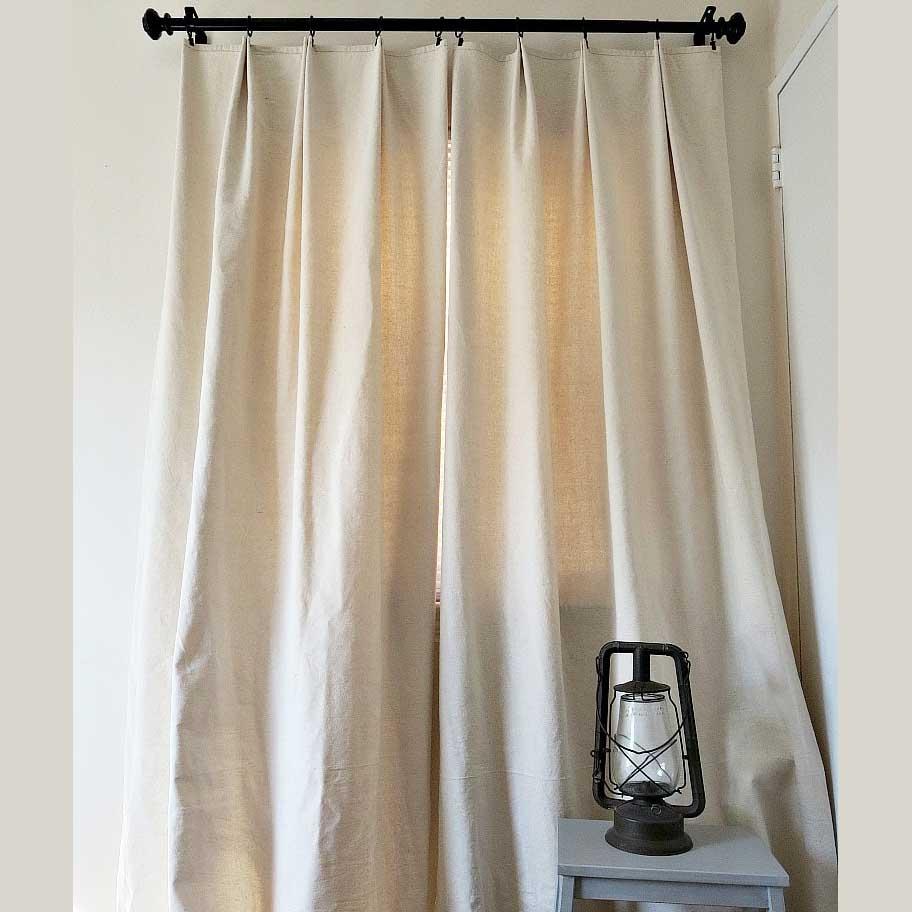
When the curtains are the right length and have been hemmed, it’s time to hang them. Clip the top of the curtain with the ring clips every few inches along the top, starting at the top. For each panel, I used a 5.
Finally, insert your rod into the rings and tighten them.
To save space, I opted to install a tension rod inside the window trim when I made curtains for my bathroom.
These ring clips are ideal whether you plan to hang yours from the ceiling or at the very least above the window casing.
Ultimately, what do you think of our do-it-yourself drop cloth curtains that didn’t require any sewing?
Sounds like a lot of fun, right? Moreover, it’s a breeze to do!
Trendy Farmhouse Drop Cloth Curtains
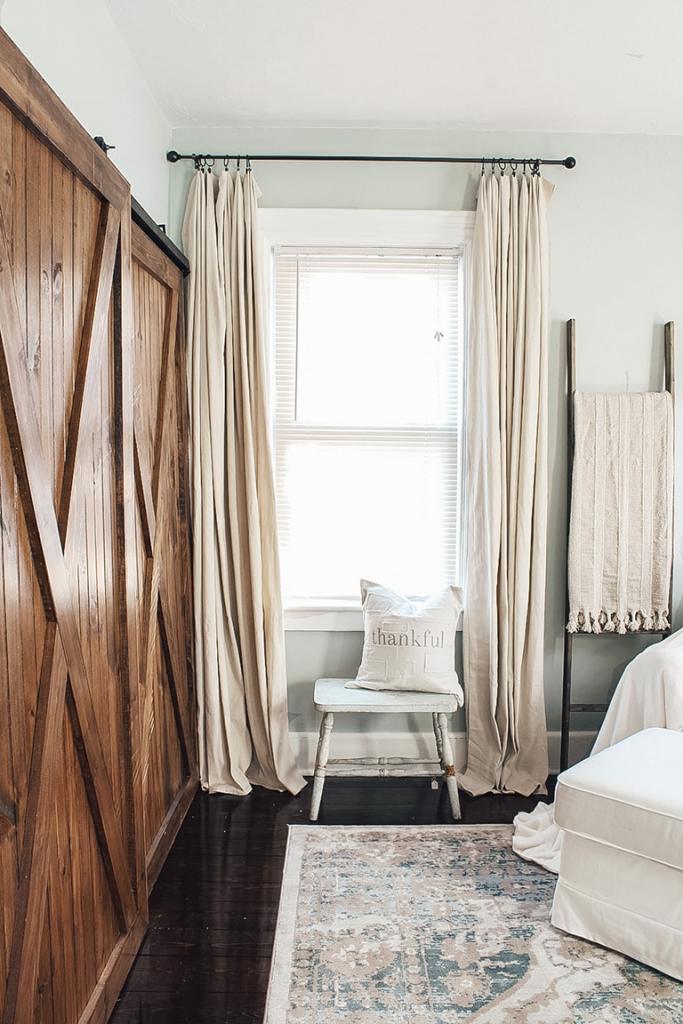
Drop cloth curtains with a trendy farmhouse vibe can be achieved by making the panels 12–16 inches longer than necessary and folding over the top to create a fluffy valance effect.
Making them long, folding them over at the top, and clipping at the fold are the only differences between hemming and hanging.
To see an example of these ready-made drop cloth curtains, consider the following:
FAQ’s:
Should I wash my drop cloths before ironing?
A person’s tastes will naturally vary in this regard. We didn’t prewash the drop cloths because we liked the way they felt stiff and crisp.
Keep in mind that washing them ahead of time will soften the material slightly. Certain individuals seek out this style. The rumor has it that ironing them after a wash is a breeze. Whether to dry them or not is also a matter of debate. If you must dry them, perhaps just damp dry them and put them away quickly.
Another option is to wash and dry your clothes after they’ve been worn, but not iron them for a more rustic, farmhouse style. You can compare this to the way we appreciate the patina of age on objects like old dressers and scales. It’s all about taste, as I said.
One more argument for keeping drop cloths clean. Not everyone appreciates the aroma. I have never noticed any odors from them outside of the ironing process.

How sheer are the drop cloths? Do I need to add blackout liners to my drop cloth curtains?
The drop cloth is made of thick material that effectively blocks light. They do not allow all light through, though. Although they are thicker than standard store curtains, a blackout liner may still be necessary for complete darkness.
Make No-Sew Drop Cloth Curtains: The Results
Well, there you have it. This tutorial will show you how to make simple drop cloth curtains without sewing.
The room was completely changed by these curtains. After we finished what we fondly call the “wall-o’curtains,” we continued on. The wall in our main living area, which is open to the kitchen, was the first to be renovated. It completely transformed the house because it is visible from the foyer. Because of how great it looked and how much value it added, my husband enthusiastically approved of new window installations. We left the kitchen and made our way to the dining area. Then there’s the adjoining living area. Stay tuned; we still have the spare room.
Nguồn: https://iatsabbioneta.org
Danh mục: Curtains


