You can manufacture your own bamboo shades with this step-by-step guide. Describes the project’s advantages and disadvantages in detail, with images and video.
- How To Keep Curtains Together? Step-By-Step Guide
- How To Wash White Sheer Curtains? Learn From The Best Guide!
- How To Hang Curtains In A Pop Up Camper? Step by Step Instructions
- How To Choose The Right Light Filtering Curtains? Comprehensive Guide
- How To Keep Shower Curtains Clean? Complete Step-by-Step Guide
A combination of curtains and bamboo blinds is one of my favorite window treatments. I knew from the start that I wanted it in my room. However, when I began to price it out, I encountered difficulties.
Bạn đang xem: How To Make Bamboo Curtains? Step-By-Step Guide
The cost of two sets of Ikea curtains, enough to cover all of the windows, ranged from $60 to $80. There was no real improvement using drop cloths, which cost $60 to cover the entire room and are difficult to install.
Including an additional $100 for the mainly decorative shades, I was looking at costs that I simply could not afford.
As always, things are going according to plan. I contemplated it and looked for possible solutions. A slew of false bamboo shades, aka shades that look like bamboo but aren’t, can be found on Pinterest in profusion.
It’s a rarity for me to want more sunlight, but I’m a stickler about privacy at night and waking up to sunlight streaming into my bedroom in the morning.
I’ve created roman blinds previously, so I figured making bamboo roman shades wouldn’t be all that different from that. A DIY project for two shades of gray was priced out, but I went ahead and did it.
My Project Planner is a lifesaver for me, and I highly recommend it!) When I’m planning a project, it’s the first item I reach for. It’s available for free right here!)
I was looking at a total cost of $78 for the endeavor, rather than $100 for two shades. For the most part, this wasn’t the best financial decision, but it was one that I was willing to take. I placed my purchase for the fencing on Amazon and scheduled the installation for later this month.
Please be aware that this site contains links to third-party vendors. I may get paid if you buy something after clicking on my link (at no additional cost to you.)
Materials
- To be honest, I used willow twig fencing instead of bamboo fencing because it was a darker hue. As far as I can tell, bamboo fence is much the same as regular fencing, except that it’s lighter and, well, made of bamboo.
- A pack of four 72-inch-long, 1/2-inch-diameter, dowel rods was all I needed. In order to get the two rods I needed from a single dowel rod, I chopped it down to the length of my window, 33 inches.
- You’ll need 8 per shade, or 16 if you’re making two.
- It’s possible to go without lining, but as my shades were going to be in a bedroom, I decided to do so. I was able to utilize half of a Walmart twin-sized sheet for both hues because I split it in half. (I’m not sure I’d do it this way again, so be sure to check out Part 3).
- To fit your window, use 1″x 2″ boards.
- Each shade will require two 2′′ Angle Brackets.
- Screw Eyes – Small – Two per color
- In order to secure the shade’s mounting board, use electrical staples.
- A nylon string
- A miter saw
Tools Required
- A miter saw is needed to cut the fencing to the proper length. The saw I used was the only one that worked for me.
- Applying lining with a glue gun and stick.
- This tool is used to install shades.
Do you love the style of bamboo blinds, but hate the price? Learn how to make DIY bamboo blinds with this simple hack that will save you money too!
We’ll be moving into a new house with 17 windows in the coming several weeks. Seventeen. We need bamboo blinds for all 17 of our windows… This builds up to an expensive cost in no time.
I was reminded of a strategy I used in our last residence while calculating totals and comparing possibilities. It’s an inexpensive and simple solution to give your home the look of bamboo roman shades.
These easy-to-make DIY bamboo blinds will give any room a unique look and feel.
In the interest of full disclosure, I have included affiliate links in this piece.
Make Windows Appear Larger
In addition to being a “look for less,” this bamboo blind hack is also a way to make a smaller window appear larger.
Our bedroom windows, for example, were short. Despite the fact that this is useful in terms of furniture placement and privacy, I don’t find it appealing. There were a lot of short and stubby windows in the room.
What’s the solution? To create the illusion of a larger window, use long, wide drapes.
This is a tried-and-true interior design method that everyone on Pinterest has seen at some point. This method has an important but rarely mentioned nuance: the empty space left between the rod and the window.
So, what do you do if you’re bothered by the awkwardness of the empty space? ‘ It’s the ideal location for the installation of chic, textured bamboo roman blinds, so don’t hesitate.
But what if you don’t want to go through the trouble? These bamboo blinds (which are cordless!) are my fave. You may discover how cordless blinds operate and how to install them by watching a video.
How to Make Cheap DIY Bamboo Blinds
Cheap, DIY bamboo blinds may be made in a matter of minutes. The DIY bamboo blinds trick I’ve described below is all you need!
Please click here if you’d like to download and print these instructions (together with links to the necessary items).
Supplies
- Each window should have two curtain rods.
- Each window gets a pair of white RITVA curtain panels
- No more than one (1) long bamboo shade
- Cable Ties, Miniature
- Heat-activated Glue Gun
- Scissors
Instructions
1. Measure the Bamboo Shade and Identify Cut Points
A bamboo shade should first be unrolled. Determine how many imitation bamboo blinds you can manufacture from the shade by measuring it.
Determine which slats will be the top and bottom of each of your imitation bamboo blinds before you begin cutting the blind into 2 foot pieces.
Apply a dab of hot glue to the cording on that slat. Starting to break up the shade into portions will be easier with this in place.
For instance, I bought a three-window 6 foot shade. For this reason, I had three 2-foot parts to work with, so I applied glue to each of them at the 2-foot mark.
The four slats between the hot glue and the white circle in the photo above will be an additional cost. Removing this material allows for the addition of cording past the adhesive point, when previously only glued cording existed.
2. Snip Cords and Remove Slats
Using scissors, cut the rope at least four slats below where the hot glue has been applied. So that you can tie off each lamp individually, you’ll have extra cording to work with in this way.
Xem thêm : How To Make Color Block Curtains? Complete Step-by-Step Guide
Knot the cording after you’ve removed all of its slats. A strong knot is essential.
For each faux roman shade, repeat this process for the bottom and top.
Because the bottom of the original bamboo shade is already finished, you may skip this step.
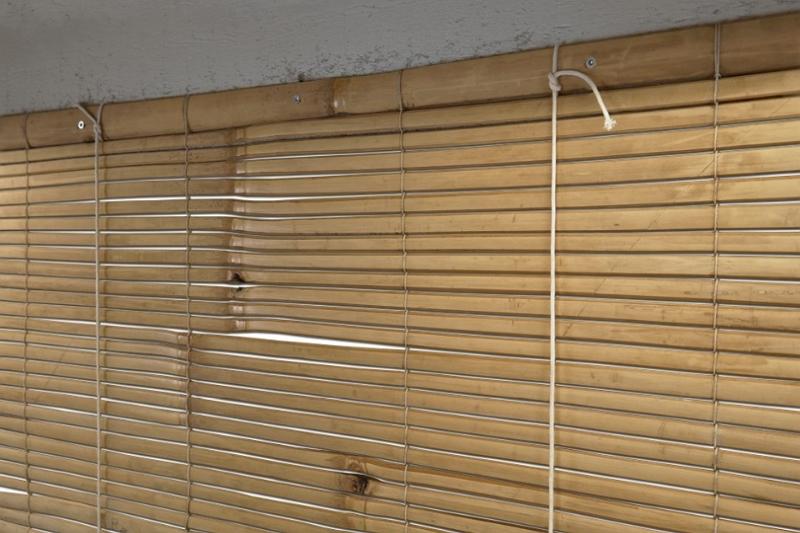
3. Measure and Attach the Blinds to the Curtain Rod
The next step is to estimate an approximate loop size by wrapping the top of each bamboo blind around the curtain rod. Using cable ties, fasten two slats together at the cording ends.
The second slat from the top and the eighth slat from the top were used in my situation. With eight slats, you may wrap the curtain rod around it.
The blinds should be reinforced once everything else is in place. Hot glue the cording to the top 2-3 slats for additional strength.
Using scissors, cut the cable tie ends after they have been pulled as tight as possible but not so tight that the blinds can’t be removed from the rod if necessary.
4. Add Weight and Finish the Bottom Edge
Last but not least, gather up the bamboo slats that were thrown out. The slats at the bottom of each faux roman shade will be utilized to add weight.
Apply hot glue to the bottom slat, and then fold the bottom slat back onto the glue to create weight.
It’s time to add some more hot glue-applied slats! As a result of this procedure, your shade will be able to hang properly. What a great way to finish off the shade!
Bamboo Blinds: FAQs
A: Do bamboo blinds block off light?
A: That’s correct. Bamboo blinds can be seen through at night. The backs of the blinds can be covered with fabric if desired for complete darkness or seclusion.
A: Without the use of curtains, how can you conceal a window?
A: If you don’t want to use curtains, bamboo blinds are a terrific solution. Blinds made from bamboo are a great option for those who don’t have enough wall space to hang curtains, but yet want a stylish and textured window covering.
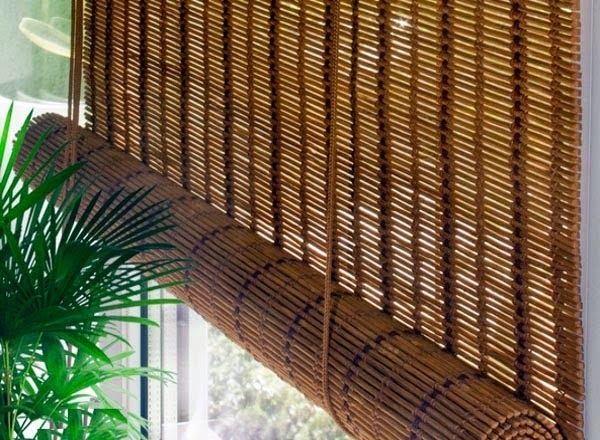
Pairing Curtains with DIY Bamboo Blinds
Add depth and character to the area by pairing a soft white weave curtain with bamboo roman blinds. As you can see in our Navy Master Bedroom Reveal post, we used two curtain panels on either side of the headboard to frame the outside edges of the windows.
It was because of the texture in the weaving of the IKEA RITVA Curtains that I chose these over some of the other white IKEA curtain options.
The bamboo blinds, of course, are not practical. Simply buy the bamboo blinds and hang them as-is if you like the function of a roman shade.
But if you’re on a budget, this is an easy way to save money!
In addition, you can still hang a simple room-darkening shade within the window, which will be covered behind the bamboo shade throughout the day (just pull it down at night).
Why don’t we hear from you! Is this something you’d use in your own home? I’ve always been a fan of bamboo shades because of their unique texture. Isn’t this a bargain?
Do-it-yourself Window Treatments
- Make Your Own Extra-Long Curtain Rods for Large Windows and Sunrooms
- Ideas for making your own extra long curtain rods: 11 DIY Projects!
- Make a faux Roman Shade for less than $5 with this no-sew tutorial.
- Customizing a Window with Bamboo Blinds
How to Make A DIY Bamboo Shade
Step 1: Cut Fencing to Size
Cut the fence to the desired window size with a miter saw. Because the fencing is thick and difficult to cut through, I would just stop and turn the fencing around. It took longer than a typical miter cut, but it worked.
Unroll your fence so that it is flat on the floor. To determine the fence’s length, multiply the window’s width by 5. As an added bonus, this will give you a little extra shade in case you need it.
After that, cut your fence to the desired length by slicing through all of the wires that are directly below it. I was able to get by with regular scissors, but I’m sure it dulled them a bit.
Twist the wires together once they’ve been cut to keep the new length in place.
Step 2: Add Dowel Supports
I began by staining my dowels to match the dark twigs I was using, so that if they were visible, they wouldn’t be very conspicuous. The lighter bamboo presumably negates the need for this step.
After dividing the ultimate length of my shade (not the fencing, just the shade) by 4, I figured out where to lay my dowels. Let’s call it X for now.
One dowel was placed at the very bottom of the shade, and the other three were spaced X distance off from it. That is to say, the distance between each dowel should be a certain number of inches more than that.
Just insert each dowel into the wires that keep the twigs in place and you’re done! To accommodate the dowel, I would occasionally have to cut a twig or two from the wires, but in most cases, there was sufficient room.
During this process, I also attached the dowel rod’s plastic rings. All of the rings were checked to make sure they were encased in the outermost metal. If that’s not an option, use hot glue to keep the rings in place.
Step 3: Add the Lining
Lay out your lining on the shade and cut it to fit. Hot glue the lining’s edges to the fencing, and you’re done!
Xem thêm : How To Add Blackout Lining To Curtains? Complete Step-by-Step Guide
Every time I came across a plastic ring as I made my way around the perimeter of the shade, I cut the sheet to fit my needs. Makes attaching the shade pulls easier!
Step 4: Make the Mounting Board
Add an angle bracket to either end of the shade by cutting the 12 to the shade’s width. My angle brackets were at the ends of the board since I was fastening my shade to the window frame.
Moving the angle brackets so they face the rear of the board allows you to mount the shade to the wall or back of a window frame as well.
Then, three to four inches from either end, put a small screw eye.
The opposite end of this board is identical, in case anyone was wondering.
Step 5: Attach the Mounting Board
It was necessary to apply electrical staples around a wire while attaching the mounting board to the shade. The twigs were too weak to support the weight of the shade, so I tried using staples around them. Using the wire was a far better choice.
It worked with the electrical staples I used, but nail ones should do the same.
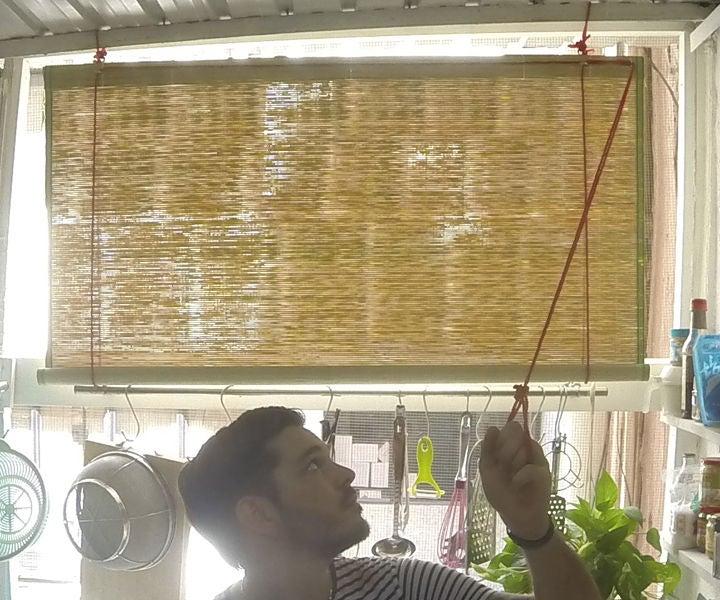
Step 6: Install the Pull-String
When it comes to controlling the shade, there are two primary strings to consider. For starters, as seen in the photo below, the first screw should be threaded through each and every ring on the shade.
A secure knot should be tied on the lower right side of the string. As much as I’d like to think I’m an expert on knots, I just googled “secure single-string knot” and came up with the bowline. In order to find out what to do, I consulted this YouTube video, which has proven to be an excellent resource.
As can be seen in the image below, the second string only passes through the rings on the left hand.
Make a knot in the other end of the string and attach it to the bottom of the ring. It’s best to leave the other open.
When you get to this step, the shade should have two loose ends of string on its left side. Double Fisherman’s Knot these two strings together. A “strong knot for two strings” was the second term I typed into Google.
Step 7: Hang Shade
Hang the shade using the angle brackets on the mounting board.
Isn’t it beautiful? My photography and staging talents are clearly on display in this photo.
Part 2: Why You Shouldn’t Make a DIY Bamboo Shade
This color is a complete abomination. I’ll explain why.
1. It’s Ugly
You’re probably thinking, “But it’s so gorgeous…” Take this as a lesson in the power of bloggers to turn everything into something beautiful. This is what you get if you remove those beautiful, flowing drapes.
The shade is enormous and protrudes from the window by inches. Even the maroon curtains that are too short and don’t complement the rest of the room make the place look shabby. They should be ignored.
Some people may say “put them down!” but you may be thinking something else. They must be prettier from the bottom.” No. They don’t do it at all, unfortunately. Not during the daytime, at any rate. The sun peeks awkwardly through the haze, showcasing my shoddy attempt at shadiness.
One sheet of paper was used to make two different tones of the same color. As a result, it doesn’t appear well when it’s actually visible to the naked eye.
At night, it does appear to be a nice place to be. It’s only that the sheet is so thin that the outside world can see into my chamber. Even so, this isn’t great.
2. It Doesn’t Work Well
The slender twigs and shades are cumbersome. This means that when you tug on the string, it won’t be as tempted to rise as it would if it were attached to a conventional fabric shade. You must pull the cord and lift the shade from the bottom in order for it to work. It’s a little awkward, to be honest.
Who wants to get up and do this every day? Nobody.
3. It’s Not a Big Money Saver
I built two shades for about $80, and I already had some of the materials I needed on hand. Two new bamboo coverings for these windows would have cost me approximately $100.
I wish I had done so. It wasn’t worth the $20 discount. To be completely honest with you, I’m dismantling them and putting them in my basement’s “odd trash” area. Eventually, I’d like to turn them into something useful. Pay attention.
Part 3: If You’re Completely Determined to DIY…
I’d use a bamboo mat/rug instead of fencing if someone threatened me with a pistol and told me to create DIY Bamboo Shades again. Because rugs are flat, they might theoretically be used to generate a more flattering tone.
My twigs are less voluminous than bamboo mats, so I’m not sure if it means they’re lighter. If that’s the case, the second issue I was having with operation will be resolved, as they will be lighter and easier to operate.
It would necessitate a few changes to the process, but I’m confident it can be done.
As a result, I’m unsure whether this approach will save money in the long run. Please share your experiences in the comments section below if you decide to give it a go. There are so many things I’d like to know: Was it successful? Was it slanted or flat? The answer is yes. Just about anything and anything would be much appreciated.
Final Thoughts
In the event that you’d like to construct your own bamboo shades in the future, bookmark this page to Pinterest as a memory of my mishap.
Follow me on Pinterest if you’d want to see more projects and/or spectacular failures! If nothing else, you can count on a good time!
Nguồn: https://iatsabbioneta.org
Danh mục: Curtains


