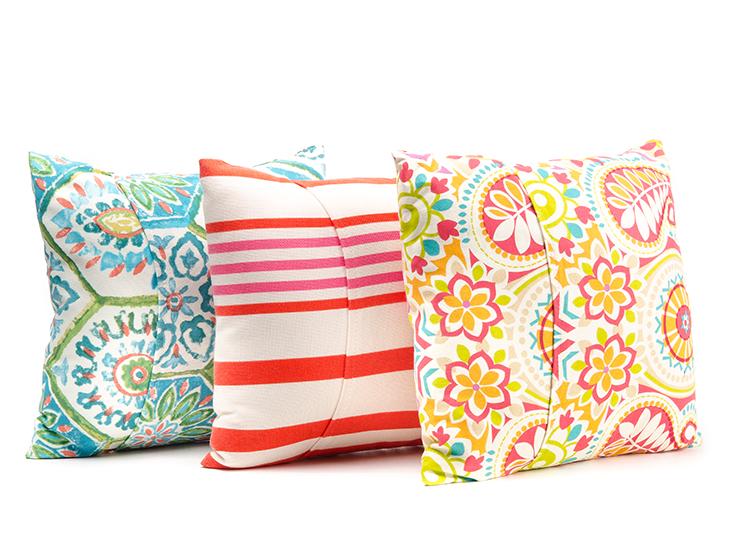
Are you interested in learning how to sew an outdoor pillow? You can do it yourself in just six simple steps!
Pillows are a great way to add color, texture, and character to any space.
Bạn đang xem: How To Make An Outdoor Pillow? Special Tips and Tricks
Improving the visual appeal of a place is not restricted to the interior of a building; it can also be done in the garden or on the patio.
DIY outdoor cushions are easy to construct if you have some imagination and some basic sewing skills.
It’s not easy to keep outside furniture and decorations in good condition due to the sun, heat, and other elements.
But with this manual as a reference, you can be assured that the final result will not only meet, but exceed, your expectations for an outdoor pillow.
Through this process, you will get to appreciate the outside area more. In addition, guests will get an intimate sense of who you are as they explore the room.
Supplies And Tools Needed
- Through this procedure, you will come to appreciate the outside surroundings more. Furthermore, your guests will get a sense of who you are as a person from the way you’ve decorated the room.
- By going through this, you’ll have a deeper appreciation for the outdoors. Not only that, but your guests will get a sense of who you are as a person from the details you provide.
- Cotton piping, in a width equal to the diameter of the cushion insert.
- Needles and thread Sewing machine (with zipper foot)
- Stitching needle for handwork
- Thread
- Pins (Heavy-duty) (Heavy-duty)
- Scissors
- Pencil
- A measuring stick or a ruler
Step By Step Instructions
Do you have any idea how to sew a pillow for use in the great outdoors?
Your outdoor pillow may be made in just six simple steps. It is imperative that you carry out each step accurately if you want to attain your goals.
Step #1. Cut the outdoor fabric
Outdoor fabric is laid out flat on the table.
A seam allowance of half an inch should be added to all sides, so use your ruler and pencil to measure and mark it based on the size of the pillow form.
If your pillow form is 16 by 16, you’ll need fabric that’s 17 by 17.
To make the front and back of the pillow, you’ll need two matching pieces, so be sure to follow the pattern twice.
You’ll need to cut the fabric in half and then stitch it back together.
Step #2. Make the Piping
Prepare the cotton piping for your pillow by trimming it to the same circumference as your cushion form.
With the same 16×16 inch pillow form example, the piping should be 64 inches long.
The identical 16×16 inch pillow form would require piping that is 64 inches in length.
If you need to join numerous pieces of fabric into one long one, simply sew the ends of the strips together.
It’s important to keep in mind that when stitching, the right sides should be facing each other.
Wrap the fabric around the cotton piping with the correct side showing.
After that, attach the piping using the zipper foot on your sewing machine.
Step #3. Put Together the Pillow Cover
Right sides together, stack your identical square fabric pieces.
Align the rough edges of the piping you just constructed with the raw edges of the fabric pieces.
Make use of your sewing pins or clips to keep the three pieces together.
Cut cuts around the corners of the fabric so that the piping will look and lay nice.
Make careful to cut a slit in the bottom of the pillow cover to insert the pillow form after it has been turned inside out.
Step #4. Sew the Fabric Pieces
During this process, you’ll observe the cushion taking form.
Take out your sewing machine and sew over the pins you just placed.
As you work your way around the cover’s perimeter, be sure to pull out the pins.
Do you recall the unzipped section earlier?
Leave them separate; no need to stitch them.
Step #5. Insert the Pillow Form
Once you’ve finished stitching the pillow cover, you may turn it inside out and cut away any excess thread.
Now, you may stuff the pillow shape into the case through the opening you created.
Gently lift the form until it reaches the top of the pillowcase, making sure to get into all the nooks and crannies.
The elements provide a challenge to outdoor furnishings and decor.
Due to its durability and low upkeep requirements, polyfill is an excellent insert for outdoor settings.
On top of that, it does not soak up as much moisture as other pillow inserts, so it dries out more quickly.
Step #6. Close the Opening
Xem thêm : How To Wash A Memory Foam Pillow? Helpful Tips To Remember
The gap here needs to be closed via hand sewing.
To prevent any slipups, the pillow opening should be pinched shut and pinned.
You should use a needle and thread to close the gap.
Trim the extra thread, and your pillow is finished and ready for use.
If you want to be more creative with future pillow projects, you can always add zippers, ruffles, etc.
You may also employ functional inserts, such as shredded plastic.
Make Your Own Outdoor Pillows The Easy Way
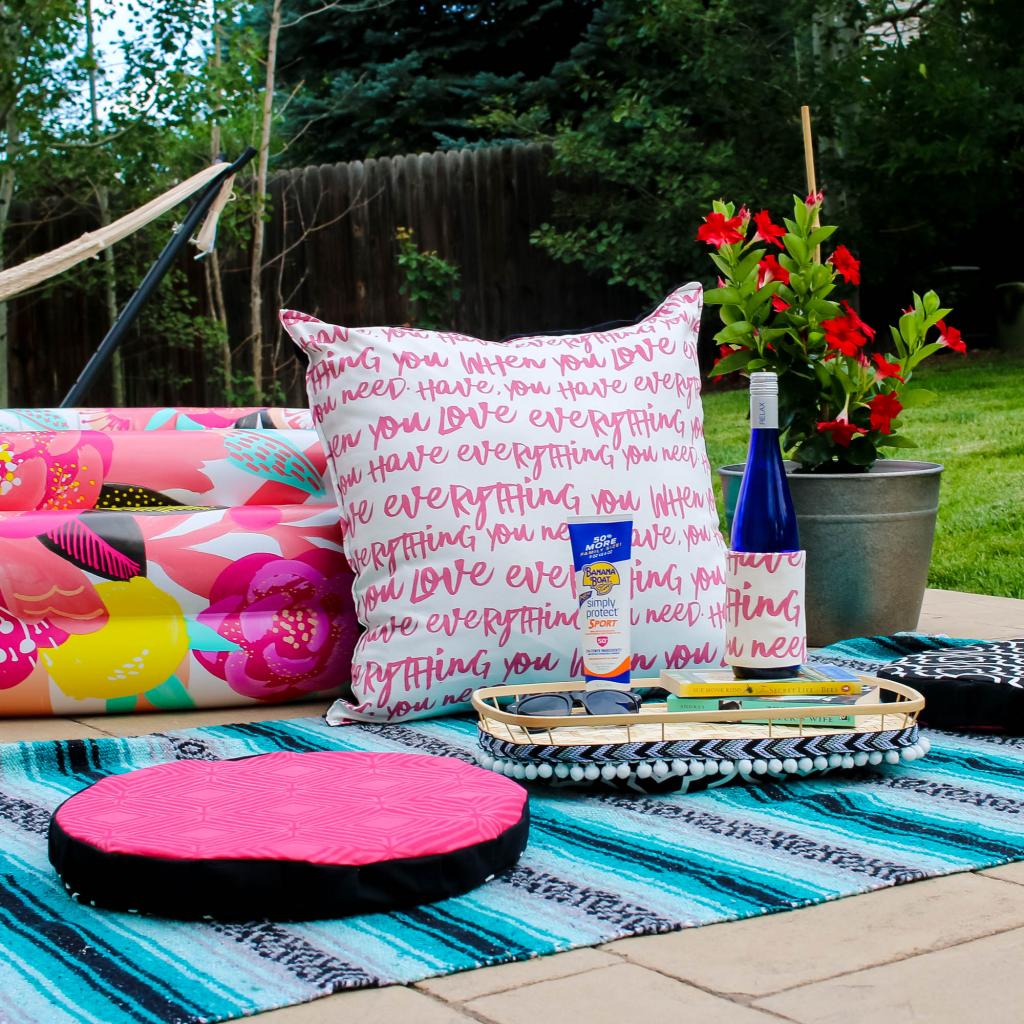
Salutations, pals! Now is the time of year when we go shopping for all of the outdoor gear we could possibly need. After such a long winter, we are determined to make this year’s celebrations truly unforgettable. Could it be?! Finding the perfect outdoor pillows is a challenge for me, and I don’t know if you have the same problem. They’re all a bit wooden and uninspired. Well, I’ve got an answer for you and a simple plan for making your own outdoor pillows!
Pillowcases from Etsy, H&M, West Elm, Pottery Barn, etc. fill an entire closet in my house. It’s a simple and inexpensive technique to give one’s look a seasonal facelift. Now the question is, how can we make these cushion covers weatherproof for use in the great outdoors? Just by using Rust-Never Oleum’s Wet.
For this endeavor, I shopped to H & M for pillowcases because of the store’s wide selection of reasonably priced yet stylish options. Also from the P.B.O., I brought home a fern-themed lumbar pillow.
Actually, it couldn’t be easier! Do this in the open air and protect yourself by using gloves and a face mask. Avoid having kids or dogs nearby when drying by using a plastic drop cloth.
Spray the entire fabric and hang it up to dry in the sun for a full day. It’s enough to cover roughly 4 standard pillows. Moreover, I put each one to the ultimate test by soaking it in water: fantastic!
Even after an hour, the water bead was clearly visible.
There are no flakes or discolouration after it dries.
This is a game-changer for people who have to endure oppressive summer heat and humidity.
I simply have to figure out if I want them in my backyard or on my porch. And what do you think?
I’m still on the lookout for some indigo to add to this collection. It’s clear how adaptable these cushions are. Those in the black circle are only $2.99 each; what a deal! If you’re interested, you may view them by clicking HERE.
How to Sew an Outdoor Pillow
Want to make your own outdoor pillow? This simple sewing project will walk you through how to make full and comfy pillows that hold up to the elements and come in the perfect fabric; one that you choose! Subscribe to Creative Ramblings and get new posts like this delivered right to your inbox.
Are you interested in creating your very own outdoor cushion? The instructions in this sewing project will show you how to create plush pillows out of any fabric you like that can withstand the elements. If you appreciate posts like this one, subscribe to Creative Ramblings and new posts will be sent directly to your inbox.
Watch how to sew an outdoor pillow
If you like this video and want to see more like it, subscribe to Creative Ramblings on YouTube.
Supplies
- Outdoor fabric
- Patio upholstery
- Canvas For The Great Outdoors
- Ruler
- Iron
- Pins
- My Singer is a hefty workhorse machine, but I adore it.
Start by cutting a half yard of outdoor fabric into a 18 x 42 inch piece. Hem the 2 short ends by folding them over twice, about a half inch total, then sewing with a straight stitch. This is a thick fabric so I found it helpful to press my hem and pin it in place before sewing.
To get started, cut a half-yard of outdoor cloth into an 18-by-42-inch rectangle. Make a straight stitch along both of the garment’s shorter sides before turning them over twice for a half-inch hem. Because of the weight of the fabric, I found that pressing the hem and pinning it in place prior to sewing was most effective.
Pin the fabric in place and use a zigzag stitch to close up the ends of the pillow. Remove the pins, trim any excess tread and turn your pillow cover right side out. Stuff an outdoor pillow insert inside and your outdoor pillow is ready to go!
Closing the pillow’s openings requires pinning the cloth in place before using a zigzag stitch. Take out the pins, snip off the extra thread, and flip the cover right-side out. An outdoor pillow is complete once you stuff it with an outdoor pillow insert.
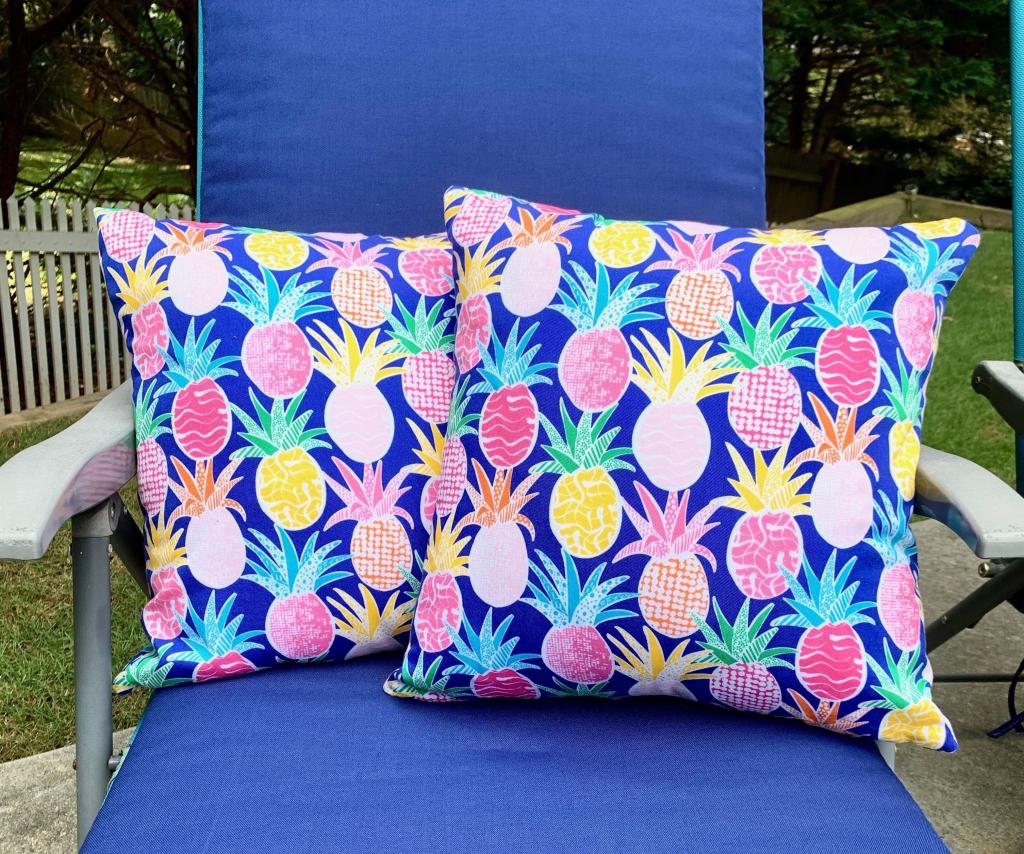
Making Outdoor Pillow Covers
The summers in southwestern Ontario are rather brief. It feels like we wait the entire year for the few warm Summer months. The only thing I’d like more than a tranquil backyard sanctuary to enjoy the sunshine in is a pool, but alas, I have bills to pay. This is when do-it-yourself initiatives come in handy!
These easy-to-use outdoor pillowcases were made in collaboration with Canvas Etc using their premium awning fabric. Since my backyard is decorated in shades of blue and green, I opted for those two hues. This cloth can withstand the sun’s rays, rain, and mildew without deteriorating.
Tips for Sewing Outdoor Fabric
Fabrics that are coated in a waterproof finish, such as polyurethane like the one I’m using for this project can be tricky to sew with. This fabric is not as simple to work with as other non-coated woven textiles, and you may run into some difficulties. Here is a list of challenges and solutions when sewing outdoor fabrics:
Issue:
- If you’re having trouble with your conventional metal presser foot, try switching to a teflon (plastic) one or taping it.
- Sewing over a seam line that has been rubbed with candles is said to prevent the seam from opening. Waxed materials tend to be smoother and easier to work with.
- Please make use of 4.0 or greater stitch lengths.
- To make the fabric easier to work with, cut small strips of tissue paper, parchment paper, printing paper, or wax paper and sandwich the fabric between the papers. Once you’ve finished stitching the seams, you can discard the paper.
- To make the coated fabric less sticky, sprinkle some talcum powder over its surface.
- Use a thicker fabric needle (US16) that is sharp, but remember that using a larger needle will result in more holes in the cloth.
- Spray silicone on the needle plate and clean the needle with rubbing alcohol often.
Issue:
A gross, sticky film forms on the needle during and after sewing, making it difficult to use.
Discernable Methods
- Use a lot of alcohol wipes/rubbing alcohol and cotton balls to remove the sticky residue.
- Please make use of 4.0 or greater stitch lengths.
- Thread the needle and oil it with Sewer’s Aid or another similar product.
I published the instructions for creating this hammock chair last month, and now, with the addition of these Do It Yourself outdoor pillows, my backyard oasis is starting to take shape. In order to stay inside my spending limit, I repurposed the excess pillow forms from my existing decorative pillows. I could have also constructed my own DIY pillow forms and used them with cushion inserts of varying sizes.
Materials Needed:
In the interest of full disclosure, this post will continue to contain affiliate links. Our whole policy regarding disclosure is available on this page.
- 50% of a yard of 60″ wide blue canvas awning fabric (may be used for both commercial and residential awnings)
- To Cut Fabric With Scissors
- Need a sewing machine and some polyester or marine-grade thread to match?
- Pillow form (or construct your own by upcycling existing pillows) or pillow insert of desired size (I used a rectangular 12″ x 20″ and a few square 19″ x 19″).
- Measurement tools, including tape and wax, and rules
How to Make Outdoor Pillows:
Cutting
Hold the material down with some weights or clips as you make your cuts. The holes left by the pins may allow water to seep through the fabric.
Make a cover that perfectly fits the pillow form by following the insert’s dimensions.
Mark the fabric with a seam allowance of half an inch all the way around the measurements for the pillow shape.
You can build pillowcases with color blocks by cutting the front cover in half across the width. Mark the fabric with the correct measurements plus a half-inch for the seam.
Sewing
Avoid pinning the fabric, as this will also cause holes, just like cutting. Instead, keep your hands as close together as possible while sewing.
If you want flawless stitching, use the smallest needle size possible and make sure it’s sharp. Since a larger needle makes a larger hole in the fabric, it is important to choose the appropriate size before beginning. Use a thread that can withstand the elements, such as polyester or outdoor thread that is resistant to mildew and sunlight.
Xem thêm : How To Make A Lavender Eye Pillow? Step-by-Step Tutorial
If you’re also going for a color block look on the front cover, you should join the two panels together. Place the RIGHT sides together and sew using a half-inch seam allowance.
Fabric that does not move freely and easily should be treated as described above. Fabric should be layered between sheets of tissue paper before being sewed. Maintain a strong grip on the fabric during sewing to prevent uneven stretching.
Place the FRONT and BACK pieces with the RIGHT sides together, then stitch along all three edges with a half-inch seam allowance.
After you’re done sewing, rip off the paper.
Leave a gap big enough to fit the pillow form inside by only sewing the final edge together.
For further peace of mind, you may choose to use a waterproof sealer on the seams before turning the piece right-side out.
Trim the corners, flip the pillow cover inside out, and poke the corners with tweezers or a needle and thread before inserting the pillow form.
Lastly, sew the opening closed with an edgestitch.
More DIY Outdoor Patio Ideas
- Repurposing old garden ornaments by spray painting them
- planters for patios and decks that are both unique and inexpensive
- Place to relax on a hammock
- The Tic-Tac-Rock game
- Container Gardens: How to Grow and Care for Flowers Outdoors
- Barbecue-ing and painting a caddy
- Greetings mat
- Decorate your yard with some owls!
- potted-plant container made of wood
What are outdoor pillows made out of?
Polypropylene fabric is ideal for outdoor cushions. Due to its high UV resistance, polypropylene was one of the first maritime fabrics to be widely used. The finest material for outdoor cushions is polypropylene because it is water resistant and does not absorb dye.
Can you make a pillow out of a yard of fabric?
A half-yard (18 inches) of 60-inch wide fabric is enough for two complete pillows up to 13 inches wide. But you’ll need almost a yard and a half of 54-inch cloth to cover those same two cushions. It takes more fabric to make a no-sew pillow. Pillowcases for a standard 12- or 14-inch bed pillow need a 36-inch piece of fabric (1 yard).
What foam is used for outdoor cushions?
Two full pillows up to 13 inches wide can be made using a half-yard (18 inches) of fabric that is 60 inches wide. You’ll need almost a yard and a half of 54-inch fabric to cover those two cushions. More fabric is needed for no-sew cushions. It takes a 36-inch square of fabric to make a pillow that is 12 to 14 inches in size (1 yard).
What is Sunbrella fabric made of?
Sunbrella fabrics are produced using only the highest quality solution-dyed acrylic. Therefore, they have many similar qualities, such as being lightweight and resistant to stains, water, mildew, and ultraviolet light. The fiber core of every Sunbrella cloth is colored, so the color will never fade even after years in direct sunlight.
What kind of fabric do you use for sling chairs?
Phifertex® and Sunbrella® Sling are two of the most popular types of fabric for sling chairs, and we stock both of these brands. Both of these textiles are excellent options for sling chairs, but they each have their own benefits. Both have excellent resistance to the sun’s rays, as well as durability and breathability.
How many pillows can you make from a yard of fabric?
Calculating How Much Fabric You’ll Need for Pillow Covers King-size bed pillow 20 x 36 inches 1-1/4 yards Square pillow forms 12 x 12 inches 1/3 yard 14 x 14 inches 1/2 yard 16 x 16 inches 1/2 yard Rectangular pillow forms 18 x 18 inches 1-1/4 yards
How many feet of fabric are needed for each pillow?
Sizes for throw pillows are as follows: 12 inches by 1.5 yards, 14 inches by 1.75 yards, 16 inches by 2 yards, 18 inches by 2.25 yards.
How much fabric do I need to make 2 pillowcases?
Fabric measuring 20″ x 30″ is required to construct two standard or queen-sized pillowcases. Pillowcases for a king bed require 2.5 yards (2.3 meters) of fabric (20″ x 40″).
How do you protect outdoor cushions from rain?
Waterproof silicone spray can be used to help prevent mold and mildew from forming on your cushions if you leave them outside. Spray your pillow with a product designed for its material. If your cushions did not come with a waterproof covering, spray them with a waterproofing spray after washing them.
How much fabric do I need for outdoor cushions?
Each cushion will require at least 0.9 meters of cloth. To compensate for potential fabric shrinking, we suggest purchasing 1 meter of cloth.
What is the most comfortable foam for outdoor cushions?
For outdoor seating, what kind of foam works best? Ultra-fast-drying Urecel foam. Cushions placed in the open air should be made with Urecel quick-dry foam, since it performs well in all climates. The foam used to float on water. Synthetic polyester filling. Open-cell foam. Foam polyurethane.
Can you use poly foam for outdoor cushions?
With sturdy plastic coverings, standard polyurethane foam can be used for outdoor cushions if you’re on a small budget. Be sure to cut holes in the plastic lids to allow for air circulation, drainage, and drying. Feb 21, 2017.
What is the best filler for outdoor cushions?
Foam made of compressed polyester and polyurethane As an alternative to foam, compressed polyester can be used to create comfortable outdoor furniture. It doesn’t turn yellow or degrade like regular foam does, although it does get compressed with time. It can be cleaned easily, doesn’t attract mildew, doesn’t cause allergies, and dries up in a hurry when exposed to air.
Are Sunbrella fabrics toxic?
Most Sunbrella upholstery fabrics conform to STANDARD 100 by OEKO-TEX® (19. HUS.
Is Sunbrella a polyester?
Sunbrella textiles are acrylic based rather than polyester based, which is the fundamental distinction between Top Notch and Sunbrella. The high-quality Sunbrella materials are resistant to mildew, mold, and stains.
What grade fabric is Sunbrella?
Highest quality cushions available right now are Grade C (Standard Sunbrella & In Stock Options). Acrylics, a type of synthetic polymer, are commonly used to make cushions of grade C, and are 100% solution colored before being spun into fiber.
What is sling fabric made of?
Fabrics for Pillows, Furnishings, and Drapes Fabric for sling chairs is often a vinyl-coated polyester and acrylic yarn mix called Sunbrella® Sling.
How many yards of fabric do I need for a sling chair?
Most chair sling replacements require between 1.5 and 2 yards (1.4 and 1.8 m) of material. Again, sling chairs come in such a wide range of sizes and styles that you’ll need to take your own measurements to determine how much fabric you’ll need.
Can Sunbrella fabric be used for sling chairs?
Recovering the mesh seats and backs of patio chairs with Sunbrella sling cloth is a great idea. The unique technique used to create it allows Sunbrella’s legendary durability to coexist with the fabric’s signature suppleness.
How much fabric do I need for a 24×24 pillow?
A 2424 pillow requires approximately 1.33 yards of fabric.
How much fabric do I need for a 20×20 envelope pillow?
If I want to make envelope pillow covers, how much fabric would I need? To get a square of fabric that’s 16 by 16, you’ll need to cut a piece of 17 by 38 inches, or half a yard. 18″ x 18″ = 19″ x 42″, or 2/3 yard. The required amount of fabric to cover a 20×20 inch area is 3/4 of a yard, or 21 inches by 46 inches.
How much fabric do I need for a queen size pillowcase?
Each pillowcase for a queen bed will require 1 1/4 yards of 44-inch cloth. You’ll need around 2 1/2 yards of cloth to make two pillowcases. The material and structure of this pillowcase are both consistent with the use of a single cloth.
How much fabric do I need to cover a 18×18 pillow?
Pillowcases for a standard 12- or 14-inch bed pillow need a 36-inch piece of fabric (1 yard). Approximately 1 1/4 yards of 54-inch fabric is required to make a pillowcase that is 18 to 20 inches in diameter.
How do I calculate how much fabric I need for a cushion?
Fabric requirements for the sides, front, and back of a box cushion are calculated by multiplying the cushion’s width by two, then adding the cushion’s depth by two. For seam allowances, add two inches.
Final Words
You should be proud of the lovely new feature you’ve added to your yard.
It is my hope that this home furnishing helps provide harmony to your garden.
It may be time-consuming to sew your own outdoor pillow, but buying one won’t give you the same sense of fulfillment.
Feel free to sew as many pillows as you like for your house now without worrying about making a mistake.
Take pleasure in learning how to sew an outdoor pillow.
Nguồn: https://iatsabbioneta.org
Danh mục: Pillow


