When it comes to making an envelope pillow cover using one piece of fabric, you’re in for a treat.
Following these easy guidelines is all that’s required.
Bạn đang xem: How To Make An Envelope Pillow Cover With One Piece Of Fabric? Step-By-Step Guide
Pillow covers are a must for nearly everyone because they provide a variety of benefits for both pillows and our own comfort.
From protecting your pillow to sprucing up a room, pillow covers have proven their worth time and time again.
People are constantly inventing new ways to make pillow covers more exciting these days.
What’s this? You can’t go wrong with a personal touch. DIYs can be a terrific source of revenue and a money-saving strategy for many people.
You may have the guts to start your own DIY projects, but you’re in a bind.
For those who want to make a pillowcase but- oh no! Only a small piece of fabric remains. It just serves to muddle matters further.
Don’t worry, because this article is here to save the day. Envelope pillow covers can be tricky to make, so keep reading for a step-by-step explanation.
5 Easy Steps To Guide You
One piece of cloth is all that is needed to produce an envelope pillow cover.
Step #1. Gather your materials
When producing an envelope pillow cover, you’ll first need to gather the tools you’ll need:
A piece of cloth
Color, pattern, and design are entirely up to you when it comes to your clothing. It’s up to you!
But remember that your fabric choice has a lot of repercussions.
Avoid skin discomfort by being aware of which one works best for you.
Sewing machine
Hand stitching your cover is an option if you don’t have access to any sewing machines.
However, if you’re one of those people who prefers the ease of sewing, get your machine ready!
Rotary cutter
The cutter isn’t required, although it’s a nice to have. A straight line can be sliced with a rotary cutter in a matter of seconds.
If you’re looking for a clean and precise cut, you may want to consider purchasing them.
Sewing kit
You’ve seen this before. A sewing kit includes a needle, thread, a pair of scissors, and a couple of clothespins by default. Don’t be scared to experiment with different designs.
Step #2. Measure the dimensions
Measure first, then proceed. It’s a crucial phase because it will determine whether or not this pillowcase is a success.
You could end up with a misshaped cushion if you make the mistake of marking the wrong size.
Using a tape measure isn’t the only tool needed to get accurate measurements. You’ll need a little arithmetic to get the job done.
You don’t always have to hand measure the cloth. Some pillows come with a label that specifies their dimensions.
Add 2 inches to the length to obtain the total.
You’ll need to buy the goods and then add 6 inches to it. Measurements for the cover have been provided for your convenience and reference. The width does not need to be altered.
Step #3. Cut
Snip!
Using the measurements, cut the fabric to the desired length and width. Remove any excess fabric.
However, you can also achieve this with the help of a rotary cutter.
Step #4. Sew
There are a variety of methods for sewing, including the following:
Hemstitching
Fold the ‘width edge’ in half. A fold of 14 or 12 inch may be ideal for specs. Using dressing pins, fasten the hem.
Get out your thread and needles. Sew the hem of the garment.
Ensure that your stitches are strong and secure before moving on to the next step. Your pillow cover and stitching will be more durable as a result.
Setting the structure
In a wide open area, spread out your one-piece cloth.
Your hems have now been sewn. The next step is to shape the fabric to the desired shape and size.
Do you recall the alterations and modifications you made?
For the other side of your cover, do this. Consequently, place the other halves together on top of the overlapping portion.
There should be two hems on top of each other.
They should be sewn together, but remember that the stitching lines should be hidden from view.
Xem thêm : How To Knit A Pillow
Sew the length together on one side. Because you’ll be flipping your fabric over, leave one side exposed.
Step #5. Finishing up!
In order to see the bright side of the cover, simply turn the cover over To complete the effect, insert your pillow into the envelope cover.
Foam or fibre can also be used in place of cushions. Make sure all of the edges are flush. To make them protrude, poke them with your finger.
There is no limit on what you can do.
Be careful not to damage the structure while you are working.
Make sure there are no stray threads or pieces of cloth that could make your work look sloppy or lopsided.
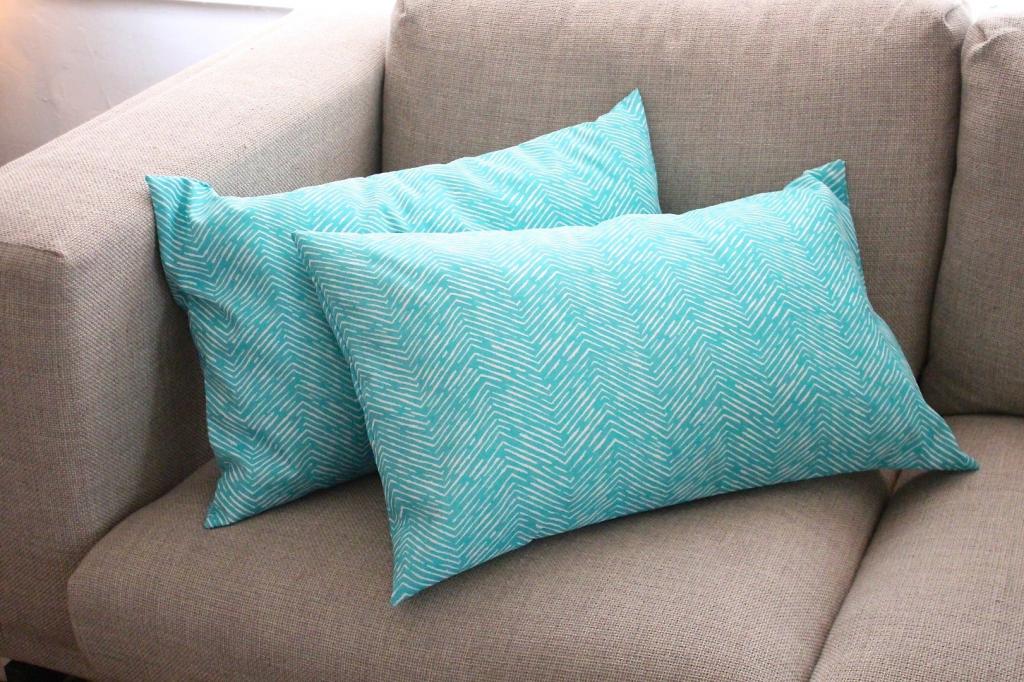
An envelope pillow constructed out of one piece of fabric.
Why Envelope Pillow Covers Are Perfect for Easy Home Decor
What? This is the first time you’ve heard of me making all my pillow covers with zippers.
That is not at all the case!
A couple sofa pillows are a must for me, as I have two young children who may or may not fall asleep on the couch and drool (sorry honey) and a spouse who may or may not slobber on the couch (sorry honey).
We’re not living in a museum or a magazine. We can’t stop salivating. Then there are the times when our fingers are covered in glue.
It’s simple to make your own envelope pillow cases, which you can toss in the washing machine and reuse again and again.
What are we waiting for? Let’s get to work!
Supplies to make an envelope pillow case:
- insert or old pillow that you’d like to use as a cover
- the material (how much will depend on the size of your pillow)
- rotary cutter or a pair of scissors (which is the most awesome cutting too ever, btw)
- if you’re using a rotary cutter, a cutting mat.
- needle and thread are required for stitching
- iron is an optional ingredient.
How to make an envelope pillow cover without a pattern
Cutting out the pieces of your pillow case
An envelope pillow cover pattern is not required! If you know the size of the pillow you’re covering, this is a simple technique to make a pillow cover.
For starters, cut a square of your pillow cover to fit your pillow insert.
A 16-inch square piece of fabric will be needed for each of the insert’s four corners.
If you don’t mind it traveling in the other direction of the front, cut two pieces for it’s reverse side.
There will be 5 inches added to the length of each backside piece to account for seams and overlap (the envelope part.)
When it comes to my pillow insert, which is 16 inches long, I divide that by half and multiply that by five to get 13 inches. As a result, my back pieces will measure 16 inches wide by 13 inches high.
How to Sew Your Envelope Pillow Case
To finish the bottom edge of the top back piece, fold it over about half an inch, then fold it back over again and sew along the edge.
Repeat for the bottom piece’s upper edge.
To make sewing these kinds of seams easier, press them first.
Putting Your Envelope Pillow Case Together
Place your front piece with the fabric facing the direction you want the finished pillow to go.
Afterwards, line up the corners of the back bottom piece and then line up the top back piece. It will encroach on the lower portion.
Around the entire perimeter, secure with pins.
Step 5: Sew a 1/2-inch seam around the perimeter of your pillow.
Zip-zag stitch around all corners with needle barely off cloth on outer edge, then finish by hand sewing in place. Using this method will keep your cloth from unraveling.
When you’ve completed Step 7, it’s time to add your pillow insert! DONE!
These envelope pillow coverings give a cheerful splash of color to my otherwise all-neutral living area!
The husband now has a light spot to put his tired head at night.
Supplies needed for an Envelope Pillow Case:
- 1/2 yard of cloth is sufficient for a 16 X 16 or smaller pillow.
- thread
- needle and thread on the sewing machine
- scissors
Envelope Pillow Cover Fabric Calculation:
It’s not difficult to figure this out. Start with the dimensions of your pillow. A 16 × 16-inch pillow, for instance, would be a good illustration. Your cloth will have a 16-inch width on one side.
Double that, plus 6 inches, will be the other side. 16 X 2 + 6′′ = 38′′ As a result, you’ll need a piece of fabric measuring 16″ x 38″.
How to Sew an Envelope Pillow Cover with One Piece of Fabric
In order to measure my pillow, which was 16 X 16, I followed the preceding instructions.
Afterwards, complete the short sides.
These are the edges where the hole will be located when it is completed. Each edge should be folded over 1/4 – 1/2 inch before being folded a second time.
Sew down each edge after pressing each fold in place.
We’re almost done, just two more seams to go!
Right side up, lay out your fabric. Each side should be folded in toward the center. Overlapped in the centre.
The pillow should measure 16′′ Or the pillow size you choose after tinkering with it.
Xem thêm : How To Make A Pillow Box? Helpful Information
Then, pin in place and sew along each of the corners.
Right-side out the cloth
Finally, place your pillow in place and you’re all set.
These envelope covers are a couple that I made. Some of them even got a little appliqué love from me.
Take a look at my Pinterest board titled “Pillows to Make.” Please consider following me if you enjoy what you see.
What is an envelope pillow cover?
No zips are required for envelope pillow covers. When folded into an envelope shape, it can be produced out of a single piece of cloth
In this case I am using 3 pieces of fabrics. The 2 pieces in the back are sewn together and overlap in a way in which the inner pillow can be inserted inside the cover. Let me show you!
How to make DIY envelope pillow cover Tutorial
Materials and Equipment (Free Pattern and sewing instructions provided at the end of this tutorial)
Here, I’m making use of three different types of materials. It is possible to place the inner pillow into the cover thanks to an overlap between the two layers at the rear that has been sewed together. Let me show you what I’m talking about!
Step 1:
However, if you like a different size, you are free to do so. I’m going with 18″ × 18″ (45.7 cm x 45.7 cm). It is important to note that the designs and instructions offered adhere to these measurements.
To begin, cut three pieces that are each 19″ by 13″ (48.3 cms by 33 cms) in size. In this case, I’m utilizing a little quilt fashioned from natural dyed fabric scraps.
Step 2:
The edges of your pillow pieces should be zig zagged or serged/overlocked (so that they don’t fray).
Step 3:
One of the back pieces should have a 1 1/2″ (3.8 cm) deep hem sewn on one of its sides. Doing so eliminates any exposed raw edges by double folding the hem. Before sewing, use a press to make a clean edge.
Step 4:
Put the front and back pieces together with the right sides facing out. At the center back, the back pieces will meet (this will be the insert opening).
Allow for a seam allowance of 12″ (1.3 cm) while sewing around all corners. The corners should be trimmed off.
Step 5:
Insert the cushion by turning it inside out (pillow form). ENJOY!
How much should an envelope pillow overlap?
It all depends on the dimensions of the pillow you’re using. In order to keep the inside cushion hidden, you must always leave enough overlap.
Envelope pillow tutorials
I enjoy making envelope pillows since they are simple and quick to put together. They’re also an excellent cushion pattern to utilize when sewing pillows for the home and children’s bedroom because they’re so simple to wash.
Take a look at these creative and adorable cushion tutorials!
- Baby pillowcase tutorial: step-by-step instructions
- The best way to make a girl’s quilted pillow cover
- Intricately hand-stitched pillow for your children
- An easy tutorial on how to create an applique pillow for Father’s Day.
How do you make an 18 inch envelope pillow cover?
An 18-by-18-inch pillow shape requires an envelope-style pillow cover. If your cloth is made of natural fibers, wash and dry it before using it. A piece of fabric that measures 18 inches by 18 inches will be needed for this project. Piece B should be 18 by 26 inches. Once you’ve done that, you can break apart piece B in half. Each B-piece must have its one-side hemmed (the longest side).
How do you make an envelope pillow cover with one piece of fabric?
Instructions The fabric should be washed. To make a pillow, simply cut the cloth to the appropriate size. Double-fold the smaller ends of the cut fabric. Pin and stitch a 1/2′′ seam to create the pillow form’s dimensions. Turn the fabric right side out after trimming the corners. After that, all that’s left is to enjoy your new pillow!
How much should an envelope pillow overlap?
The finished product will have the ends overlapping roughly 3 inches towards the back. To ensure that the pillow form is not visible while the pillow cover is in place, this extra fabric has been added. You’ll need to measure your pillow insert to get the fabric measurement.
What size zipper do I need for a 20 inch pillow?
Using a zipper two inches smaller than the insert’s size works best. For example, I use an 18″ zipper for a 20″ pillow insert, and a 22″ zipper for a 24″ pillow insert, etc.
How do you measure fabric for envelope pillows?
Your pillow size multiplied by 2 + 6 equals the amount of cloth you need to cut. This pillow is 18″ by 18″ — 18″ x 2 Plus 6″ equals 42″. If you sleep on a pillow that says: 16-inch-by-16-inch fabric Approximately 16′′ x 38′′ 17 inches by 17 inches Approximately 17 inches by 40 inches. The cloth should size 18′′ by 18′′. A rectangle that measures 18 inches by 42 inches 19″ x 19″ piece of cloth 20′′ x 20′′ 20′′ x 20′′ 20′′ x 20′′ measure 20′′ x 46′′ of cloth.
How much fabric do I need for a 20×20 envelope pillow?
These pillow covers require three pieces of cloth. Measure your cushion to get an idea of how much fabric you’ll need for the project. In the first panel, we see: Your pillow’s width and height should be increased by a full inch each. Cut a piece of fabric 2121 in size if your cushion is 2020 in size, for example.
How much fabric do I need for a no sew pillow?
You’ll need to cut the following from your cloth to start making your pillow covers: For the front panel, you’ll need one 20×20 square and two 13×20 rectangles.
What is an envelope pillowcase?
A pillowcase with an envelope closure is called what? On the ends of traditional pillowcases, there is an opening. For a more polished look when making the bed, an envelope pillowcase has a distinctive envelope closure at the end of the case.
How much fabric do I need to make an envelope cushion?
In order to figure out how much cloth you’ll need for a single cover: Just multiply the cushion pad’s width by the seam allowance to get the total length. To put it another way, in terms of numbers: The sum of 17 and one inch is 18 inches (45.5 + 2.5 = 47.5 cm). A piece of cloth that is 48′′ (125 cm) long and 18′′ (47.5 cm) wide is all that is required to make a single cover.
What size zip do I need for a cushion?
Two. – The zip should be equal in length to that of a cushion’s edging (as the zip goes into the bottom of the cushion). Zips should be 45cm long if the end dimension of the cushion is 45x45cm. The zip would be 45cm long if your cushion was 45cm long and 35cm wide.
What kind of zipper do you use for pillows?
Keep in mind that zippers aren’t measured with a tape measure but rather along the teeth. For cushion covers, plastic (nylon coil) zippers are preferable than metal zippers since they are easier to sew.
How much material do I need to cover a 16×16 pillow?
Estimating Pillow Cover Fabric Requirements Specifications (Length by Width) Fabric Required for a Single Pillow Cover (Using 54-inch Wide Fabric with No Pattern Matching) fourteen and a half by fourteen-tenths of an inch A quarter of a yard 16 × 16-inch A quarter of a yard 18.5 by 18.5 cm 5/8 of an inch a size of 20 × 20 inches 34 of a yard
What size pillow goes in a 16×16 cover?
To ensure a full pillow, use an 18″ x 18″ insert with our 16″ x 16″ throw pillow covers.
How do you make an Oxford pillowcase stand up?
A hotel and department store method for making Oxford pillows stand upright is to starch the edge of the flange. Add two European cushions at the back, then a row of Oxford pillows, and finally a row of housewife pillows to complete the layering.
What is the difference between a pillow case and a sham?
If you exclude differences such as the opening location and decorative front, the main difference between the two is that the pillowcase is designed to keep your pillow clean and free of body oils and grime while you sleep, while the pillow sham serves a more decorative purpose.
How do you make a sheet metal flange?
Flange the edge of the object. To make use of the Sheet Metal tab, open the Design workspace and click on it. Sketch tools can be used to build a closed 2D profile. Create a flange by selecting Create > Flange. Select the edge or edges that you want to use. The grip can be used to set the flange’s height.
How are pillow covers measured?
The most precise way to gauge the size of a pillow is to measure it from the inside seam to the outside seam. Remove the pillow cover from the insert / filler, flip the cover inside out, place the cover on a level surface, and measure from the inside seam to the inside seam.
How much material do I need to cover a pillow?
A 20-by-26-inch regular size pillow requires 5/8 yard of 54-inch fabric. One and one eighth yards of fabric are required to make a 20-by-30-inch pillow for a queen-size bed. About 1 1/4 yards of fabric is required to make a 20 by 36-inch pillow. Pillows are so small that it’s not a problem if more fabric is needed to match patterns or stripes.
How do you make a no sew Tshirt pillow?
The contents of the book are listed in this section. Step 1: Lay the shirt flat and pin it. The next step is to cut out the graphic portion of the design. Step 3: Make a Small Square by Folding. Step 4: Unfold the paper and cut it into thin strips to finish. Tie Strips, the final step. When you’ve finished stuffing the pillow, tie the ends together. Next, let’s say thanks for all the good times.
Conclusion
The process of making an envelope cushion from the ground up, especially with only one piece of fabric, may seem difficult, but with the correct materials and instructions, you will succeed!
If you’re able to complete all of these steps, you might find yourself embarking on a new hobby.
I appreciate you taking the time to check out “How to make an envelope pillow cover with one piece of fabric?” Make the most of your vacation!
Nguồn: https://iatsabbioneta.org
Danh mục: Pillow


