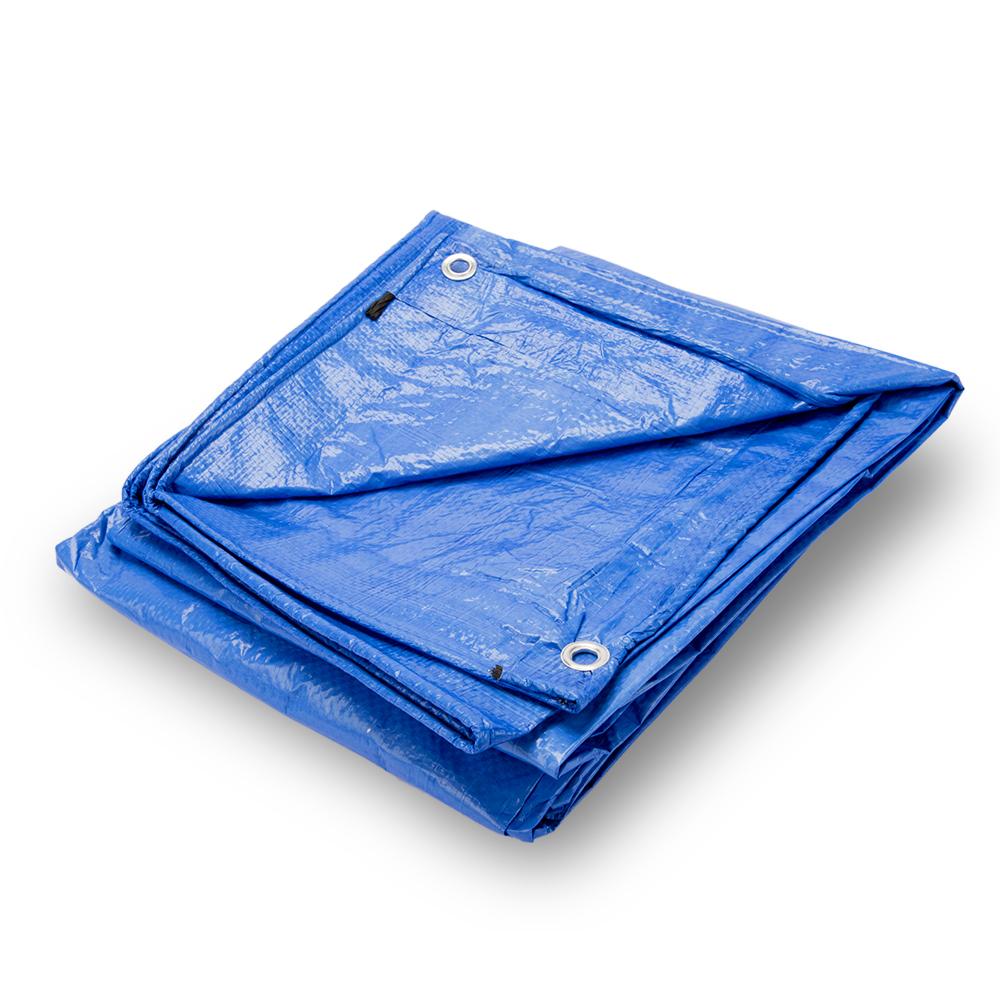
Do you want to know how to create a tarp shade canopy? It’s a wonderful development! There are only a few simple actions that you need to follow, which you will learn later on.
Having a canopy tent in your backyard is a great way to expand your outdoor living space. It has a wide range of applications.
Bạn đang xem: How To Make A Shade Canopy With A Tarp? Step By Step Guide
And I’m sure you’ll enjoy it, too. You may use it for backyard parties, camping, or just hanging out with your family on the weekends.
You can also offer a variety of entertaining events, which will encourage your children to spend more time playing outside.
As an added bonus, you may use a tarp-covered shade canopy as a carport to shield your vehicle or other valuables from the sun or rain.
If you’re looking for a cheap canopy, you may want to consider purchasing one made of tarp; it’s lightweight, robust, and more cost-effective.
What are we waiting for?
Things Needed To Make A Canopy With A Tarp
If you have a few supplies, you may easily create your own canopy.
You’ll need the following:
- There are grommets in this high-quality material (size may depend upon the tarp used)
- Pitchfork (8 to 10 feet)
- The corners of the tent need four sets of tent poles (7 to 8 feet, depending upon your desired height)
- The stakes of a tent.
- Six-millimeter-wide nylon rope (around 40 feet)
Step By Step Guide On Making A Shade Canopy With A Tarp
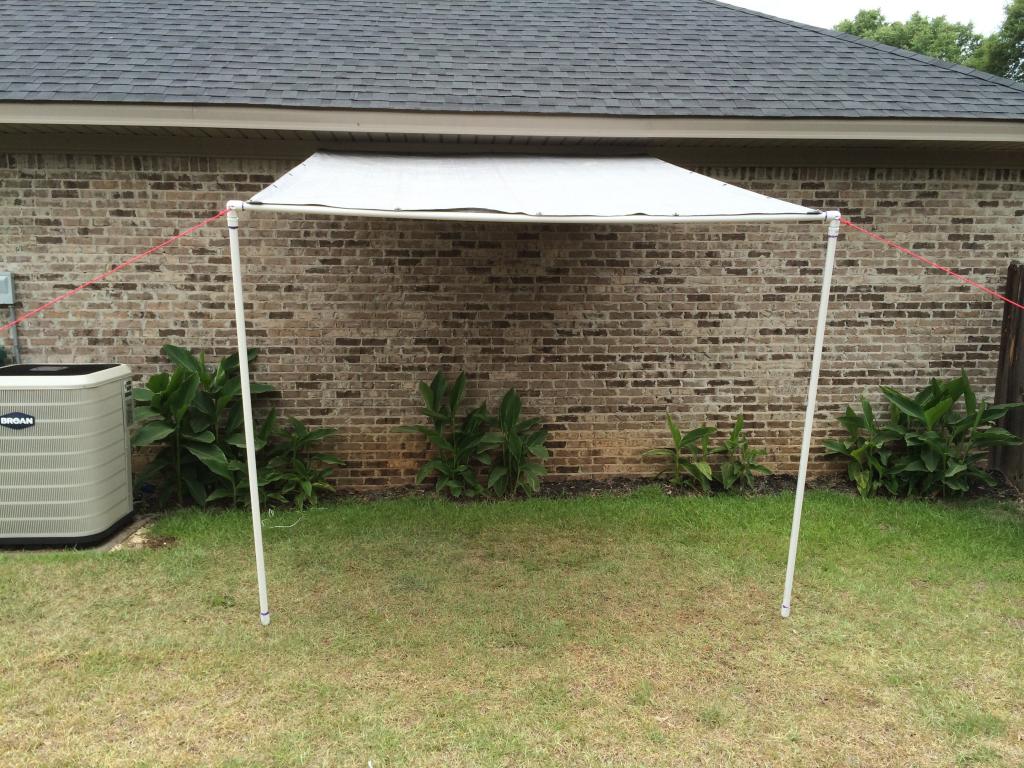
Step #1. Preparing the area
In what location do you want to erect the canopy? What’s the matter? Sure. Everything is up to you!
To begin, make sure the space is free of obstructions. Make sure it’s free of any debris.
Make sure there are no sharp items in the area where you plan to spread the tarp.
Remember to put your own well-being first!
You must, of course, be careful not to damage or scratch the tarp.
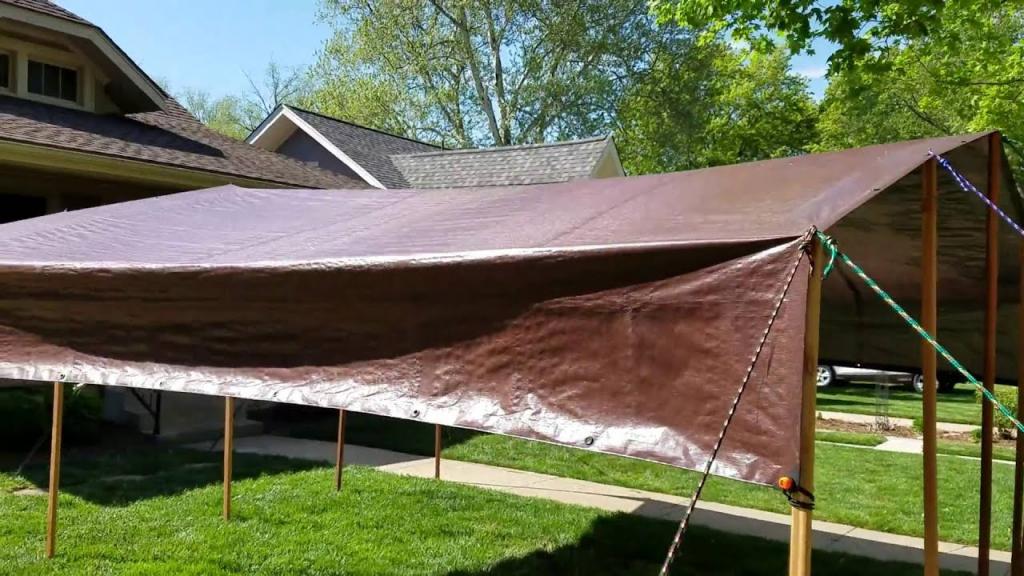
Step #2. Attaching the poles into the corners
Finally, the canopy’s corners are ready to be made.
Get your hands on four poles that are between 7 and 8 feet tall (depending upon you).
Then, insert the end of the pole into the tarp’s grommet.
Xem thêm : How To Get Rid Of Cottony Cushion Scale? Ultimate Guide
In case you’re unsure, here are a few pointers.
A rope can be used. It’s really that simple!
Step #3. Tying the corners
Even if the processes are straightforward, it’s a good idea to enlist the assistance of a friend or family member.
Do the corner tying with a friend (the more, the better).
Lift the poles with care and precision, avoiding any damage.
Each of the four corners should have a person assigned to holding a pole.
Because this method necessitates collaboration, anybody and everyone can pitch in and lend a hand.
Step #4. Securing the poles
So, you’ll have to learn how to anchor the poles in the ground.
You’ll need to learn how to secure a canopy to the ground using either concrete or dirt (depending on the type of ground you’ll be using).
In any case, to secure the poles, a rope must be dragged to the ground. Make sure it’s not in the canopy’s centre.
Attach the rope to the ground when you’ve stretched it out.
If you’ve put the canopy down on the ground, this is correct.
What’s the best way to attach it?
After driving a stake through the ground and tying a rope to it, you’re ready to pitch your tent. No problem, isn’t it?
All corners of the canopy should be treated similarly.
Here, discover how to secure a canopy tent to the ground on concrete!
Step #5. Attaching the center pole
A center pole is essential for providing maximum support and strength to your canopy.
Xem thêm : How To Collect Dragons Breath? Comprehensive Guide
Get a pole that’s about 8 to 10 feet in height.
Place the pole in the middle of the tarp now. Push the pole up to the height you choose.
In order to keep the pole in place, you must anchor it firmly to the earth
Step #6. Securing the canopy
The ground should be smooth after the poles have been anchored in place.
It’s a sign that the canopy’s already been cinched down firmly.
If you follow this procedure, you can rest assured that the tarp will be free of debris and wetness.
This is important:
How the tarps are fastened to the poles and to the ground is critical to the strength of your canopy shade.
Step #7. Decorating
Who wants a drab and uninspiring camping tent?
You may, of course, personalize it. It’s also worth noting that it’s optional.
Make the canopy even more appealing by having more fun and making it more appealing.
Consider a particular style or concept.
Because it’s so simple to embellish, having an outside canopy is a wonderful sensation.
You can use it whenever you want, which saves you money on renting a space.
Conclusion
It’s time to put your newfound skills to use and construct your own tarp-based shade umbrella.
It only takes a few simple steps to complete one.
With a canopy in your home, you may change the design to suit your mood at any time.
Make it a comfortable hangout for you and your family by adding some lighting.
Nguồn: https://iatsabbioneta.org
Danh mục: Guide