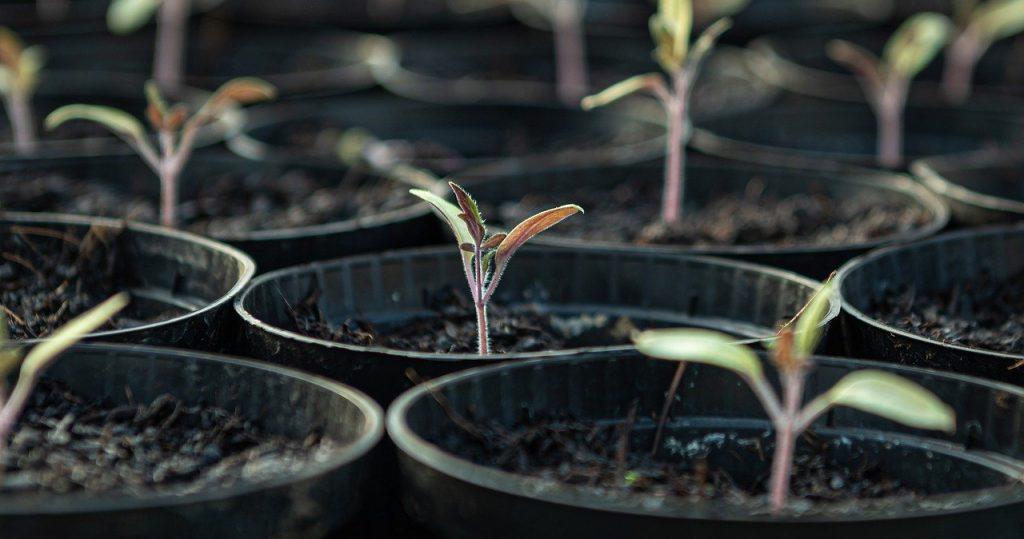
Taking care of clones in Rockwool requires you to follow a four-step process. Rockwool is well-known as a seed-starting medium, but it’s also great for propagating plants from clones or cuttings. Rockwool is useful for clones since it is easier to root them in wet and steady growing conditions.
You’ll also need to know how to keep your Rockwool clones healthy if you want to promote rooted. These four methods will help you get the most out of this medium and grow healthy plants. In this approach, you’ll be able to transfer outside without any major difficulties.
Bạn đang xem: How To Take Care Of Clones In Rockwool? Easy Step-by-step Guide
How To Grow And Maintain Clones In Rockwool
Step #1. Preparation
Before you do anything else, make sure your tray, dome, and environment are all set up correctly. A humidity of 50% and a temperature of 75°F are ideal conditions for your tray and dome. To keep the starting cubes from getting too cold, place the tray on a piece of cardboard.
![What Is Rockwool & Rockwool Cubes [Using Rockwool In Hydroponics]](https://iatsabbioneta.org/wp-content/uploads/2022/03/how-to-take-care-of-clones-in-rockwool-img_622b09e8c1705.jpg)
A light above your dome is necessary to promote root development because you’ll be growing and caring for clones or cuttings. After that, adjust the pH of the starting cubes by soaking them for 30 minutes at 5.5 pH. Make sure you brush off any extra liquid and use a paper towel to soak up any remaining water on the tray before putting the rockwool cubes in there.
Step #2. Taking cuttings
Prior to cloning in rockwool, make sure your cuttings or clones are in the greatest possible health. With the help of clones, you want to maximize the growth of your plant. In addition, cutting at a 45-degree angle increases the cutting surface area.
They’ll be able to absorb moisture and nutrients more easily this manner, which is important for root development. In addition, you must remove everything but a few leaves at the top of the portion. Taking this step will prevent the roots from competing for nutrition.
Finally, apply rooting hormone to the end of the clone to speed up root development. In addition, you can see which ingredients are ideal for your plant. To avoid the spread of disease, always use rooting hormone in a sanitary manner when dipping the clones.
Step #3. Growing clones
Xem thêm : How To Prune A Sunflower? Comprehensive Guide
After dipping the clones in the rooting hormone, you should be ready to push them into the rockwool cubes. Check to see if they’re secure and stable after the procedure. The number of cubes per tray can reach up to 40 if you fill them appropriately.
Place your clones beneath your light with an inch of space between them and put on the dome. Low-intensity fluorescent lighting is preferred because it poses no danger to the clones. To encourage roots, the light’s warmth will evaporate the moisture on your cubes.
You should be able to care for clones without many drawbacks after completing the first three processes. Remember that if you don’t complete the preceding steps correctly, you’ll have issues with cuttings’ care and maintenance. Once you’ve completed the installation, the only thing you’ll need to do is remove any water that has accumulated on the tray.
Step #4. Maintenance
When it comes to caring for clones housed in rockwool, it’s as simple as shaking the dome every day and ensuring that the circumstances are just right. Remember that because you’re growing clones in rockwool, the ideal humidity and temperature are 50 percent and 75 degrees, respectively. Make sure to keep in mind that there are no vents or direct heat sources that will keep dampness at bay.
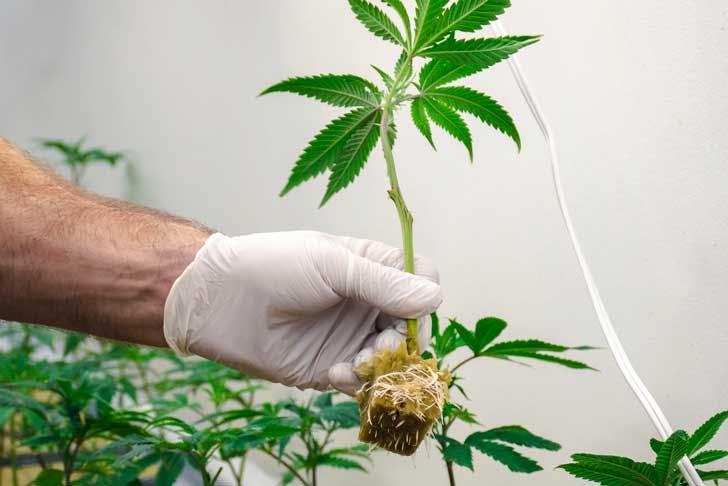
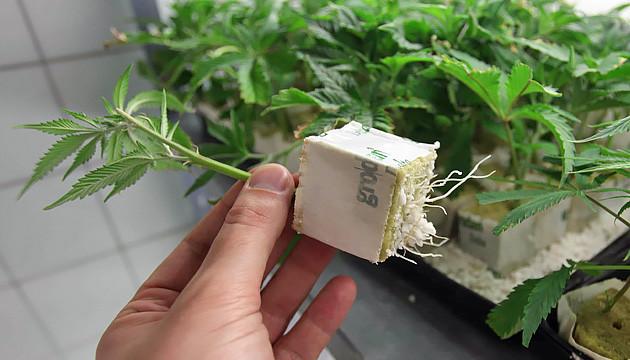
Check the weight of the rockwool cubes after a period of time to see if they require watering. Under the cubes, you can also look for roots. This will tell you whether or not you can gradually open the dome’s vents to allow for the best possible growth.
You can leave the dome off for a few hours to assist the clones get used to being outside after you’ve opened all the vents. This is akin to acclimating cuttings so that they can be transplanted in the future, which is similar.
Top Consideration When Rooting In Rockwool
Keep in mind that treating rockwool prior to use is critical. Even though soaking the cubes in pH-treated water isn’t very time-consuming, it is nevertheless a crucial step that you should never skip. You need to keep an eye on your pH levels to make sure you’re giving the right environment for root development.
How to clone plants using Rockwool
Using Rockwool as a growing medium, Paul demonstrates how to make clones (cuttings) step by step here. Your clones can be transplanted to any type of media or soil once they have rooted.
Xem thêm : How To Grow Gerbera From Cuttings? Comprehensive Guide
Use a new or disinfected tray and dome at all times. Your tray and dome should be placed in a room with a temperature of 75°F and a relative humidity of 50 percent. Be certain that your tray is not sitting on a chilly surface next. Using a heat mat may cause your beginning cubes to dry up too rapidly for some people. It’s fine to use a towel or a large piece of cardboard. All they need to do is get away from the frigid ground. A 24 watt T5 light, hung 2 feet above your dome, is all you need to start cuttings. Pre-soak 20 to 30 rockwool cubes in water with a pH of 5.5. Soak the cubes for around 20-30 minutes before using.
Put Cubes in Tray – Step 2 After presoaking your 20-30 cubes, it’s time to arrange them in the tray, making sure they are all uniformly spaced. Because this will modify the rockwool’s consistency when you remove it from the pre-soak solution, it is important to give each cube a couple good hard shakes without squeezing. The cube should be able to stand with one corner lower than the rest without water dripping if done correctly. Even if you don’t anticipate to find clones in any of the cubes, do this to all of them. Once all the cubes are in the tray, make sure no more water has drained from them by checking afterward. Use a paper towel to blot out any water that is still in the container.
Always use new growth (tops, suckers, etc.) for making clones while making clones. At the point where new growth meets the main stalk, cut at a 45-degree angle and remove all except the top two leaves. New root growth might be encouraged by a slightly slanted incision. Cutting back the extra foliage allows the plant to continue photosynthesis while allowing it to concentrate on growing new roots. Using a rooting hormone like Hormex, Clonex, Olivia’s, RootTech, or Dip’n Grow, dip about 1/4″ of the cut end into the solution. To find the one that works best for you, don’t be afraid to experiment with several brands that contain the active component Indole Butyric Acid. Using a small amount is all that is required. The tiniest amount can make a big difference.
Just after dipping your cuts into rooting hormone, you’ll want to press the stems into the pre-existing holes in your rockwool cubes. It’s possible to use the backside of the cube if the whole appears too loose. As a reminder, you’re cutting and filling as many cubes as you need, so keep that in mind. In your tray, there should be between 20 and 30 cubes. Even if you don’t use it for a clone, the tray should retain its contents for future humidity needs.
As soon as you’ve completed all of your cutting and cubing, you may put on your 7-inch humidome with the vents closed. Tray and dome should be placed centered under your 2′ long T5 light, which should be roughly 1′′ above your dome. In order for the plants to obtain enough light and warmth from the fluorescent light, they must be placed so close together. Water in the cubes will progressively evaporate due to the warmth, resulting in daily condensation on the dome’s four sides. The plants “chase” the water and sprout roots as a result of the cubes slowly drying. Do this every single day to get rid of any water that may have accumulated in the tray. Check to see if your tray and dome aren’t being directly touched by cold air (i.e. air conditioning) or direct heat other than the T5 light if you don’t have daily condensation. Don’t forget to keep the room temperature at 75°F and the humidity level at 50%.
Prepare them for their journey in Step 6– Until this point, you’ve been shaking out the moisture by removing the dome once a day. The tray should also be wiped off to remove any excess water that may have built up. When the cubes are about five days old, you’ll want to weigh them. You’ll need to add more liquid if they’re feeling dehydrated. Just enough water to rehydrate the cube is all that is needed. If water does get past the cube and into the tray, make sure to clean it up as soon as possible. Inspect the cubes’ undersides as well for signs of roots. You can open the dome’s vents once you detect a few roots protruding from the bottom. They no longer have to rely on inhaling water from the cubes; instead, they may drink it directly from the roots. Every day, you’ll open the vents further and further. A few hours after they’ve fully opened, you’ll have to remove the dome altogether. A few more hours the next day, and then entirely remove the dome by the third or fourth day of removal. Once the dome has been removed and they are perky and healthy, they can be transplanted!
Conclusion
When the right conditions and methods are followed, rockwool cuttings can be an excellent way to propagate your plants. As a result, caring for Rockwool clones goes much beyond simple upkeep. You also need to make sure that the method is followed, from the initial preparation to the actual cloning.
Care for Rockwool clones is as simple as opening the dome once a day to eliminate condensation after you’ve mastered the first three steps. Wipe away any water that accumulates on the tray until the clones develop roots. If you’re patient, you’ll be able to remove the vents all at once.
Nguồn: https://iatsabbioneta.org
Danh mục: Guide