The process of growing hops from seed is simple and only requires two steps. Hops cultivation is becoming increasingly popular because of its potential for profit. Therefore, you need to identify the best method of starting that is best suited to your needs.
Similar to other plants, sprouting hops from seed isn’t for everyone. However, germination in a greenhouse can be guaranteed if you take the time to properly prepare the seeds. Additional papers from extension services are also readily available to help you with hops production.
Bạn đang xem: How To Grow Hops From Seed? Complete Guide for Beginners
Beginner’s Guide For Growing Hops From Seed
Step #1. Preparation
To begin growing hops from seed, the first step is to prepare the seeds for sprouting. Always keep in mind that cold treatment is required for hops seeds before they will sprout. Growing hops from seed is a possibility for some growers, but the method itself is uncomplicated.
Mixing moist sand with hops seeds in a tight plastic bag is the most basic treatment procedure. After five to six weeks in the refrigerator, place the bag somewhere warm. Make sure to keep the seeds out of direct sunlight and level out the bag so that they can sprout.
Sow the seeds, and wait two months for them to sprout at 68°F. In theory, the seedlings are ready for transfer, but patience is essential. Restart the cycle and store the seeds in the refrigerator if they haven’t sprouted after a few more days.
Step #2. Planting
The seeds will sprout and grow faster if they are exposed to cold temperatures. To get them to sprout on time, you need to simulate the circumstances they’ll face in the wild. If the weather in your area is unpredictable, you may want to grow the hops seedlings in a greenhouse or otherwise arrange the appropriate location.
In an ideal world, your seedlings should be placed in a location with at least 12 hours of daily direct sunlight. Compost and peat moss should be worked into the soil to provide additional support for your plants. The middle of April is a good time to plant hops in an area that has been fertilized with a slow-release fertilizer.
Remember to keep your hops at a 4-foot spacing to provide proper air circulation. Prepare sticks to support your plant so you can train the vines over time. Aside from harvesting, there should be little difficulty in cultivating hops at this time…
How To Grow Hops From Rhizomes
In two easy steps, you can also cultivate hops from rhizomes. The rhizomes can be kept in the refrigerator until planting time if you have just harvested them. If you want to keep flowers from drying out, spray them frequently.
Step #1. Site preparation
Preparation for the rhizomes is critical to their success. It’s best to do a soil test before making any changes. As an example, remember that hops need a neutral and fertile soil.
As a result, it may be necessary to adjust the soil’s pH and add organic matter before planting. Compost, on the other hand, enhances the soil’s structure, making it more suitable for planting. Keep in mind that you must till the soil before planting rhizomes in late spring.
Step #2. Planting and maintenance
Plant the rhizomes with the buds pointing upward after the site has been prepared. Plant the rhizomes 3 feet apart, 1 inch deep in the dirt. Having a trellis ready will help the hops grow.
The soil is always a concern when it comes to upkeep. Because their roots are still forming, the first year of hops cultivation is important. Keep the soil moist without allowing it to become sodden.
Can You Grow-Hops From Cuttings?
In addition to seed and rhizome starters, hops can be started from cuttings. In the late spring or summer, pick a healthy plant and get your pots ready for re-potting. The soil should be fertile and neutral, much like the preceding advice.
Make sure two of the cutting’s nodes are under the medium before placing it in the pot. Place the pots in the greenhouse to encourage root growth and cover them with plastic to retain humidity. This is a faster way than beginning from seeds because you can transplant your plants as early as two weeks after seeding.
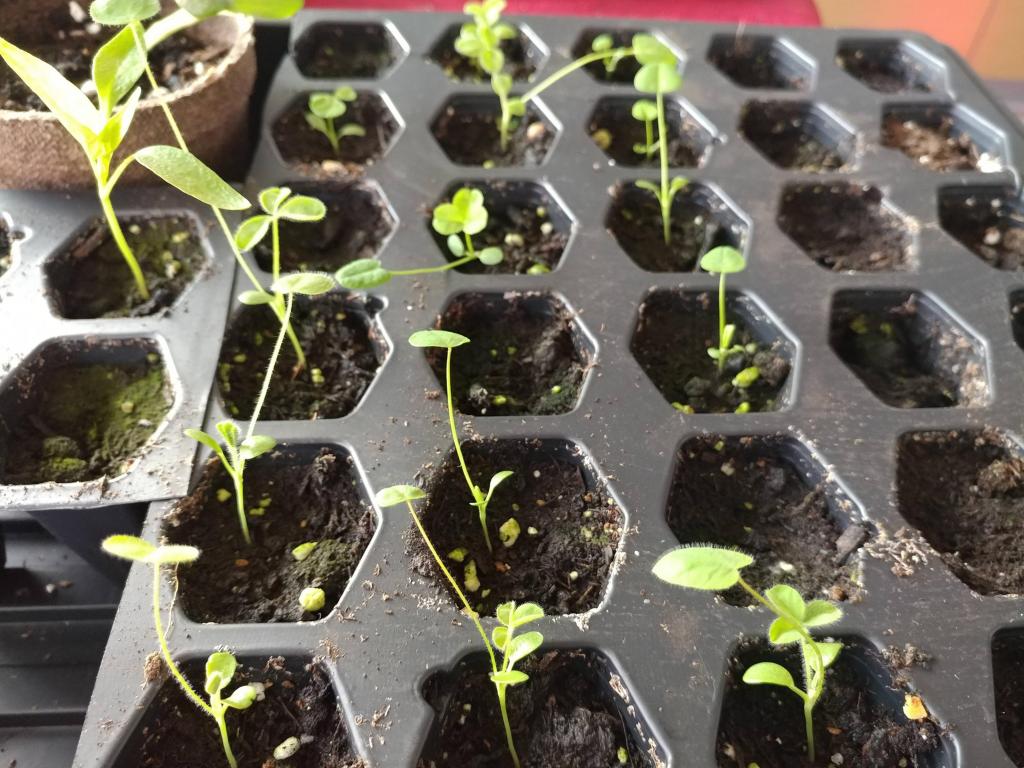
Sowing and Germinating Hops
Hops (Humulus Lupulus) are difficult to grow from seed, and patience is required. For around 4 to 8 weeks, hop seeds germinate in temperatures ranging from 0 to 8 degrees Celsius, which activates and stimulates the sprouting and growth of the seeds. Why? Hops are naturally one of the earliest sprouting plants, appearing as early as January in the year’s first year of growth.
A Little Hop Seed Germination Trick
The simple trick is to obtain a little plastic box with a cover, fill it with moist sand or soil, add seeds, and store it in the refrigerator for around six weeks if it is later than January or February and temperatures are higher than 5 degrees celsius. Seeds don’t really do much during this time period except from receiving an activation signal indicating they’re about to begin sprouting. In around 2 to 3 weeks after you remove the box from the fridge, either place it on a light or plant the seeds directly into pots.
This is something I discovered for myself, and it’s a big one: I grew only six plants out of a batch of 50 seeds when I planted them in a regular room temperature of 18 degrees Celsius. However, when I used the “Fridge technique,” I was able to get 9 out of 12 seeds to germinate, which is a far higher success rate.
Starting from scratch can be highly time-consuming but once you get hops going, they grow quickly, a few centimeters in 24 hours when they’re big enough to handle the stress.
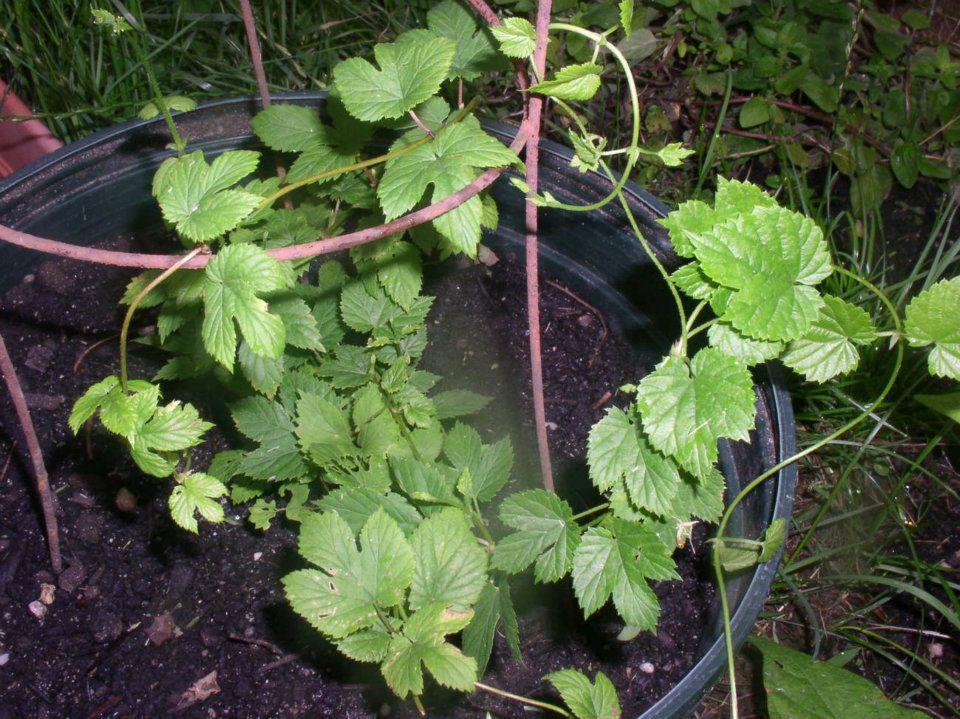
Potting and Growing Hops
In order to support your hop plant, you’ll need at least a one-meter-tall stick or other sturdy object. Trees and wooden fences would be no match for it when it comes to climbing the vines. Beware of hops that can reach heights of up to seven feet.
The Hop plant’s advantage is that it isn’t overly subject to pests or weather, and it doesn’t even require a lot of rich soil. One of its advantages is that it self-renewes each year, thanks to its well-developed underground root system, which also serves as a means of spreading and multiplying. Up until harvest in late summer, there isn’t much else to do, making it a completely low-maintenance plant.
Use and Benefits of Hops
Most people are familiar with the fact that hops are utilized in the brewing process to provide a fruity, bitter flavor to a beer. But it’s not the only one. Relaxing and calming benefits of hops have been shown to have a positive effect on the neurological system. Barley malt brews benefit from the high levels of natural preservatives found in hop plants, making them an even better pairing with hops.
Our research on the health advantages of hops (Humulus Lupulus) is just beginning. I’ll be updating this page as soon as I uncover more reliable information.
Sincerely, have a “hoppy” life and thanks for reading!
About The Hops Plant
Humulus Lupulus, popularly known as hops, are perennial vines that add height to backyard gardens. Every summer, the perennial crown’s twinning bines can grow to a height of 20 feet.
As long as they remain in the same location, these plants can live a long time. As a result, the plants die off during the winter and then re-grow in the spring. Hops are a sturdy plant that can withstand a lot of abuse.
The hops plant has a variety of distinct characteristics:
- Breweries rely on hops as a mainstay ingredient. Hops are utilized in the production of beer in a large percentage of the time, and they contribute a distinctive flavor to the beverage. You can utilize a variety of hops varietals for different brews.
- The vines cling to the trellises and arbors, creating beautiful garden art. As a result of its pine-like perfume, hops attract a wide variety of attractive wildlife, such as butterflies.
- Linalool, tannins, myrcene, resin, and other compounds found in hops flowers make them beneficial to the pharmaceutical sector.
Ways To Grow Hops
To multiply hops plants, you have a choice of three methods. Let’s have a look at what these methods are:
- The fastest technique is to use hops rhizomes, which is why most gardeners opt for it.
- As a result, this strategy requires some effort but is worth it in the long run because of the increased yield and healthier plants.
- A more labor-intensive option is to use hops seeds, which is something no one wants to do.
The first two procedures guarantee outcomes while taking significantly less time. These methods of plant propagation produce stronger and faster-growing plants. Of primary importance is the fact that by identifying the parent hop plant, these approaches allow you to establish whether the new plant is male or female.
Facts About Growing Hops From Seeds
Xem thêm : How To Grow Coreopsis From Seed? Comprehensive Guide
First, you must be aware of a few facts regarding the process of growing hops from seed:
- The least recommended way to cultivate hop plants is from seeds. This is mostly due to the length of time it takes from the start of the process until the crop is ready for picking. It takes a seedling about a year to build a strong root system.
- Both sexes produce distinct varieties of hops, making the hops a very diverse plant.
- The majority of the seedlings you’ll receive will be male. Pollination would occur via seed production rather than floral cones.
- It takes a long time for the seedlings to mature into mature plants that can be harvested.
Caring For The Hops Plants
The hops will need some attention once they’ve established themselves in the garden. In the following order of importance:
- The seedlings should be thinned to about six to twelve inches apart.
- The growing hops plants require an adequate supply of water. Keep the soil wet but not saturated by watering them every day.
- In order for the hops to produce more, they need to be given a boost in nutrients. Compost or organic fertilizers can be used to feed the plants. Regular application of fertilizers is recommended.
- Hops plants can get quite tall, so they’ll require a framework to help them spread. Using trellises, you can teach them to grow taller.
- To avoid overcrowding and pest infestation, it is essential to cut back the shoots. Keeping the vines from tangles is also a necessary!
- As far as hop pests and illnesses, powdery mildew and aphids are the most prominent culprits. If any leaves appear to be infected, cut them off and dispose of them in a safe location outside the garden.
What Are Hops?
Horticulturally, the female flowers of Humulus lupulus are known as hops. As a flavour and preservation aid, hops are an essential ingredient in beer. The bitterness of hops balances out the sweetness of malt, resulting in a mouthfeel and flavor that beer drinkers love. When it comes to the level of bitterness in a beer, the amount and type of hops used will have a significant impact.
As long back as the 11th century, hops were employed to flavor beer. Before then, many brewers used herbs and flowers to flavor their beer. In the end, the alcohol content of the brews was significantly reduced, but they were also more vulnerable to deterioration.
There are several farmers who use modern methods to the age-old traditional preparation of hops in today’s brewing industry.
Types of Hops
Brewers commonly utilize one of two types of hops. To enhance the beer’s scent, aroma hops have a reduced acid content. As a finishing or conditioning agent, these are the most prevalent. Bitter hops, on the other hand, have a higher acid content. These come in handy during the boiling phase of the brew.
Hops come in a wide range of flavors, and each one has its own distinct character. There are a wide variety of hops to choose from when brewing your beer. You’ll find a brief summary of what each of these hops may achieve for your brew below.
Tips on Growing Hops
There is no reason why people can’t cultivate their own hops in their own backyards. To begin, rhizomes, or root segments, from elder plants are procured. Several trustworthy sellers may be found all around the country selling these. Potted hops plants are also available for purchase by growers, who may then grow the plants in their own backyards.
Hops plants can survive a wide range of climatic conditions, making upkeep a breeze.
Planting:
It’s preferable to grow your hops in a sunny location. As they develop, you’ll need a way to assist them. As they mature, hops plants learn to climb on wire supports, which many growers use to encourage the plants to coil higher. To prevent vines from becoming too long, this is a good practice.
At least three feet apart, plant your rhizomes about one to two inches deep. At first, plants will grow at a rate of one foot per day or more. Once the danger of frost has passed, it’s ideal to start planting as soon as the weather permits in the spring. Using too much or too little water and fertilizer might have a negative impact on your crop.
Harvesting:
Depending on where you live, the harvest might take place anywhere from the middle of August to the middle of September. A person should be aware of the characteristics of their plants that indicate when they are ripe for harvesting.
Smell and appearance of the plants are crucial in this regard. During harvest, hops will emit a fragrant aroma, and they should be pale and dry to the touch. Before being used in beer, hops need to be dried once they are gathered. An oven, food dehydrator, or even a homemade hop drier can be used to dry hops.
In the absence of hops, beer simply wouldn’t be the same. Growing your own ingredients for brewing can be a rewarding experience for both experienced and inexperienced brewers. Home brewing may be taken to the next level with a little garden in your back yard.
Planting Hops Around Your Pets
Thanks to Brian, who mentioned in the comments below that hops can be hazardous to pets, for bringing this to our attention. Hops, it turns out, is poisonous to both cats and dogs, according to my investigations.
Toxicities can range from moderate to severe, and your dog’s size and breed, as well as the amount they consumed, all have a role. Heavy breathing, anxiety, nausea, vomiting, high temperatures, a raised heart rate, and even death are all possible symptoms. If you have any reason to believe your dog has eaten your homegrown hops or hop pellets, you should take him to the vet right away.
Why Grow Hops at Home?
When you’re constructing your own great 6-packs at the local bottle shop, you don’t have the same level of control and gratification that comes with homebrewing.
Having the ability to cultivate hops on one’s own is a natural extension of a growing pastime. In addition, it gives each batch of homebrew an extra touch of uniqueness and authenticity.
A large tract of farmable land or even a backyard isn’t available to every craft beer fan. Get imaginative and embrace the urban jungle at this point. Create an oasis of greenery and hops in your tiny studio space.
You can grow hops in a tiny yard, on an apartment balcony or even in your living room with some guidance from the experts.
How To Grow Hops Indoors
1. Do your research.
When properly cared for, hops can last a long time and produce a good harvest once a year for many years.
If given the opportunity, hop bines (the vines of a hop plant) can grow up to 30 feet tall, and the weight of a large cone harvest is no joke! In their heyday, hop plants have been known to knock down a trellis or two.
Rhizomes
Both sexes of hop plants can be found. Cones, the flowers you’ll need for homebrewing, are only produced by female plants. This means that if you were to buy a packet of seeds and plant them all, you would only have a fifty percent chance of producing a plant capable of delivering the things you desire. Rhizomes come into play here.
A female hop plant’s rhizome is a little section of root severed from the main root system. In fact, they’re not part of the root, but rather an underground stem system. Using rhizomes, you can tell if a plant is female since it can produce hop flowers from a single rhizome. There’s no room for error. On harvest day, there were a lot of hop cones.
Hop Plant First Aid
Even hop plants can go ill. Hop plants are a favorite food source for aphids and mites, who feed on the growing cones and tasty fluids of the plant. One victim of aphids can transmit a plant virus to a new victim.
Fortunately, predatory mites or ladybugs can feast on these bothersome animals and safeguard your hops crop if you’re growing them on your balcony or the side of your home.
If you’re growing your hops indoors or out, be on the lookout for mildew. Fungi that produce mildew can infect your plant and colonize; this stunts growth and damages the bines that manage to grow and climb, making them unappealing to the eye. A fungicide or removing the infected areas of your plant is the best strategy to deal with this problem.
These facts must be taken into account while deciding on how and where to grow your future crop of hops, but don’t stop here! Learn about the finest hop varieties to produce in your area by talking to local hop farmers.
2. Pick the perfect location.
There is no such thing as a bad location for rhizomes, indoor or outdoor. Your hop plants will thrive if they have access to 6-8 hours of direct sunlight each day. If any cones sprout at all, the harvest could be very limited due to a lack of sunlight.
In light of this, consider placing your hops near a sunny window or along the side of your house. If you and your neighbor share extremely little space, don’t worry; they’ll spread upwards rather than outwards. If at all feasible, seek a location with a southern exposure.
3. Establish a place for your future hop plant to climb.
Xem thêm : The Art of Making an Espresso: A Brief Guide to the Swivel
Growing your own hops is a rewarding experience in and of itself because of how quickly they develop. Hop plants are one of the few types of flora that can grow up to twelve inches in a single day, but they aren’t just any plant.
If you want your plants to thrive, make sure they can climb to their heart’s content.
It’s critical, according to Adam Tymn of Father Time Machine Hops in Denver, to have the trellis up and running before planting anything else.
A bine that grows to the height of twenty to thirty feet tall in an indoor or residential balcony environment may have you scratching your head in anticipation.
But do not be alarmed! An archway over a window or a garden walkway could be in your future if you train hop plants to grow vertically and then horizontally. Alternatively, if all else fails, the bines will fold in on themselves and hang from the ceiling once they’ve reached their highest point.
4. Ready the soil.
Rhizomes may not thrive to their fullest capacity if the soil in which they are housed does not have adequate drainage or acidity.
Olson & Son Hopyard was founded by Rhode Island hop expert Eric Olson. To that question, he said, “Not paying attention to what type of soil I was planted in,” when questioned about his early blunders in hops cultivation.
In his case, the clay-rich soil in his area made it difficult for water to drain. Olson observed that part of the plant’s root system had perished due to standing water after digging out the roots several seasons later.
Keep your soil loose so that it can drain, and if you plan to grow hops in pots indoors, drill several holes in the bottom of your container before setting it on a tray to collect the run-off water. Though thirsty, hop plants should never be left to sit in water for an extended period of time.
Hop plants also prefer soil that is slightly acidic. A pH testing kit can be used to ensure that you’re feeding your hop plants with exactly what they need, whether you’re purchasing soil in a bag or utilizing the actual thing from your backyard.
5. Choose your rhizomes.
One of the most critical decisions you can make is where to buy your rhizomes. Remember those pesky hop plant diseases we talked about in the beginning? You’re already doomed if you got your rhizome from a sick plant because some of these diseases are hereditary.
Even the owner of Florida Hops, LLC, Richard Smith, has been afflicted by rhizomes that are contaminated.
Apple Mosaic virus was found in the rhizomes of the plants that sprouted from the rhizomes, he notes. It’s not just me who did this! It was revealed that the rhizomes that University of Florida associates brought in from a larger supplier had Downy Mildew, a killer of hop plants. We removed the plants right away and quickly re-started the projects.”
When this happens, the best option is to start over from scratch with fresh rhizomes, no matter how drastic it may sound at first.
To learn more about the “parent” plant’s history and the origin of your rhizomes, consider purchasing them locally.
6. Get planting!
If you’re planting your rhizomes outdoors, the best time to grow them will depend on the climate where you reside. In contrast, Tymn, who resides in Colorado, is a proponent of getting started earlier.
Rhizomes were planted in the first week of May, and I suppose I could have planted them even two weeks earlier than I did.
It’s generally recommended that you plant your hops in early Spring, when there is no longer a risk of a frost.
However, at Florida Hops, “holiday hops” can continue to thrive well into the winter. Between Thanksgiving and Christmas, they may even provide a second harvest.
Rhizomes should be spaced at least three feet apart when planting outdoors (and at least five feet apart when planting different types). Get your hands on a 20-inch planter and plant a single rhizome in the center for the best hops-in-a-pot experience. Make sure the buds of your rhizomes are pointing upwards toward the soil’s surface when planting them vertically. Two to three inches deep is ideal.
7. Take care of your new hop babies.
At every step of the route, hop plants must be fed and hydrated with the right amount of nutrients and water.
Because he pioneered the practice of effectively producing hops in a state where it was once deemed impossible, Smith knows this better than anyone else.
Inexperienced farmers generally under-fertilize their plants, which results in weaker growth and lower yields, says the horticulturist. When it comes to growing effective plants, “one of the most important things you can learn is how to give the plant what it needs at each stage of growth.”
If you still don’t feel confident in your knowledge of hop growth and when and how often to fertilize, go back to step 1 and do some additional study. As long as you have the right information, you’ll be more likely to have a successful hop harvest than without it.
Simple is still the best option when in doubt. You should “[w]ater your hops every day,” says Tymn. In addition to a lot of water, hops prefer well-drained soil.
Keeping a close eye on the weeds around your rhizomes will ensure that your soil is as clean as it was when you originally planted them.
In contrast to weeds, hops “do not like to compete.”
8. Be patient. Drink some beer.
If your rhizomes have been established in your garden or pot, you’re in it for the long haul. With patience and attention, you should expect to see lovely hop cones in the second year.
To paraphrase Olson, “Don’t expect real cones the first year, then a couple the second year, and by the third year, you’ll be sharing with all of your homebrewing buddies.”
However, this is highly dependent on the individual. After a few weeks, it’s unlikely you’ve done anything wrong. Wait it out and give your hop plants the attention they deserve as you relax and wait it out.
Conclusion
If you’re looking for a low-maintenance crop, hops could be a good option for you. However, because hops do not sprout quickly, not everyone is interested in learning how to produce them from seed. They must be treated with cold before sprouting, although this is a simple process that requires little time and effort.
To keep them fresh, just keep them in the fridge and grow seedlings for transplanting. The fruits of your labor are plants that require little to no care and attention after the work is complete. Just make sure you have adequate room and that you know how to properly train the vines.
Nguồn: https://iatsabbioneta.org
Danh mục: Guide