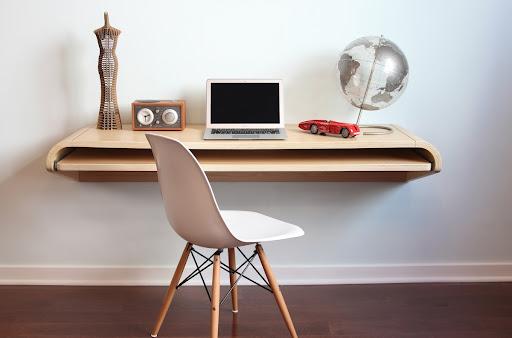
Mounting your TV is a quick way to save space, enhance the aesthetics of a room, and improve your TV viewing experience, whether you just got a sleek, new flat-screen TV or want to finally get rid of that cumbersome media cabinet.
This is a project that, at first appearance, may seem daunting. When mounting a television, how do you ensure that it is securely fastened to the mount? Also, how do you know it will stay put once you’ve hung it?
Bạn đang xem: How To Hook Up A TV To A Swivel Stand?
Don’t worry; we’ll show you just how to hang your TV. To watch how Kurt installs a full-motion TV mount, check out the video below below, and keep reading to find out what to think about before you mount your own TV.
Putting up a TV on a SANUS mount is a quick and easy job that can be completed in under 30 minutes. To guarantee your success in mounting your TV and your satisfaction with the final product, we provide a detailed installation manual with graphics and text, installation videos, and U.S.-based installation experts who are available seven days a week.
Deciding Where to Mount Your TV:
Before deciding where to put your TV, think about how you’ll be able to see it from various vantage points. You wouldn’t want to spend time and effort mounting your TV on the wall, only to realize afterwards that the spot isn’t optimal.
Try taping a large piece of paper or cardboard to the wall in the desired location, sized roughly to your TV. Until you locate a location that is conducive to your furniture and the room’s layout, you may need to move it about.
At this stage, it is also a good idea to confirm the stud location within your walls. Knowing whether you will be attaching to a single stud or dual studs will help you pick the right mount. It is important to note, many mounts offer the ability to shift your TV left or right after installing, so you can place your TV exactly where you want it – even if you have off-center studs.
Choosing the Right Mount:
At this stage, it is also a good idea to confirm the stud location within your walls. Knowing whether you will be attaching to a single stud or twin studs will help you pick the proper mount. It is crucial to note, many mounts have the flexibility to shift your TV left or right after installing, so you may set your TV exactly where you want it–even if you have off-center studs.
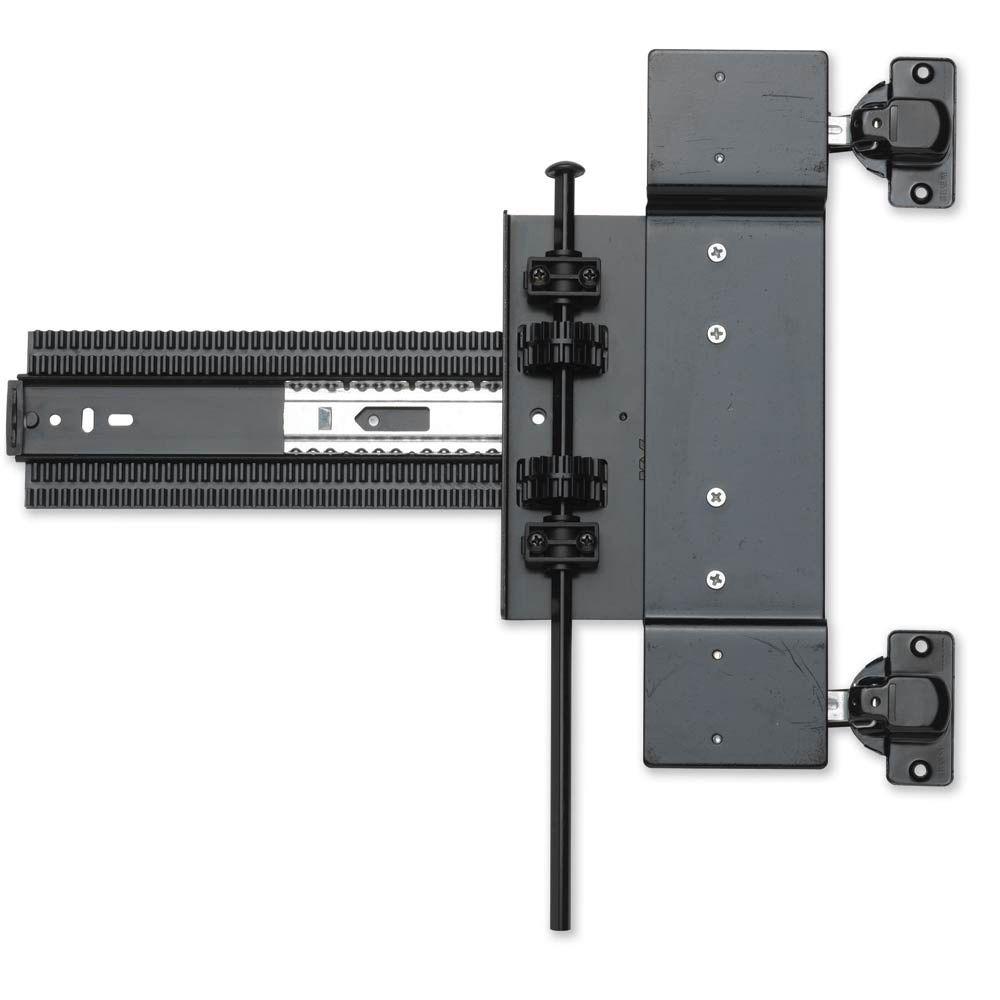
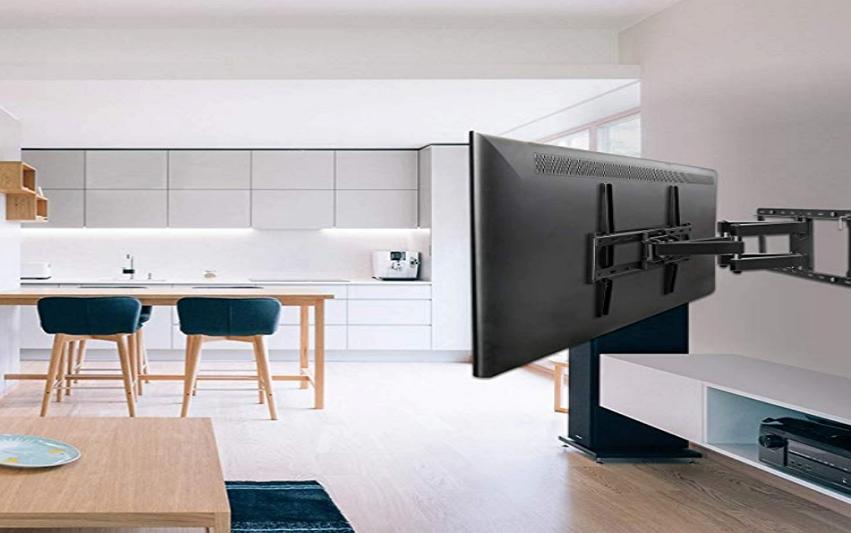
Full-Motion TV Mount:
It is also a good idea at this stage to verify the stud placement within your walls. Knowing whether you’ll be using a single stud or a pair of studs can assist you choose the best mount. It is crucial to note, many mounts have the flexibility to shift your TV left or right after installing, so you may set your TV exactly where you want it–even if you have off-center studs.
If you want to be able to view your TV from different parts of the room, if you have a small living area and need to put your TV in an awkward spot like the corner, or if you require frequent access to the back of your TV to change the HDMI cables, then a wall mount like this is what you need.
Tilting TV Mount:
Depending on your viewing preferences, you can tilt your TV using a mount that offers this feature. Where mounting a television above eye level, such as above a fireplace, or when glare from an indoor or outdoor light source is a problem, this style of mount is an excellent choice. In addition, they free up the wall behind the TV for a streaming device.
Fixed-Position TV Mount:
The simplest kind of mount is the fixed-position mount. According to their moniker, they do not move. The biggest advantage is that they allow the TV to be mounted flush against the wall, giving the room a more minimalistic appearance. If your viewing area is directly across from your TV, there is no glare, and you won’t require access to the rear of your TV, then a fixed-position mount may be the best option for you.
Mount Compatibility:
Your TV’s back may have a VESA pattern (mounting pattern), which you’ll need to match with the mount you choose.
You can use the SANUS MountFinder tool, or you can measure the distance in millimeters between the mounting holes on your TV. Simply enter your TV’s make, model, and size into MountFinder, and the tool will return a list of mounts that will work with your set.
Make Sure You Have the Necessary Tools:
Make sure you have everything you need, including the mount’s installation documentation, before you begin. If you have any questions about your SANUS mount or how to set it up, feel free to contact our U.S.-based customer service team. Seven days a week, you can reach out to them for assistance.
You will need the following items to properly install your mount:
- Cordless electric drill
- screwdriver with a Phillips head
- Ruler or Tape
- Level
- Pencil
- Torpedo bit
- Tool for locating studs
- Hammer (concrete installations only) (concrete installations only)
Step One: Attach the TV Bracket to Your TV:
Identify the appropriate bolts for your TV and don’t be daunted by the abundance of gear; you won’t need them all. Each SANUS TV mount comes with a selection of accessories that work with the vast majority of TVs on the market. This includes popular brands like Samsung, Sony, Vizio, LG, Panasonic, TCL, Sharp, and dozens more.
Please contact our customer support staff if you require any more hardware, and they will be happy to provide it at no additional cost.
Xem thêm : How To Get Gum Out Of Things? Helpful Tips
Now, position the TV bracket so that the mounting holes line up on the back of the TV, and insert a screw of the correct length into the TV.
Tighten the screw with your Phillips head screwdriver until it is secure, but not too tight or you risk damaging your TV. To secure the TV bracket to your TV, repeat this process for the remaining holes.
You can use the spacers that come with the hardware kit to mount the TV bracket to a TV that doesn’t have a flat back or to make room for cables.
Step Two: Attach Wall Plate to the Wall:
Following the completion of Step 1, the next step is to secure the wall plate to the wall.
Find the Right TV Height:
If you’re watching TV while sitting down, you should place the middle of the screen at around 42 inches from the ground.
Use the SANUS HeightFinder calculator to identify the optimal placement for your TV’s mounting bracket. To use HeightFinder, simply enter the desired height of the TV’s placement on the wall, and the app will provide instructions for drilling the necessary holes.
Locate Your Wall Studs:
Let’s locate the studs in your wall now that we have the desired height for your TV. Find the wall studs with a stud finder. Most studs are placed at 16- or 24-inch intervals.
Attach the Wall Plate:
The SANUS wall plate template is the next thing to get. Cut out the necessary shapes from the template, then position them on the wall so that the notches line up with the studs.
Next, check that your template is, in fact, level using your level. When your template is in place and at the correct height, you can drill four pilot holes through the holes in your template and into the studs behind the wall.
Please be aware that you will require specialized hardware if you intend to mount into steel studs. Contact our help desk if you need anything else to finish the installation. 1-800-359-5520.
Incorporate the wall plate into the wall by aligning its apertures with the pilot holes, and then fastening it in place with the lag bolts. This can be done with a socket wrench or power drill. In the same way that you wouldn’t want to damage your TV by overtightening the TV bracket, you also don’t want to damage your TV by overtightening the bolts.
Step Three: Attach the TV to the Wall Plate:
The TV can be mounted on the wall now that the plate has been installed. Since we are showing how to mount a full-motion TV mount, we’ll start this process by attaching the arm to the wall plate.
Here comes the exciting part: mounting the television on the wall! Your TV’s size and weight may necessitate the assistance of a friend.
After hooking the hang tab onto the arm, you can then rest your TV on the arm. The TV arm should be locked into place once the TV has been hung from the mount. For further information on how to properly install your mount, please consult the manual.
That’s all there is to it! For the finest possible viewing experience from any seat in the room, a SANUS full-motion TV mount allows you to extend, tilt, and swivel your TV without the use of tools.
If your mount has cable management options, you can hide your TV cords along the arm of the mount.
Additionally, most SANUS full-motion mounts include post-installation leveling, so if your TV isn’t perfectly level, you can make leveling adjustments after your TV is on the wall.
Most SANUS full-motion mounts also provide post-installation leveling, allowing you to alter the angle of your TV after it has been mounted on the wall if it isn’t completely level.
Hide TV Cords and Components (Optional):
If you don’t want exposed cords below your TV, you’ll want to think about cable management. There are two ways to hide the cords dangling below your TV.
Xem thêm : How To Swivel A Chop Saw? Step-By-Step Guide
Cable management is something to consider if you don’t want your TV stand to look like a spaghetti junction. The dangling cables from your television set can be concealed in one of two ways.
On-wall cable management is the alternative. If you go with this method, you’ll have to run cables behind the wall, but a cable channel can help you do so. After you’ve mounted the TV on the wall, you can spend another 15 minutes neatly concealing the cords.
Use a streaming device bracket to tuck away smaller streaming devices like an Apple TV or Roku from view behind your TV. It quickly and easily mounts to your mount and keeps your streaming device out of sight.
Finally, after only half an hour, your TV will be mounted on the wall, and all of the cables will be neatly tucked away. This is the time to relax and take things easy.
How to Mount a Flat Screen TV on a Wall
Choosing a TV Mount
First, you’ll need to decide on a wall mount, which is the primary tool for hanging your TV. Several distinct models of TV wall mounts are available.
- A television mounted on a fixed wall mount will remain in one place, perpendicular to the wall, and will not budge.
- With a swivel TV wall mount, the screen may be swiveled to the left or right for optimal viewing from any seat in the room.
- As the name implies, a tilting TV wall mount allows you to tilt your TV down for better viewing when mounted higher on the wall.
- Full-motion TV wall mounts allow you to manually adjust the television right, left, up and down for a custom angle. Some models have a telescoping arm, which can be useful when mounting a TV on the wall in a corner location.
Some wall mounts for TVs, known as full-motion mounts, allow you to tilt the screen in any of the four cardinal directions. In some cases, a telescopic arm is a handy feature to have when hanging a TV in a corner.
Choose Location and Height
Planning ahead is essential before mounting a television on the wall. Planning ahead for wall holes might help you save time and save unnecessary stress. You should first decide where on your wall you want to display your television.
- Find a spot that’s close to plugs, cables, and places to plug in speakers and other gadgets.
- Find a good spot for electronics including cable boxes, video game consoles, and DVD players.
- You might want to add a shelf underneath your mounted TV to store components.
- Do not put in the path of traffic or expose to strong sunshine, heat, or vibrations.
- A load-bearing wall should be chosen. The total weight of the apparatus and its accessories must be four times the bearing capacity of the wall.
For most do-it-yourselfers, the question of how high on the wall to mount the TV arises. When it comes to mounting a TV, many people believe that nothing else matters more.
When seated, the ideal viewing position places the center of the screen at or slightly below eye level. A lot of people think that this is too short to be mounted on the wall. Rather, they follow this guideline:
- When seated, the best viewing position is directly in front of the viewer’s line of sight. It is widely agreed upon that this is too shallow for a wall mounting. Rather, they follow this guideline:
- Positioning the screen such that it is at eye level when seated is the best viewing position. As a result, many feel that this is inappropriate for a wall installation. Instead, they adhere to the following principle:
In most cases, a pleasant viewing experience can be expected for anything within these parameters.
The next step is to conduct an experiment to determine the optimal mount height and viewing height:
- Make a template for your TV out of paper or cardboard, and then mount it on the wall.
- Use painter’s tape to affix to the wall.
- Put it to the test from various vantage points in the room. Center it and don’t put it where you have to crane your neck to see it.
Locate Studs
You must screw into studs when mounting a TV on the wall. Do not use hollow-wall anchors, as they cannot support the weight of TV wall mount brackets and the television.
- When wall-mounting a television, make sure you screw into studs. TV wall mount brackets and the television might add up to a lot of weight, so you shouldn’t utilize hollow-wall anchors.
- Find the wall studs that will hold your TV in place. (One-stud attachments are standard on some models.)
- Find the exact middle of each stud and make a mark on the paper. Find a stud with a nail and hammer it in to make sure.
Tip: If mounting a TV to a wall made of brick, you won’t need to find studs. When attaching the mount to the wall, masonry anchors should be used instead.
Mark Pilot Holes
- If you’re mounting a TV on a brick wall, you won’t need to locate any studs. Mounts should be attached to the wall with masonry anchors.
- Calculate the height of your TV by using the measurement between the two holes on the mounting arms. You should use these holes as a guide to mark two spots in the middle of each wall stud.
- Make sure the holes for each arm’s installation are even with a level.
Position the Wall Mount
- Put the TV mount brackets or flat screen wall mount against the wall and use a level to make sure it’s level.
- Get an assistant to help you hold the wall mount.
- Drill pilot holes into the studs at the marked locations.
An old saying advises, “Mark twice. Cut only once. Wall drilling is subject to the same restrictions. Before beginning to drill, double-check the level of the mounting holes.
Attach the Mount to the Wall
- After you’ve drilled the pilot holes in the wall, have a friend help you hold the mount in place.
- Screw the mount to the wall using a drill.
- After you’ve mounted it, you should double-check that it’s level.
Advice: Before fully tightening all of the screws, make sure they are all level by driving them in halfway.
Attach the Mounting Plate to the TV
Mount TV to the Wall
A television set can be as cumbersome and delicate as it is potentially weighty. Get enough support to accomplish this step safely, depending on the size of your TV and where you’re hanging it. If you want to mount your TV on the wall, you should check the manufacturer’s guidelines first.
- Verify that the TV plate is securely attached to the wall.
- If the TV’s cables aren’t already hidden behind the wall, you can disguise them with a cord cover.
With the correct equipment, learning how to hang a TV is a simple task. Select the mounting solution that suits your needs. Plan out where in the room you want to put your new TV and how high you want to sit to enjoy it. You should set up your mount and make sure it is perfectly level. Put your TV on a wall. Are you prepared to visit your neighborhood retailer and locate the components you require for your next undertaking? The Home Depot app can be used to search for items and view stock levels. The specific aisle and bay will be shown to you.
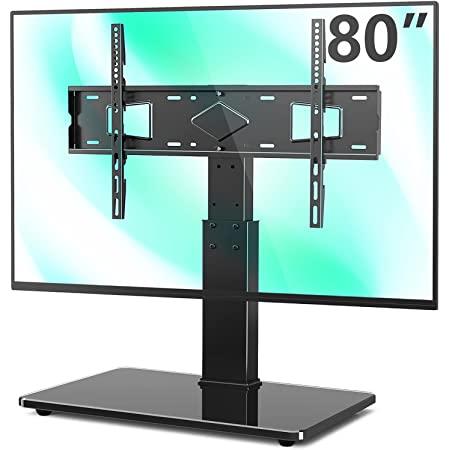
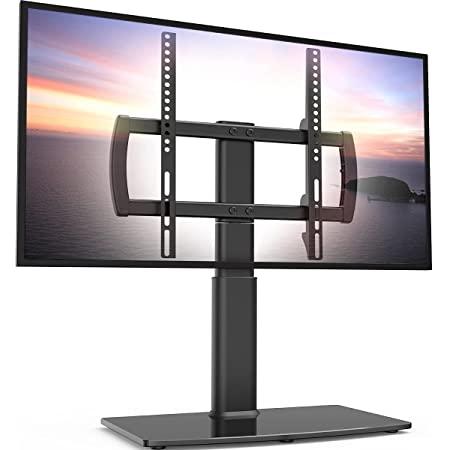
How to choose the best TV stand
Finding the best TV stand, as you may expect, initially requires using your common sense. We are all well aware that a poor choice exists whenever a resource has a limited capacity, whether that be in terms of weight or volume. Accordingly, if you stick to that approach when searching for the right TV stand, you will locate your stand in no time.
Let’s take a look at what needs your immediate attention right now.
Nguồn: https://iatsabbioneta.org
Danh mục: Guide