Installing a swivel pocket door is a snap. Installing a swivel pocket door in your house or workplace is easy when you follow the instructions in this article. The most common mistakes individuals make while installing swivel pocket doors can be avoided by following our step-by-step instructions.
Steps on Installing Swivel Pocket Door
Step one: Take a look around. Before you begin the installation, take note of any obstructions that might get in the way of a pocket door. Adjust your dimensions if there is an obstruction, such as furniture or walls.
Bạn đang xem: How to Installing Swivel Pocket Door? Helpful Information!
The second step is to install the first panel. Pocket doors should have a flat bottom and be level from side to side when they’re closed. As you adjust the other end, lean it against a wall or piece of furniture for support.
A well-secured header should be used to attach your door’s top. A level and plumb framework should be attached to the wall before to employing 200-pound-per-square-inch fasteners (psi).
Step four is to attach the bottom rail to the door using two large carriage bolts.
In order to make your pocket door glide smoothly and softly, the final step is to install a closer. Install it by measuring how far it has to be from the rail’s edge and then attaching it with screws or bolts as necessary.
Install rail mounting brackets on either side of where you want them to be placed in Step 6. (if applicable). It’s up to you whether or not they’re already linked to the door.
If necessary, use screws or bolts to secure the rails in place. Make sure they are parallel. There may be an issue with the way your pocket is installed if they are not.
Step 8: Place your sliders in place.
Nineth step: Use screws to attach the end caps or rails to the end caps.
You’ve completed the tenth and last step!
What is Swivel Pocket Door?
It is a sort of door with a normal-sized opening and a smaller pocket door on the side.. Because it replaces your existing entryway or wall, you won’t have to make any changes to how you use the area.
Depending on how you install the swivel, the door will open from either the right or left.
Advantages of Swivel Pocket Door
You don’t have to give up any of that extra space to take advantage of the ease of a standard door.
Keeping pets and small children out of rooms you don’t want them in is easy thanks to the pocket-sized design.
It’s ideal for RVs and tiny homes when space is at a premium, such as a loft bedroom where the number of steps up is limited.
It’s impossible to swing a conventional door open in a corridor with solid walls on both sides; in an entryway with no room to swing it open without hitting something else; or when there’s not enough room at the side of the door to swing it open.
Apartment dwellers appreciate the ease with which these doors can be installed and removed as needed, making it possible to move them around the house as needed without having to make a permanent installation.
These doors can also be utilized in large homes as an exit or entrance to a specific room.
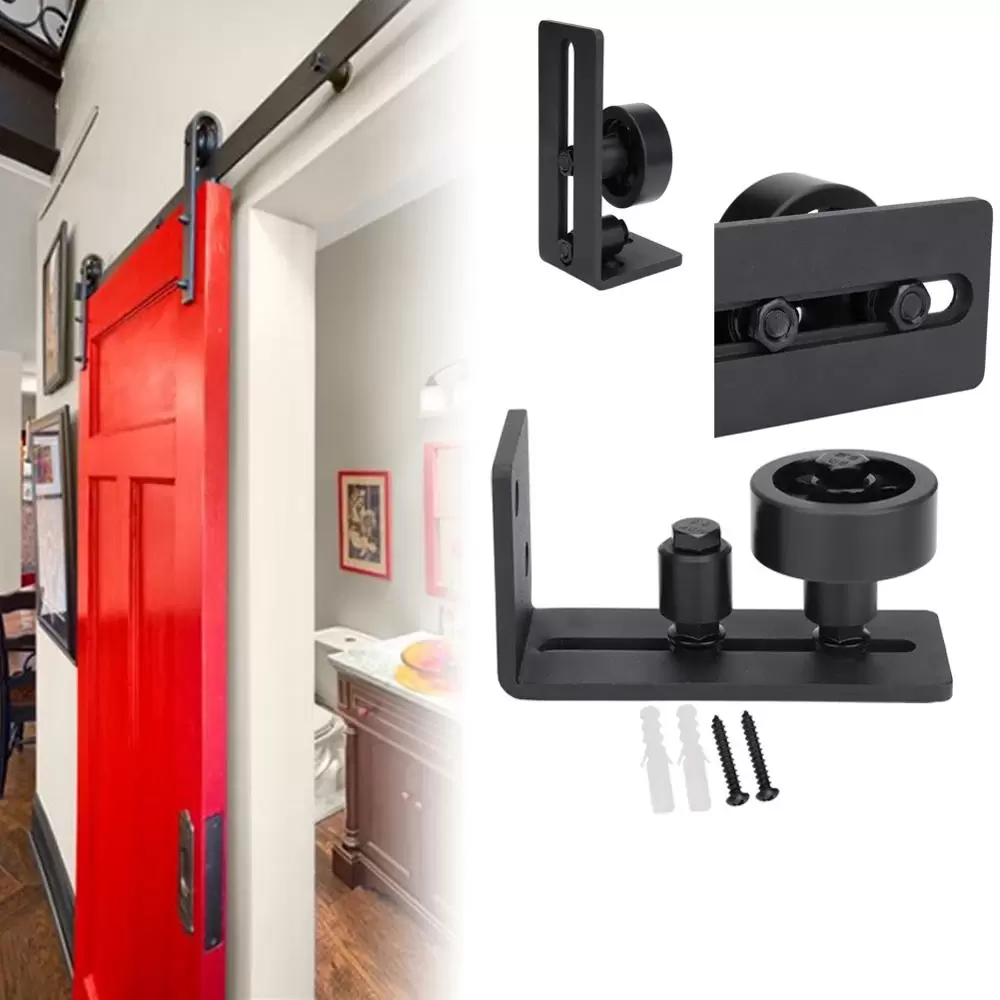
Also ideal for sliding in tight places, like when you’re attempting to get by with minimum space at the side of the door frame and don’t wish to have anything bumping into your swinging door, swivel pocket doors are an excellent solution.
How to Prevent Damage on Swivel Pocket Door
Xem thêm : How To Propagate Oleander? Things You Will Need
How will you protect a sliding door from being damaged?
The pinch point comes in handy in this situation. To prevent the door from rolling up the frame, add a small amount of extra material or hardware to the top and bottom of the aperture.
Depending on the thickness of the door, the pinch point should be at least one inch long and two inches away from the opening’s entry or exit.
If the extra component is made of a heavier material than the door itself, it will be difficult to slide.
Use your excess piece of hardware as an anchor for the bottom and top pieces of loose material that will be joined to the frame using screws in order to finish the installation.
Cover the hardware on each side of your door once the pinch points are all installed and you’re done.
People around you will be able to see how the new mechanism works without being aware of it.
How to Install a Pocket Door in 4 Steps
If you’ve got a little space that has to be partitioned off, pocket doors are an ideal solution. In only four simple steps, you can install a pocket door.
My husband, Todd, and I were thrust into a competition for space after restoring our Victorian duplex’s lone complete bathroom. We hoped to squeeze a tub, toilet, sink, and even a small linen closet into the little bathroom. The layout plan had a stumbling block: the bathroom door couldn’t swing freely because of the sink. As a result, we chose to convert our bathroom door into a pocket door, inspired by two sets of original pocket doors in our living room.
Historically, pocket doors have been renowned for sticking, making a lot of noise when opened, or even worse, tumbling off their tracks. We’ve had to pry our stubborn living room pocket doors out of the wall on a number of occasions. The current generation of pocket doors, on the other hand, didn’t meet our expectations in this regard. Track-jumping is rare in today’s pocket door hardware, which uses nylon rollers on box-style metal tracks. Modern doors have replaceable rollers that may be rehung easily if they fall off the track. A keyhole slot in the floor makes it possible to remove the tracks without having to open the wall. Now that we knew what we needed to do to make a new pocket from our original door, we got right to work. This is how we went about it.
Step 1: Frame the rough opening.
84 1/2′′ is the minimum height for the rough opening if your door is 80′′ high—standard size—so build a header and two studs at that height. For the new design, we lowered the header by 1 1/2′′ and trimmed the bottom ends of split jambs by 1 1/2′′. For example, if your door is 34′′ wide, the rough opening should be 69′′ broad—two times the door’s width plus one inch. The paneled nature of our pocket door meant that it had to be centered when it was closed in order to maintain a clean appearance. Our rough opening was 69 3/4′′ wide, so we figured up how much 3/4′′ trim we needed for the jamb.
The studs should be used to square and plumb the header (for the rough opening) to ensure that it is level. The header and studs were constructed from 2x4s, which were fastened together with 2′′ nails. Measure up from the finished floor 80 3/4′′ to 81 1/2′′, which will leave 3/4′′ to 1 1/2′′ of room at the floor, depending on the clearance required under the door. Then, make a mark on each of the studs with a pencil. In the center of each stud, place a 2-inch nail, leaving 1/8-inch protruding for the pocket door header end brackets to rest on, at the level of the markings.
The header is made up of a wood header, a metal track, and two nailing strips wedged between them (the nailer headers). The wood header is marked with various widths of doors on it. Before hanging the pocket door header, remove the end brackets to alter its length. Only the wood header needs to be cut to the proper length for your door. In order to make the metal track 1 3/8′′ shorter than the wood header, flip the header over. Reattach the header’s cut-end brackets. The length of the nailing strips will be determined by the length of the door. Cut the nailing strips only where the header is marked, then flip it over and do the same. Repeat the process on the other side.
Slip the end plates for the header over the nails in the rough studs with the help of the slots on the end plates. Check to see that the header is level once more. Continue to hammer nails into the end plates until they are securely in place.
Step 2: Attach the split jambs.
Finally, the split jambs can be installed. There are two locations for the split jambs. Two split jambs are installed, one flush with the nailer header and the other in the “pocket.”
A plumb bob worked just as well for plumbing the split jambs, despite the manufacturer’s recommendation that two chalk lines be snapped on the floor parallel to the side jambs. Mark the floor with the plumb bob, then drop it halfway into the wall’s “pocket” and do the same thing again.
Nail the split jamb’s lower half onto its floor plate, beginning at the nailer header. Finger-like projections on the floor plate link to slots in the split jamb; insert the “fingers” into the slots. The next step is to attach the split jamb to the nailer header. At the half-way point, switch to the second split jamb and repeat the procedure. Using your marks from the plumb bob or chalk line, check to see if the split jambs are level. Make sure the floor plates are attached to the ground.
Step 3: Enclose the frame.
The frame needs to be enclosed at this point. Hang the drywall, use drywall tape to seal the joints, joint compound to cover the tape, smooth with a damp sponge, and sand to remove any remaining defects. Remember, however, that while using drywall screws to attach the drywall, it is extremely vital not to overdo it. (We used 1-inch drywall screws.) The door will be damaged if something protrudes from the wall pocket. You can temporarily slip a 2 1/8-inch-wide board between the split jambs if you require a sturdy nailing platform.
Before hanging, paint or stain the door’s full face and edges to ensure a long-lasting finish. Before painting, we had to fill in the hole where the previous doorknob had been, since we were utilizing the original bathroom door. For the enormous hole, we employed an ancient carpenter’s trick of mixing sawdust and putty to thicken the putty. After the wood putty has dried completely, look for any cracks. Dry, fill, and resand cracks until they are completely smooth (repeating as necessary). In the end, we repainted the door and made a new opening for the pocket door latch to fit through.
Step 4: Mount the pocket door.
A normal door requires a bumper to be positioned halfway up the door’s back edge, which is 40 inches for a regular door. Specifically, (for our door, it measured 39 1/4 inches). Attach the doorplates with the lock tabs pointing in the same direction 2 inches from the top edge of the door. Make sure the weight is evenly distributed by switching the wheel positions of each hanger.
A friend or family member may be helpful in installing the pocket door. The “pin” of the hanger goes into a slot on the doorplate. After lifting the door, insert the pin into the doorplate, and then swivel the lock tab into position.
Xem thêm : How To Prune Impatiens? Complete Guide for Beginners
Finish the jambs, header and trim next. In case you need to take out the door for future modifications, use screws to attach the finished jamb to steel studs on the “pocket” side of the opening. Shim if necessary to ensure that the door is perfectly aligned with the jambs. The space between the jamb and the door should be no less than 3/16″ wide. The final split header and trim should then be attached.
Flipper & Pocket Doors: What’s the Difference?
- When you open a flipper door, the door rises open and retracts into the cabinet, much like a garage door. The door’s retractable opening makes it easy to get to the contents while still keeping it out of the way.
- Doors can be slid out of view using a ball bearing or track system in the pocket door. When pocket doors are closed, they disappear into the cabinets, saving you the space that regular pull-out doors take up.
- While flipper doors are typically utilized as overhead storage, a few creative designers have used them to hide equipment to create a clean, uncluttered environment.
- A pocket door can be utilized in any cabinet or millwork that has an outward-opening door, including pantries, media centers, and armoires.
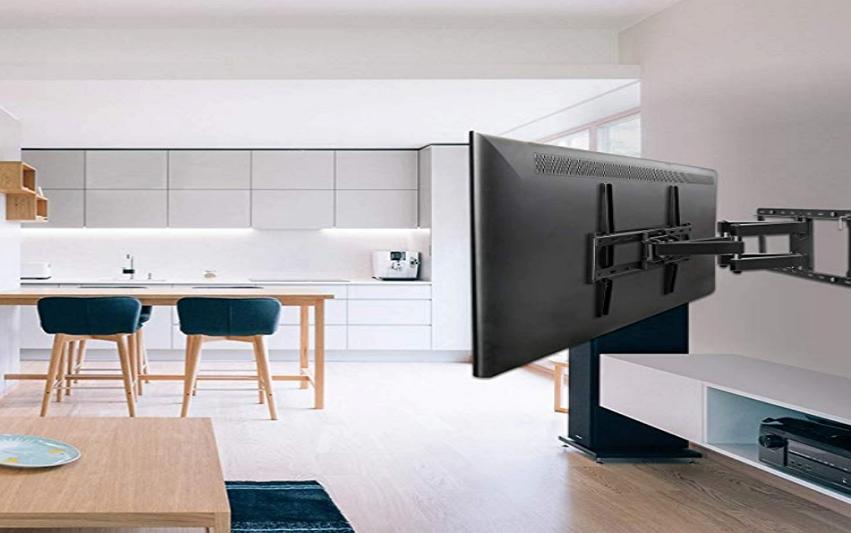
In recent years, flipper and pocket doors have found a new purpose as a way to save space when storing console televisions and video cassettes. If you haven’t given these types of entries a second thought, you could be missing out on a lot of potential.
The following is an overview of what’s going on.
Flipper Doors
When you open a flipper door, the door rises open and retracts into the cabinet, much like a garage door. Similar to typical drawer slides, these holes are operated by ball bearing systems. Easy access to the contents is made possible by an opening that retracts. In contrast to typical drawer slides, the members of these slides do not disengage from each other.
Flipper doors are commonly used as overhead storage in kitchens, media centers, garages, and offices.
While flipper doors are typically utilized as overhead storage, a few creative designers have used them to hide equipment to create a clean, uncluttered environment. Flipper door slides like the 1155 Easy-Down have a mechanism that gently closes doors as they slide closed.
Pocket Doors
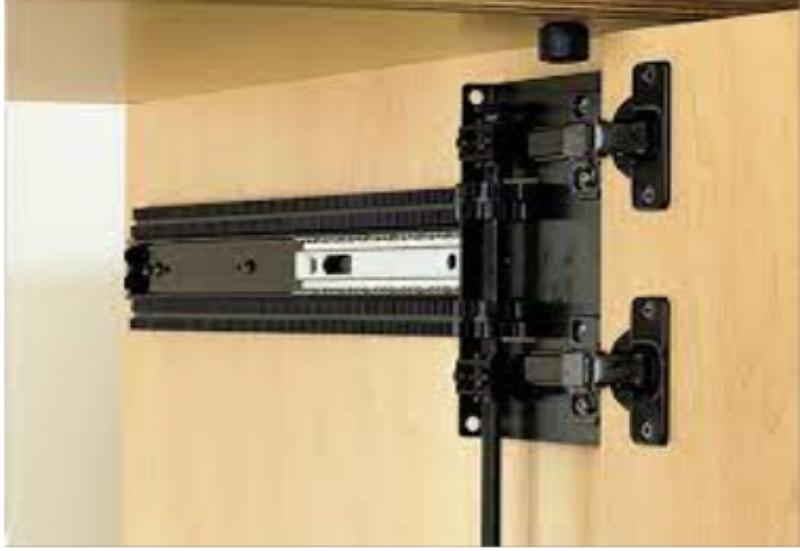
Like flipper doors, pocket doors slide out of sight with the use of a ball bearing or track system. Pocket doors, as opposed to standard doors, open outward before retracting inside the cabinet. When pocket doors are closed, they disappear into the cabinets, saving you the space that regular pull-out doors take up.
Pocket doors are commonly used on armoires, display cabinets, and entertainment centers.
A pocket door can be utilized in any cabinet or millwork that has an outward-opening door, including pantries, media centers, and armoires. For pocket doors, the Accuride 1234 is an example of a ball bearing slide
Specs & Options
Doorslides for pocketed or flipper-style doors are available in a wide range of specifications, sizes and designs.
Depending on the model, polymer bearings may be used instead of steel for quieter movement. Optional features like soft-close (like the 1155 Easy-Down Flipper Slide) or push-to-open mechanisms are available on several flipper and pocket door slide models.
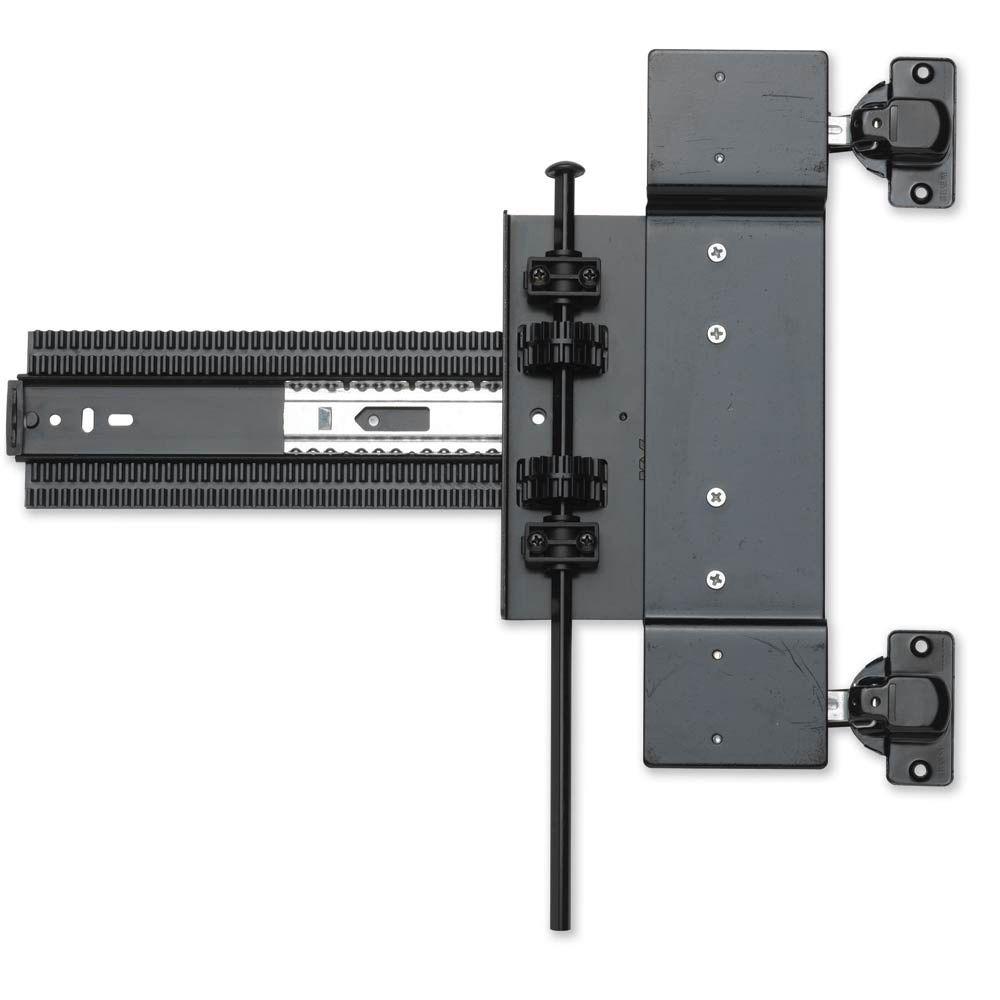
Pocket and flipper door slides on the cabinet level are usually light-duty. As an example, the Accuride versions commonly support doors weighing 20 to 30 pounds, with maximum vertical and horizontal diameters up to 42 inches (for flipper).
The 1332 and 1432 are the only two exceptions to this rule: The ingenious wire system in these pocket door slides keeps them stable and supports doors up to 78 inches tall and 75 pounds in weight.
This 3D video shows how Accuride movement solutions, including flipper and pocket door slides, can create a space-saving environment.
Pocket and flipper doors can save you a lot of space in your kitchen, living room, or workplace, regardless of the movement option you choose.
Pocket and flipper door slides, as well as a variety of attachments, are all available from Accuride. Visit Accuride’s Pocket and Flipper Door Page to examine all of the available options, whether your application is light duty or requires soft-close.
FAQs
Can you install a pocket door without removing drywall?
You don’t have to tear into the drywall if you just want to replace or repair a pocket door! That’s wonderful news. To remove the door from the track, all you need to do is lift it.
Do you need a header for a pocket door?
To install a pocket door in a load-bearing wall, you’ll need an enlarged header. For a pocket door to work, there must be enough wall space for the door’s pocket.
Are pocket doors easy to install?
Installing the pocket door frame and hardware is a simple task if you have the right equipment. It’s also a cinch to put the door in the pocket.
Can you install pocket door after drywall?
Removing drywall is necessary to install a pocket door in an existing wall, and it is much easier to work with a larger opening rather a small one. Instead of cutting studs, you can remove them in their whole and reroute cables as needed.
Do pocket doors require thicker walls?
Ideally, the existing wall should be at least 4 inches thick, while the usual pocket door thickness is 2 inches.
What is the rough opening for a pocket door?
It is recommended that the open doorframe is 1 inch wider than the proposed door slab. For a 30-inch door slab, the rough opening should be 61 inches. The door slab’s vertical length, the thickness of the track, and the needed clearance all go into determining the height (about 1 inch, though product dimensions vary).
What are standard pocket door sizes?
Standard sliding pocket doors are the same dimensions as their hinged counterparts. It is usually 30′′ or 36′′ wide and 80′′ tall. Customized solutions can also be built with passage diameters that are extremely large or extremely small.
Can you put a pocket door in a wall with electrical?
Johnson Hardware, a manufacturer of very smooth-rolling pocket door hardware, is one of my favorite pocket door hardware suppliers. Because the pocket door often leaves little area in the wall for plumbing or electrical (such as outlets and switches), careful design is necessary.
Nguồn: https://iatsabbioneta.org
Danh mục: Guide