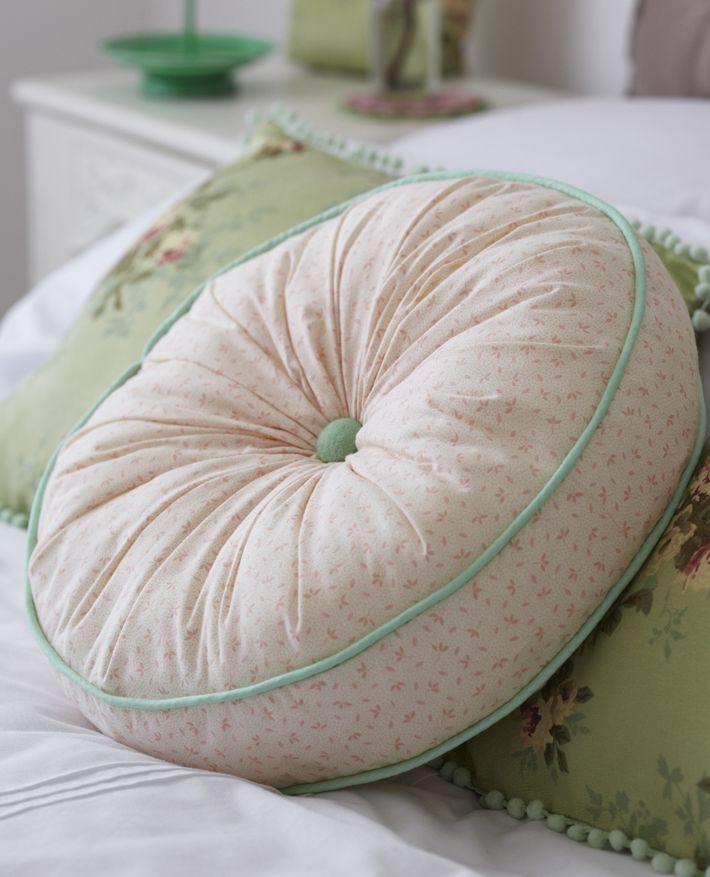
It’s a home-made circle pillow! Recently, I’ve seen a lot of circular pillows in some of my favorite stores. So, I suggested that we try making some of our own. It turns out that making them yourself is a lot more cost-effective than purchasing them. To that end, I’d want to provide the tutorial. In less than 30 minutes, you can construct your own DIY circle pillow.
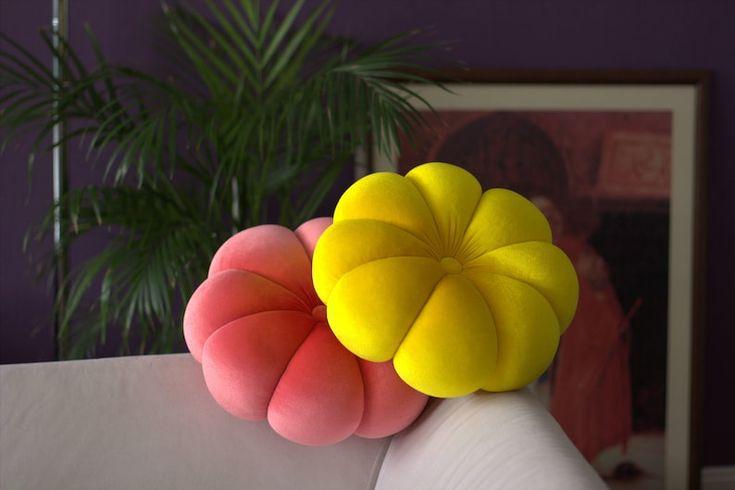
It’s really a dust cover from an old Clare V bag that I had Emma rip up and turn into a pillow for the step by step images. There are so many interesting materials and prints available if you’re willing to venture outside the box a little. And the yellow pillow is made from scraps of linen from the cocktail napkins I made at home (which is prob my fave of the two).
Bạn đang xem: How To Make A Round Throw Pillow? Complete Step-by-Step Guide
Materials for DIY Circle Pillow
- yardage of textiles Your pillow will cost a different amount depending on how big you create it.
- a polymer-based filler (amount will depend on how large you make your pillow)
- such and such that can be used to mark the circle (like a large bowl)
- fabric-matching needles and thread
- needle and thread
Instructions for DIY Circle Pillow
Draw a circle on your fabric and trace it. I had a huge bowl on hand that worked perfectly. Make a cut out of the form.
Once you’ve completed step 1, repeat the process using a second piece of fabric.
Put pins at either end of the second piece (face to face if your fabric has a front and back).
A three-inch gap will be left free for filling with pillow stuffing, so stitch the rest of the edges. Begin and conclude with a backstitch.
Turn the circle right side out and stuff the poly fill as evenly as possible until you reach the required fullness.
With a needle and thread, sew the three-inch hole closed. The bag is now ready for use.
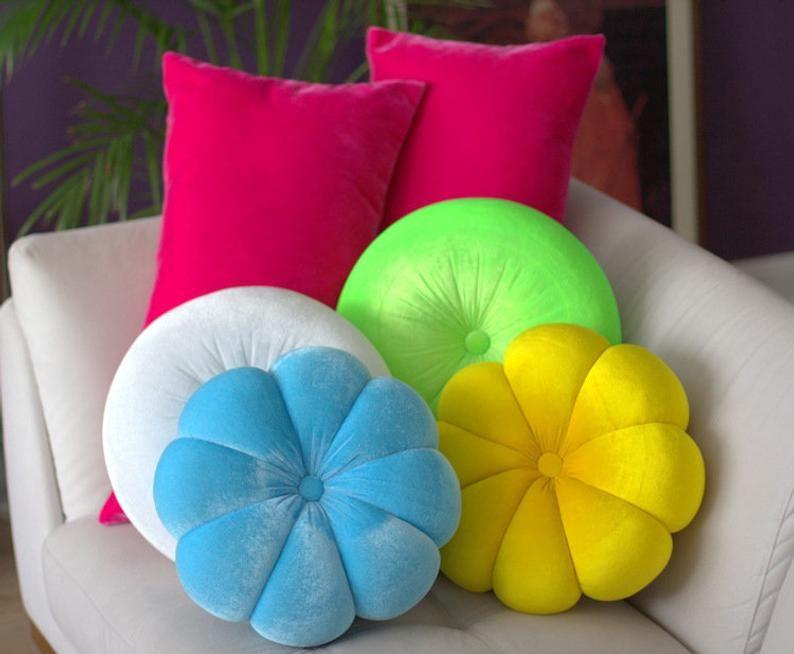
ROUND VELVET PILLOW DIY
Velvet is, in my opinion, the most opulent fabric out there, even more so than furry accessories. When it’s a light hue, you can really see how it shimmers in the light, and gosh, it’s just so beautiful. Simple round pillows can be given a “embossed” appearance by sewing lines over the velvet’s top layer. Let me show you how!
Supplies:
—a half-yard piece of velvet (this would work well)
the velvet is matched by a color thread
Xem thêm : How To Sleep With A Body Pillow? All You Need To Know
–machine for sewing
–shears and fabric
–ruler
pins with straight ends
A huge circle can be drawn or traced onto your fabric by folding the fabric in half, then pinning it together. Make two similar circles out of your circle by cutting it out.
A ruler and a pen can be used to draw a straight line down the middle of one of your circles (you can fold the circle in half to find the halfway mark). To divide your circle into four equal sections, draw another line. Divide your portions into halves using the lines you’ve drawn until you have 16 equal pieces. When you turn the cloth over, you’ll find an embossed pinwheel design that was created by sewing down each of those lines. A 2-3′′ gap should be left between the top circle piece and the bottom circle piece during sewing. When you’ve finished turning the pillow over, stuff it with your favorite pillow filling. Stitch a blind stitch around the opening of your pillow. The backside of your pillow’s center can be found by threading a needle in the middle of it.
Do not just pass it through; go through the middle of the front piece, as well. Knot the thread after passing through the back of the cushion once more to bring in the center a little bit. After that, simply trim the thread to finish! Simple but so beautiful! However, I believe that the little pucker that occurs as a result of drawing in the middle of the cushion does serve to define the embossed lines. If you want the pinwheel effect to be more prominent, choose a thread that is significantly lighter or darker than the velvet hue. As a whole, this is a really simple cushion that looks a little more unique than a simple round pillow would (you can also buy one like this or go for a larger floor pillow version if you’re not the DIY kind!). There are a ton more pillow DIYs on the blog, so take a look around and see which ones catch your eye! xo, Simple and adorable are two of my favorite things. Laura
What are the Benefits of Using Throw Pillows?
A good set of throw pillows is a must-have for any home. Here are just a few of the fantastic advantages they provide:
Benefit #1: You can use them to express your creative side
For starters, they’re a simple and fast way to add aesthetic flair to a place. Adding a touch of color and luxury to your overall home decor is the finest thing about them. Since throw pillows are so easy to switch out, you don’t have to be afraid to take chances when selecting patterns and colors.
Benefit #2: They don’t cost much
In addition, they are cost-effective due to their low cost. However, if you want to save money, you may want to put in the time and effort to learn how to do it yourself. It’s a good thing you’ve found this post, because it’s a how-to for those who are just starting off.
Benefit #3: They provide added support and comfort
In order to keep your cervical spine in a more neutral position, you can use a few throw pillows. Due to their role in reducing mechanical stress on your lower back, they aid in maintaining a proper spinal alignment. Sprains and snoring can be alleviated by using them to brace your ankle or to help you sleep better at night.
Your Guide on How to Make a Round Throw Pillow
If you’re looking to add an artistic flair to your home’s interior design without breaking the bank, circular pillows may be the best option. Nonetheless, you should begin your sewing journey with these DIY lovely, circular pillows.
Step #1: Prepare your materials
Xem thêm : How To Use The Pregnancy Pillow? Comprehensive Guide
Make sure that the fabric is in place before moving on. After that, you’ll need polyfill for the stuffing. Remember that the size of your cushion will dictate the amount of fabric and stuffing you need.
You can use a ruler or a wide bowl to sketch a circle to create the circular shape. As soon as that’s done, you can get your sewing machine and all the other tools ready, including matching-colored scissors, needles, pins, and threads.
Step #2: Use scissors to cut out two circles from the fabric
Using a pair of sharp scissors, cut out two circles from the fabric before attempting to sew them together. It’s important to avoid unraveling the fabric’s edges when doing this. Also, don’t forget to include a seam allowance in your design.
Step #3: Pin the two fabric pieces together
It’s important to make sure both right sides are facing each other before pinning them together. The fabric may need to be baste to keep the circular shape and avoid flat parts if it is slick.
Step #4: Start sewing
If everything is in order, you’re ready to start stitching. Take note that you can’t immediately sew all the way around the edges during this time period. Stuffing must still be able to be inserted via a three-inch aperture.
To disguise the stitch marks, the sewed circle should be flipped right side out before it is packed. The next step is to evenly stuff the turkey until it is fully stuffed.
Step #5: Seal the hole via a ladder hand stich
In order to close the hole, you will need needles and threads and a ladder hand stitch. You’ll be ready to use your DIY round throw cushion once you’ve completed these steps.
How to make round throw pillows from old pillows
Many folks are stumped as to what to do with their unused pillows. Throwing away or storing them to collect dust is of no use at all. What do you need to do next? Throw pillows in the shape of a circle are a simple solution to this problem.
It’s not difficult to transform existing normal pillows into those adorable spherical ones. Follow these simple steps to make it happen. To begin with, they must be thoroughly cleaned to ensure that both the casing and the filling are free of dirt and debris.
Remove the stuffing by cutting open one end of the casing. Two circles must be cut from the casing using a guide. After that, you can sew around the edges, leaving a little hole, and pin the circles together.
The old pillow stuffing must first be broken apart to restore its fluffiness before being inserted. It is then necessary to fill the new casing to the desired thickness. Finally, you must hand-stitch all of the pillow’s seams together.
Conclusion
The process of making a round throw cushion at home may be both simple and fun. You’ll be able to improve your artistic abilities while also enhancing the ambiance of your home.
Nguồn: https://iatsabbioneta.org
Danh mục: Pillow


