When it comes to quilting, how many of you are still unsure of how to get started? Making a quilt from the ground up?
That’s a lot of work, but you might start with something simpler.
Bạn đang xem: How To Make A Quilted Pillowcase? Easy Step-by-step Guide
Here is a tutorial on making a quilted pillow case. If you’ve never tried quilting before, this is a terrific project for you to take on.
We want to help you get started with this beginner-friendly project! Let’s get this started!
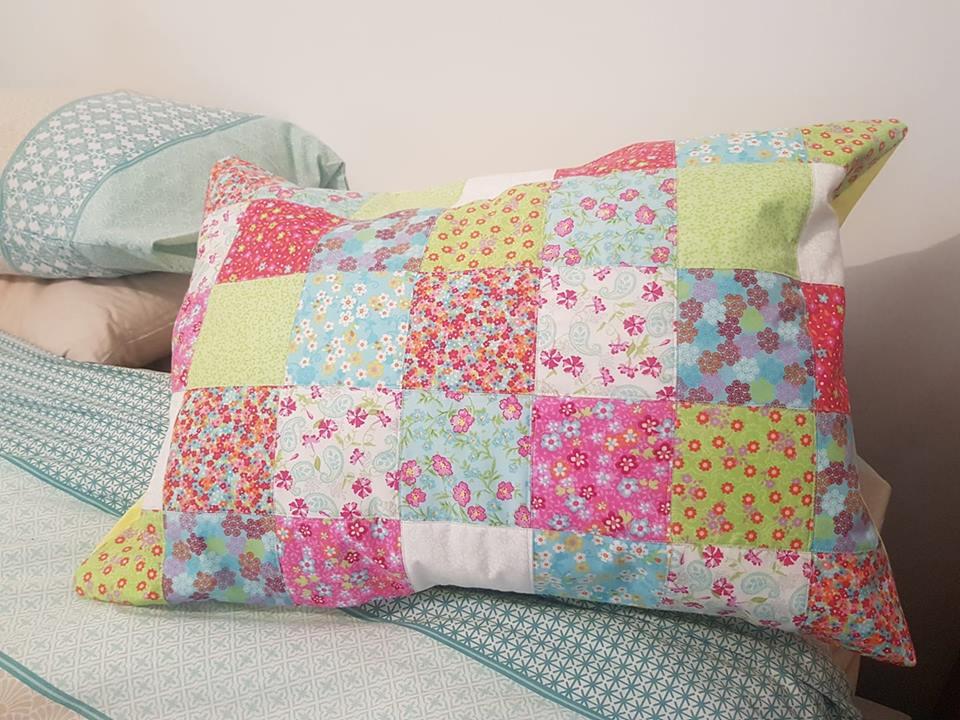
Quilted Pillow Cover Tutorial
A pillow cover is a terrific way to get your feet wet in both quilting and sewing without feeling overwhelmed.
I’ll show you how to make a zipped pillow in this tutorial. If the thought of working with a zipper still scares you (I’ve been there, and I know how it feels), you could make an envelope-style pillow instead. Later, we’ll talk about that.
With a few hours of work, you can create a new piece of decor that transforms the appearance and atmosphere of any area. In addition, it provides an opportunity for you to show off your artistic side and create something that no one else will have. Isn’t that amazing?
With that said, let’s get started on making this quilted pillow cover.
Quilted Pillow Cover Supplies
- In this technique, I used an 18-inch cushion insert, but you can use any size you desire. As an alternative, you can utilize the insert from an existing throw pillow.
- If you don’t already have a rotary cutter (or scissors if you don’t), a ruler, or whatever to serve as a straight edge for trimming your cloth edges, you’ll need a sewing machine and thread.
- The front of the pillow will be covered in this fabric. 🙂 Make your pillow top 1″ smaller than your pillow insert. How much smaller depends on the design of your pillow top. Your pillow will appear plump and full if you follow these instructions. My pillow insert is 18″ long, hence the top of my pillow is 17″ long. If you choose to use a single piece of fabric instead of piecing it together, you can simply cut it to 17″ square.
- For the top of your quilted cushion, you’ll need batting. I use 100% cotton batting in all of my projects. For the quilting procedure, cut the batting square at least 1″ bigger than the pillow top. I’m going to cut my batting into 18″ squares to make it fit my quilt.
- You’ll need two pieces of fabric for the pillow’s back. Using my example 18″ cushion, I cut one piece 9″x17″ and the other 12”x17” (the backing piece should also be 1” smaller than the pillow insert).
- To make the binding for the pillow, I cut a 5′′ x 42′′ piece of fabric into two 2 12” x 42′′ strips (step 5).
- I went with a 16-inch zipper.
- Pins or Spray Basting
How To Make a Quilted Pillow Case
Step 1: Choose the fabric, pattern, and size of the pillow insert.
A jellyroll of fabric from Joann’s was just what I needed for this lesson because I wanted to keep it simple. The term “Jellyroll” refers to fabric that is 2.5″ broad and whose length is calculated by dividing the width by the fabric’s width (WOF).
This is an excellent choice if you’re just getting started. Basically, all you have to do is stitch the strips together lengthwise until the desired width is reached, and then cut the strips to the required length, remembering to keep them 1″ smaller than the pillow insert.
A quick search on Instagram or Pinterest will yield a wealth of ideas and inspiration.
Step 2: Create your pillow top and make your “quilt sandwich.”
It’s time to have some fun! Sew the pillow top together from all of the individual sections, using the instructions that came with your chosen design.
Make a “quilt sandwich” after piecing together your pillow top. Three layers of bread will make up the sandwich.
- Topped with a pillow
- Cut the batting 1″ larger than the pillow top.
- I used white broadcloth for the back because it’s just going to be on the inside of the pillow. – the same as your batting’s dimensions
The three layers should be pinned or sprayed together. You’re now ready to start sewing. Yay!
Step 3: Quilt as desired and trim edges to ensure your pillow top is square.
On this pillow top, I decided to use straight-line quilting. This form of quilting relies heavily on seams as a guide. Beginners will have little trouble with this style of quilting. I also like the contemporary look of it.
Remove all the excess batting and backing fabric after you’ve completed your quilting.
You’ve just finished quilting your lovely pillow cover, so take a moment to enjoy your hard work.
Step 4: Attach the zipper to the backing fabric.
In this case, the pillow cover has a secret zipper on the back.
Alternatively, you can make an envelope-style pillow cover instead of a zippered one, as previously indicated.
Instead of sewing a zipper into the two edges that meet in the centre of the pillow, simply hem them together like I suggested in the supplies part.
Using a zipper or an envelope cover, we want one piece to be longer than the other so they can overlap smoothly. I would divide the length of the pillow top by two in order to make this work for a different-sized pillow insert. To the bottom piece, add 12″ (for the hem) and 3 12″ (for the hem plus 3′′ overflow) to the top.
If you’re constructing an insert cover for a 20-inch cushion, you’ll need to cut the following:
- Dimensions of the base: 10 x 19 inches
- 13′′ x 19′′ for the top
With an iron, fold each edge 14 inch inward and then iron again to hem. In order to prevent the pillow cover from fraying, you should double-fold the cover. Clean hemmed edges are as simple as topstitching over the fold. The binding will cover the rest of the edges, so there’s no need to worry about them.
You want to make sure that your finished backing is the same size as your finished pillow top.
Then, with the correct sides out, you can place the pillow pieces together after making sure they are the same size. The zipper will be on the back of the pillow as it will be when it’s finished, and the pillow top will face outward.
Tip: I prefer to sew a 1/8″ basting stitch around the pillow’s perimeter. By doing this, you can rest assured that the layers won’t move while the binding is being applied.
Step 5: Bind the pillow.
My pillow cover is 17″ square, therefore I’ll multiply 17 by 4 to get my binding length. To be on the safe side, I always include an extra 6 inches of binding.
174 = 68+6 = 74″
A regular 42″ to 44″ broad piece of quilting cotton fabric would enough for this project. Binding should be a 2 12″ width. In order to make your binding, sew together the strips and then press the long strip in half.
The first step is to sew the binding to the pillow top with a 14″ seam, then flip it over and sew the binding to the back of the pillow cover by hand or with a sewing machine.
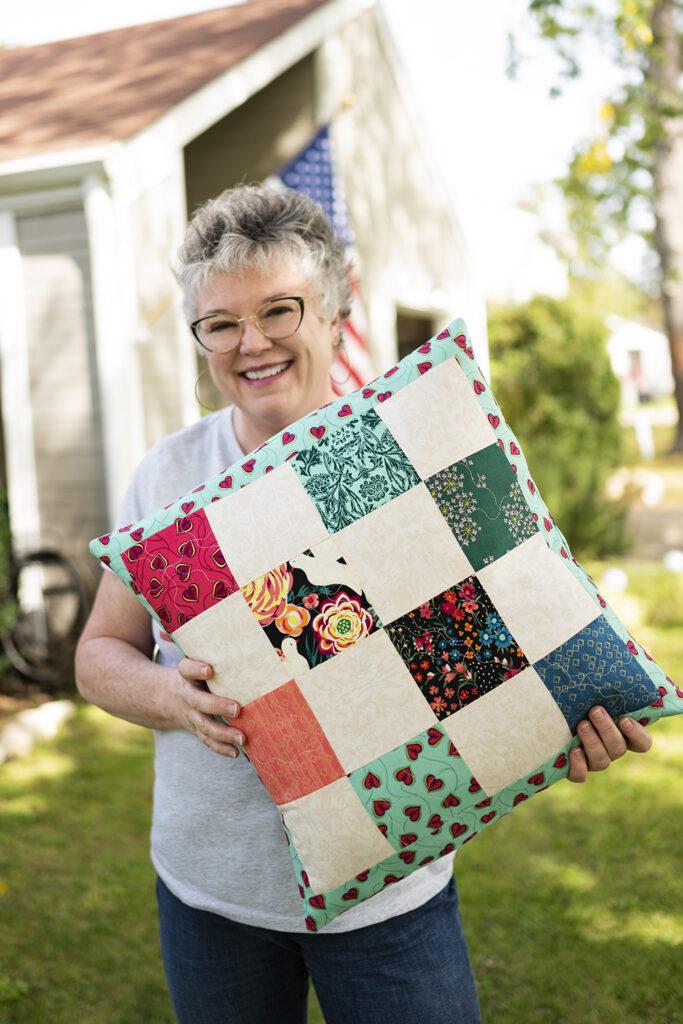
Step 6: Stuff the cover with your pillow insert and ENJOY!
Congratulations! You’ve completed a full-scale quilting project!
That was all I had to say on how to make a quilted pillow cover, so I hope it was helpful. You can make any size pillow you need or want with this project because it’s so flexible and fun to do.
These would also be wonderful gifts! This new talent you’ve acquired opens up a world of opportunities! Sew happy!
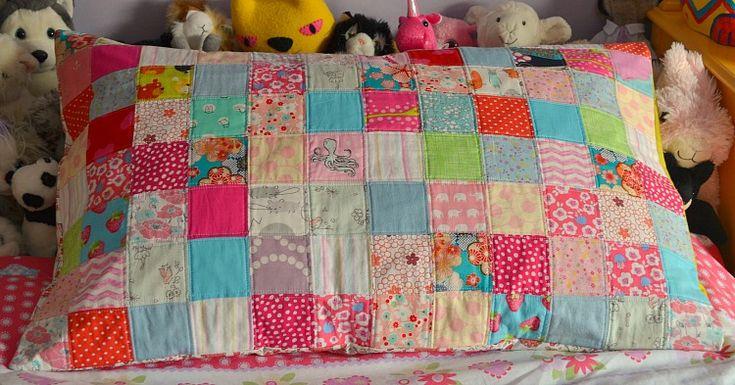
How to Make a Quilted Pillow Case Top
It’s time to lay down each and every square, one at a time, in rows of 12. Each of the photo’s triangles faces a specific direction.
Xem thêm : How To Make A Pillow Cover With A Velcro Closure? Step by Step Instructions
With the four magenta triangles that make the diamond, I find it simplest to begin by making concentric diamonds that alternate between magenta and aqua with a white one sandwiched in the middle of each of the other two colors.
As you work your way from the upper right to the lower left, sew all of the squares into pairs. Repeat the process of sewing and pressing.
In pairs, this is what the entire top row looks like.
Row two begins on the left and progresses toward the right, like before.
It’s easier to keep everything straight if you alternate directions. In the next stage, the seams will nestle together, allowing the quilt to rest flat. It’s important to do everything you can to ensure that the blocks fit together smoothly and straightly when working with this many small parts (144 squares are formed of two triangles each, for a total of 288 itty bitty pieces).
Sew each row in the opposite direction of the previous one until all 12 rows have been put together.
Once the rows are sewn together, the next step is to create squares. Again, switching directions is a great way to keep things fresh!
Now, don’t be as stupid as I was. Everything appears to be in order in the following image. It’s not, however. Rows three and four are not shown in this photo because I pinned the pairs after stitching rows one and two. I also made a mistake when it came to arranging the top row of squares. The place where the two lines meet (just to the left of center) should be magenta, not aqua, and the corner triangles should be white, but none of these things are readily apparent in this photograph. After sewing and pressing each square, I kept trying to put it back in the appropriate location, but I couldn’t get it to line up! Take your time and only stitch a few squares at a time, and keep an eye on the photo of all 144 squares taken before they were sewed together to ensure that everything is in the correct place!
After realizing my mistake, I had already stitched all the squares together correctly and didn’t need to tear any seams apart.
Pin all of the seams together before sewing, and make sure to put the squares back in the correct position after sewing.
Pin squares together in pairs in the same way you did in the previous row.
Because of A., it is a fantastic time to take a vacation. B.’s blunder and A.’s stress are still causing a high level of anxiety. The light from the skylight is coming in at the improper angle for photographing subjects.
Is everything back to normal? Isn’t it nice out? Is that what you did on your lunch break? Excellent! Make 18 total units by sewing, pressing, and returning each one to its original location.
Sew the three rows of units together, one on top of the other, to form a row. Rows three and four, as well as five and six, should be repeated, with care taken to change directions and all seams pinned throughout the process. We now have a total of nine rectangles, each with 16 half square triangles. My outdoor break turned out to be more peaceful than I expected! When I returned to the sewing room, I got into the swing of things and completely forgot to take pictures as I went along. There aren’t nine squares visible in this photograph. It displays seven squares, two of which have already been sewed together, in the form of a quilt. Imagine what this would have looked like if squares 8 and 9 had been stitched together before you did so.
Create the top of the pillow case by sewing these nine squares together. I’d suggest measuring your pillow case to make sure it’s the correct 1212 inches. There are so many tiny components that a seam allowance that isn’t exactly 14 could have a big impact on the finished size.
Take a look at the back—all of those seams are so neatly tucked in!
After you’ve sewed the pillowcase to your fabric square, you can quilt it anyway you’d like. When you finish this stage, your pillowcase will be machine washable, with no open seams. In order to repair seams that have opened, you can check out this tutorial, however it’s a good idea to quilt this with lines that are close together to avoid wear.
It’s your call. 14 inch within and outside the seams, I traced a diamond shape. Remove any extra muslin from the quilted pillow case top’s edges. The muslin side of the quilted top is shown here.
Nguồn: https://iatsabbioneta.org
Danh mục: Pillow


